
 Operation and Maintenance
Nginx
How to use Nginx open source visual configuration tool NginxConfig
Operation and Maintenance
Nginx
How to use Nginx open source visual configuration tool NginxConfig
How to use Nginx open source visual configuration tool NginxConfig

NginxConfig Introduction
NginxConfig Known asThe only Nginx configuration tool you need, you can use the visual interface to generate Nginx configuration, the function is very powerful, it is available on Github There are 15K Star!

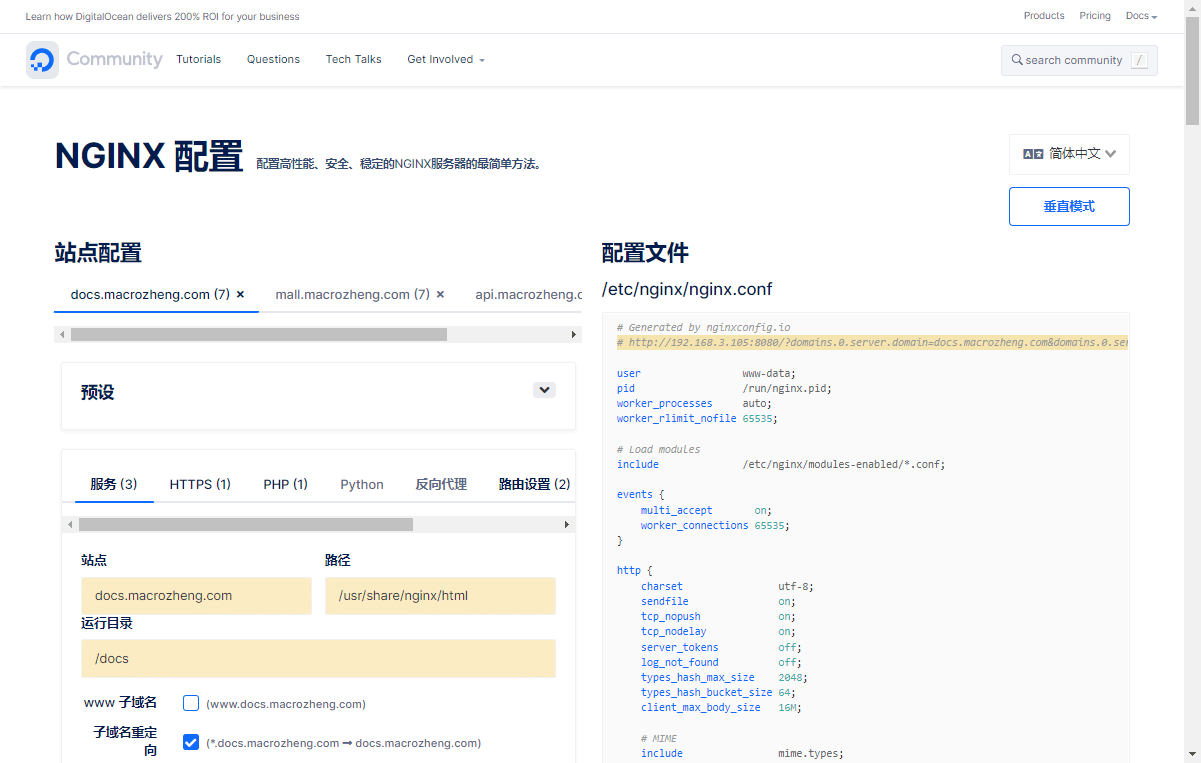
The following is a rendering of the use of NginxConfig, you can take a look!
Installation
Next, we will introduce the installation of
NginxConfig. It is relatively convenient to install it on Linux.
Install Node.js
Since
NginxConfigis a front-end project based on Vue, we must first installNode.js.
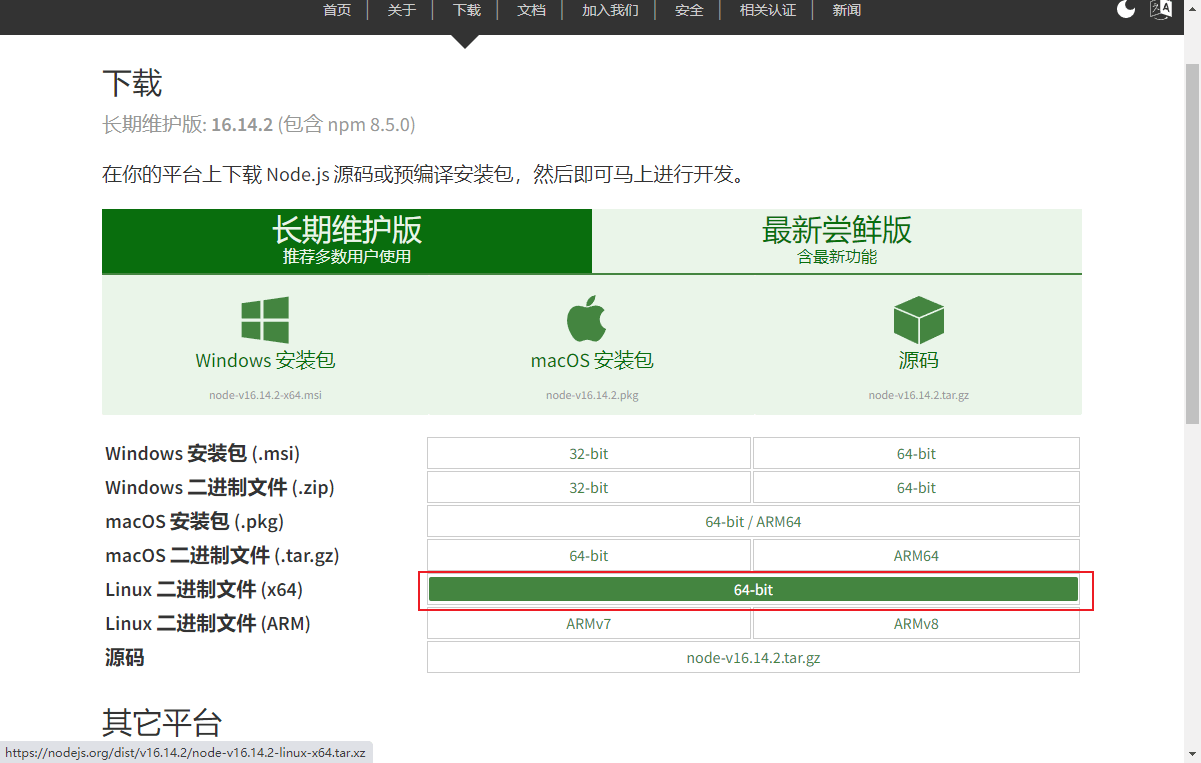
First download the installation package of Node.js from the official website
Download address: https://nodejs.org/zh-cn/download/
After the download is successful, unzip the installation package to the /usr/local/src/ directory and use the following command;
cd /usr/local/src/
tar xf node-v16.14.2-linux-x64.tar.xz
cd node-v16.14.2-linux-x64/
./bin/node -v
Use the ./bin/node -v command to view the currently installed version;
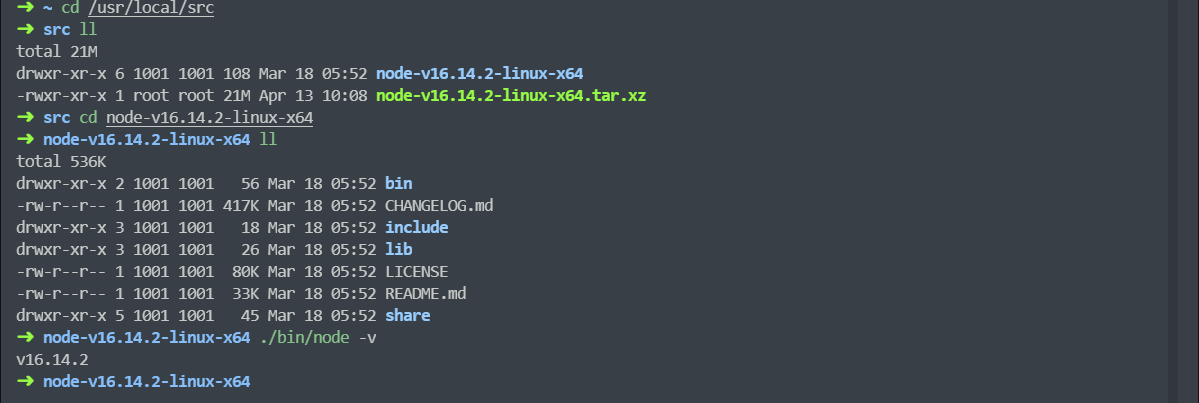
If you want to run it directly from the Linux command line, you also need to # The ##node and npm commands create soft links;
ln -s /usr/local/src/node-v16.14.2-linux-x64/bin/node /usr/bin/node
ln -s /usr/local/src/node-v16.14.2-linux-x64/bin/npm /usr/bin/npm
node -v
npm -v
Node.js installation is complete.

First download the installation package ofNode.js
After the installation is complete, you can start the installationNginxConfig.
NginxConfig,
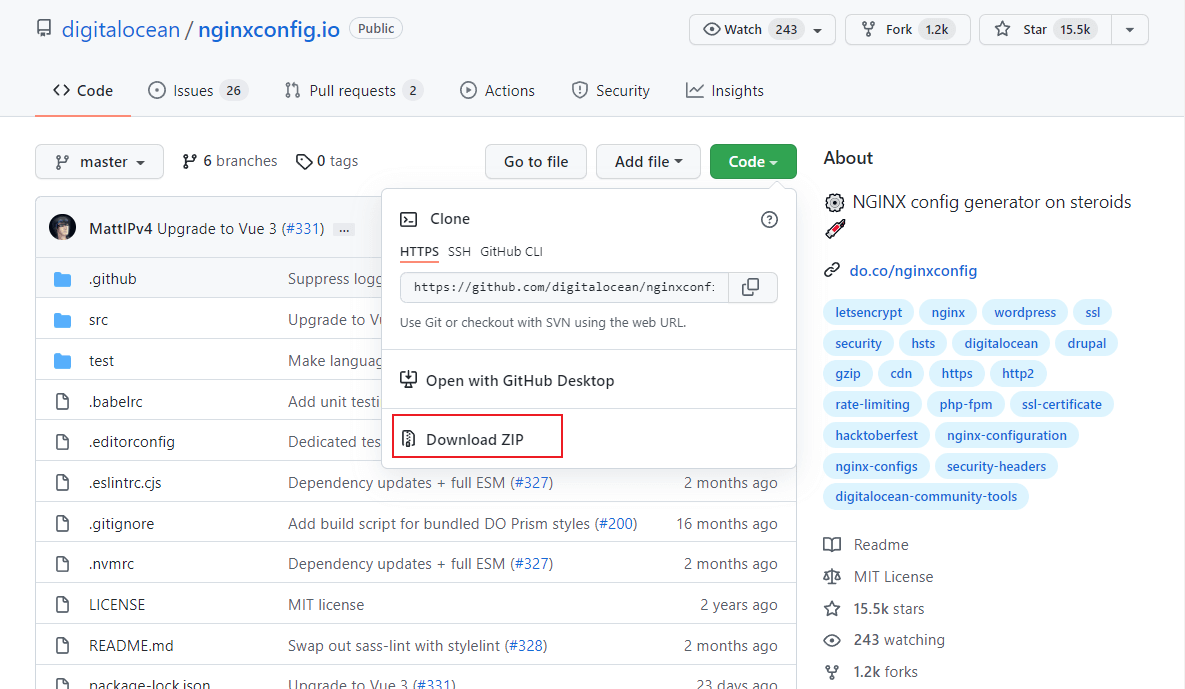
npm command to install the dependencies and run it;
tar -zxvf nginxconfig.io-master.tar.gz
npm install
npm run dev
NginxConfigAfter successful operation, You can access it directly. It is quite good to see that the interface supports Chinese. Access address: http://192.168.3.105:8080
Next we will experience the visual configuration generation function ofPreparation for useFirst we need to install Nginx. For Nginx installation, please refer to the Nginx usage tutorial written before; We will implement the following functions through static proxy To access static websites in different directories, access the API interface provided by SpringBoot through a dynamic proxy;NginxConfig
to see if it is powerful enough!
# 静态代理,访问mall文档网站
docs.macrozheng.com
# 静态代理,访问mall前端项目
mall.macrozheng.com
# 动态代理,访问mall线上API
api.macrozheng.com
192.168.3.105 docs.macrozheng.comDocumentation website Configuration192.168.3.105 mall.macrozheng.com
192.168.3.105 api.macrozheng.com
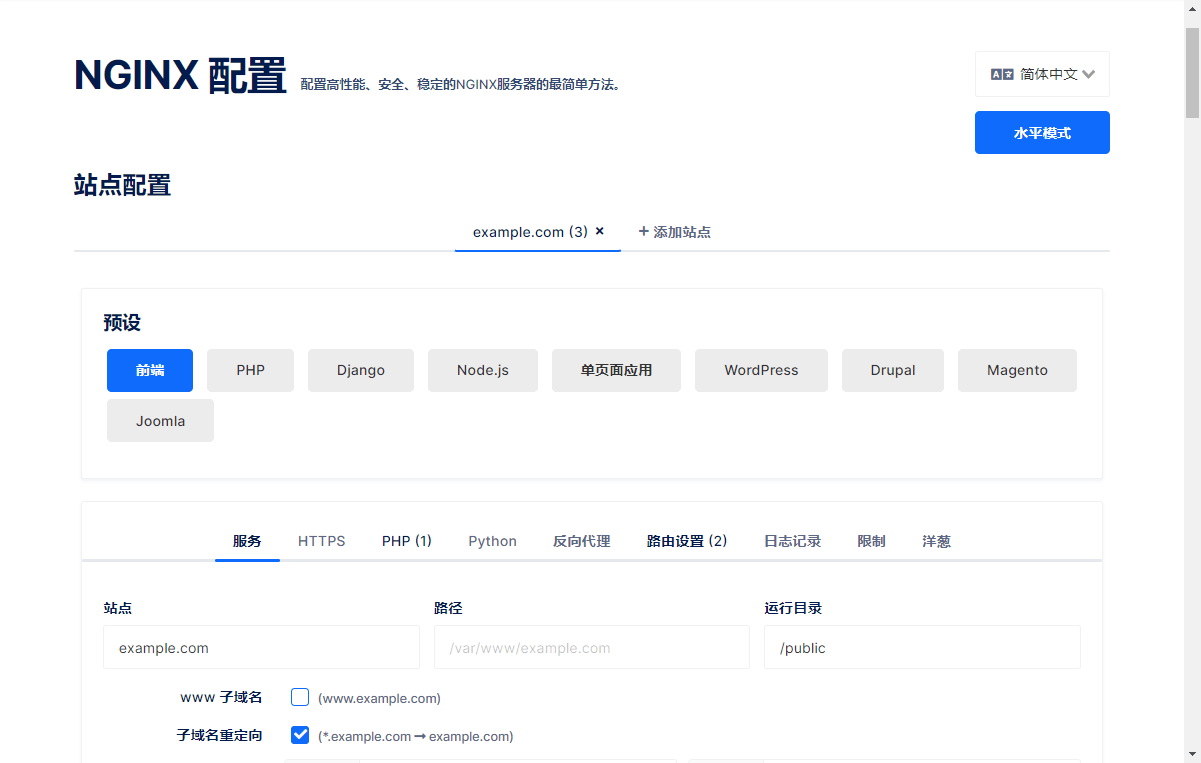
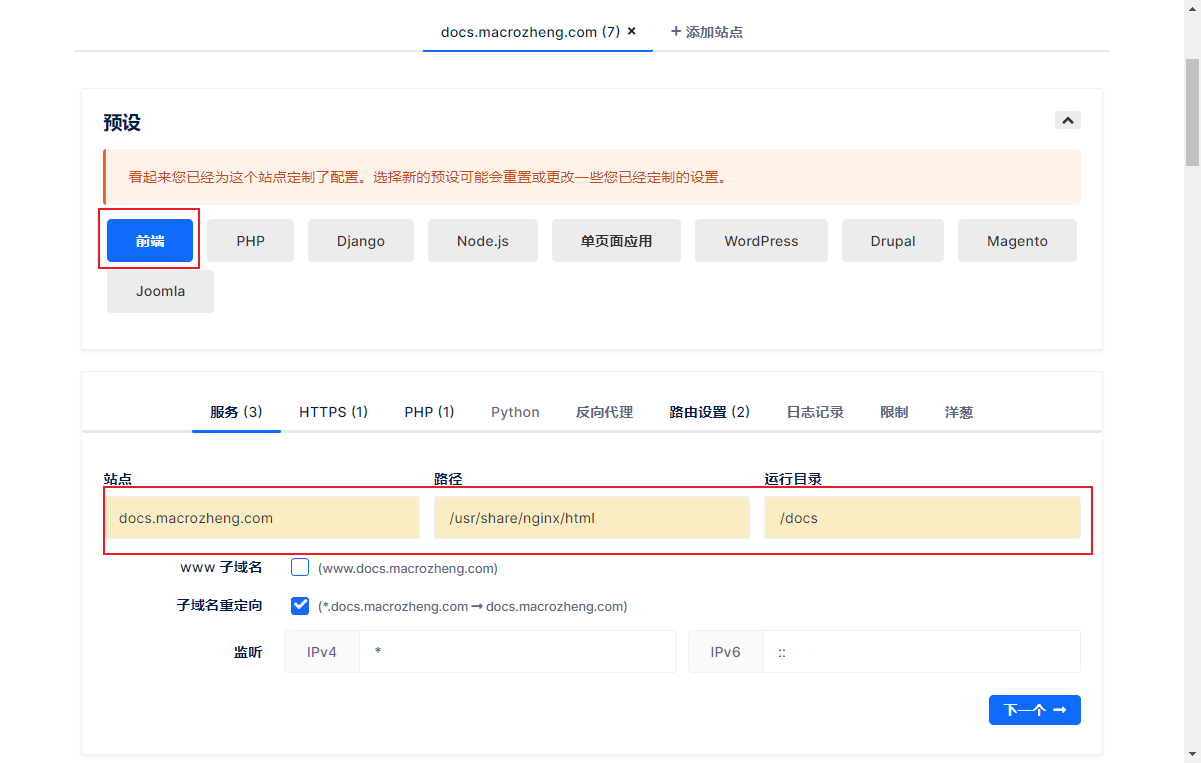
Let’s first configure access to the mall document website. The domain name is: docs.macrozheng.com.Select
default as the front end in NginxConfig, then modify the service configuration, configure the site, path and running directory;

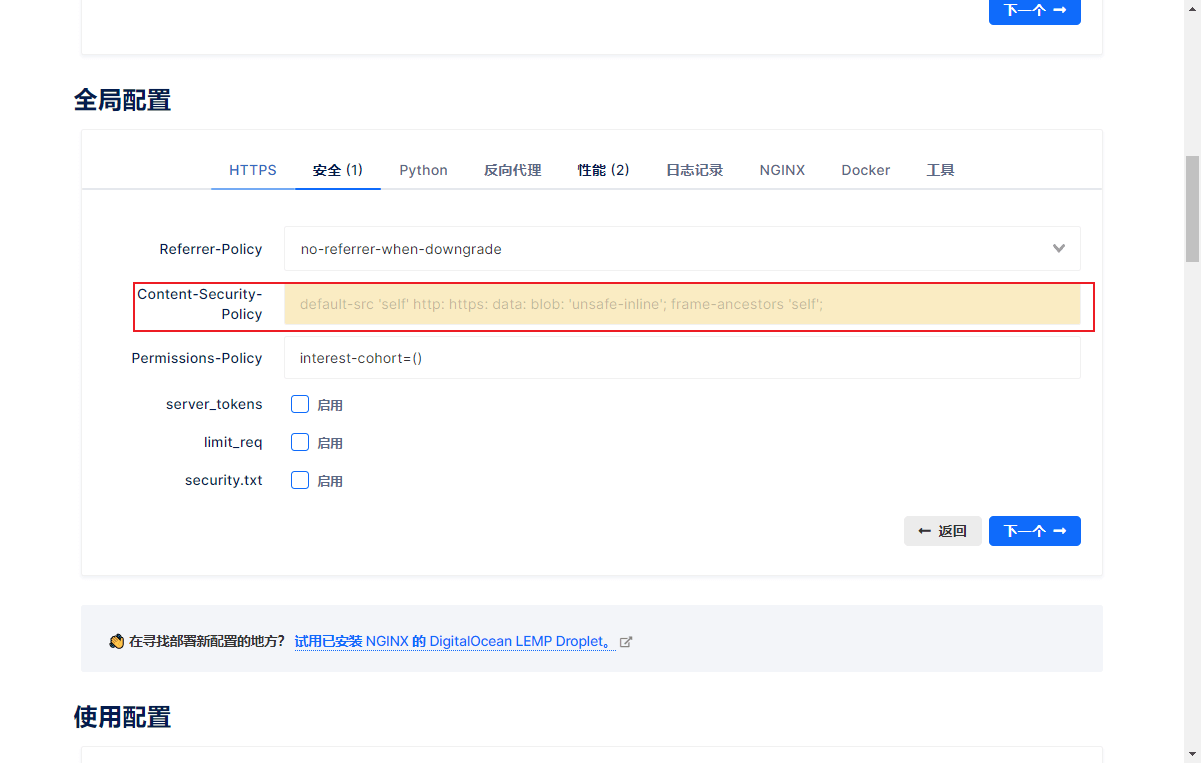
Global Configuration->Security Content-Security-Policy Settings;
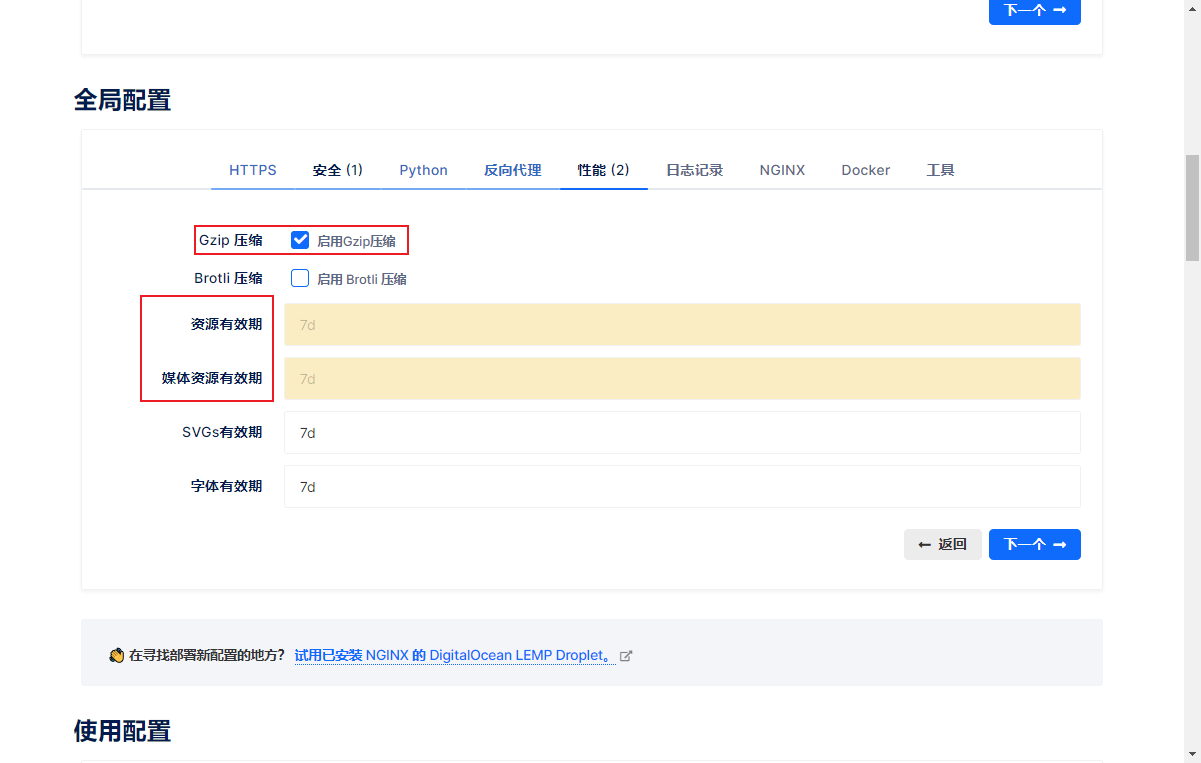
Performance configuration, enable Gzip compression, and delete the resource validity limit.
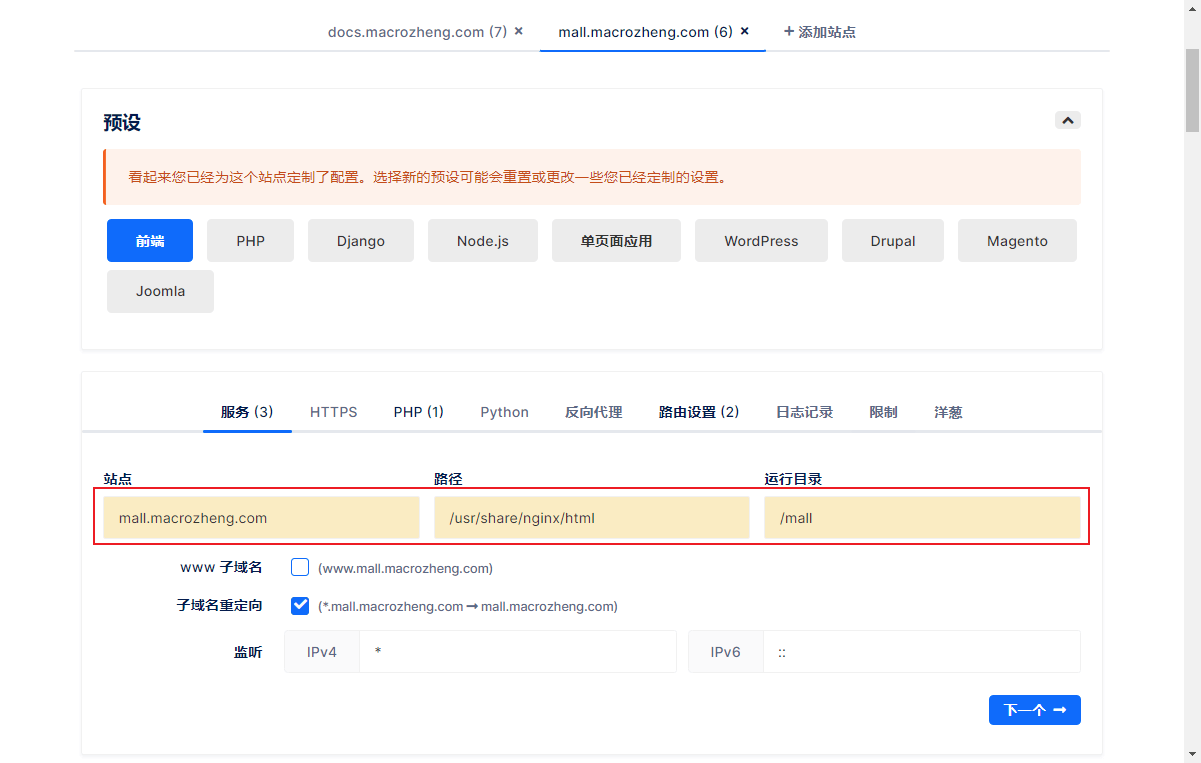
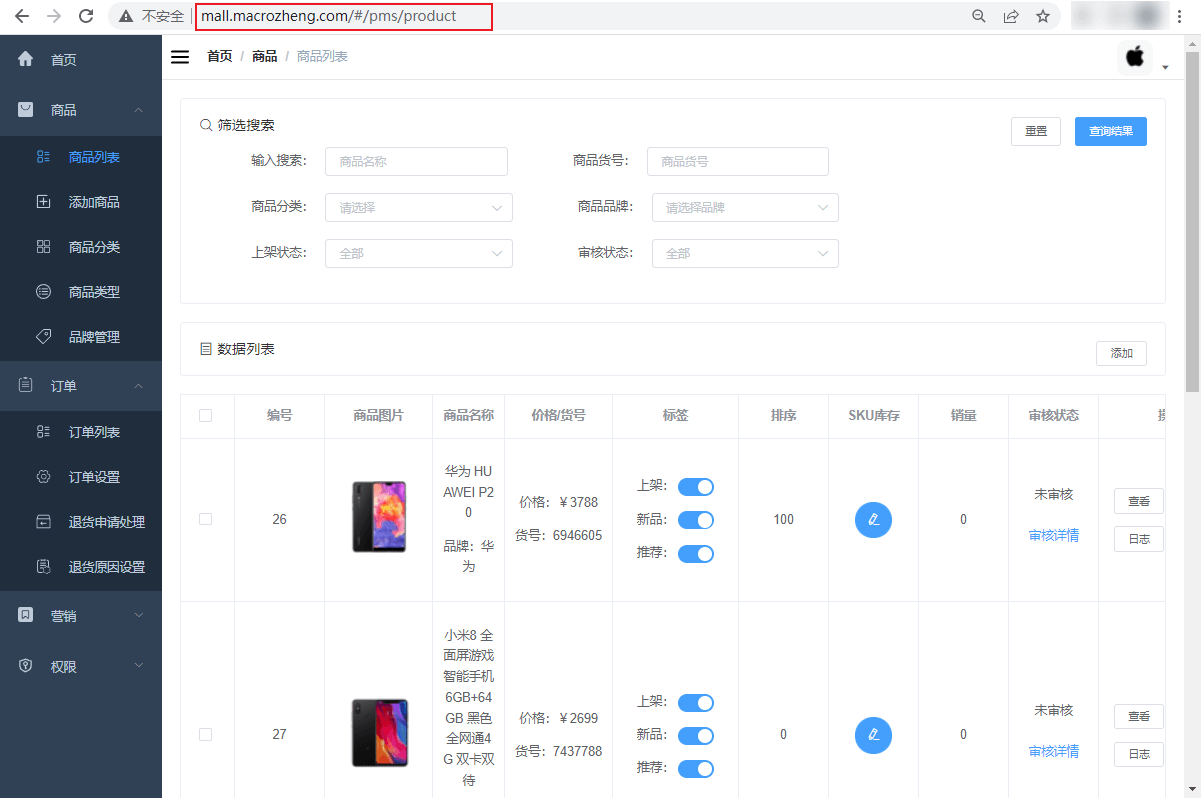
Let’s configure access to the mall front-end website. The domain name is: mall.macrozheng.com.Next we add another site and modify the service configuration. The rest is basically the same as above.
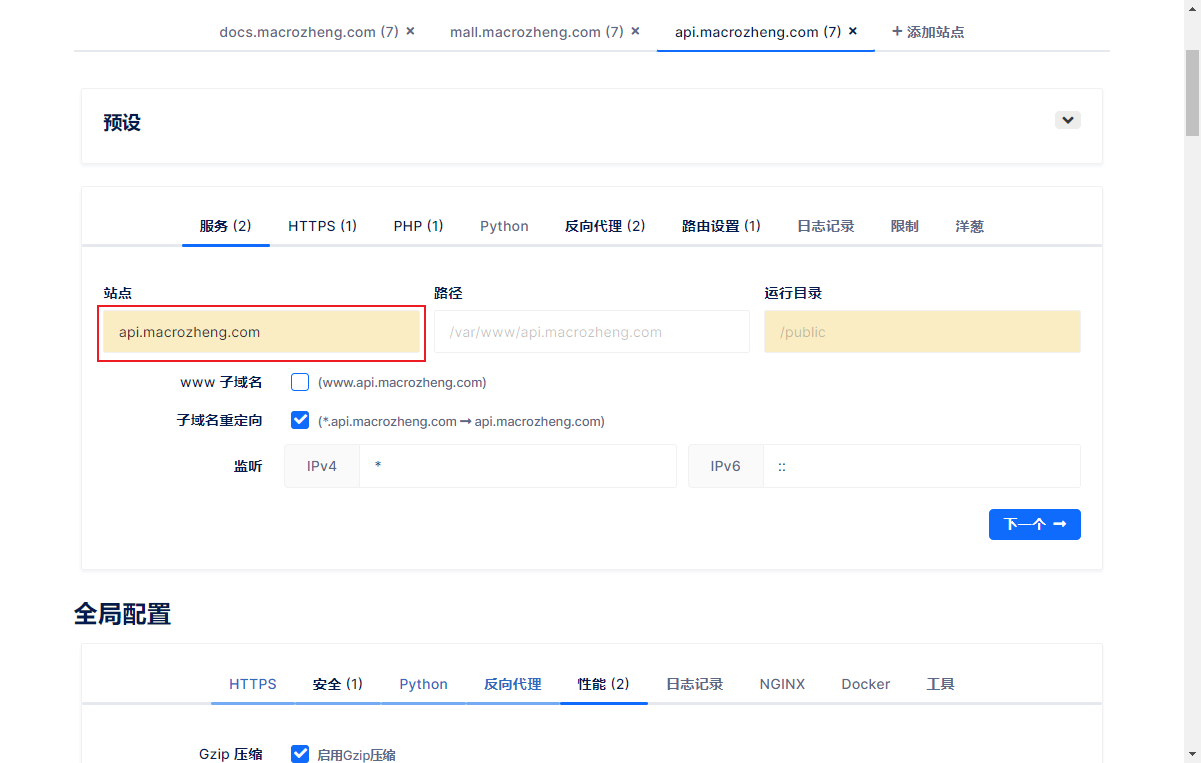
API网站配置
最后配置下mall的Swagger API文档网站的访问,域名为:api.macrozheng.com。
继续添加一个站点,修改服务配置,只需修改站点名称即可;
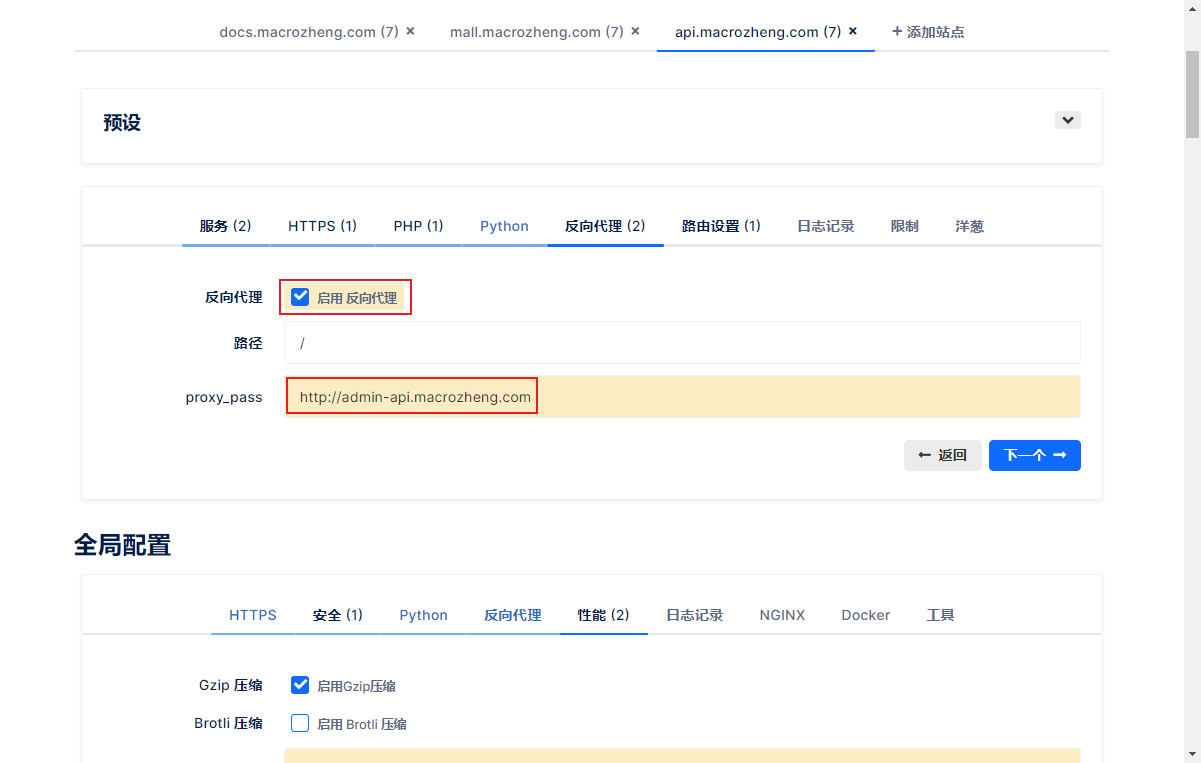
然后启用反向代理并设置,反向代理到线上API;
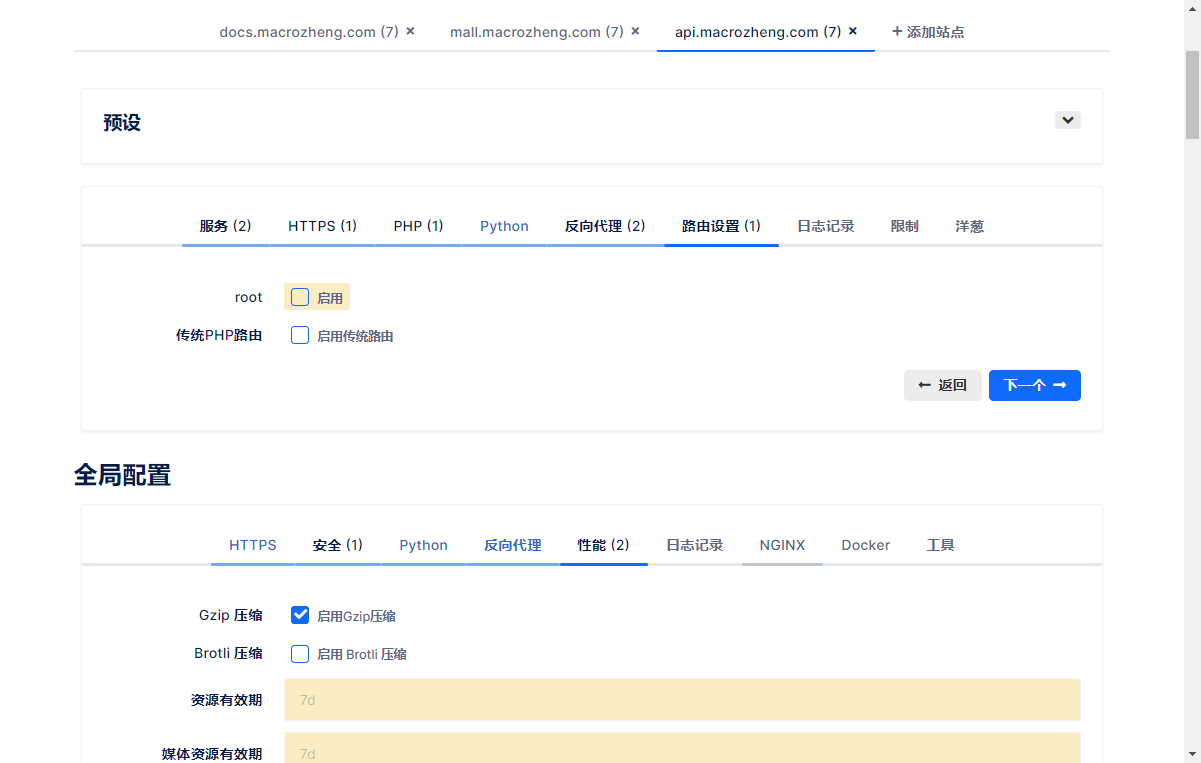
路由功能暂时不用可以关闭。
使用配置 接下来我们就可以直接下载NginxConfig给我们生成好的配置了;
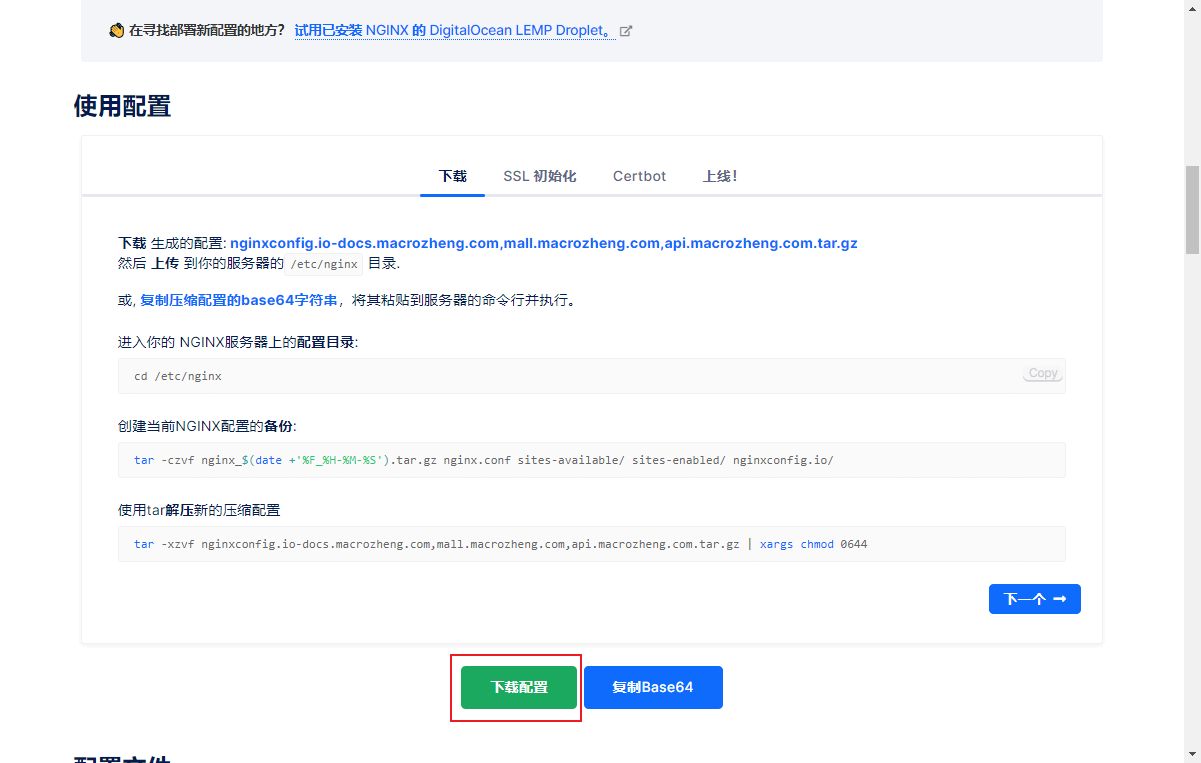
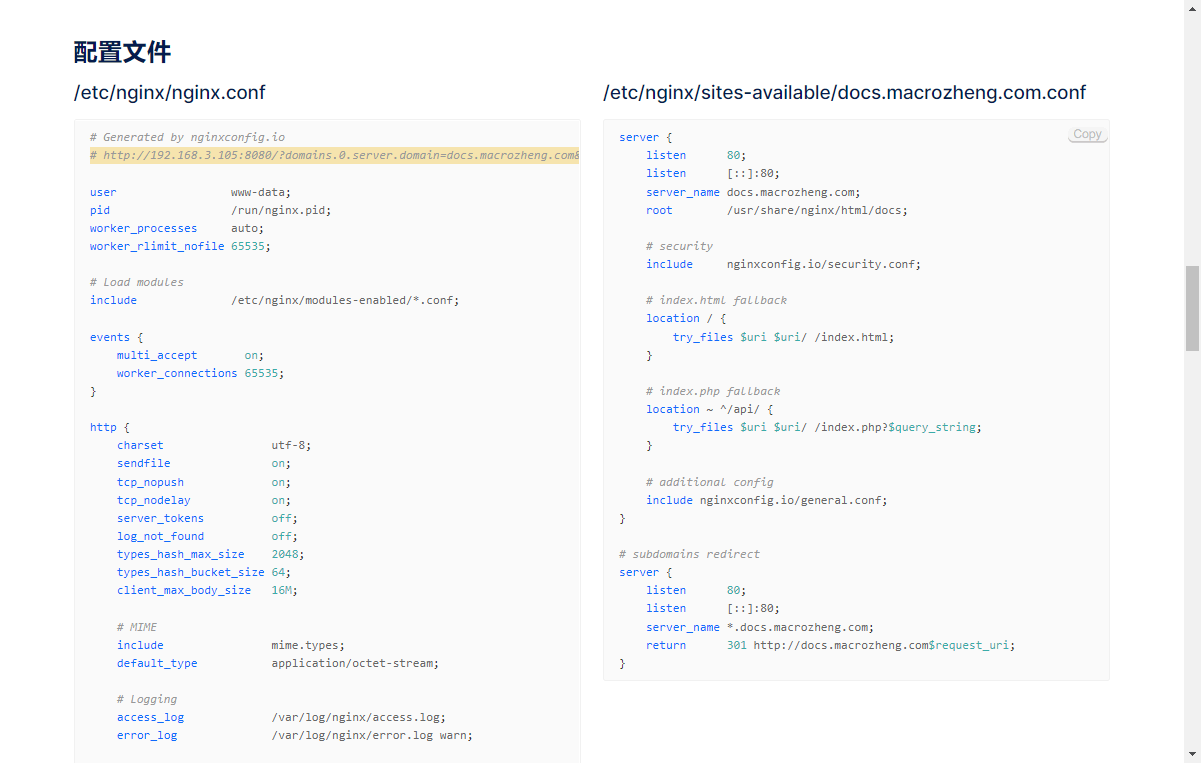
我们先来看下NginxConfig给我们生成的配置内容,这种配置手写估计要好一会吧;
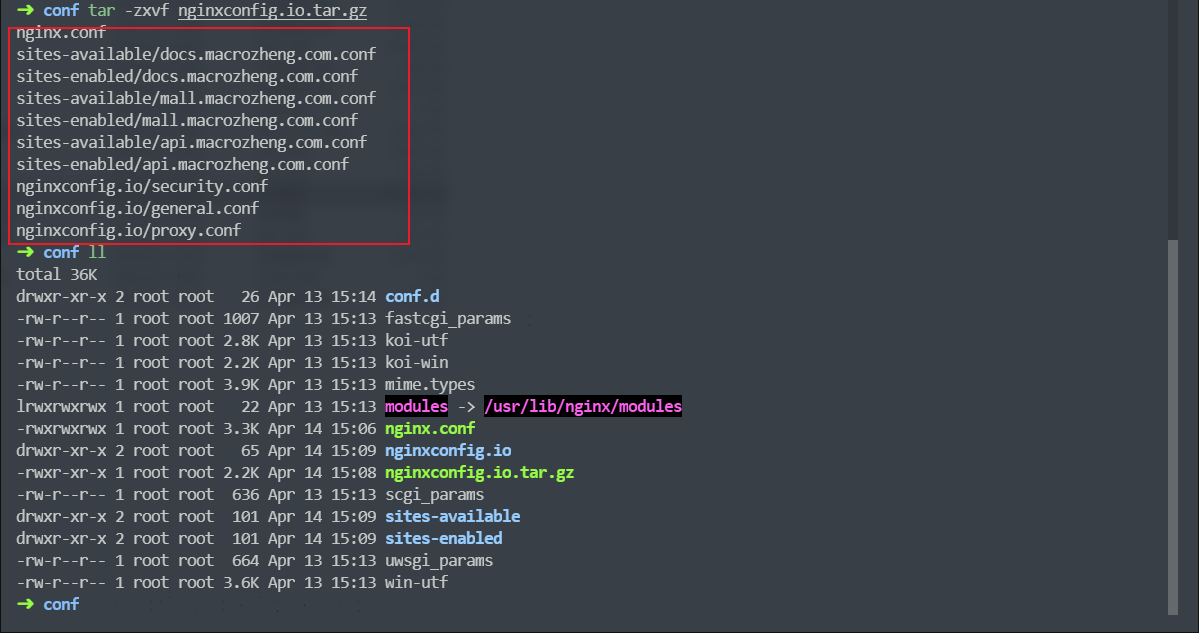
点击按钮下载配置,完成后改个名字,然后上传到Linux服务器的Nginx配置目录下,使用如下命令解压;
tar -zxvf nginxconfig.io.tar.gz
大家可以看到NginxConfig将为我们生成如下配置文件;
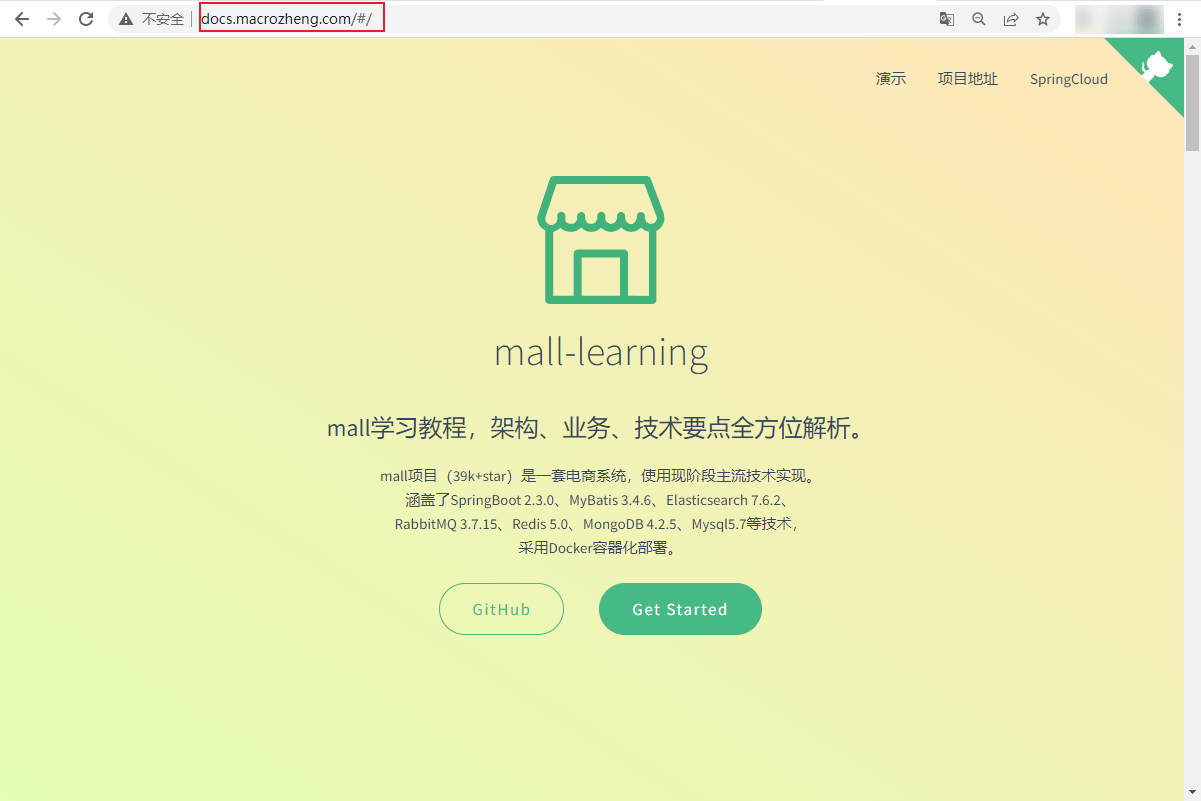
接下来将我们之前的mall文档网站和mall前端网站放到Nginx的html目录下,然后重启Nginx就可以查看效果了;
docker restart nginx
先访问下我们的mall文档网站,访问地址:http://docs.macrozheng.com/
在访问下mall的前端网站,访问地址:http://mall.macrozheng.com
最后访问下mall的API文档网站,访问地址:http://api.macrozheng.com/swagger-ui.html

The above is the detailed content of How to use Nginx open source visual configuration tool NginxConfig. For more information, please follow other related articles on the PHP Chinese website!

Hot AI Tools

Undresser.AI Undress
AI-powered app for creating realistic nude photos

AI Clothes Remover
Online AI tool for removing clothes from photos.

Undress AI Tool
Undress images for free

Clothoff.io
AI clothes remover

Video Face Swap
Swap faces in any video effortlessly with our completely free AI face swap tool!

Hot Article
Hot Tools

Notepad++7.3.1
Easy-to-use and free code editor

SublimeText3 Chinese version
Chinese version, very easy to use

Zend Studio 13.0.1
Powerful PHP integrated development environment

Dreamweaver CS6
Visual web development tools

SublimeText3 Mac version
God-level code editing software (SublimeText3)
Hot Topics
 1386
1386
 52
52

 How to configure cloud server domain name in nginx
Apr 14, 2025 pm 12:18 PM
How to configure cloud server domain name in nginx
Apr 14, 2025 pm 12:18 PM
How to configure an Nginx domain name on a cloud server: Create an A record pointing to the public IP address of the cloud server. Add virtual host blocks in the Nginx configuration file, specifying the listening port, domain name, and website root directory. Restart Nginx to apply the changes. Access the domain name test configuration. Other notes: Install the SSL certificate to enable HTTPS, ensure that the firewall allows port 80 traffic, and wait for DNS resolution to take effect.
 How to check whether nginx is started
Apr 14, 2025 pm 01:03 PM
How to check whether nginx is started
Apr 14, 2025 pm 01:03 PM
How to confirm whether Nginx is started: 1. Use the command line: systemctl status nginx (Linux/Unix), netstat -ano | findstr 80 (Windows); 2. Check whether port 80 is open; 3. Check the Nginx startup message in the system log; 4. Use third-party tools, such as Nagios, Zabbix, and Icinga.
 How to check nginx version
Apr 14, 2025 am 11:57 AM
How to check nginx version
Apr 14, 2025 am 11:57 AM
The methods that can query the Nginx version are: use the nginx -v command; view the version directive in the nginx.conf file; open the Nginx error page and view the page title.
 How to create a mirror in docker
Apr 15, 2025 am 11:27 AM
How to create a mirror in docker
Apr 15, 2025 am 11:27 AM
Steps to create a Docker image: Write a Dockerfile that contains the build instructions. Build the image in the terminal, using the docker build command. Tag the image and assign names and tags using the docker tag command.
 How to start nginx server
Apr 14, 2025 pm 12:27 PM
How to start nginx server
Apr 14, 2025 pm 12:27 PM
Starting an Nginx server requires different steps according to different operating systems: Linux/Unix system: Install the Nginx package (for example, using apt-get or yum). Use systemctl to start an Nginx service (for example, sudo systemctl start nginx). Windows system: Download and install Windows binary files. Start Nginx using the nginx.exe executable (for example, nginx.exe -c conf\nginx.conf). No matter which operating system you use, you can access the server IP
 How to run nginx apache
Apr 14, 2025 pm 12:33 PM
How to run nginx apache
Apr 14, 2025 pm 12:33 PM
To get Nginx to run Apache, you need to: 1. Install Nginx and Apache; 2. Configure the Nginx agent; 3. Start Nginx and Apache; 4. Test the configuration to ensure that you can see Apache content after accessing the domain name. In addition, you need to pay attention to other matters such as port number matching, virtual host configuration, and SSL/TLS settings.
 How to check the name of the docker container
Apr 15, 2025 pm 12:21 PM
How to check the name of the docker container
Apr 15, 2025 pm 12:21 PM
You can query the Docker container name by following the steps: List all containers (docker ps). Filter the container list (using the grep command). Gets the container name (located in the "NAMES" column).
 How to check whether nginx is started?
Apr 14, 2025 pm 12:48 PM
How to check whether nginx is started?
Apr 14, 2025 pm 12:48 PM
In Linux, use the following command to check whether Nginx is started: systemctl status nginx judges based on the command output: If "Active: active (running)" is displayed, Nginx is started. If "Active: inactive (dead)" is displayed, Nginx is stopped.
