How SpringBoot tests configuration properties and web startup environment
Load test-specific attributes
Click on @SpringBootTest source code to view
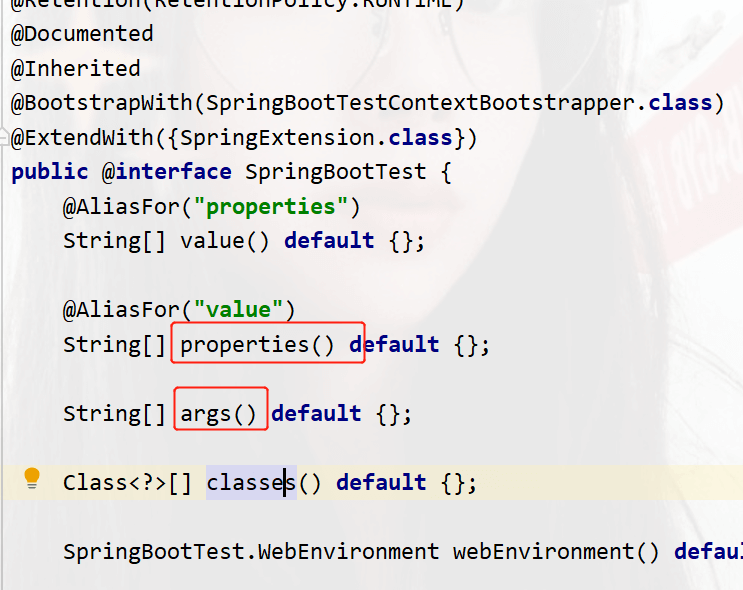
You can add temporary configuration later, or you can use the command line args parameter set up. The set test-specific parameters will override those in the configuration file.
package com;
import org.junit.jupiter.api.Test;
import org.springframework.beans.factory.annotation.Value;
import org.springframework.boot.test.context.SpringBootTest;
@SpringBootTest(args = {properties = {"test.properties=1234"})
public class TestProperties {
    @Value("${test.properties}")
    private String ps;
    @Test
    public void test(){
        System.out.println(ps);
    }
}Run results
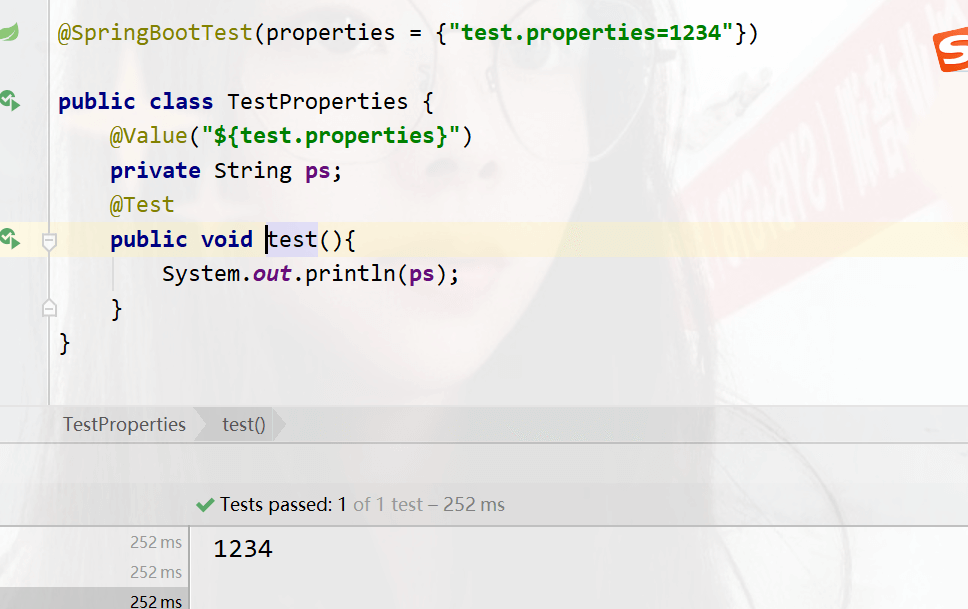
You can also use command line parameters
args = {"--test.properties=4321"},
The priority of the command line parameters is higher than that of the configuration file, so when the two coexist, the command line parameters take precedence
@SpringBootTest(args = {"--test.properties=4321"},properties = {"test.properties=1234"})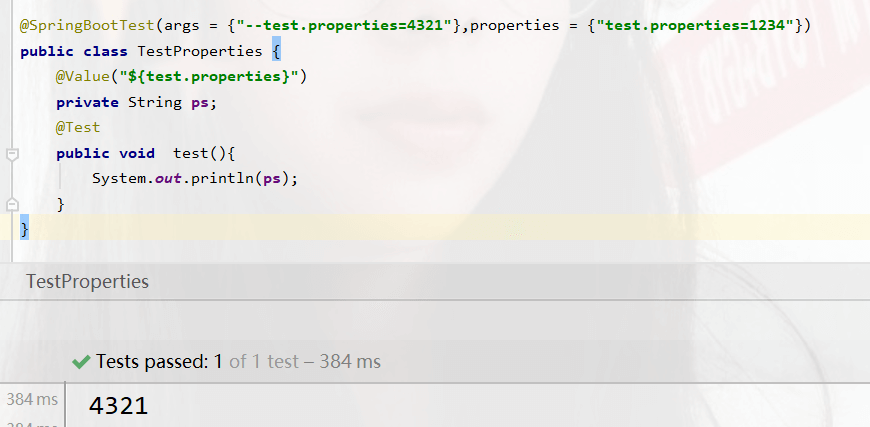
This test The attributes set by the class are only valid for the current test and have little impact
Use external beans for testing
package com.config;
import org.springframework.context.annotation.Bean;
import org.springframework.context.annotation.Configuration;
@Configuration//说明当前为配置类
public class TestBean {
    @Bean//创建bean
    public String mess(){
        return "this bean run ";
    }
}Under the test class, use the @Import annotation to load the current test configuration
package com.test;
import com.config.TestBean;
import org.junit.jupiter.api.Test;
import org.springframework.beans.factory.annotation.Autowired;
import org.springframework.boot.test.context.SpringBootTest;
import org.springframework.context.annotation.Import;
@SpringBootTest
@Import({TestBean.class})
public class TestBeanNow {
    @Autowired//注入bean对象
    public String mess;
    @Test
    public void test(){
        System.out.println(mess);
    }
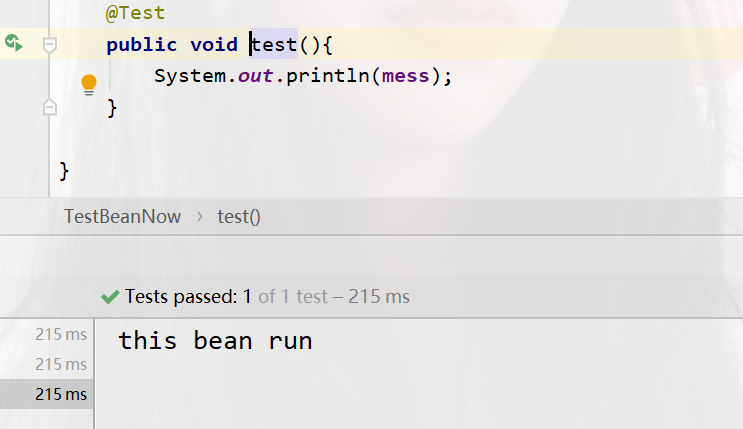
}Running results
Speed test class starts the web environment
Generally, the server will not be started when running in the test class, as shown below. They all display information about the success or failure of the operation

We Ctrl b click into the @SpringBootTest source code to view, there is a question about the web
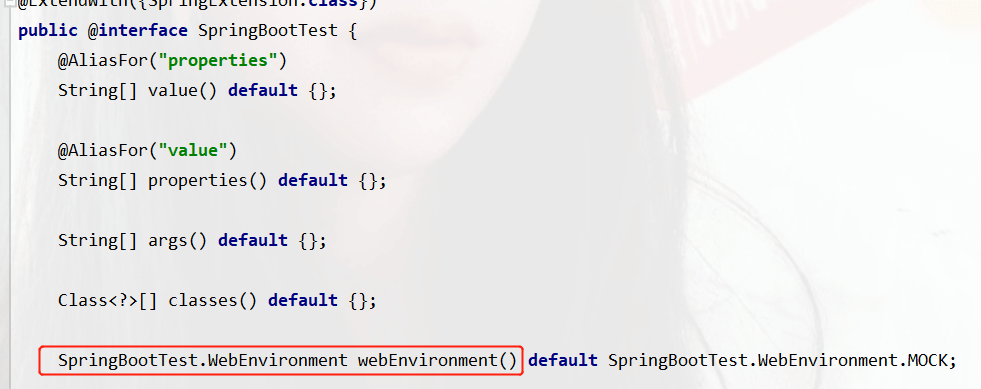
The default value is MOCK, mock: provides a simulated web environment by default and will not start the embedded server
We are in the test class

The first one is started with the port specified in your configuration file. If not, it will be started with 8080 by default.
The second mock: provides a simulated web environment by default and will not start the embedded server
The third is not to start the server
The fourth is to start the random port
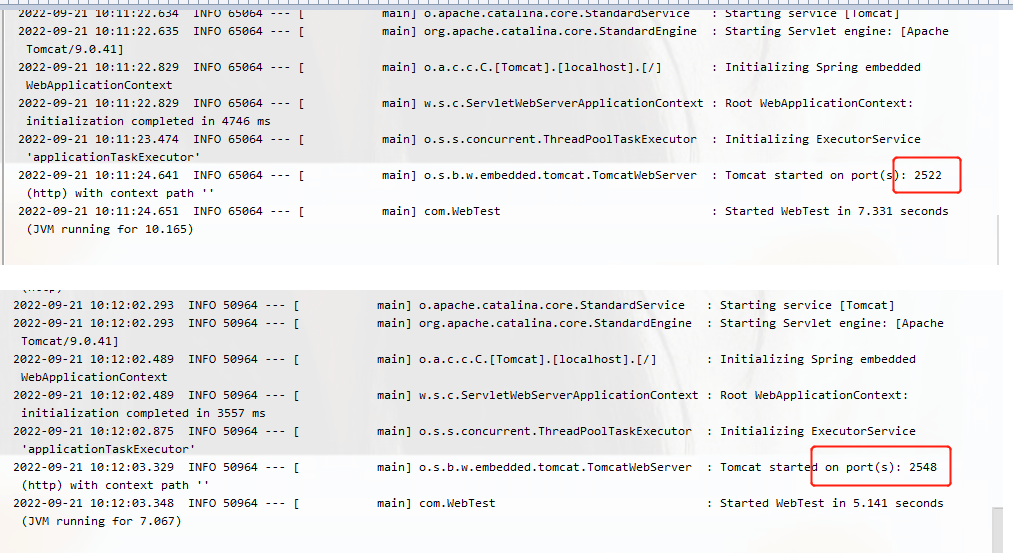
We test the random port startup
package com;
import org.junit.jupiter.api.Test;
import org.springframework.boot.test.context.SpringBootTest;
@SpringBootTest(webEnvironment = SpringBootTest.WebEnvironment.RANDOM_PORT)
public class WebTest {
    @Test
    public void test(){
    }
}Running results
Run it twice to see the port results, they are all random
The above is the detailed content of How SpringBoot tests configuration properties and web startup environment. For more information, please follow other related articles on the PHP Chinese website!

Hot AI Tools

Undresser.AI Undress
AI-powered app for creating realistic nude photos

AI Clothes Remover
Online AI tool for removing clothes from photos.

Undress AI Tool
Undress images for free

Clothoff.io
AI clothes remover

AI Hentai Generator
Generate AI Hentai for free.

Hot Article

Hot Tools

Notepad++7.3.1
Easy-to-use and free code editor

SublimeText3 Chinese version
Chinese version, very easy to use

Zend Studio 13.0.1
Powerful PHP integrated development environment

Dreamweaver CS6
Visual web development tools

SublimeText3 Mac version
God-level code editing software (SublimeText3)

Hot Topics
 Comparison and difference analysis between SpringBoot and SpringMVC
Dec 29, 2023 am 11:02 AM
SpringBoot and SpringMVC are both commonly used frameworks in Java development, but there are some obvious differences between them. This article will explore the features and uses of these two frameworks and compare their differences. First, let's learn about SpringBoot. SpringBoot was developed by the Pivotal team to simplify the creation and deployment of applications based on the Spring framework. It provides a fast, lightweight way to build stand-alone, executable
 Real-time protection against face-blocking barrages on the web (based on machine learning)
Jun 10, 2023 pm 01:03 PM
Face-blocking barrage means that a large number of barrages float by without blocking the person in the video, making it look like they are floating from behind the person. Machine learning has been popular for several years, but many people don’t know that these capabilities can also be run in browsers. This article introduces the practical optimization process in video barrages. At the end of the article, it lists some applicable scenarios for this solution, hoping to open it up. Some ideas. mediapipeDemo (https://google.github.io/mediapipe/) demonstrates the mainstream implementation principle of face-blocking barrage on-demand up upload. The server background calculation extracts the portrait area in the video screen, and converts it into svg storage while the client plays the video. Download svg from the server and combine it with barrage, portrait
 SpringBoot+Dubbo+Nacos development practical tutorial
Aug 15, 2023 pm 04:49 PM
This article will write a detailed example to talk about the actual development of dubbo+nacos+Spring Boot. This article will not cover too much theoretical knowledge, but will write the simplest example to illustrate how dubbo can be integrated with nacos to quickly build a development environment.
 How to implement form validation for web applications using Golang
Jun 24, 2023 am 09:08 AM
Form validation is a very important link in web application development. It can check the validity of the data before submitting the form data to avoid security vulnerabilities and data errors in the application. Form validation for web applications can be easily implemented using Golang. This article will introduce how to use Golang to implement form validation for web applications. 1. Basic elements of form validation Before introducing how to implement form validation, we need to know what the basic elements of form validation are. Form elements: form elements are
 Using Jetty7 for Web server processing in Java API development
Jun 18, 2023 am 10:42 AM
Using Jetty7 for Web Server Processing in JavaAPI Development With the development of the Internet, the Web server has become the core part of application development and is also the focus of many enterprises. In order to meet the growing business needs, many developers choose to use Jetty for web server development, and its flexibility and scalability are widely recognized. This article will introduce how to use Jetty7 in JavaAPI development for We
 How to enable administrative access from the cockpit web UI
Mar 20, 2024 pm 06:56 PM
Cockpit is a web-based graphical interface for Linux servers. It is mainly intended to make managing Linux servers easier for new/expert users. In this article, we will discuss Cockpit access modes and how to switch administrative access to Cockpit from CockpitWebUI. Content Topics: Cockpit Entry Modes Finding the Current Cockpit Access Mode Enable Administrative Access for Cockpit from CockpitWebUI Disabling Administrative Access for Cockpit from CockpitWebUI Conclusion Cockpit Entry Modes The cockpit has two access modes: Restricted Access: This is the default for the cockpit access mode. In this access mode you cannot access the web user from the cockpit
 Is PHP front-end or back-end in web development?
Mar 24, 2024 pm 02:18 PM
PHP belongs to the backend in web development. PHP is a server-side scripting language, mainly used to process server-side logic and generate dynamic web content. Compared with front-end technology, PHP is more used for back-end operations such as interacting with databases, processing user requests, and generating page content. Next, specific code examples will be used to illustrate the application of PHP in back-end development. First, let's look at a simple PHP code example for connecting to a database and querying data:
 What are the commonly used directories for springBoot projects?
Jun 27, 2023 pm 01:42 PM
Commonly used directories for springBoot projects. The directory structure and naming specifications of springBoot projects are introduced based on the directory structure and naming specifications during SpringBoot development. Through the introduction, we can help you solve the problem. How to plan the directory structure in actual projects? How to name directories more standardizedly? What do each directory mean? Wait three questions. Directory description servicex//Project name|-admin-ui//Management service front-end code (usually UI and SERVICE are put into one project for easy management)|-servicex-auth//Module 1|-servicex-common//Module 2|-servicex-gateway//Module 3|


