
You can connect multiple output devices to your computer. Therefore, depending on your requirements, you may want to switch between these output devices frequently. While this can be done easily, you may be wondering which way is easiest and fastest. First, you need to understand which options apply to you to determine which option is easiest and best for you.
In this article, we detail 4 different ways you can use to easily switch between output devices in Windows 11.
Step 1: Click the Quick Settings Panel consisting of the Wi-Fi icon, speaker icon and battery icon icon.
In the Quick Settings panel, click the right arrow icon associated with the Volume Slider.
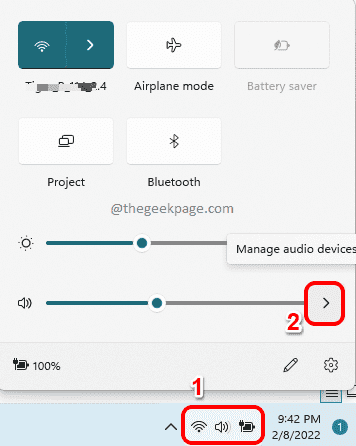
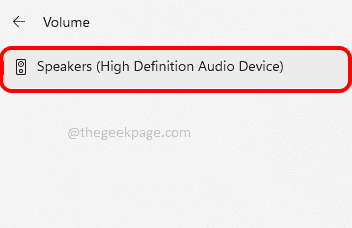
Step 2: Now in the pop-up window, you will be able to see all the output devices connected to your computer. Just click on your preferred output device. That’s all.
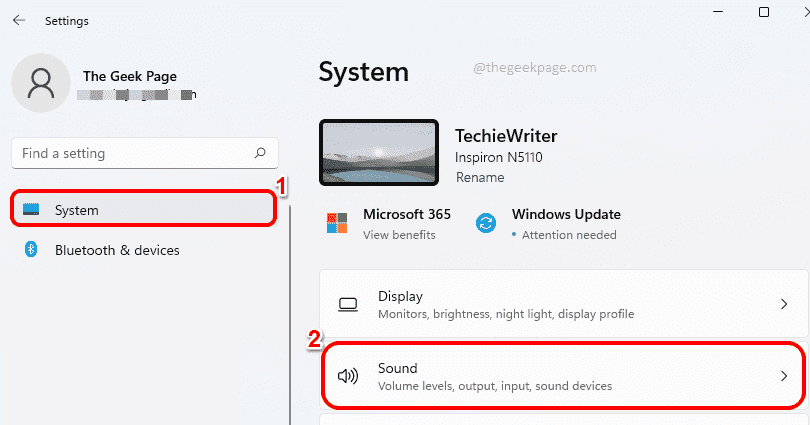
Step 1: Press the Win I key at the same time to launch the Settings application. In the left pane, click the "System" tab, and in the right pane, click the "Sound "Tab.
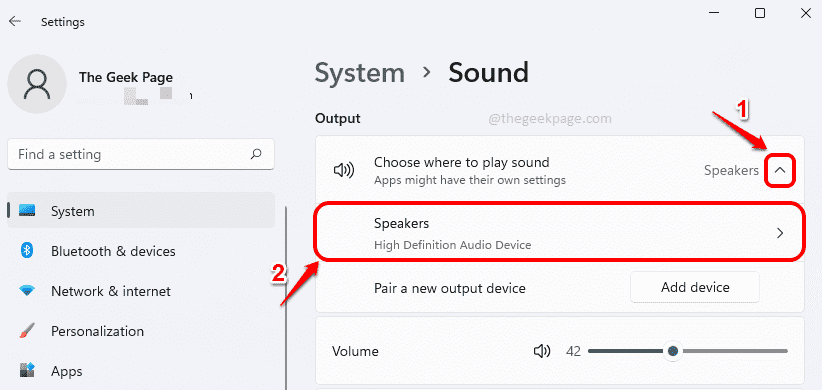
Step 2: In the Sound Settings window, expand the Select where to play the sound" section.
Under this section you can see all the output devices connected to your computer. You can select your preferred device from multiple output devices by clicking on the corresponding radio button. That’s all.NOTE: In the screenshot below, there are no radio buttons because there is only one output device connected to my computer.
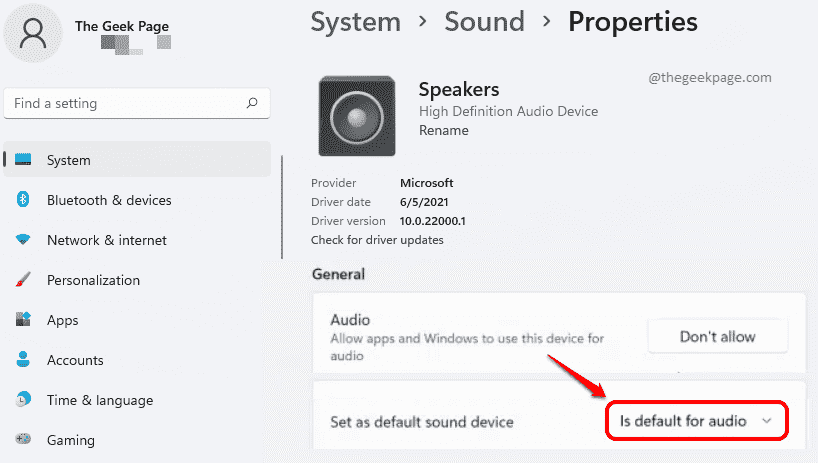
Alternatively, if you want to make a specific device thedefault output device, click the right arrow## associated with that output device #icon to expand its properties.
: In the subsequent Properties window, under the "General" section, select "Set as the default sound device" Select "Default" for the "Audio" option in the drop-down menu. That’s all.
 Method 3: Setting via Volume Mixer
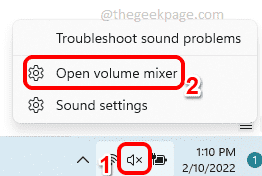
:Right clickTaskbarSpeaker icon in the upper right corner. From the expanded menu, click to open the Volume Mixer option.
: Now in the Volume Mixer window you can select Choose your preferred output device.
Method 4: Via Game Bar Settings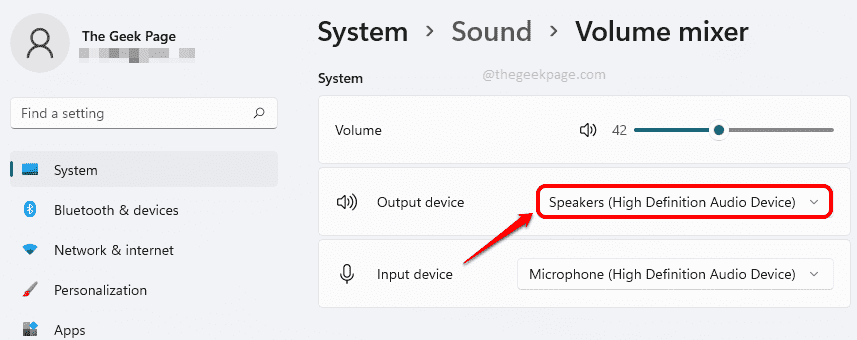 Simultaneously press the
tab. Under the MIX tab, for the
WINDOWS DEFAULT OUTPUTdrop-down menu, you can set your preferred output device with just one click.
That’s all. Hope you found this article useful.The above is the detailed content of 4 different ways to change the sound output device on Windows 11. For more information, please follow other related articles on the PHP Chinese website!
 Computer is infected and cannot be turned on
 How to prevent the computer from automatically installing software
 Summary of commonly used computer shortcut keys
 Computer freeze screen stuck
 How to measure internet speed on computer
 How to set the computer to automatically connect to WiFi
 Computer 404 error page
 How to set up computer virtual memory


