
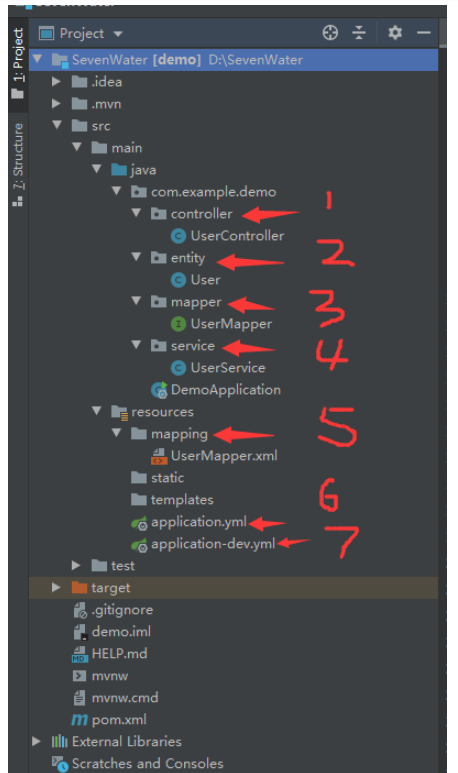
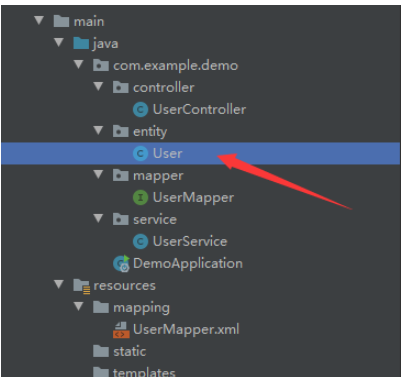
As shown in the above figure, we have 7 more important modules in the idea that need to be built
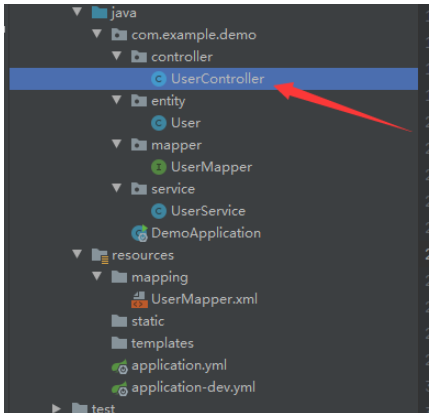
(1) Controller package: If you learn Friends who have experienced or know something about SpringMVC must know that the controller is the control layer, which is equivalent to the place where we receive browser information and respond to send relevant information. Specifically, it also combines computer network related knowledge to understand how to use it in the browser. Receive information, and how to respond to the information. We implement relevant data manipulation under the controller control layer (here, I would like to express my special thanks to my senior brother during my graduate career for teaching me about Web programming for a long time, which has benefited me a lot. I hope everyone can use the relevant time. , check more information and related videos to learn);
(2) entity package: our entity classes are stored here, which is exactly the same as simply learning to create classes in java, there is no difference;
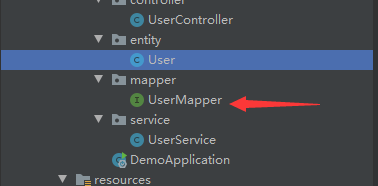
(3) mapper package: SpringMVC It is called the persistence layer in the DAO layer (DAO layer (data access object)). Here you can directly operate the database and is generally used in conjunction with the fifth package mapping package;
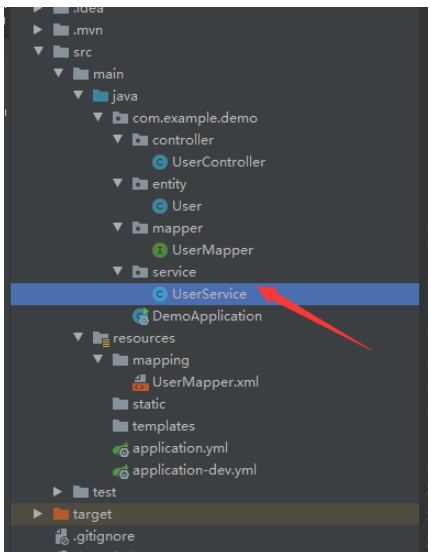
(4) service package: called in SpringMVC Business logic layer, so the classes stored here are all related to processing related business logic;
(5) mapping package: placed under resources as classpath, stored mybatis file, because the current SpringBoot is very integrated, many configurations The files can be put together, and even friends who don't have much mybatis foundation can learn it. The reason why the mapper package and the mapping package are used together is because they form a mapping relationship, and they are used in combination to access our database files;
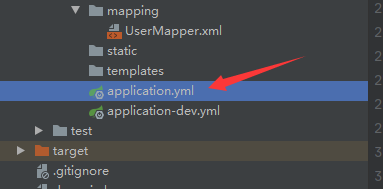
(6) application.yml: As a global default configuration file, it applies to the entire Project, to integrate so much of our configuration information, this configuration file is definitely indispensable (it is best to use the yaml language to write the configuration file here, because the writing is relatively simple and clear);
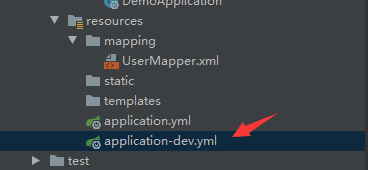
(7) application-dev.yml : This is considered a configuration file for a specific environment, and it should be combined with our actual project. Because the project itself is not only a development environment, but also a series of environments such as testing and production. When we do development, we use the development environment to configure application-dev.yml. When we do testing, we use the testing environment to configure application-test.yml. When we do production, we use the production environment to configure application-pro. yml. At present, we are only talking about the development environment, so we only use one configuration file application-dev.yml. A specific environment configuration information will override the default configuration of application.yml when used, so there is no need to worry about the conflicts between the statements in the default configuration and the statements in the environment configuration.
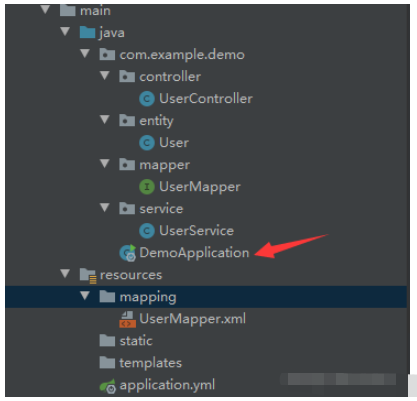
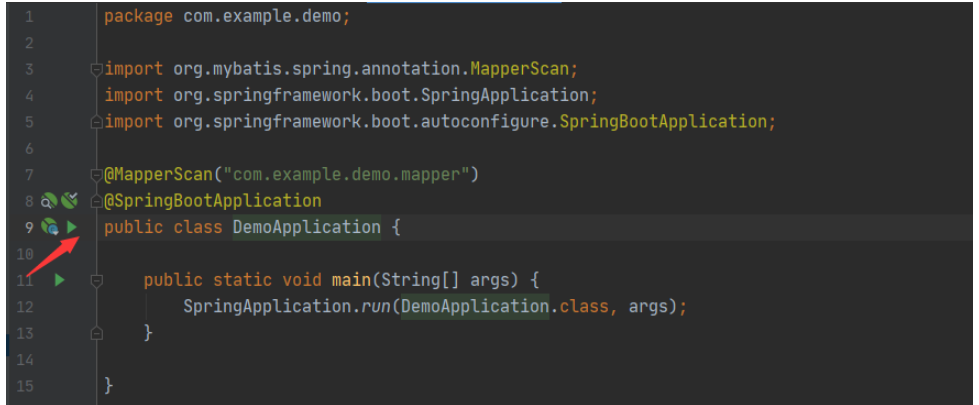
Every java program has a program entrance. DemoApplication itself already exists when we initialize SpringBoot. We do not need to do too much configuration here.
package com.example.demo;

import org.mybatis.spring.annotation.MapperScan;
import org.springframework.boot.SpringApplication;
import org.springframework.boot.autoconfigure.SpringBootApplication;

@MapperScan("com.example.demo.mapper")
@SpringBootApplication
public class DemoApplication {

    public static void main(String[] args) {
        SpringApplication.run(DemoApplication.class, args);
    }
}●@SpringBootApplication annotation: It is used to indicate that this is the startup item class of a springboot project. The purpose is to enable automatic configuration (in fact, it is inherited from the Configuration configuration class. In-depth understanding requires everyone to analyze the principles of SpringBoot)
●@MapperScan ("com.example.demo.mapper") is to scan our mapper files and effectively access related database file URL mapping (this annotation is very useful !)
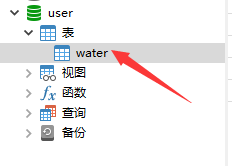
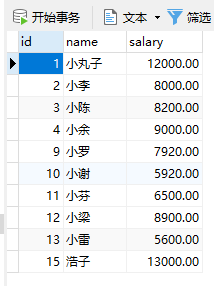
CREATE TABLE `water` (
  `id` int NOT NULL,
  `name` varchar(255) COLLATE utf8_unicode_ci NOT NULL,
  `salary` double(10,2) NOT NULL,
  PRIMARY KEY (`id`)
) ENGINE=InnoDB DEFAULT CHARSET=utf8mb3 COLLATE=utf8_unicode_ci;
package com.example.demo.entity;

/**
 * @description:    实体类
 * @author: Fish_Vast
 * @Date: 2021/8/25
 * @version: 1.0
 */
public class User {
    private String name;
    private Integer id;
    private Double salary;

    public User() {
    }

    public String getName() {
        return name;
    }

    public void setName(String name) {
        this.name = name;
    }

    public Integer getId() {
        return id;
    }

    public void setId(Integer id) {
        this.id = id;
    }

    public Double getSalary() {
        return salary;
    }

    public void setSalary(Double salary) {
        this.salary = salary;
    }

    @Override
    public String toString() {
        return "User{" +
                "name='" + name + '\'' +
                ", id=" + id +
                ", salary=" + salary +
                '}';
    }
}●In the reading and input related to mybatis in Java, why try to use packaging classes instead of basic data types?
① If no value is assigned to a field in MySQL, the default value is null. When you check it from the database, it is also null. If the field is of int type in the corresponding Java code, null cannot correspond to the int type, because int represents the basic The data type can only be basic numbers.
②The attributes of the entity class can be assigned a value or not. When you do not assign a value to it, it has a default value. For example, the default value of int is 0. But actively setting the value to 0 and it defaulting to 0 are two different concepts. For example, the score of a class: 0 means that a certain student has a score of 0, and null means that the student has no score in the exam. These are two different concepts.
package com.example.demo.mapper;

import com.example.demo.entity.User;
import org.springframework.stereotype.Repository;

import java.util.List;

@Repository
public interface UserMapper {
    //1.通过id查询用户信息
    User getUser(int id);
    //2.通过id删除用户信息
    int delete(int id);
    //3.更改用户信息
    int update(User user);
    //4.插入用户信息
    int save(User user);
    //5.查询所有用户信息
    List<User> selectAll();
}●@Repository,注解它本身的作用便是标注数据访问组件,作为DAO对象,它将 DAO 导入 IoC 容器,并使未经检查的异常有资格转换为 Spring DataAccessException。通过这个注解能够报出更多发现不了的错误,更有利于对项目的维护和开发。其实@Repository不在接口上进行注明,我们的程序照样可以运行,因为在我们使用@MapperScan的时候,我们已经将我们的接口交给框架中的代理类,所以即便是我们不写,程序不会报错,只是我们在Service层写明接口的时候,IDEA会给出红色的波浪线。可以这样理解,标注@Repository是为了告诉编译器我将接口注入到了IoC容器了,你不要报错啦~
●相应地,写出增删查改和查询全部信息的五个方法。
<?xml version="1.0" encoding="UTF-8"?>
<!DOCTYPE mapper PUBLIC "-//mybatis.org//DTD Mapper 3.0//EN" "http://mybatis.org/dtd/mybatis-3-mapper.dtd">
<mapper namespace="com.example.demo.mapper.UserMapper">
    <resultMap id="BaseResultMap" type="com.example.demo.entity.User">
        <result column="id" jdbcType="INTEGER" property="id" />
        <result column="name" jdbcType="VARCHAR" property="name" />
        <result column="salary" jdbcType="DOUBLE" property="salary" />
    </resultMap>
    <!--查询用户信息-->
    <select id="getUser" resultType="com.example.demo.entity.User">
        select * from water where id = #{id}
    </select>
    <!--删除用户信息-->
    <delete id="delete" parameterType="int">
        delete from water where id=#{id}
    </delete>
    <!--返回所有用户信息-->
    <select id="selectAll"  resultType="com.example.demo.entity.User">
        select * from water
    </select>

    <!--增加用户信息-->
    <insert id="save" parameterType="com.example.demo.entity.User" >
        insert into water
        <trim prefix="(" suffix=")" suffixOverrides="," >
            <if test="id != null" >
                id,
            </if>
            <if test="name != null" >
                name,
            </if>
            <if test="salary != null" >
                salary,
            </if>
        </trim>
        <trim prefix="values (" suffix=")" suffixOverrides="," >
            <if test="id != null" >
                #{id,jdbcType=INTEGER},
            </if>
            <if test="name != null" >
                #{name,jdbcType=VARCHAR},
            </if>
            <if test="salary != null" >
                #{salary,jdbcType=DOUBLE},
            </if>
        </trim>
    </insert>

    <!--根据id更改用户信息-->
    <update id="update" parameterType="com.example.demo.entity.User">
        update water
        <set >
            <if test="name != null" >
                name = #{name,jdbcType=VARCHAR},
            </if>
            <if test="salary != null" >
                salary = #{salary,jdbcType=DOUBLE},
            </if>
        </set>
        where id = #{id,jdbcType=INTEGER}
    </update>
</mapper>●mapper namespace用于绑定mapper接口的,当你的namespace绑定接口后,你可以不用写接口实现类,mybatis会通过该绑定自动帮你找到对应要执行的SQL语句(通过mapper方法名进行绑定);
●resultMap 定义了一个id为BaseResultMap的标识,type代表使用哪种类作为我们所要映射的类;
●
package com.example.demo.service;

import com.example.demo.entity.User;
import com.example.demo.mapper.UserMapper;
import org.springframework.beans.factory.annotation.Autowired;
import org.springframework.stereotype.Service;

import java.util.List;

/**
 * @description:	实现类,对进行相关的业务逻辑
 * @author: Fish_Vast
 * @Date: 2021/8/25
 * @version: 1.0
 */
@Service
public class UserService {
    @Autowired
    private UserMapper userMapper;

    public User getUser(int id){
        return userMapper.getUser(id);
    }

    public int delete(int id){
        return userMapper.delete(id);
    }

    public int update(User user){
        return userMapper.update(user);
    }

    public int save(User user){
        return userMapper.save(user);
    }

    public List<User>  selectAll(){
        return userMapper.selectAll();
    }
}●这里我特别说明一下,private UserMapper userMapper既可以当做是引用数据类型,也可以作为接口对象进行使用,这里我们当接口对象使用(初次接触的时候肯定对这个会有些许疑问,很正常,因为我当时对于这个接口也纠结了很久哦);
●@Service表示我们在业务逻辑层进行操纵,属于自动配置的环节;
●相应的五个方法,通过对象得到相应返回值给UserMapper接口。
package com.example.demo.controller;

import com.example.demo.entity.User;
import com.example.demo.service.UserService;
import org.springframework.beans.factory.annotation.Autowired;
import org.springframework.web.bind.annotation.*;

import javax.xml.ws.Service;
import java.util.List;

/**
 * @description:	控制器,接收并响应相关信息
 * @author: Fish_Vast
 * @Date: 2021/8/25
 * @version: 1.0
 */
@RestController
@RequestMapping("/seven")
public class UserController {
    @Autowired
    private UserService userService;
    //通过id得到用户信息
    @RequestMapping(value = "/getUser/{id}", method = RequestMethod.GET)
    public String getUser(@PathVariable int id){
        return userService.getUser(id).toString();
    }
    //通过id删除用户信息
    @RequestMapping(value = "/delete", method = RequestMethod.GET)
    public String delete(int id){
        int result = userService.delete(id);
        if(result >= 1){
            return "删除成功!";
        }else{
            return "删除失败!";
        }
    }
    //更改用户信息
    @RequestMapping(value = "/update", method = RequestMethod.GET)
    public String update(User user){
        int result = userService.update(user);
        if(result >= 1){
            return "更新成功!";
        }else{
            return "更新失败!";
        }
    }
    //插入用户信息
    @RequestMapping(value = "/insert", method = RequestMethod.GET)
    public int insert(User user){
        return userService.save(user);
    }
    //查询所有用户的信息
    @RequestMapping(value = "/selectAll")
    @ResponseBody   //理解为:单独作为响应体,这里不调用实体类的toString方法
    public List<User>  listUser(){
        return userService.selectAll();
    }
}●@RestController注解:就表示我们在控制层模块。控制层是作为SpringMVC最重要的一个环节,进行前端请求的处理,转发,重定向,还包括调用Service方法;
●@RequestMapping注解:处理请求和控制器方法之间的映射关系;
●@ResponseBody注解:将返回的数据结构转换为JSON格式响应到浏览器(这里说得比较笼统,只是简单滴给大家说明一下,水平还不够,认识还不深,不到之处还请见谅!);
●更多的注解解释,还需要大家多去学习一下SpringMVC和SpringBoot,这里面会详细地介绍,在这里我只是做了很粗略的说明而已(本人也是正接触不久,正在努力学习当中)。
(8)配置application.yml文件
spring:
  profiles:
active: dev●语句很简单,指明我们要使用的开发环境配置文件
#服务器端口配置
server:
  port: 8081

#数据库配置
spring:
  datasource:
    username: 数据库名称
    password: 账号密码
    url: jdbc:mysql://localhost:3306/user?useUnicode=true&characterEncoding=utf-8&nullCatalogMeansCurrent=true&useSSL=true&&serverTimezone=Asia/Shanghai
    driver-class-name: com.mysql.cj.jdbc.Driver

#mybatis配置
mybatis:
  mapper-locations: classpath:mapping/*.xml
  type-aliases-package: com.example.demo.entity

#showSQL
logging:
  level:
com.example.demo.entity: debug●在开发配置文件当中,我们配置好我们的服务器端口号、数据库的配置、mybatis的配置和如何展示我们的Sql;
●其中要注意的是,数据库的配置中的username和password使用我们安装MySQL数据库时使用的账号名称和密码,url中的3306/紧跟着我们的数据库名称,如果建立的数据库名称不一致,也需要进行修改。
通过以上9个步骤,我们从第(1)个步骤程序入口处点击运行按钮,在浏览器中输入相应指令即可得到不同的展示信息:(到这一步,大概知道为啥要使用@MapperScan注解了吧,可以直接将扫描到的包文件交到代理类中,SpringBoot就是很人性化的框架!)
①查询操作:http://localhost:8081/seven/getUser/1

②删除操作:http://localhost:8081/seven/delete?id=14

③Change operation: http://localhost:8081/seven/update?id=1&name=小 Maruko&salary=12000


The above is the detailed content of How to implement basic addition, deletion, modification and query in SpringBoot in Java. For more information, please follow other related articles on the PHP Chinese website!


