How to install Nginx using YUM under CentOS7 system
简介
nginx 是由 igor sysoev 为俄罗斯访问量第二的 rambler.ru 站点开发的,第一个公开版本0.1.0发布于2004年10月4日。其将源代码以类bsd许可证的形式发布,因它的稳定性、丰富的功能集、示例配置文件和低系统资源的消耗而闻名。
centos 7 条件
教程中的步骤需要root用户权限。
一、添加nginx到yum源
添加centos 7 nginx yum资源库,打开终端,使用以下命令:
sudo rpm -uvh http://nginx.org/packages/centos/7/noarch/rpms/nginx-release-centos-7-0.el7.ngx.noarch.rpm
二、安装nginx
在你的centos 7 服务器中使用yum命令从nginx源服务器中获取来安装nginx:
sudo yum install -y nginx
nginx将完成安装在你的centos 7 服务器中。
三、启动nginx
刚安装的nginx不会自行启动。运行nginx:
sudo systemctl start nginx.service
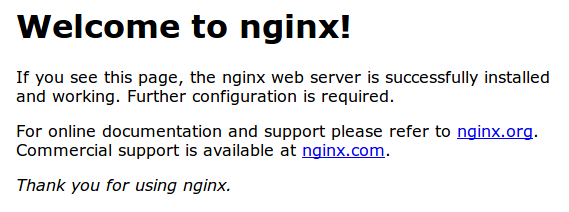
如果一切进展顺利的话,现在你可以通过你的域名或ip来访问你的web页面来预览一下nginx的默认页面;

如果看到这个页面,那么说明你的centos 7 中 web服务器已经正确安装。
centos 7 开机启动nginx
sudo systemctl enable nginx.service
nginx配置信息
网站文件存放默认目录
/usr/share/nginx/html
网站默认站点配置
/etc/nginx/conf.d/default.conf
自定义nginx站点配置文件存放目录
/etc/nginx/conf.d/
nginx全局配置
/etc/nginx/nginx.conf
在这里你可以改变设置用户运行nginx守护程序进程一样,和工作进程的数量得到了nginx正在运行,等等。
linux查看公网ip
您可以运行以下命令来显示你的服务器的公共ip地址:
ip addr show eth0 | grep inet | awk '{ print $2; }' | sed 's/\/.*$//'The above is the detailed content of How to install Nginx using YUM under CentOS7 system. For more information, please follow other related articles on the PHP Chinese website!

Hot AI Tools

Undresser.AI Undress
AI-powered app for creating realistic nude photos

AI Clothes Remover
Online AI tool for removing clothes from photos.

Undress AI Tool
Undress images for free

Clothoff.io
AI clothes remover

Video Face Swap
Swap faces in any video effortlessly with our completely free AI face swap tool!

Hot Article

Hot Tools

Notepad++7.3.1
Easy-to-use and free code editor

SublimeText3 Chinese version
Chinese version, very easy to use

Zend Studio 13.0.1
Powerful PHP integrated development environment

Dreamweaver CS6
Visual web development tools

SublimeText3 Mac version
God-level code editing software (SublimeText3)

Hot Topics
 1387
1387
 52
52
 How to configure cloud server domain name in nginx
Apr 14, 2025 pm 12:18 PM
How to configure an Nginx domain name on a cloud server: Create an A record pointing to the public IP address of the cloud server. Add virtual host blocks in the Nginx configuration file, specifying the listening port, domain name, and website root directory. Restart Nginx to apply the changes. Access the domain name test configuration. Other notes: Install the SSL certificate to enable HTTPS, ensure that the firewall allows port 80 traffic, and wait for DNS resolution to take effect.
 How to start nginx server
Apr 14, 2025 pm 12:27 PM
Starting an Nginx server requires different steps according to different operating systems: Linux/Unix system: Install the Nginx package (for example, using apt-get or yum). Use systemctl to start an Nginx service (for example, sudo systemctl start nginx). Windows system: Download and install Windows binary files. Start Nginx using the nginx.exe executable (for example, nginx.exe -c conf\nginx.conf). No matter which operating system you use, you can access the server IP
 How to check nginx version
Apr 14, 2025 am 11:57 AM
The methods that can query the Nginx version are: use the nginx -v command; view the version directive in the nginx.conf file; open the Nginx error page and view the page title.
 How to check the name of the docker container
Apr 15, 2025 pm 12:21 PM
You can query the Docker container name by following the steps: List all containers (docker ps). Filter the container list (using the grep command). Gets the container name (located in the "NAMES" column).
 How to run nginx apache
Apr 14, 2025 pm 12:33 PM
To get Nginx to run Apache, you need to: 1. Install Nginx and Apache; 2. Configure the Nginx agent; 3. Start Nginx and Apache; 4. Test the configuration to ensure that you can see Apache content after accessing the domain name. In addition, you need to pay attention to other matters such as port number matching, virtual host configuration, and SSL/TLS settings.
 How to check whether nginx is started
Apr 14, 2025 pm 01:03 PM
How to confirm whether Nginx is started: 1. Use the command line: systemctl status nginx (Linux/Unix), netstat -ano | findstr 80 (Windows); 2. Check whether port 80 is open; 3. Check the Nginx startup message in the system log; 4. Use third-party tools, such as Nagios, Zabbix, and Icinga.
 How to create a mirror in docker
Apr 15, 2025 am 11:27 AM
Steps to create a Docker image: Write a Dockerfile that contains the build instructions. Build the image in the terminal, using the docker build command. Tag the image and assign names and tags using the docker tag command.
 How to start containers by docker
Apr 15, 2025 pm 12:27 PM
Docker container startup steps: Pull the container image: Run "docker pull [mirror name]". Create a container: Use "docker create [options] [mirror name] [commands and parameters]". Start the container: Execute "docker start [Container name or ID]". Check container status: Verify that the container is running with "docker ps".


