How to use tomcat with nginx
Summary of using tomcat combined with nginx
I believe many people have heard of nginx. This small thing is slowly eating up the share of apache and IIS. So what exactly does it do? Maybe many people don't understand it.
Speaking of reverse proxy, many people may have heard of it, but many people may not know what a reverse proxy is. Take a description from Baidu Encyclopedia:
The reverse proxy method refers to using a proxy server to accept connection requests on the Internet, then forwarding the requests to the server on the internal network, and returning the results obtained from the server to the client requesting a connection on the Internet. At this time, the proxy server appears as a server to the outside world.


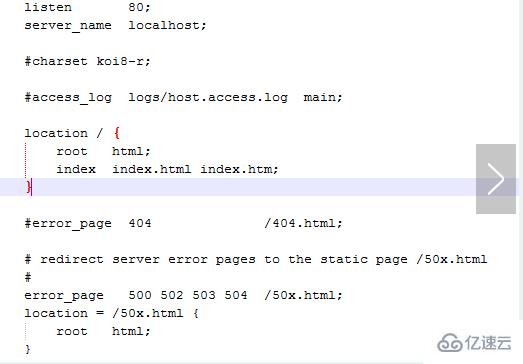
index: When no home page is specified, the specified file will be selected by default. There can be multiple files and they will be loaded in order. If the first one does not exist, the second one will be found, and so on.
The error_page below is the page that represents the error. We will not use it here for the time being, so we will ignore it for now.
Then we know the specific configuration, how to make it switch to tomcat when accessing localhost. In fact, only two places have to be modified:
1 server_name localhost:8080;
2
3 location / {
4     proxy_pass http://localhost:8080
5 }We have modified the above two places. My tomcat is on port 8080. You can modify it according to your own needs. There is a new element proxy_pass here, which represents the proxy path, which is equivalent to forwarding, unlike the root that must be specified before.
Now that we have modified the file, does it mean that we must shut down nginx and then restart it? In fact, it is not necessary, nginx can reload the file.
We run directly:

It was too early to rejoice, we found an error:

What happened? An error was found on line 45. We didn’t want to find } on that line, so we looked carefully and found that the proxy_pass we added was strange. It didn’t end with a ; sign. This was the problem. We modified it directly and then ran it again. We found that there was no Error, OK.
If you don’t want to load it directly, but just want to see if there is any problem with your configuration file, you can directly enter:

This checks the configuration file for errors. All our modifications below assume that we run nginx -s reload to reload the configuration file after the modification is completed. Please note.
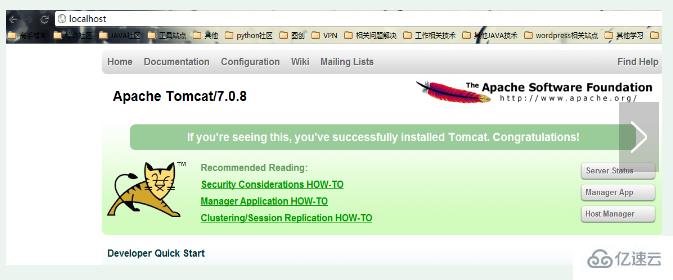
Everything is fine. Then we reopen http://localhost and we see the following page:

At this time, we found that it was not the welcome page just now, but the tomcat management page. No matter what link we click, there will be no problem, which is equivalent to directly accessing http://localhost:8080.
3) Above we directly tried a small example to let nginx forward, which is the so-called reverse proxy. But in fact our needs will not be like this. We need to filter by file type. For example, jsp is directly processed by tomcat, because nginx is not a servlet container and cannot process JSP, while html, js, and css do not need to be processed. Yes, cache it directly to nginx.
Let's configure it so that the JSP page is directly sent to tomcat, and some pictures and JS such as html and png are directly cached by nginx.
At this time, the most important thing to use is the location element, and it involves some regular rules, but it is not difficult:
1 location ~ \.jsp$ {
2         proxy_pass http://localhost:8080;
3 }
4
5 location ~ \.(html|js|css|png|gif)$ {
6     root D:/software/developerTools/server/apache-tomcat-7.0.8/webapps/ROOT;
7 }We first need to remove the previously configured location / to prevent all requests from being intercepted.
Then let’s take a look at http://localhost

When we do not specify the jsp page, it will not be found because there is no corresponding location match at this time, so there will be a 404 error, and then it will jump to the nginx custom error page.
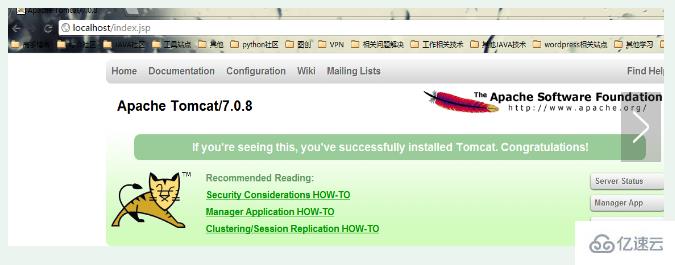
And when we use http://localhost/index.jsp to visit, we see the familiar page: 
And the pictures are displayed normally, because the pictures are png, so we can directly search them in the tomcat/webapps/ROOT directory. Of course, if we click on the Manager Application HOW-TO link, we find:

It still can't be found, why? Because this is an html page, but it is not in the ROOT directory, but in the docs directory. But when we match html, we go to the ROOT directory to find it, so we still can't find the page.
Under normal circumstances, if we need to use nginx to serve static files, we will generally put all static files, html, htm, js, css, etc. in the same folder, so that there will be no such situation as tomcat. Because the ones under tomcat belong to different projects, there is nothing we can do about this.
3) Some people will say that these will only find one server, but what if we want to automatically find another server when one server hangs up? This is actually taken into consideration by nginx.
At this time, the proxy_pass we used before will be of great use.
Let’s modify the first example before, that is, all agents:
The final modification is as follows:
 1 upstream local_tomcat {
 2     server localhost:8080;
 3 }
 4
 5 server{
 6         location / {
 7            proxy_pass http://local_tomcat;
 8         }
 9         #......其他省略
10 }We added an upstream outside the server and used it directly in proxy_pass using the name of http:// upstream.
我们还是直接来http://localhost,还是和第一个一样的效果,所有链接都没问题,说明我们配置正确。
upstream中的server元素必须要注意,不能加http://,但proxy_pass中必须加。
我们刚才说可以在一个服务器挂了的情况下连到另外一个,那怎么弄呢?
其实很简单,在upstream中的local_tomcat中配置多一个server。比如我现在弄多一个jetty,端口在9999,所以我们配置如下:
1 upstream local_tomcat {
2     server localhost:8080;
3     server localhost:9999;
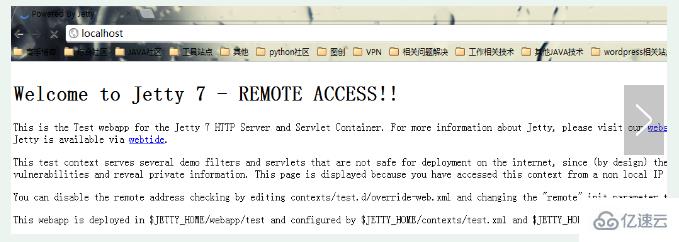
4 }此时,我们关闭tomcat,而只开jetty。我们来运行http://localhost看看效果:

我们看到它请求到了jetty的页面,但由于jetty的机制,这时没有显示jetty主页,这个我们先不管。但我们的在一个服务器挂的情况下自动使用另外一个的功能实现了。
但有时我们就不想它挂的时候访问另外一个,而只是希望一个服务器访问的机会比另外一个大,这个可以在server最后加上一个weight=数字来指定,数字越大,表明请求到的机会越大。
1 upstream local_tomcat {
2     server localhost:8080 weight=1;
3     server localhost:9999 weight=5;
4 }这时我们给了jetty一个更高的权值,让它更有机会访问到,实际上当我们刷新http://localhost访问的时候发现jetty访问机率大很多,tomcat几乎没机会访问,一般情况下,如果我们必须这样用,不要相关太大,以免一个服务器负载太大。
当然,server还有一些其他的元素,比如down表示暂时不用到该服务器等等。这些可以参考nginx的wiki。也许写了一大堆,有人会有问题,那nginx怎么关闭呢?这倒是个问题,其实直接运行nginx -s stop就可以关闭了。
The above is the detailed content of How to use tomcat with nginx. For more information, please follow other related articles on the PHP Chinese website!

Hot AI Tools

Undresser.AI Undress
AI-powered app for creating realistic nude photos

AI Clothes Remover
Online AI tool for removing clothes from photos.

Undress AI Tool
Undress images for free

Clothoff.io
AI clothes remover

AI Hentai Generator
Generate AI Hentai for free.

Hot Article

Hot Tools

Notepad++7.3.1
Easy-to-use and free code editor

SublimeText3 Chinese version
Chinese version, very easy to use

Zend Studio 13.0.1
Powerful PHP integrated development environment

Dreamweaver CS6
Visual web development tools

SublimeText3 Mac version
God-level code editing software (SublimeText3)

Hot Topics
 How to deploy multiple projects in tomcat
Apr 21, 2024 am 09:33 AM
To deploy multiple projects through Tomcat, you need to create a webapp directory for each project and then: Automatic deployment: Place the webapp directory in Tomcat's webapps directory. Manual deployment: Manually deploy the project in Tomcat's manager application. Once the project is deployed, it can be accessed by its deployment name, for example: http://localhost:8080/project1.
 Where is the root directory of the tomcat website?
Apr 21, 2024 am 09:27 AM
The Tomcat website root directory is located in Tomcat's webapps subdirectory and is used to store web application files, static resources, and the WEB-INF directory; it can be found by looking for the docBase attribute in the Tomcat configuration file.
 How to run two projects with different port numbers in tomcat
Apr 21, 2024 am 09:00 AM
Running projects with different port numbers on the Tomcat server requires the following steps: Modify the server.xml file and add a Connector element to define the port number. Add a Context element to define the application associated with the port number. Create a WAR file and deploy it to the corresponding directory (webapps or webapps/ROOT). Restart Tomcat to apply changes.
 How to run html and jsp on tomcat
Apr 21, 2024 am 09:04 AM
Tomcat can run HTML and JSP. The method is as follows: copy the HTML file to the corresponding subdirectory of the Tomcat directory and access it in the browser. Copy the JSP file to the corresponding subdirectory of the Tomcat directory, and use the <%@ page %> directive to specify the Java code and access it in the browser.
 How to generate URL from html file
Apr 21, 2024 pm 12:57 PM
Converting an HTML file to a URL requires a web server, which involves the following steps: Obtain a web server. Set up a web server. Upload HTML file. Create a domain name. Route the request.
 Reasons for garbled characters in tomcat
Apr 21, 2024 am 10:18 AM
Reasons for Tomcat garbled characters: 1. Character set mismatch; 2. HTTP response header is not set correctly; 3. Filter or encoder configuration error; 4. Web page encoding is incorrect; 5. Other reasons (including server-side language, database encoding and proxy server issues).
 How to add a server in eclipse
May 05, 2024 pm 07:27 PM
To add a server to Eclipse, follow these steps: Create a server runtime environment Configure the server Create a server instance Select the server runtime environment Configure the server instance Start the server deployment project
 How to configure domain name in tomcat
Apr 21, 2024 am 09:52 AM
To configure Tomcat to use a domain name, follow these steps: Create a server.xml backup. Open server.xml and add the Host element, replacing example.com with your domain name. Create an SSL certificate for the domain name (if required). Add an SSL connector in server.xml, change the port, keystore file, and password. Save server.xml. Restart Tomcat.


