

How to use Nginx to deploy flask application in centos

Environment preparation
Python package installation tool pip: sudo apt-get install pip
virtualenv: In order to avoid conflicts between the system environment and the application environment Conflict, use a virtual environment to install application dependencies. virtualenv can create an independent development environment for each python application. Installation method: sudo pip install virtualenv
Virtual environment usage
flask project address:/usr/local/flasky, you only need to run the command under the project address:
virtualenv venv
It is a common convention to use "venv" as the name of the virtual environment, so that we A virtual environment folder venv is created as shown in the red box in the figure below:

Next, activate the virtual environment with just the command
source venv/bin/activate

After activating the virtual environment, there will be a (venv) logo in the command line header. After only the virtual environment is required, all operations to install python will install the packages and references in the virtual environment and will not affect the global situation. The python environment
Instructions to exit the virtual environment, directly type:
deactivate
to exit the virtual environment
Configuring the flask application environment
When developing a flask application, a lot of templates will be applied. "Dog Book" introduces a more convenient way to directly add the flask dependencies of the development environment, etc. It is very convenient to export it as a txt file, and then use the corresponding instructions in the centos virtual environment to install according to this txt file.
pip freeze >requerements.txt
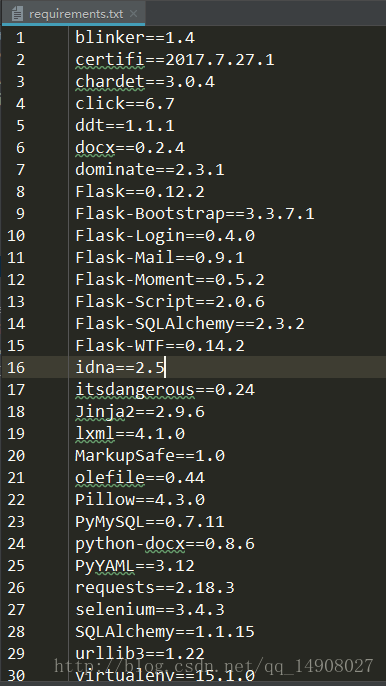
This command exports a text file named requirements.txt. The content is as shown in the figure below
Then use the following command in centos
pip install -r requerments.txt
This will install a copy in the virtual environment that is consistent with the development environment.
Be sure to use batch installation instructions in the virtual environment, otherwise it will be installed globally, and the consequences will be quite painful.
Installing uwsgi
There are not many choices for the actual production operating environment of flask. The more mature ones are [gunicorn] and [uwsgi]. Here is a book recommended by Dong Weiming. These two deployments are discussed in "Python Web Development Practical Combat".
The following content comes from Baidu Encyclopedia:
uwsgi is a web server that implements wsgi protocol, uwsgi, http and other protocols. The function of httpuwsgimodule in nginx is to exchange with uwsgi server. wsgi is a web server gateway interface. It is a specification for communication between a web server (such as nginx, uwsgi, etc.) and a web application (such as a program written with the Flask framework).
The installation instructions are as follows. Please make sure you have entered the virtual environment and activated it:
pip install uwsgi
There is no need to use sudo because virtualvenv has no permission requirements. .
Upload project files
The Linux connection tool used by the blogger is xshell. In a previous article, I talked about how to upload files to the Linux host, so I won’t do it here. Detailed description, show the general project structure and startup file manage.py
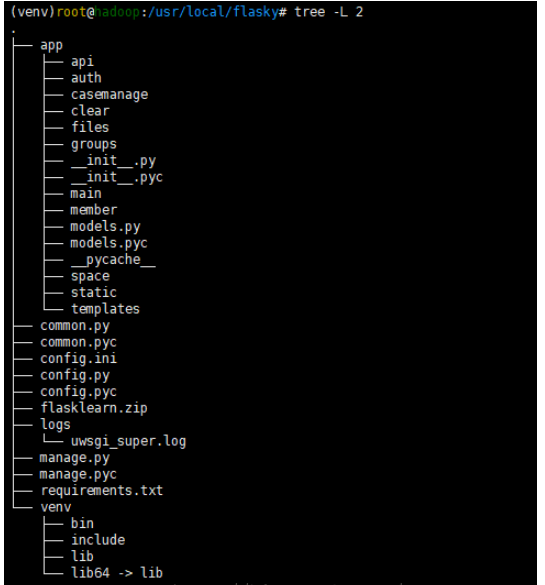
The tree command can display the file structure in the form of a tree diagram, and can give the depth of the parameter setting tree , here the blogger shows the 2-layer
installation command:
sudo apt-get install tree
manage.py code is as follows
#coding=utf-8
#!/usr/local/flasky/venv python
'''
created on 2017/11/9
@author: savitar丶
project:
'''
import os
from app import create_app
from flask_script import manager, shell
app = create_app(os.getenv('flask_config') or 'default')
manager = manager(app)

def make_shell_context():
 return dict(app=app)
manager.add_command("shell", shell(make_context=make_shell_context))
@manager.command
def deploy():
 """run deployment tasks."""
 pass
if __name__ == '__main__':
 manager.run()
#app.run()Command line running flask project
python manage.py runserver
The above commands are generally used when debugging in the development environment, or commented Remove "manager.run()" and use "app.run()". The latter can directly execute the project in pycharm. I will not explain it in detail here
Configuring uwsgi
We create a new file "config.ini" directly under the root directory of flask, and use the configuration startup method. The content of the file is as follows
[uwsgi]

# uwsgi 启动时所使用的地址与端口

socket = 127.0.0.1:5000

#虚拟环境目录
home = /usr/local/flasky/venv

#指向网站根目录
chdir = /usr/local/flasky

#python启动程序文件
wsgi-file = manage.py

#python程序内用于启动的application变量名
callable = app

#处理器数
processes = 4

#线程数
threads = 2

#状态监测地址
stats = 127.0.0.1:9191

#设置uwsgi包解析的内部缓存区大小。默认4k

buffer-size = 32768
To execute the configuration file, enter the command on the command line:
uwsgi config.ini
Or do not write the configuration file (not It is recommended to do this), directly enter
uwsgi –socket 127.0.0.1:5000 –wsgi-file manage.py –callable app –process 4 –threads 2
callable=app here This app is a variable in the manage.py program file. The type of this variable is the application class of flask
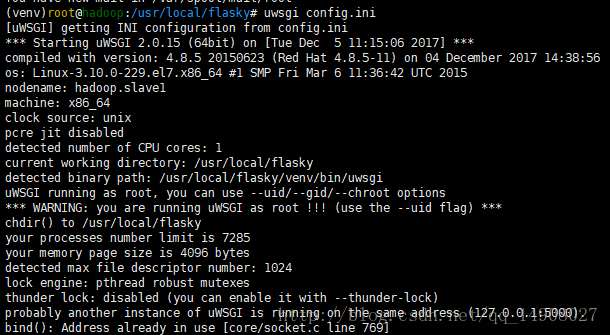
这里是因为博主已经配置好了项目自启动,已经有一个配置文件在运行了,大家按照正常流程配置就好。ctrl+c关闭程序,在实际项目中我们的服务器上可能会有多个项目在运行,我们需要应用随同服务器启动并作为后台服务运行才是实际项目需要,所以我们需要安装另一个工具来引导执行uwsgi
安装supervisor
supervisor可以同时启动多个应用,最重要的是当某个应用down掉的时候,他可以自动重启该应用,保证可用性。
sudo apt-get install supervisor
supervisor的全局配置文件在

打开该默认配置文件,最下面一行我们看到,该默认配置文件会从 /etc/supervisord/目录下面加载所有的配置文件

我们不需要修改默认的配置文件,只需要在/etc/supervisord/目录下新建一个配置文件(命名为flask_supervisor.conf)
该文件内容如下:
[program:flasky]
# 启动命令入口
command=/usr/local/flasky/venv/bin/uwsgi /usr/local/flasky/config.ini

# 命令程序所在目录
directory=/usr/local/flasky
#运行命令的用户名
user=root

autostart=true
autorestart=true
#日志地址
stdout_logfile=/usr/local/flasky/logs/uwsgi_super.log
这里command这一行代码看起来很长,其实就是之前我们的 “uwsgi config.ini”指令,这里使用的是绝对路径,保证命令和文件的准确性,大家也可以copy这一行代码出去执行,结果是ok的。autostart和autorestart参数保证了我们的应用可以一直保持启动的状态,即使是down掉了也能重启服务。
启动服务
sudo service supervisor start
终止服务
sudo service supervisor stop
安装nginx
nginx是轻量级,性能强,占用资源少,能很好的处理高并发的反向代理软件。
正向代理和反向代理
正向代理,作为一个媒介将互联网上获取的资源返回给相关联的客户端。代理和客户端在一个局域网,对于服务是透明的。反向代理,根据客户端的请求,从后端的服务器上获取资源,然后再讲这些资源返回给客户端。代理和服务器再一个局域网,对客户端是透明的。nginx是反向代理的最佳选择。
反向代理的作用
提高动态语言的io处理能力
加密和ssl加速
安全。
负载均衡
缓存静态内容
支持压缩。
nginx安装指令:
sudo apt-get install nginx
配置nginx
我们找到nginx的配置文件,不要修改默认的nginx.conf(路径 /etc/nginx/nginx.conf)文件,只需要在同样的文件夹下面新建一个文件夹(conf.d)然后在conf.d下面新建配置文件(flask_ng.conf)即可,如下图

flask_ng.conf文件内容如下
server {
  listen 80;
  server_name www.cloud-test.com; #公网地址

  location / {
  include  uwsgi_params;
  uwsgi_pass 127.0.0.1:5000; # 指向uwsgi 所应用的内部地址,所有请求将转发给uwsgi 处理
  uwsgi_param uwsgi_pyhome /usr/local/flasky/venv; # 指向虚拟环境目录
  uwsgi_param uwsgi_chdir /usr/local/flasky; # 指向网站根目录
  uwsgi_param uwsgi_script manage:app; # 指定启动程序
  }
}启动nginx
sudo service nginx restart
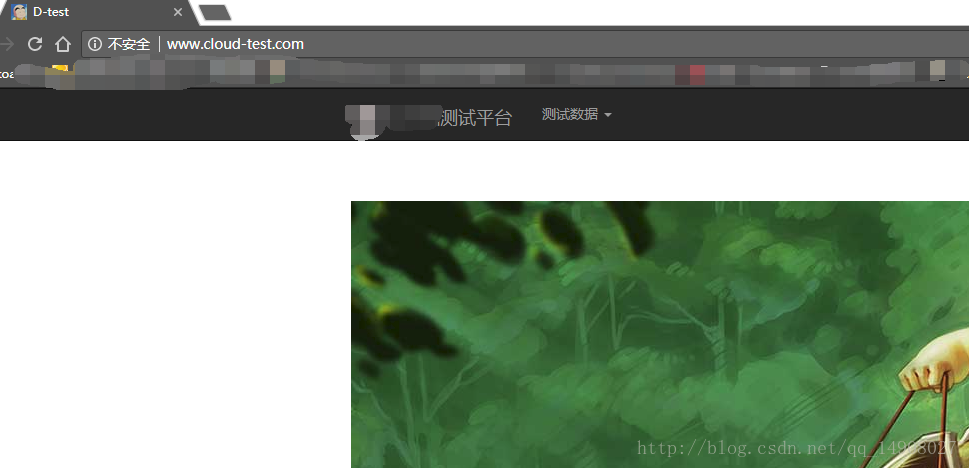
然后浏览器直接访问服务器http://www.cloud-test.com地址,结果如下

小case,解决办法,直接修改本机hosts,绑定就好了,如下图所示

然后再去访问
然后也可以找自己的同事一起访问,看看并发请求,网站的运行情况,想来能解决在开发环境使用了host 0.0.0.0 也只能处理一个用户的请求的问题
查看应用的运行情况
supervisorctl 是 supervisord 的命令行客户端工具,使用的配置和 supervisord 一样,这里就不再说了。下面,主要介绍 supervisorctl 操作的常用命令:
输入命令 supervisorctl 进入 supervisorctl 的 shell 交互界面(还是纯命令行),可以看到应用的运行情况
就可以在下面输入命令了。:
help # 查看帮助
status # 查看程序状态
stop program_name # 关闭 指定的程序
start program_name # 启动 指定的程序
restart program_name # 重启 指定的程序
tail -f program_name # 查看 该程序的日志
update # 重启配置文件修改过的程序(修改了配置,通过这个命令加载新的配置)
You can also operate directly through shell commands:
supervisorctl status
supervisorctl update

The above is the detailed content of How to use Nginx to deploy flask application in centos. For more information, please follow other related articles on the PHP Chinese website!

Hot AI Tools

Undresser.AI Undress
AI-powered app for creating realistic nude photos

AI Clothes Remover
Online AI tool for removing clothes from photos.

Undress AI Tool
Undress images for free

Clothoff.io
AI clothes remover

AI Hentai Generator
Generate AI Hentai for free.

Hot Article
Hot Tools

Notepad++7.3.1
Easy-to-use and free code editor

SublimeText3 Chinese version
Chinese version, very easy to use

Zend Studio 13.0.1
Powerful PHP integrated development environment

Dreamweaver CS6
Visual web development tools

SublimeText3 Mac version
God-level code editing software (SublimeText3)
Hot Topics
 1381
1381
 52
52

 How to optimize CentOS HDFS configuration
Apr 14, 2025 pm 07:15 PM
How to optimize CentOS HDFS configuration
Apr 14, 2025 pm 07:15 PM
Improve HDFS performance on CentOS: A comprehensive optimization guide to optimize HDFS (Hadoop distributed file system) on CentOS requires comprehensive consideration of hardware, system configuration and network settings. This article provides a series of optimization strategies to help you improve HDFS performance. 1. Hardware upgrade and selection resource expansion: Increase the CPU, memory and storage capacity of the server as much as possible. High-performance hardware: adopts high-performance network cards and switches to improve network throughput. 2. System configuration fine-tuning kernel parameter adjustment: Modify /etc/sysctl.conf file to optimize kernel parameters such as TCP connection number, file handle number and memory management. For example, adjust TCP connection status and buffer size
 Centos shutdown command line
Apr 14, 2025 pm 09:12 PM
Centos shutdown command line
Apr 14, 2025 pm 09:12 PM
The CentOS shutdown command is shutdown, and the syntax is shutdown [Options] Time [Information]. Options include: -h Stop the system immediately; -P Turn off the power after shutdown; -r restart; -t Waiting time. Times can be specified as immediate (now), minutes ( minutes), or a specific time (hh:mm). Added information can be displayed in system messages.
 Centos configuration IP address
Apr 14, 2025 pm 09:06 PM
Centos configuration IP address
Apr 14, 2025 pm 09:06 PM
Steps to configure IP address in CentOS: View the current network configuration: ip addr Edit the network configuration file: sudo vi /etc/sysconfig/network-scripts/ifcfg-eth0 Change IP address: Edit IPADDR= Line changes the subnet mask and gateway (optional): Edit NETMASK= and GATEWAY= Lines Restart the network service: sudo systemctl restart network verification IP address: ip addr
 Difference between centos and ubuntu
Apr 14, 2025 pm 09:09 PM
Difference between centos and ubuntu
Apr 14, 2025 pm 09:09 PM
The key differences between CentOS and Ubuntu are: origin (CentOS originates from Red Hat, for enterprises; Ubuntu originates from Debian, for individuals), package management (CentOS uses yum, focusing on stability; Ubuntu uses apt, for high update frequency), support cycle (CentOS provides 10 years of support, Ubuntu provides 5 years of LTS support), community support (CentOS focuses on stability, Ubuntu provides a wide range of tutorials and documents), uses (CentOS is biased towards servers, Ubuntu is suitable for servers and desktops), other differences include installation simplicity (CentOS is thin)
 What are the backup methods for GitLab on CentOS
Apr 14, 2025 pm 05:33 PM
What are the backup methods for GitLab on CentOS
Apr 14, 2025 pm 05:33 PM
Backup and Recovery Policy of GitLab under CentOS System In order to ensure data security and recoverability, GitLab on CentOS provides a variety of backup methods. This article will introduce several common backup methods, configuration parameters and recovery processes in detail to help you establish a complete GitLab backup and recovery strategy. 1. Manual backup Use the gitlab-rakegitlab:backup:create command to execute manual backup. This command backs up key information such as GitLab repository, database, users, user groups, keys, and permissions. The default backup file is stored in the /var/opt/gitlab/backups directory. You can modify /etc/gitlab
 How to install centos
Apr 14, 2025 pm 09:03 PM
How to install centos
Apr 14, 2025 pm 09:03 PM
CentOS installation steps: Download the ISO image and burn bootable media; boot and select the installation source; select the language and keyboard layout; configure the network; partition the hard disk; set the system clock; create the root user; select the software package; start the installation; restart and boot from the hard disk after the installation is completed.
 CentOS HDFS performance tuning tips
Apr 14, 2025 pm 06:00 PM
CentOS HDFS performance tuning tips
Apr 14, 2025 pm 06:00 PM
CentOS Platform Hadoop Distributed File System (HDFS) Performance Optimization Guide Optimizing HDFS Performance is a multi-faceted issue, and multiple parameters need to be adjusted for specific situations. The following are some key optimization strategies: 1. Memory management adjusts the NameNode and DataNode memory configuration: reasonably configure the HADOOP_NAMENODE_OPTS and HADOOP_DATANODE_OPTS environment variables according to the actual memory size of the server to optimize memory utilization. Enable large page memory: For high memory consumption applications (such as HDFS), enabling large page memory can reduce memory page allocation and management overhead and improve efficiency. 2. Disk I/O optimization uses high-speed storage
 Centos stops maintenance 2024
Apr 14, 2025 pm 08:39 PM
Centos stops maintenance 2024
Apr 14, 2025 pm 08:39 PM
CentOS will be shut down in 2024 because its upstream distribution, RHEL 8, has been shut down. This shutdown will affect the CentOS 8 system, preventing it from continuing to receive updates. Users should plan for migration, and recommended options include CentOS Stream, AlmaLinux, and Rocky Linux to keep the system safe and stable.
