How to apply Vue3 list animation and state animation
Overview
List animation and status animation are both ways to increase user experience. When adding data or removing data from a list, if you add it directly, The sudden display is a bit abrupt, and the user may not know that data has been added at this time. The same is true for removing data from the list. The user may not know which piece of data has been removed. Interesting animations are very attractive and can help users focus on new and removed data, so adding animations can improve the user experience. This is list animation, and state animation refers to the change from one state to another. If you change it directly, it will look stiff, but it will be much better if you add animation to slowly transition.
Example analysis
List animation

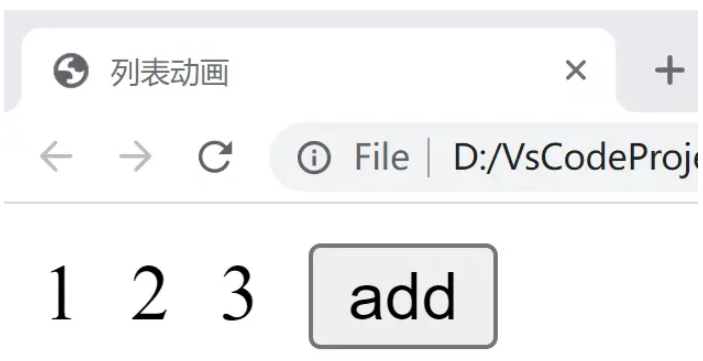
As shown in the picture above, we want to display a list of numbers. There is a button on the right, click The button will perform an animation to increase the number. The code is as follows:
<!DOCTYPE html>
<html lang="en">
<head>
<meta charset="UTF-8">
<meta http-equiv="X-UA-Compatible" content="IE=edge">
<meta name="viewport" content="width=device-width, initial-scale=1.0">
<title>列表动画</title>
<style>
.list-item{
display: inline-block;
margin-right: 10px;
}
.v-enter-from{
opacity: 0;
transform: translateY(30px);
}
.v-enter-active{
transition: all 1s ease-in;
}
.v-enter-to{
opacity: 1;
transform: translateY(0px);
}
.v-move{
transition: 2.5s ease-in;
}
</style>
<script src="https://unpkg.com/vue@next"></script>
</head>
<body>
<div id="root"></div>
</body>
<script>
const app = Vue.createApp({
data() {
return {
list:[1,2,3]
}
},
methods: {
handleClick(){
this.list.unshift(this.list.length+1);
}
},
template:
`
<div>
<transition-group>
<span class="list-item" v-for = "item in list" :key="item">{{item}}</span>
</transition-group>
<button @click="handleClick">add</button>
</div>
`
});
const vm = app.mount('#root');
</script> We first use CSS to define the animation effect of the list. This effect is similar to the animation definition mentioned before. I won’t go into details here. After defining the animation, we use a span displays our list of numbers, and then the most important thing is that we use the <transition-group> tag to wrap the part we want to animate. When we click the button, the js function is executed to add a number to the list with the length of the list plus one. Readers can view the animation effect by running it.
State animation

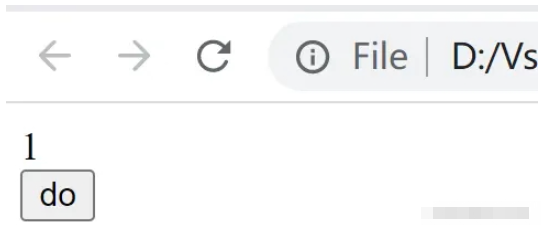
State animation is relatively simple, that is, adding some transition values from one state to another, mainly controlling the content through data. Display, for example, changing from 1 to 10. If 1 directly changes to 10, it will look very stiff, but adding other numbers in the middle, such as 2, 3, 4... and finally changing to 10 will be much better. Code As follows:
<!DOCTYPE html>
<html lang="en">
<head>
<meta charset="UTF-8">
<meta http-equiv="X-UA-Compatible" content="IE=edge">
<meta name="viewport" content="width=device-width, initial-scale=1.0">
<title>状态动画</title>
<script src="https://unpkg.com/vue@next"></script>
</head>
<body>
<div id="root"></div>
</body>
<script>
// 状态动画:通过数据控制内容的展示
const app = Vue.createApp({
data() {
return {
number:1,
animateNumber: 1
}
},
methods: {
handleClick(){
this.number =10;
if(this.animateNumber<this.number){
const animation = setInterval(()=>{
this.animateNumber += 1;
if(this.animateNumber === 10){
clearInterval(animation)
}
},100);
}
}
},
template:
`
<div>
<div>{{animateNumber}}</div>
<button @click="handleClick">do</button>
</div>
`
});
const vm = app.mount('#root');
</script>The list animation is relatively simple. When we click the execute button, we use the js function to modify the currently displayed value every 100 milliseconds until the value becomes the value of the final desired state.
The above is the detailed content of How to apply Vue3 list animation and state animation. For more information, please follow other related articles on the PHP Chinese website!

Hot AI Tools

Undresser.AI Undress
AI-powered app for creating realistic nude photos

AI Clothes Remover
Online AI tool for removing clothes from photos.

Undress AI Tool
Undress images for free

Clothoff.io
AI clothes remover

AI Hentai Generator
Generate AI Hentai for free.

Hot Article

Hot Tools

Notepad++7.3.1
Easy-to-use and free code editor

SublimeText3 Chinese version
Chinese version, very easy to use

Zend Studio 13.0.1
Powerful PHP integrated development environment

Dreamweaver CS6
Visual web development tools

SublimeText3 Mac version
God-level code editing software (SublimeText3)

Hot Topics
 1376
1376
 52
52
 vue3+vite: How to solve the error when using require to dynamically import images in src
May 21, 2023 pm 03:16 PM
vue3+vite:src uses require to dynamically import images and error reports and solutions. vue3+vite dynamically imports multiple images. If vue3 is using typescript development, require will introduce image errors. requireisnotdefined cannot be used like vue2 such as imgUrl:require(' .../assets/test.png') is imported because typescript does not support require, so import is used. Here is how to solve it: use awaitimport
 How to use tinymce in vue3 project
May 19, 2023 pm 08:40 PM
tinymce is a fully functional rich text editor plug-in, but introducing tinymce into vue is not as smooth as other Vue rich text plug-ins. tinymce itself is not suitable for Vue, and @tinymce/tinymce-vue needs to be introduced, and It is a foreign rich text plug-in and has not passed the Chinese version. You need to download the translation package from its official website (you may need to bypass the firewall). 1. Install related dependencies npminstalltinymce-Snpminstall@tinymce/tinymce-vue-S2. Download the Chinese package 3. Introduce the skin and Chinese package. Create a new tinymce folder in the project public folder and download the
 How Vue3 parses markdown and implements code highlighting
May 20, 2023 pm 04:16 PM
Vue implements the blog front-end and needs to implement markdown parsing. If there is code, it needs to implement code highlighting. There are many markdown parsing libraries for Vue, such as markdown-it, vue-markdown-loader, marked, vue-markdown, etc. These libraries are all very similar. Marked is used here, and highlight.js is used as the code highlighting library. The specific implementation steps are as follows: 1. Install dependent libraries. Open the command window under the vue project and enter the following command npminstallmarked-save//marked to convert markdown into htmlnpmins
 How to refresh partial content of the page in Vue3
May 26, 2023 pm 05:31 PM
To achieve partial refresh of the page, we only need to implement the re-rendering of the local component (dom). In Vue, the easiest way to achieve this effect is to use the v-if directive. In Vue2, in addition to using the v-if instruction to re-render the local dom, we can also create a new blank component. When we need to refresh the local page, jump to this blank component page, and then jump back in the beforeRouteEnter guard in the blank component. original page. As shown in the figure below, how to click the refresh button in Vue3.X to reload the DOM within the red box and display the corresponding loading status. Since the guard in the component in the scriptsetup syntax in Vue3.X only has o
 How to solve the problem that after the vue3 project is packaged and published to the server, the access page displays blank
May 17, 2023 am 08:19 AM
After the vue3 project is packaged and published to the server, the access page displays blank 1. The publicPath in the vue.config.js file is processed as follows: const{defineConfig}=require('@vue/cli-service') module.exports=defineConfig({publicPath :process.env.NODE_ENV==='production'?'./':'/&
 How to use Vue3 reusable components
May 20, 2023 pm 07:25 PM
Preface Whether it is vue or react, when we encounter multiple repeated codes, we will think about how to reuse these codes instead of filling a file with a bunch of redundant codes. In fact, both vue and react can achieve reuse by extracting components, but if you encounter some small code fragments and you don’t want to extract another file, in comparison, react can be used in the same Declare the corresponding widget in the file, or implement it through renderfunction, such as: constDemo:FC=({msg})=>{returndemomsgis{msg}}constApp:FC=()=>{return(
 How to select an avatar and crop it in Vue3
May 29, 2023 am 10:22 AM
The final effect is to install the VueCropper component yarnaddvue-cropper@next. The above installation value is for Vue3. If it is Vue2 or you want to use other methods to reference, please visit its official npm address: official tutorial. It is also very simple to reference and use it in a component. You only need to introduce the corresponding component and its style file. I do not reference it globally here, but only introduce import{userInfoByRequest}from'../js/api' in my component file. import{VueCropper}from'vue-cropper&
 How to use defineCustomElement to define components in Vue3
May 28, 2023 am 11:29 AM
Using Vue to build custom elements WebComponents is a collective name for a set of web native APIs that allow developers to create reusable custom elements (customelements). The main benefit of custom elements is that they can be used with any framework, even without one. They are ideal when you are targeting end users who may be using a different front-end technology stack, or when you want to decouple the final application from the implementation details of the components it uses. Vue and WebComponents are complementary technologies, and Vue provides excellent support for using and creating custom elements. You can integrate custom elements into existing Vue applications, or use Vue to build


