

1. Introduction to nginx
nginx is a web server that can also be used for load balancing and reverse proxy. The most commonly used one at present is load balancing. I will not give a detailed introduction. There are many introductions to Baidu. Let’s go directly to the installation steps
2. nginx installation
1. Download nginx and related components
Linux system is centos 6.5 64-bit, I switched directly to the root user to install

Enter the user directory to download the program

Download related Component
[root@localhost src]# wget http://nginx.org/download/nginx-1.10.2.tar.gz
省略安装内容...
[root@localhost src]# wget http://www.openssl.org/source/openssl-fips-2.0.10.tar.gz
省略安装内容...
[root@localhost src]# wget http://zlib.net/zlib-1.2.11.tar.gz
省略安装内容...
[root@localhost src]# wget ftp://ftp.csx.cam.ac.uk/pub/software/programming/pcre/pcre-8.40.tar.gz
省略安装内容...
Install c compilation environment, if it is already installed, you can skip
[root@localhost src]# yum install gcc-c++
省略安装内容...
期间会有确认提示输入y回车
is this ok [y/n]:y
省略安装内容...
2. Install nginx and related components
openssl installation
[root@localhost src]# tar zxvf openssl-fips-2.0.10.tar.gz
省略安装内容...
[root@localhost src]# cd openssl-fips-2.0.10
[root@localhost openssl-fips-2.0.10]# ./config && make && make install
省略安装内容...
pcre installation
[root@localhost src]# tar zxvf pcre-8.40.tar.gz
省略安装内容...
[root@localhost src]# cd pcre-8.40
[root@localhost pcre-8.40]# ./configure && make && make install
省略安装内容...
zlib installation
[root@localhost src]# tar zxvf zlib-1.2.11.tar.gz
省略安装内容...
[root@localhost src]# cd zlib-1.2.11
[root@localhost zlib-1.2.11]# ./configure && make && make install
省略安装内容...
nginx installation
[root@localhost src]# tar zxvf nginx-1.10.2.tar.gz
省略安装内容...
[root@localhost src]# cd nginx-1.10.2
[root@localhost nginx-1.10.2]# ./configure && make && make install
省略安装内容...
3. Start nginx
First find out where nginx is installed.

Enter the nginx directory and start

An error was reported, error while loading shared libraries: libpcre.so.1 : cannot open shared object file: no such file or directory, solve the problem as follows
1.用whereis libpcre.so.1命令找到libpcre.so.1在哪里
2.用ln -s /usr/local/lib/libpcre.so.1 /lib64命令做个软连接就可以了
3.用sbin/nginx启动nginx
4.用ps -aux | grep nginx查看状态

[root@localhost nginx]# whereis libpcre.so.1
[root@localhost nginx]# ln -s /usr/local/lib/libpcre.so.1 /lib64
[root@localhost nginx]# sbin/nginx
[root@localhost nginx]# ps -aux | grep nginx

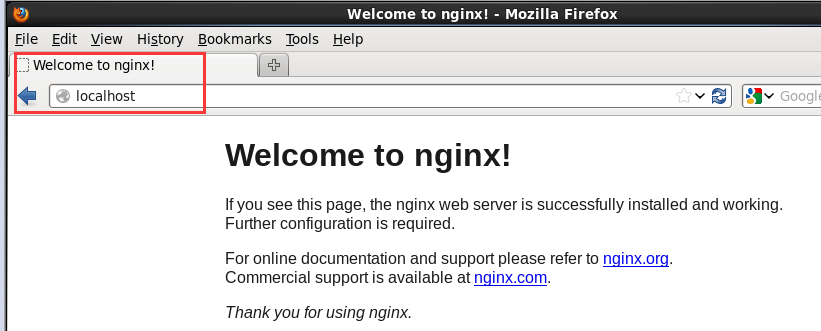
Enter the graphical interface of the Linux system, open the browser and enter localhost and you will see the following picture , indicating that nginx started successfully
Basic operations of nginx
启动
[root@localhost ~]# /usr/local/nginx/sbin/nginx
停止/重启
[root@localhost ~]# /usr/local/nginx/sbin/nginx -s stop(quit、reload)
命令帮助
[root@localhost ~]# /usr/local/nginx/sbin/nginx -h
验证配置文件
[root@localhost ~]# /usr/local/nginx/sbin/nginx -t
配置文件
[root@localhost ~]# vim /usr/local/nginx/conf/nginx.conf
4. Simple configuration of nginx
Open nginx The configuration file is located in the conf folder in the nginx directory.

Let’s briefly introduce the syntax of vim.
By default, vim cannot be entered after it is opened. You need to press a key to do so. The operations are as follows: Start editing: Press the "i" or "insert" key to exit editing: "esc" key to exit vim: ":q" save vim: ":w" save and exit vim: ":wq" exit vim without saving : ":q!"
"#" represents comments. The most important thing is that the server{} block represents each web site. For detailed configuration introduction, you can check out my other configuration article, here Let’s temporarily set up three sites
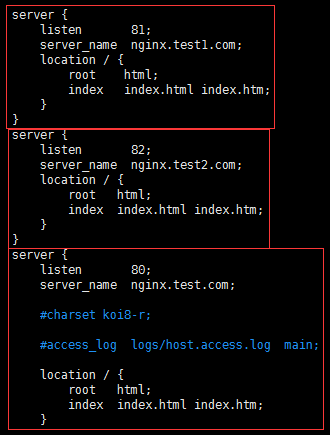
Use different ports 80, 81, and 82 respectively. Save and exit and restart nginx

5. Enable external network access
In the Linux system, by default there are all ports of the firewall iptables manager. Only the default remote connection port 22 is enabled and the others are closed. The 80 we set above etc. are also closed, so we need to open the application port first
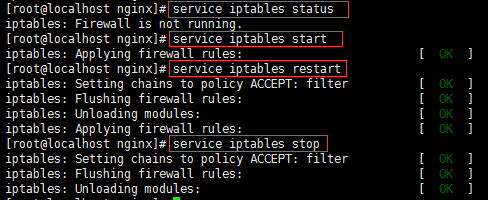
Method 1Close the firewall directly, which has better performance but poorer security. If there is a front-end firewall, you can Take this approach
关闭防火墙
[root@localhost ~]# service iptables stop
关闭开机自启动防火墙
[root@localhost ~]# chkconfig iptables off
[root@localhost ~]# chkconfig --list|grep ipt
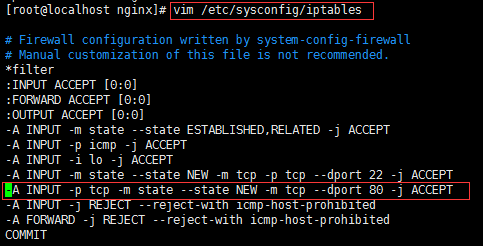
Method 2Add the opened port to the firewall whitelist. This method is safer but the performance is relatively poor
编辑防火墙白名单
[root@localhost ~]# vim /etc/sysconfig/iptables
增加下面一行代码
-a input -p tcp -m state -- state new -m tcp --dport 80 -j accept
保存退出,重启防火墙
[root@localhost ~]# service iptables restart
Linux configuration is complete. Use another computer instead of the computer where nginx is installed. I am using the windows system. Configure the host in "c:\windows\system32 Configure domain name redirection in hosts under \drivers\etc"
10.11.13.22 nginx.test.com nginx.test1.com nginx.test2.com
Then cmd and ping this again Is the domain name correctly pointed to this IP
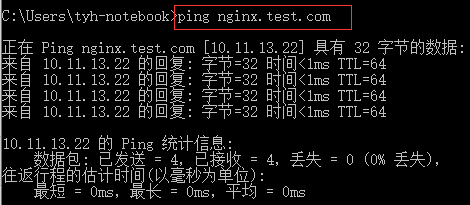
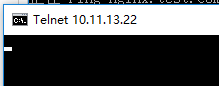
After pointing it correctly, telnet to port 80 to see if it can communicate with the port (if telnet prompts that there is no such command, the client is not installed) , just install it after enabling or disabling the windows function)

Get the following interface and it means successful communication
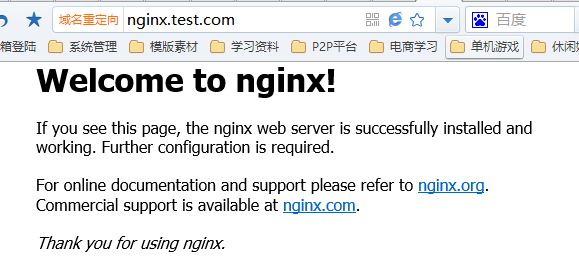
打开这台windows系统内的浏览器,输入nginx.test.com会得到以下结果,就说明外网访问成功
如果防火墙你依然启用,只是设置了启用端口,那我们访问81那个端口会发现无法访问,因为我并没有加入白名单

到此nginx服务器雏形部署完成。
6、nginx负载均衡配置
nginx集反向代理和负载均衡于一身,在配置文件中修改配就可以实现
首先我们打开配置文件
[root@localhost nginx]# vim conf/nginx.conf
每一个server就是一个虚拟主机,我们有一个当作web服务器来使用
listen 80;代表监听80端口
server_name xxx.com;代表外网访问的域名
location / {};代表一个过滤器,/匹配所有请求,我们还可以根据自己的情况定义不同的过滤,比如对静态文件js、css、image制定专属过滤
root html;代表站点根目录
index index.html;代表默认主页 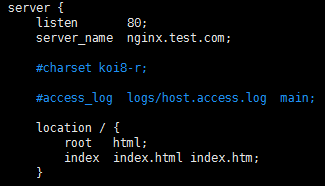
这样配置完毕我们输入域名就可以访问到该站点了。
负载均衡功能往往在接收到某个请求后分配到后端的多台服务器上,那我们就需要upstream{}块来配合使用
upstream xxx{};upstream模块是命名一个后端服务器组,组名必须为后端服务器站点域名,内部可以写多台服务器ip和port,还可以设置跳转规则及权重等等
ip_hash;代表使用ip地址方式分配跳转后端服务器,同一ip请求每次都会访问同一台后端服务器
server;代表后端服务器地址

server{};server模块依然是接收外部请求的部分
server_name;代表外网访问域名
location / {};同样代表过滤器,用于制定不同请求的不同操作
proxy_pass;代表后端服务器组名,此组名必须为后端服务器站点域名

server_name和upstream{}的组名可以不一致,server_name是外网访问接收请求的域名,upstream{}的组名是跳转后端服务器时站点访问的域名 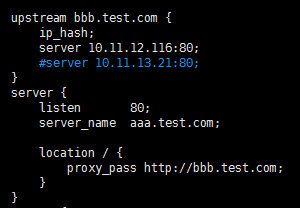
配置一下windows的host将我们要访问的域名aaa.test.com指向linux

因为硬件有限,我是将windows中的iis作为nginx的后端服务器,所以配置一下iis的站点域名
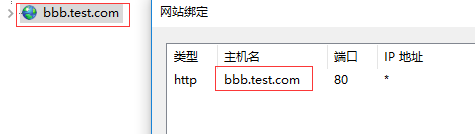
打开cmd再ping一下aaa.test.com确实指向linux系统了,再打开浏览器输入aaa.test.com会显示bbb这个站点就代表负载成功了。

The above is the detailed content of How to install and deploy Nginx in Centos 6.5 64-bit. For more information, please follow other related articles on the PHP Chinese website!


![[Web front-end] Node.js quick start](https://img.php.cn/upload/course/000/000/067/662b5d34ba7c0227.png)


