What are the application scenarios of Nginx Rewrite module?
应用场景1——基于域名的跳转
公司旧域名 ,因业务需求有变更,需要使用新域名www.kgc.com 代替
1.不能废除旧域名
2.从旧域名跳转到新域名,且保持其参数不变
部署环境
一台linux服务器(192.168.142.130)
一台测试主机windows 7
1,安装nginx服务
[root@localhost ~]# rpm -uvh http://nginx.org/packages/centos/7/noarch/rpms/nginx-release-centos-7-0.el7.ngx.noarch.rpm
#安装nginx官方源

[root@localhost ~]# yum install nginx -y
#yum安装nginx
2,修改nginx默认配置文件
[root@localhost ~]# vim /etc/nginx/conf.d/default.conf ##修改默认配置文件
server {
    listen    80;
    server_name www.accp.com;  ##修改主机名

    #charset koi8-r;
access_log /var/log/nginx/www.accp.com-access.log main; ##开启日志服务3,安装bind解析服务
[root@localhost ~]# yum install bind -y
4,修改主配置文件(named.conf)
[root@localhost ~]# vim /etc/named.conf
options {
                listen-on port 53 { any; };     ##监听所有
                ...
allow-query { any; }; ##允许所有5,修改区域配置文件(named.rfc1912.zones)
[root@localhost ~]# vim /etc/named.rfc1912.zones  ##配置区域配置文件

zone "accp.com" in {
                type master;
                file "accp.com.zone";       ##accp区域数据配置文件
                allow-update { none; };
};6,修改区域数据配置文件(accp.com.zone)
[root@localhost ~]# cd /var/named/
[root@localhost named]# cp -p named.localhost accp.com.zone  ##复制模板
[root@localhost named]# vim accp.com.zone  ##修改区域配置文件

$ttl 1d
@    in soa @ rname.invalid. (
                                    1d   ; refresh
                                    1h   ; retry
                                    1w   ; expire
                                    3h )  ; minimum
                ns   @
                a    127.0.0.1
www in a    192.168.142.130         ##本机地址
[root@localhost named]# systemctl start named   ##开启dns服务
[root@localhost named]# systemctl stop firewalld.service  ##关闭防火墙
[root@localhost named]# setenforce 0
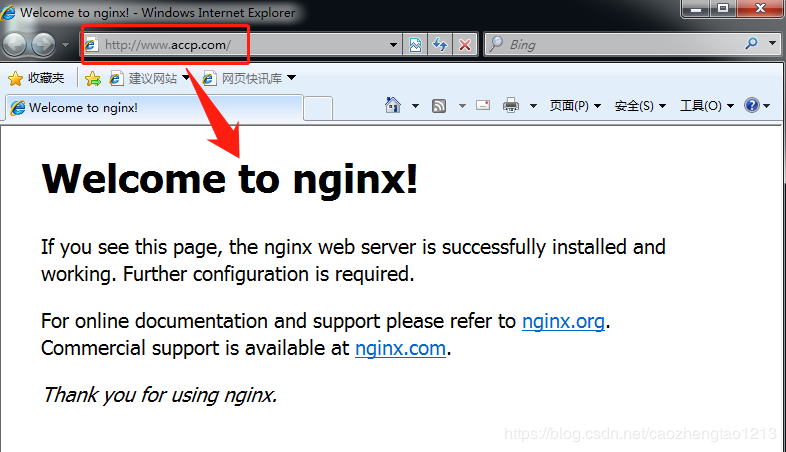
[root@localhost named]# systemctl start nginx ##开启nginx服务7,用测试机测试网页

8,修改配置文件,设置域名跳转
[root@localhost named]# vim /etc/nginx/conf.d/default.conf ##修改配置文件
  server {
      listen    80;
      server_name www.accp.com;

      #charset koi8-r;
      access_log /var/log/nginx/www.accp.com-access.log main;

      location / {
          if ($host = "www.accp.com"){    ##匹配如果域名是老域名
                  rewrite ^/(.*)$ http://www.kgc.com/$1 permanent;  ##则永久设置跳转新域名
          }
          root  /usr/share/nginx/html;
          index index.html index.htm;
}9,添加新域名解析
[root@localhost named]# vim /etc/named.rfc1912.zones

zone "kgc.com" in {
                type master;
                file "kgc.com.zone";       ##accp区域数据配置文件
                allow-update { none; };
};

[root@localhost named]# cp -p /var/named/accp.com.zone /var/named/kgc.com.zone
##复制区域数据配置文件为kgc的数据配置文件
[root@localhost named]# systemctl restart named  ##重启解析服务
[root@localhost named]# systemctl restart nginx ##重启nginx服务10,用旧域名访问,查看网页跳转


11,旧域名后加上参数,查看跳转新域名时是否有参数


应用场景2——基于客户端ip访问跳转
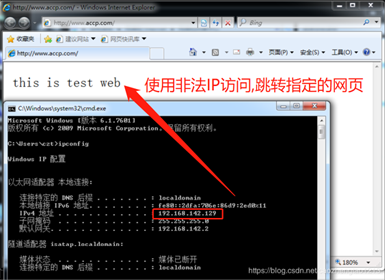
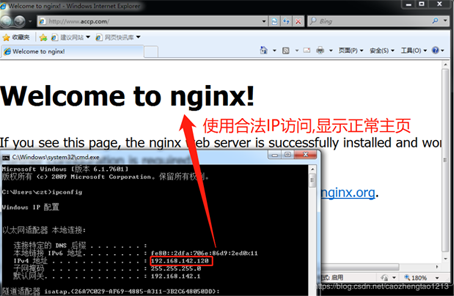
公司业务版本上线,所有ip访问任何内容都显示一个固定维护页面,只有公司ip访问正常
1,修改nginx默认配置文件
[root@localhost ~]# cd /etc/nginx/conf.d/
[root@localhost conf.d]# vim default.conf

server {
    listen    80;
    server_name www.accp.com;
    #charset koi8-r;
    access_log /var/log/nginx/www.accp.com-access.log main;
    #设置是否合法的ip标志
    set $rewrite true;     ##设置变量为真
    #判断是否为合法的ip
    if ($remote_addr = "192.168.142.120"){
        set $rewrite false;  ##匹配合法ip,将变量设置为假,正常跳转页面
    }
    #非法ip进行判断打上标记
    if ($rewrite = true){        ##匹配非法ip,跳转到main的网页
        rewrite (.+) /main.html;
    }
    #匹配标记进行跳转站点
    location = /main.html {       ##精确匹配
        root /usr/share/nginx/html;  ##站点路径
    }

    location / {
        root  /usr/share/nginx/html;
        index index.html index.htm;
}2,创建非法ip站点及main的网页页面
[root@localhost conf.d]# cd /usr/share/nginx/html/ ##切换到站点中
[root@localhost html]# vim main.html  ##编辑非法ip访问网页内容
<h1>this is test web</h1>
[root@localhost html]# systemctl restart nginx  ##重启nginx服务
3,访问测试网页


应用场景3——基于旧,新域名跳转并加目录
将域名http://bbs.accp.com 下面的发帖都跳转到http://www.accp.com/bbs 且域名跳转后保持参数不变
1,修改nginx默认配置文件
[root@localhost ~]# cd /etc/nginx/conf.d/
[root@localhost conf.d]# vim default.conf  ##修改默认配置文件
server {
    listen    80;
    server_name bbs.accp.com;  ##修改服务名称

    #charset koi8-r;
    access_log /var/log/nginx/www.accp.com-access.log main;
    location /post {     ##用location匹配post目录
        rewrite (.+) http://www.accp.com/bbs$1 permanent;  ##永久重定向跳转
}2,修改dns的区域数据配置文件(accp.com.zone)
[root@localhost conf.d]# cd /var/named/
[root@localhost named]# vim accp.com.zone  ##修改区域数据配置文件
$ttl 1d
@    in soa @ rname.invalid. (
                          0    ; serial
                          1d   ; refresh
                          1h   ; retry
                          1w   ; expire
                          3h )  ; minimum
        ns   @
        a    127.0.0.1
bbs in a    192.168.142.130
[root@localhost named]# systemctl restart named  ##重启解析服务
[root@localhost named]# systemctl restart nginx   ##重启nginx服务
[root@localhost named]# echo "nameserver 192.168.142.130" > /etc/resolv.conf
##将解析服务器地址放到本地解析配置文件中3,测试网页


应用场景4——基于参数匹配的跳转
浏览器访问:http://www.accp.com/100-(100|200)-100.html 跳转到http://www.accp.com 页面
1,修改nginx默认配置文件
[root@localhost ~]# cd /etc/nginx/conf.d/
[root@localhost conf.d]# vim default.conf

server {
    listen    80;
    server_name www.accp.com;
    #charset koi8-r;
    access_log /var/log/nginx/www.accp.com-access.log main;
    if ($request_uri ~ ^/100-(100|200)-(\d+).html$){
    ##匹配正则开头为100-(100|200)-一次多次的整数html为结尾的
        rewrite (.*) http://www.accp.com permanent;    ##永久重定向跳转到主页
}2,修改dns区域数据配置文件
  [root@localhost conf.d]# vim /var/named/accp.com.zone ##修改区域数据配置文件
  www in a    192.168.142.130
  [root@localhost conf.d]# systemctl restart named ##重启解析服务
  [root@localhost conf.d]# systemctl restart nginx   ##重启nginx服务
3,测试网页


应用场景5——基于目录下所有php文件跳转
访问http://www.accp.com/upload/1.php 跳转到首页
1,修改nginx默认配置文件
[root@localhost ~]# cd /etc/nginx/conf.d/
  [root@localhost conf.d]# vim default.conf  ##修改默认配置文件
  server {
      listen    80;
      server_name www.accp.com;
      #charset koi8-r;
      access_log /var/log/nginx/www.accp.com-access.log main;
      location ~* /upload/.*\.php$ {     ##匹配不分大小写,匹配upload后零次或多次以.php为结尾的
          rewrite (.+) http://www.accp.com permanent;  ##跳转到首页
      }
[root@localhost conf.d]# systemctl restart nginx ##重启nginx服务2,测试网页


应用场景6——基于最普通url请求的跳转,访问一个具体的页面跳转到首页
1,修改nginx默认配置文件
[root@localhost ~]# cd /etc/nginx/conf.d/
  [root@localhost conf.d]# vim default.conf  ##修改nginx默认配置文件
  server {
      listen    80;
      server_name www.accp.com;
      #charset koi8-r;
      access_log /var/log/nginx/www.accp.com-access.log main;
      location ~* ^/abc/123.html {    ##匹配某一个特定的网页
          rewrite (.+) http://www.accp.com permanent; ##跳转到首页
      }
[root@localhost conf.d]# systemctl restart nginx ##重启nginx服务2,测试网页


The above is the detailed content of What are the application scenarios of Nginx Rewrite module?. For more information, please follow other related articles on the PHP Chinese website!

Hot AI Tools

Undresser.AI Undress
AI-powered app for creating realistic nude photos

AI Clothes Remover
Online AI tool for removing clothes from photos.

Undress AI Tool
Undress images for free

Clothoff.io
AI clothes remover

AI Hentai Generator
Generate AI Hentai for free.

Hot Article

Hot Tools

Notepad++7.3.1
Easy-to-use and free code editor

SublimeText3 Chinese version
Chinese version, very easy to use

Zend Studio 13.0.1
Powerful PHP integrated development environment

Dreamweaver CS6
Visual web development tools

SublimeText3 Mac version
God-level code editing software (SublimeText3)

Hot Topics
 How to allow external network access to tomcat server
Apr 21, 2024 am 07:22 AM
To allow the Tomcat server to access the external network, you need to: modify the Tomcat configuration file to allow external connections. Add a firewall rule to allow access to the Tomcat server port. Create a DNS record pointing the domain name to the Tomcat server public IP. Optional: Use a reverse proxy to improve security and performance. Optional: Set up HTTPS for increased security.
 What are the nginx start and stop commands?
Apr 02, 2024 pm 08:45 PM
The start and stop commands of Nginx are nginx and nginx -s quit respectively. The start command starts the server directly, while the stop command gracefully shuts down the server, allowing all current requests to be processed. Other available stop signals include stop and reload.
 How to run thinkphp
Apr 09, 2024 pm 05:39 PM
Steps to run ThinkPHP Framework locally: Download and unzip ThinkPHP Framework to a local directory. Create a virtual host (optional) pointing to the ThinkPHP root directory. Configure database connection parameters. Start the web server. Initialize the ThinkPHP application. Access the ThinkPHP application URL and run it.
 Welcome to nginx!How to solve it?
Apr 17, 2024 am 05:12 AM
To solve the "Welcome to nginx!" error, you need to check the virtual host configuration, enable the virtual host, reload Nginx, if the virtual host configuration file cannot be found, create a default page and reload Nginx, then the error message will disappear and the website will be normal show.
 How to deploy nodejs project to server
Apr 21, 2024 am 04:40 AM
Server deployment steps for a Node.js project: Prepare the deployment environment: obtain server access, install Node.js, set up a Git repository. Build the application: Use npm run build to generate deployable code and dependencies. Upload code to the server: via Git or File Transfer Protocol. Install dependencies: SSH into the server and use npm install to install application dependencies. Start the application: Use a command such as node index.js to start the application, or use a process manager such as pm2. Configure a reverse proxy (optional): Use a reverse proxy such as Nginx or Apache to route traffic to your application
 How to register phpmyadmin
Apr 07, 2024 pm 02:45 PM
To register for phpMyAdmin, you need to first create a MySQL user and grant permissions to it, then download, install and configure phpMyAdmin, and finally log in to phpMyAdmin to manage the database.
 How to solve the problem of nginx when accessing the website
Apr 02, 2024 pm 08:39 PM
nginx appears when accessing a website. The reasons may be: server maintenance, busy server, browser cache, DNS issues, firewall blocking, website misconfiguration, network connection issues, or the website is down. Try the following solutions: wait for maintenance to end, visit during off-peak hours, clear your browser cache, flush your DNS cache, disable firewall or antivirus software, contact the site administrator, check your network connection, or use a search engine or web archive to find another copy of the site. If the problem persists, please contact the site administrator.
 How to communicate between docker containers
Apr 07, 2024 pm 06:24 PM
There are five methods for container communication in the Docker environment: shared network, Docker Compose, network proxy, shared volume, and message queue. Depending on your isolation and security needs, choose the most appropriate communication method, such as leveraging Docker Compose to simplify connections or using a network proxy to increase isolation.


