

How to install and run Redis as a non-root user under CentOS7

1、基本环境信息
1.1、环境信息
| 序号 | ID | 版本 |
|---|---|---|
| 1 | 操作系统 | CentOS7 |
| 2 | redis | 5.0.12 |
1.2、redis下载地址
redis下载地址:
我们这里使用的是5.0.12
2、安装
2.1、新建redis普通用户
1)、使用root登录我们的系统
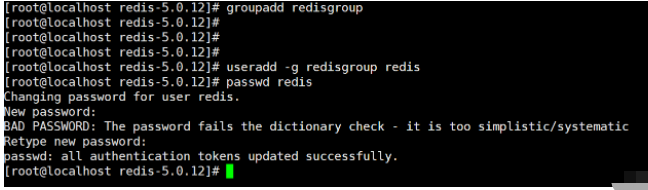
2)、新建组:groupadd redisgroup
3)、新建用户:useradd -g redisgroup redis
4)、设置密码:passwd redis 自己输入密码即可
groupadd redisgroupuseradd -g redisgroup redispasswd redis
2.2、上传安装包并解压
1)、使用root用户,新建目录:mkdir -p /usr/local/src/redis
2)、解压压缩包:tar -zxvf redis-5.0.12.tar.gz
如下:
mkdir -p /usr/local/src/redistar -zxvf redis-5.0.12.tar.gz

2.3、新建目录
切换到redis用户并在其目录下创建一个名为redis的文件夹
mkdir rediscd redismkdir datamkdir etc
2.4、编译并安装
使用root用户操作
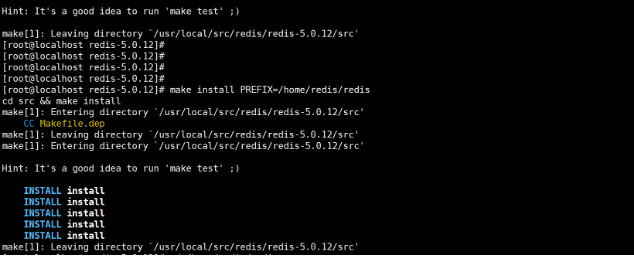
1)、编译:cd redis-5.0.12
make
2)、安装:
make install PREFIX=/home/redis/redis
3、配置
3.1、将配置文件复制到redis用户下面
1)、将
/usr/local/src/redis/redis-5.0.12下的redis.conf文件复制到/home/redis/redis/etc目录下2)、如果复制不了就用root赋权限,chmod 777 redis.conf
3)、复制过来之后,改一下文件的所属组和用户
chown redis redis.confchgrp redisgroup redis.conf
3.2、配置Redis的配置文件
修改配置文件我们主要修改三个地方:
1)、修改为后台运行
2)、修改支持其他机器连接
下面的三个键值,直接在配置文件中修改即可
# yes-后台模式运行,no-前台模式运行,默认daemonize yes# 下面的这里给注释掉,默认是放开的#bind 127.0.0.1# 下面的这个值改为no,默认是yesprotected-mode no
4、编写启动脚本,并启动
4.1、编写管理脚本
1)、使用
redis用户登录,我们在用户目录下新建一个目录bin2)、在
bin目录下新建一个redctl脚本,并授予可执行的权限,chmod a+x redisctl3)、将
~/bin目录加到用户的环境变量中去修改用户目录下的
.bash_profile文件,在倒数第二行增加
PATH=$PATH:~/bin完整内容如下:
# .bash_profile# Get the aliases and functionsif [ -f ~/.bashrc ]; then. ~/.bashrcfi# User specific environment and startup programsPATH=$PATH:$HOME/.local/bin:$HOME/bin

PATH=$PATH:~/binexport PATH
编写的redctl脚本,支持redis启动,停止,重启以及状态查看,详细内容如下:
redctl
#!/bin/bash#check paramif [ $# -lt 1 ]; thenecho "USAGE: redctl start|stop|restart|status"exit 8fipid=0
ACTION=$1REDIS_HOME=$HOME/redis# Here define some functiongetpid(){pid=`ps -ef | grep redis-server | grep -v grep |awk '{print $2}'`}start(){getpidif [ ! -n "$pid" ]; thencd $REDIS_HOME/bin
        ./redis-server ../etc/redis.conf
        getpidif [ ! -n "$pid" ]; thenecho "redis-server start failed, please check your commond"elseecho "redis-server start success, PID: $pid"fielseecho "redis-server is running PID: $pid"fi}stop(){getpidif [ ! -n "$pid" ]; thenecho "redis-server is not running"elsekill -9 $pidecho "redis-server has been stopped"fi}restart(){stopsleep 1s
start}status(){getpidif [ ! -n "$pid" ]; thenecho "redis-server is not running"elseecho "redis-server is running PID: $pid"fi}case $ACTION instart) start;;stop) stop;;restart) restart;;status) status;;*) echo "require start|stop|restart|status" ;;esac4.2、启动服务并验证
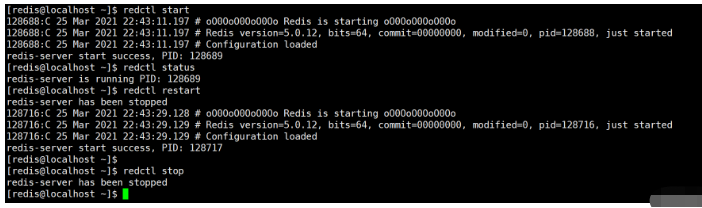
依次执行,启动,查看状态,重启,停止,命令如下:
redctl start
redctl status
redctl restart
redctl stop
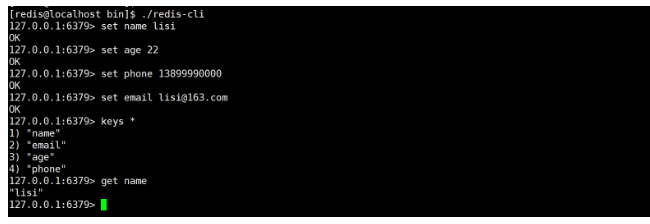
我们再次执行一下启动命令,将redis服务启动起来,
使用
redis-cli连接上,尝试设置一些值,并查看所设置的值,如下:表示成功
5、可能遇到的问题
5.1、未安装gcc g++包
未安装gcc g++包的话,请自行安装
yum install -y gcc g++
The above is the detailed content of How to install and run Redis as a non-root user under CentOS7. For more information, please follow other related articles on the PHP Chinese website!

Hot AI Tools

Undresser.AI Undress
AI-powered app for creating realistic nude photos

AI Clothes Remover
Online AI tool for removing clothes from photos.

Undress AI Tool
Undress images for free

Clothoff.io
AI clothes remover

Video Face Swap
Swap faces in any video effortlessly with our completely free AI face swap tool!

Hot Article
Hot Tools

Notepad++7.3.1
Easy-to-use and free code editor

SublimeText3 Chinese version
Chinese version, very easy to use

Zend Studio 13.0.1
Powerful PHP integrated development environment

Dreamweaver CS6
Visual web development tools

SublimeText3 Mac version
God-level code editing software (SublimeText3)
Hot Topics
 1390
1390
 52
52

 How to optimize CentOS HDFS configuration
Apr 14, 2025 pm 07:15 PM
How to optimize CentOS HDFS configuration
Apr 14, 2025 pm 07:15 PM
Improve HDFS performance on CentOS: A comprehensive optimization guide to optimize HDFS (Hadoop distributed file system) on CentOS requires comprehensive consideration of hardware, system configuration and network settings. This article provides a series of optimization strategies to help you improve HDFS performance. 1. Hardware upgrade and selection resource expansion: Increase the CPU, memory and storage capacity of the server as much as possible. High-performance hardware: adopts high-performance network cards and switches to improve network throughput. 2. System configuration fine-tuning kernel parameter adjustment: Modify /etc/sysctl.conf file to optimize kernel parameters such as TCP connection number, file handle number and memory management. For example, adjust TCP connection status and buffer size
 Centos stops maintenance 2024
Apr 14, 2025 pm 08:39 PM
Centos stops maintenance 2024
Apr 14, 2025 pm 08:39 PM
CentOS will be shut down in 2024 because its upstream distribution, RHEL 8, has been shut down. This shutdown will affect the CentOS 8 system, preventing it from continuing to receive updates. Users should plan for migration, and recommended options include CentOS Stream, AlmaLinux, and Rocky Linux to keep the system safe and stable.
 How to check CentOS HDFS configuration
Apr 14, 2025 pm 07:21 PM
How to check CentOS HDFS configuration
Apr 14, 2025 pm 07:21 PM
Complete Guide to Checking HDFS Configuration in CentOS Systems This article will guide you how to effectively check the configuration and running status of HDFS on CentOS systems. The following steps will help you fully understand the setup and operation of HDFS. Verify Hadoop environment variable: First, make sure the Hadoop environment variable is set correctly. In the terminal, execute the following command to verify that Hadoop is installed and configured correctly: hadoopversion Check HDFS configuration file: The core configuration file of HDFS is located in the /etc/hadoop/conf/ directory, where core-site.xml and hdfs-site.xml are crucial. use
 Centos shutdown command line
Apr 14, 2025 pm 09:12 PM
Centos shutdown command line
Apr 14, 2025 pm 09:12 PM
The CentOS shutdown command is shutdown, and the syntax is shutdown [Options] Time [Information]. Options include: -h Stop the system immediately; -P Turn off the power after shutdown; -r restart; -t Waiting time. Times can be specified as immediate (now), minutes ( minutes), or a specific time (hh:mm). Added information can be displayed in system messages.
 Centos configuration IP address
Apr 14, 2025 pm 09:06 PM
Centos configuration IP address
Apr 14, 2025 pm 09:06 PM
Steps to configure IP address in CentOS: View the current network configuration: ip addr Edit the network configuration file: sudo vi /etc/sysconfig/network-scripts/ifcfg-eth0 Change IP address: Edit IPADDR= Line changes the subnet mask and gateway (optional): Edit NETMASK= and GATEWAY= Lines Restart the network service: sudo systemctl restart network verification IP address: ip addr
 What are the common misunderstandings in CentOS HDFS configuration?
Apr 14, 2025 pm 07:12 PM
What are the common misunderstandings in CentOS HDFS configuration?
Apr 14, 2025 pm 07:12 PM
Common problems and solutions for Hadoop Distributed File System (HDFS) configuration under CentOS When building a HadoopHDFS cluster on CentOS, some common misconfigurations may lead to performance degradation, data loss and even the cluster cannot start. This article summarizes these common problems and their solutions to help you avoid these pitfalls and ensure the stability and efficient operation of your HDFS cluster. Rack-aware configuration error: Problem: Rack-aware information is not configured correctly, resulting in uneven distribution of data block replicas and increasing network load. Solution: Double check the rack-aware configuration in the hdfs-site.xml file and use hdfsdfsadmin-printTopo
 Centos install mysql
Apr 14, 2025 pm 08:09 PM
Centos install mysql
Apr 14, 2025 pm 08:09 PM
Installing MySQL on CentOS involves the following steps: Adding the appropriate MySQL yum source. Execute the yum install mysql-server command to install the MySQL server. Use the mysql_secure_installation command to make security settings, such as setting the root user password. Customize the MySQL configuration file as needed. Tune MySQL parameters and optimize databases for performance.
 What steps are required to configure CentOS in HDFS
Apr 14, 2025 pm 06:42 PM
What steps are required to configure CentOS in HDFS
Apr 14, 2025 pm 06:42 PM
Building a Hadoop Distributed File System (HDFS) on a CentOS system requires multiple steps. This article provides a brief configuration guide. 1. Prepare to install JDK in the early stage: Install JavaDevelopmentKit (JDK) on all nodes, and the version must be compatible with Hadoop. The installation package can be downloaded from the Oracle official website. Environment variable configuration: Edit /etc/profile file, set Java and Hadoop environment variables, so that the system can find the installation path of JDK and Hadoop. 2. Security configuration: SSH password-free login to generate SSH key: Use the ssh-keygen command on each node
