

How to install Apache and Mysql in CentOS6

1. Install apache
Enter the following command in the terminal to install apache:
sudo yum install httpd
sudo means what to do with the root user. Just click y to confirm the download and installation, which is very convenient.
Then use the following command to start the service
sudo service httpd start
Don't worry about it now, just enter the IP address digitalocean gave you in the browser, and you should be able to access the apache welcome page. Something like this:
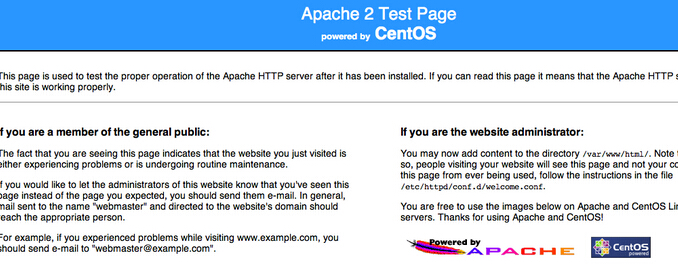
# Isn’t it cool? If your domain name has been successfully resolved to the IP address of your host, you should be able to access it using your domain name!
2. Install mysql
sudo yum install mysql-server
sudo service mysqld start
Use the above command to download and install mysql. The second one means to start the mysql service.
When you install mysql, you will be asked for some simple configurations. Press enter first. The following ones are actually very simple in English. You can choose according to your own needs.
disallow root login remotely? There is an option to allow the root user of mysql to access remotely. I chose no and it can be accessed. This is more convenient, but there are security risks. In this way, the database in this vps can also be used when making software later.
3. Install php and php components
sudo yum install php php-mysql
Use the above command to download and install php. What is more troublesome is the PHP component.
yum install php-gd php-imap php-ldap php-odbc php-pear php-xml php-xmlrpc
I simply installed 7 components here. You can also search for all PHP components and use the following command
yum search php-
4. Start the apache and mysql services by default after booting up
sudo chkconfig httpd on
sudo chkconfig mysqld on
You can use the above two commands to choose to start apache and mysql at boot.
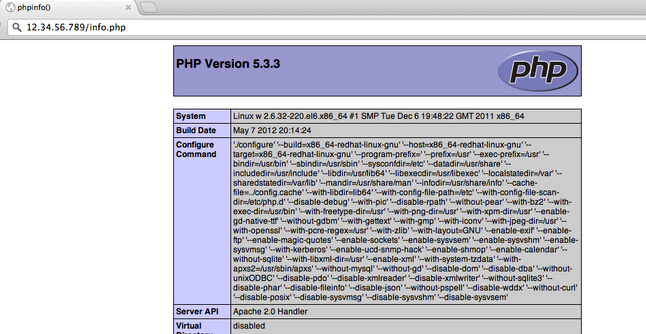
5. Test whether php is installed successfully
sudo nano /var/www/html/info.php
You can use the above commands to create a new info.php file , nano is a simple text editing tool, and vim.
Enter a simple test php command:
<?php
phpinfo();
?>
Then enter ctrl o to save, and click Enter to confirm. Then enter ctrl x to exit.
Then in the browser, enter the IP address plus info.php, you can see the php information! Similar to the picture below:
The above is the detailed content of How to install Apache and Mysql in CentOS6. For more information, please follow other related articles on the PHP Chinese website!

Hot AI Tools

Undresser.AI Undress
AI-powered app for creating realistic nude photos

AI Clothes Remover
Online AI tool for removing clothes from photos.

Undress AI Tool
Undress images for free

Clothoff.io
AI clothes remover

AI Hentai Generator
Generate AI Hentai for free.

Hot Article
Hot Tools

Notepad++7.3.1
Easy-to-use and free code editor

SublimeText3 Chinese version
Chinese version, very easy to use

Zend Studio 13.0.1
Powerful PHP integrated development environment

Dreamweaver CS6
Visual web development tools

SublimeText3 Mac version
God-level code editing software (SublimeText3)
Hot Topics
 1377
1377
 52
52

 How to create navicat premium
Apr 09, 2025 am 07:09 AM
How to create navicat premium
Apr 09, 2025 am 07:09 AM
Create a database using Navicat Premium: Connect to the database server and enter the connection parameters. Right-click on the server and select Create Database. Enter the name of the new database and the specified character set and collation. Connect to the new database and create the table in the Object Browser. Right-click on the table and select Insert Data to insert the data.
 MySQL: Simple Concepts for Easy Learning
Apr 10, 2025 am 09:29 AM
MySQL: Simple Concepts for Easy Learning
Apr 10, 2025 am 09:29 AM
MySQL is an open source relational database management system. 1) Create database and tables: Use the CREATEDATABASE and CREATETABLE commands. 2) Basic operations: INSERT, UPDATE, DELETE and SELECT. 3) Advanced operations: JOIN, subquery and transaction processing. 4) Debugging skills: Check syntax, data type and permissions. 5) Optimization suggestions: Use indexes, avoid SELECT* and use transactions.
 How to create a new connection to mysql in navicat
Apr 09, 2025 am 07:21 AM
How to create a new connection to mysql in navicat
Apr 09, 2025 am 07:21 AM
You can create a new MySQL connection in Navicat by following the steps: Open the application and select New Connection (Ctrl N). Select "MySQL" as the connection type. Enter the hostname/IP address, port, username, and password. (Optional) Configure advanced options. Save the connection and enter the connection name.
 What is the difference between syntax for adding columns in different database systems
Apr 09, 2025 pm 02:15 PM
What is the difference between syntax for adding columns in different database systems
Apr 09, 2025 pm 02:15 PM
不同数据库系统添加列的语法为:MySQL:ALTER TABLE table_name ADD column_name data_type;PostgreSQL:ALTER TABLE table_name ADD COLUMN column_name data_type;Oracle:ALTER TABLE table_name ADD (column_name data_type);SQL Server:ALTER TABLE table_name ADD column_name data_
 How to recover data after SQL deletes rows
Apr 09, 2025 pm 12:21 PM
How to recover data after SQL deletes rows
Apr 09, 2025 pm 12:21 PM
Recovering deleted rows directly from the database is usually impossible unless there is a backup or transaction rollback mechanism. Key point: Transaction rollback: Execute ROLLBACK before the transaction is committed to recover data. Backup: Regular backup of the database can be used to quickly restore data. Database snapshot: You can create a read-only copy of the database and restore the data after the data is deleted accidentally. Use DELETE statement with caution: Check the conditions carefully to avoid accidentally deleting data. Use the WHERE clause: explicitly specify the data to be deleted. Use the test environment: Test before performing a DELETE operation.
 MySQL and SQL: Essential Skills for Developers
Apr 10, 2025 am 09:30 AM
MySQL and SQL: Essential Skills for Developers
Apr 10, 2025 am 09:30 AM
MySQL and SQL are essential skills for developers. 1.MySQL is an open source relational database management system, and SQL is the standard language used to manage and operate databases. 2.MySQL supports multiple storage engines through efficient data storage and retrieval functions, and SQL completes complex data operations through simple statements. 3. Examples of usage include basic queries and advanced queries, such as filtering and sorting by condition. 4. Common errors include syntax errors and performance issues, which can be optimized by checking SQL statements and using EXPLAIN commands. 5. Performance optimization techniques include using indexes, avoiding full table scanning, optimizing JOIN operations and improving code readability.
 How to connect to local mysql in navicat
Apr 09, 2025 am 07:45 AM
How to connect to local mysql in navicat
Apr 09, 2025 am 07:45 AM
To connect to a local MySQL database using Navicat: Create a connection and set the connection name, host, port, username, and password. Test the connection to make sure the parameters are correct. Save the connection. Select a new connection from the connection list. Double-click the database you want to connect to.
 How to add columns in SQL graphical tools?
Apr 09, 2025 pm 12:54 PM
How to add columns in SQL graphical tools?
Apr 09, 2025 pm 12:54 PM
Add Columns in SQL Graphics Tool: Select the table to which columns you want to add. Right-click and select "Alter Table" or similar options. Defines the properties of the new column (name, data type, length, or whether it is empty). Specifies the default value for the new column, if applicable. Select the appropriate data type to avoid data errors. Use meaningful column names. Consider the performance impact when performing column addition operations on large tables. Always back up the database before the operation to prevent data loss.
