

How to use @Cacheable in the integration of springboot and redis

First we need to configure a cache manager, and then we can use cache annotations to manage the cache.
1 2 3 4 5 6 7 8 9 10 11 12 13 14 15 16 17 18 19 20 21 22 23 24 25 26 27 28 29 30 31 32 33 34 35 36 37 38 39 40 41 42 43 44 45 46 47 48 49 50 51 52 53 54 55 56 57 58 59 60 61 62 63 64 65 66 67 68 69 |
|
1. @Cacheable
is marked on a method or class to identify that the method or class supports it. cache. After Spring calls the annotation identification method, the return value will be cached in redis to ensure that the next time the method is called with the same conditions, the return value will be obtained directly from the cache. In this way, there is no need to re-execute the business processing process of this method, which improves efficiency.
@Cacheable The three commonly used parameters are as follows:
cacheNames Cache name
key The cached key, you need to pay attention to how the key is written
condition The condition for cache execution, when true is returned Execution
Example
1 2 3 4 5 6 7 |
|
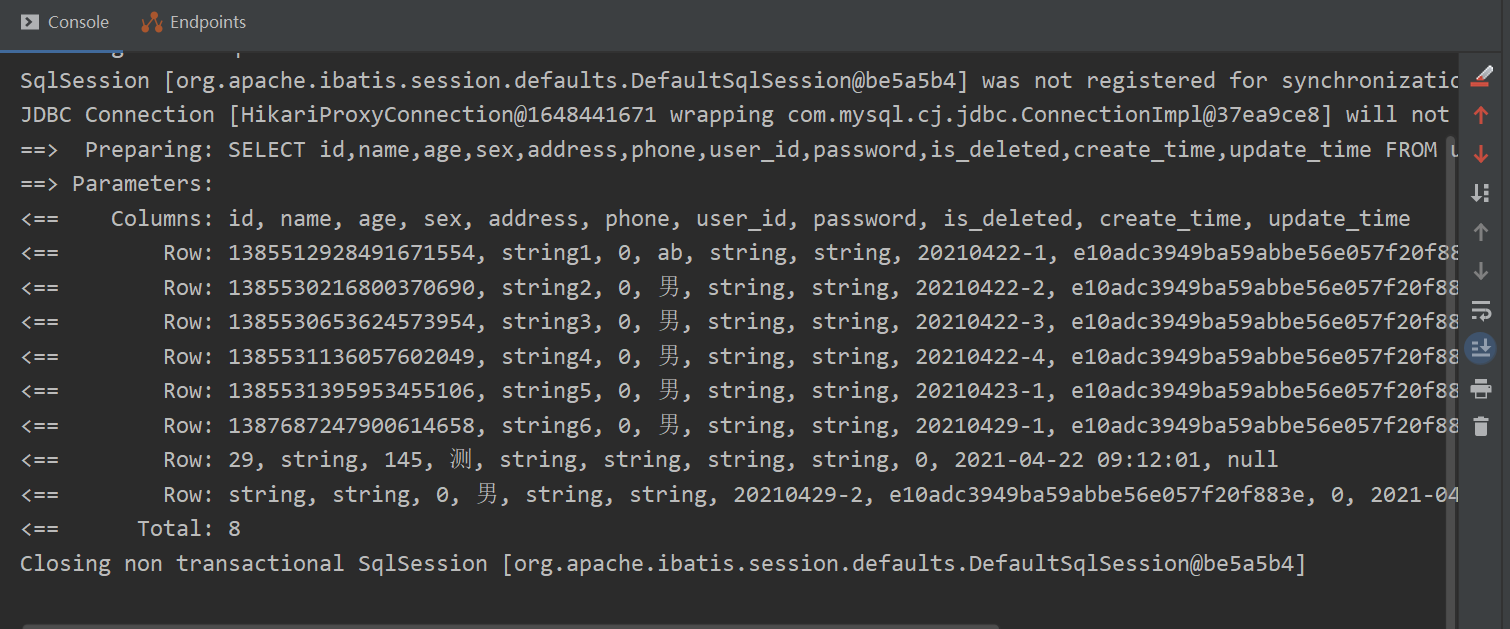
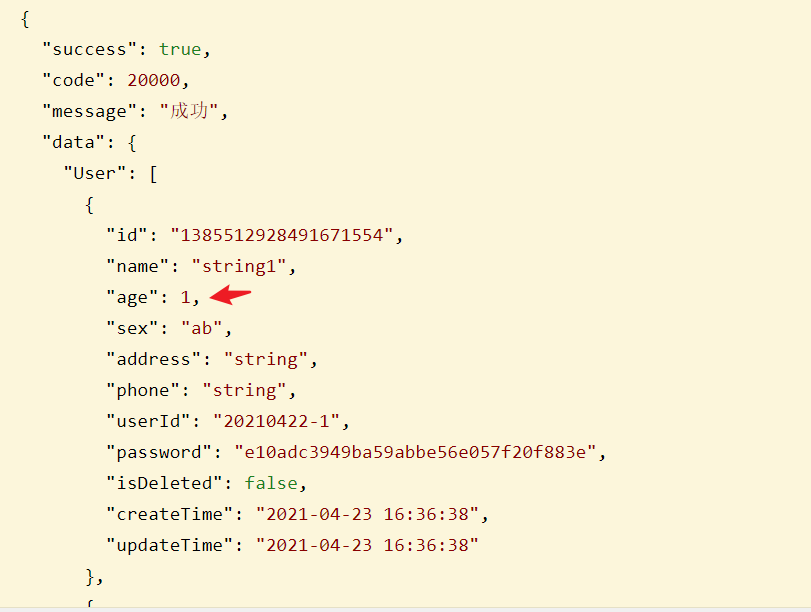
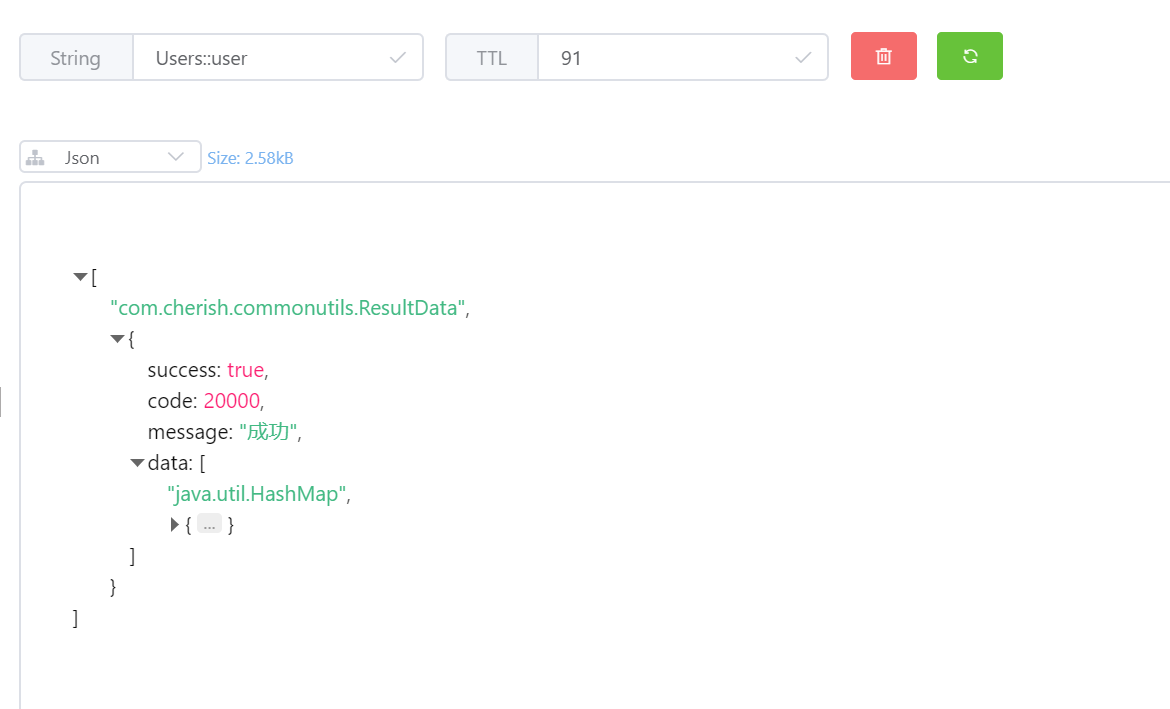
The first query is queried from the database and then cached into redis. Use the redis visualization tool to view the cached information
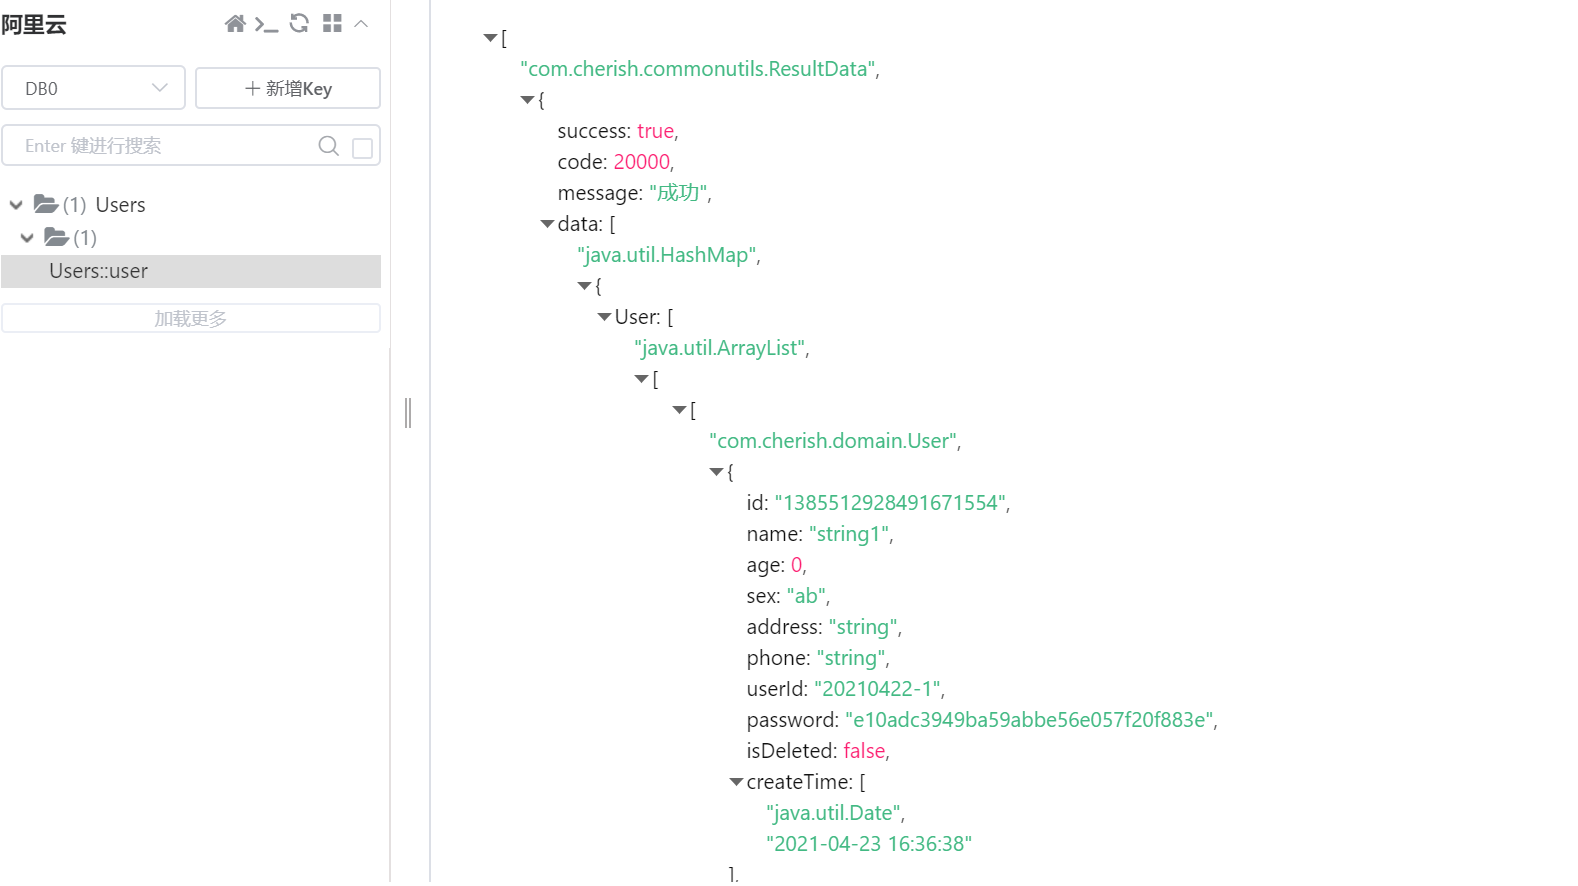
The second query goes to the cache console and there is no output, so the redis cache is to get the results in redis and return them directly.
@CacheEvict
is marked on the method. After the method is executed, the corresponding cache will be deleted based on the condition or key. Commonly used attributes:
allEntries boolean type, indicating whether all elements in the cache need to be cleared
key The key of the cache that needs to be deleted
1 2 3 4 5 6 7 8 9 10 |
|
1 2 3 4 5 6 7 8 9 |
|
When we update the data in the database, we need to clear the redis cache. Otherwise, the data we query is the data in the redis cache, which will cause inconsistency between the database and cached data.
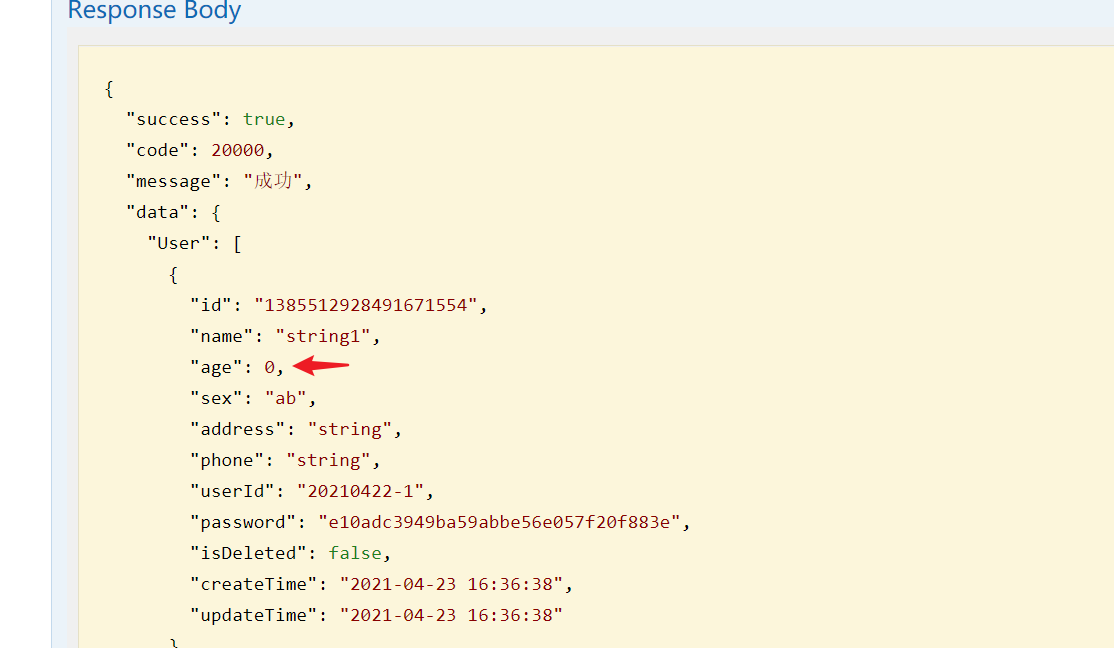
Example: Call the interface without @CacheEvict annotation to modify the data. The data obtained in the query is before modification.
So when we call the interface to modify the data, we need to clear the cache
Add the @CacheEvict annotation to clear the corresponding cache. At this time, the data is discovered during the query. It is the latest and consistent with the database.
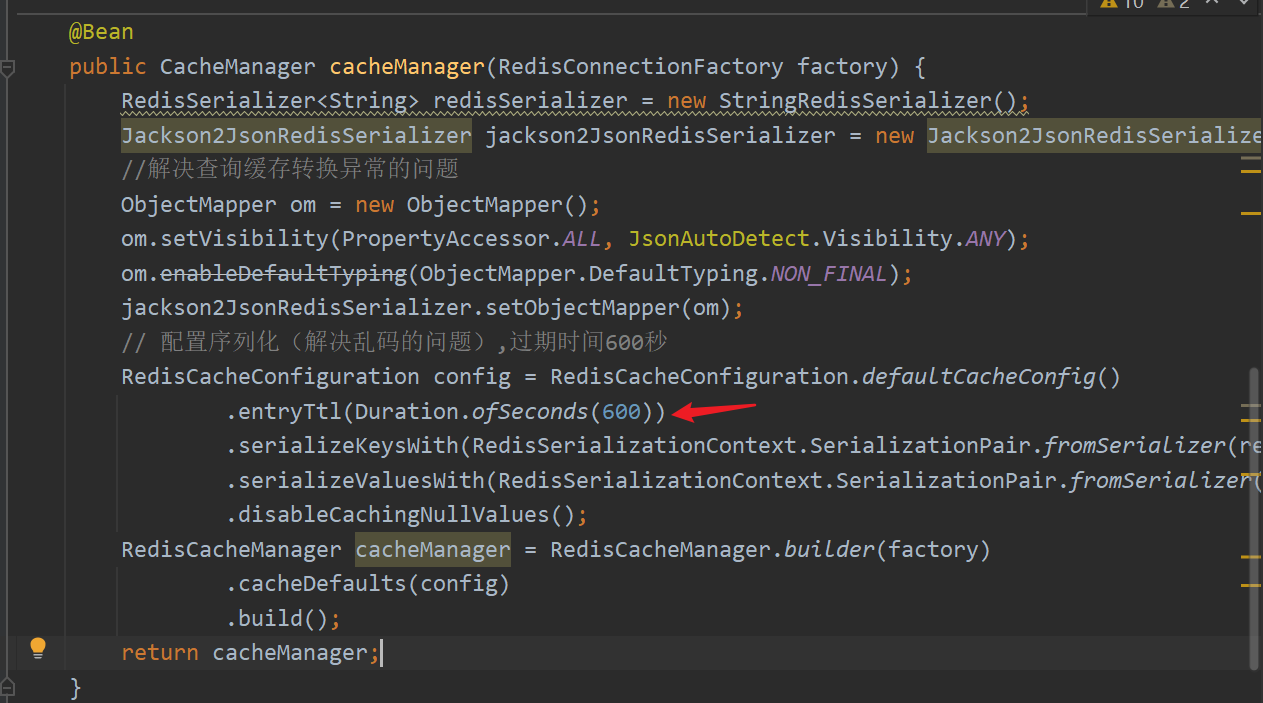
Expiration time
We have implemented the basic functions of Spring Cache and integrated Redis as RedisCacheManger, but as we all know, we are When using the @Cacheable annotation, you cannot give the cache an expiration time. But sometimes in some scenarios we really need to give the cache an expiration time! This is the default expiration time
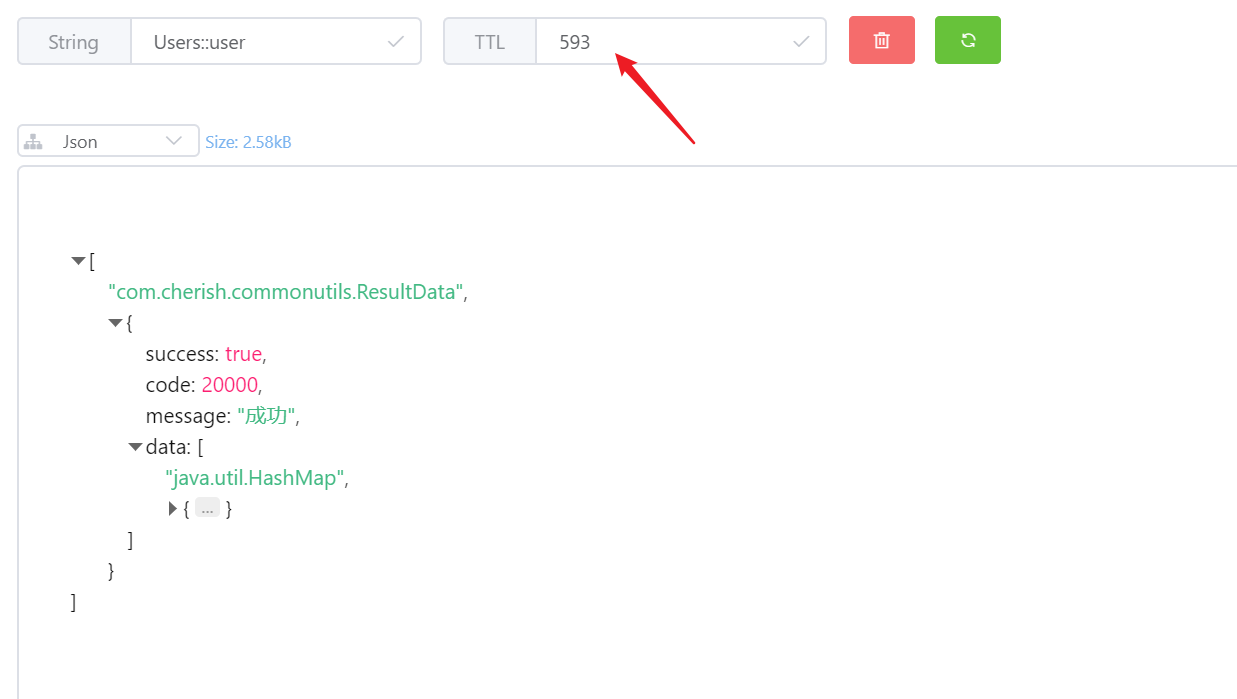
Data validity period
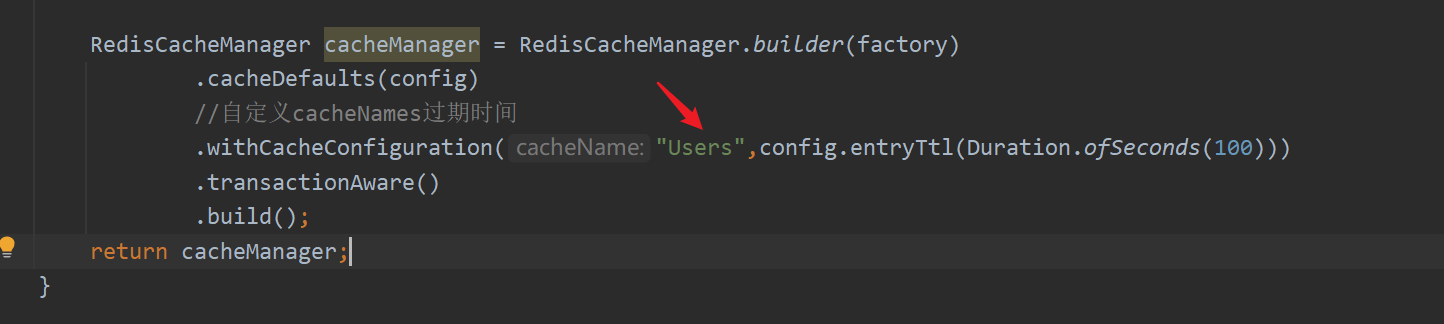
Custom expiration time
Use the new redis configuration and query the cached data again to see the data validity period
The above is the detailed content of How to use @Cacheable in the integration of springboot and redis. For more information, please follow other related articles on the PHP Chinese website!

Hot AI Tools

Undresser.AI Undress
AI-powered app for creating realistic nude photos

AI Clothes Remover
Online AI tool for removing clothes from photos.

Undress AI Tool
Undress images for free

Clothoff.io
AI clothes remover

Video Face Swap
Swap faces in any video effortlessly with our completely free AI face swap tool!
Hot Article
Hot Tools

Notepad++7.3.1
Easy-to-use and free code editor

SublimeText3 Chinese version
Chinese version, very easy to use

Zend Studio 13.0.1
Powerful PHP integrated development environment

Dreamweaver CS6
Visual web development tools

SublimeText3 Mac version
God-level code editing software (SublimeText3)
Hot Topics
 1393
1393
 52
1205
24
52
1205
24

 How to build the redis cluster mode
Apr 10, 2025 pm 10:15 PM
How to build the redis cluster mode
Apr 10, 2025 pm 10:15 PM
Redis cluster mode deploys Redis instances to multiple servers through sharding, improving scalability and availability. The construction steps are as follows: Create odd Redis instances with different ports; Create 3 sentinel instances, monitor Redis instances and failover; configure sentinel configuration files, add monitoring Redis instance information and failover settings; configure Redis instance configuration files, enable cluster mode and specify the cluster information file path; create nodes.conf file, containing information of each Redis instance; start the cluster, execute the create command to create a cluster and specify the number of replicas; log in to the cluster to execute the CLUSTER INFO command to verify the cluster status; make
 How to clear redis data
Apr 10, 2025 pm 10:06 PM
How to clear redis data
Apr 10, 2025 pm 10:06 PM
How to clear Redis data: Use the FLUSHALL command to clear all key values. Use the FLUSHDB command to clear the key value of the currently selected database. Use SELECT to switch databases, and then use FLUSHDB to clear multiple databases. Use the DEL command to delete a specific key. Use the redis-cli tool to clear the data.
 How to read redis queue
Apr 10, 2025 pm 10:12 PM
How to read redis queue
Apr 10, 2025 pm 10:12 PM
To read a queue from Redis, you need to get the queue name, read the elements using the LPOP command, and process the empty queue. The specific steps are as follows: Get the queue name: name it with the prefix of "queue:" such as "queue:my-queue". Use the LPOP command: Eject the element from the head of the queue and return its value, such as LPOP queue:my-queue. Processing empty queues: If the queue is empty, LPOP returns nil, and you can check whether the queue exists before reading the element.
 How to use the redis command
Apr 10, 2025 pm 08:45 PM
How to use the redis command
Apr 10, 2025 pm 08:45 PM
Using the Redis directive requires the following steps: Open the Redis client. Enter the command (verb key value). Provides the required parameters (varies from instruction to instruction). Press Enter to execute the command. Redis returns a response indicating the result of the operation (usually OK or -ERR).
 How to use redis lock
Apr 10, 2025 pm 08:39 PM
How to use redis lock
Apr 10, 2025 pm 08:39 PM
Using Redis to lock operations requires obtaining the lock through the SETNX command, and then using the EXPIRE command to set the expiration time. The specific steps are: (1) Use the SETNX command to try to set a key-value pair; (2) Use the EXPIRE command to set the expiration time for the lock; (3) Use the DEL command to delete the lock when the lock is no longer needed.
 How to read the source code of redis
Apr 10, 2025 pm 08:27 PM
How to read the source code of redis
Apr 10, 2025 pm 08:27 PM
The best way to understand Redis source code is to go step by step: get familiar with the basics of Redis. Select a specific module or function as the starting point. Start with the entry point of the module or function and view the code line by line. View the code through the function call chain. Be familiar with the underlying data structures used by Redis. Identify the algorithm used by Redis.
 How to use the redis command line
Apr 10, 2025 pm 10:18 PM
How to use the redis command line
Apr 10, 2025 pm 10:18 PM
Use the Redis command line tool (redis-cli) to manage and operate Redis through the following steps: Connect to the server, specify the address and port. Send commands to the server using the command name and parameters. Use the HELP command to view help information for a specific command. Use the QUIT command to exit the command line tool.
 How to solve data loss with redis
Apr 10, 2025 pm 08:24 PM
How to solve data loss with redis
Apr 10, 2025 pm 08:24 PM
Redis data loss causes include memory failures, power outages, human errors, and hardware failures. The solutions are: 1. Store data to disk with RDB or AOF persistence; 2. Copy to multiple servers for high availability; 3. HA with Redis Sentinel or Redis Cluster; 4. Create snapshots to back up data; 5. Implement best practices such as persistence, replication, snapshots, monitoring, and security measures.
