

How to install Redis and Tomcat under Centos

Install Redis and Tomcat on the server
Redis installation
Preparation
Execute the following command on the server to download the Redis compressed package. You can ignore the first two steps and do it yourself Just select a suitable directory:
mkdir /root/redis (新建目录作为Redis的安装目录)
Copy after logincd /root/redis (进入这个目录)
Copy after loginwget https://download.redis.io/releases/redis-6.0.13.tar.gz (将Redis压缩包下载到当前打开的目录下)
Copy after login
Or go here to select the appropriate version and Place it on the server.
Unzip
After the download is complete, execute the following command:
tar -zxvf redis-6.0.13.tar.gz (解压缩)
Copy after loginmv redis-6.0.13 redis6 (改名为redis6,这个目录就是Redis的安装目录)
Copy after logincd redis6 (进入这个安装目录)
Copy after login
Compile
In this step, you need to ensure that you have gcc on your server, because you need to use gcc to compile. We can use the following command to check whether you have gcc on your server:
gcc -v
Copy after login
If you have gcc on your server, we can see the content as shown below: 
Continue Next we officially start compilation, execute the following command and wait for it to complete:
make
Copy after login
If successful, we will see the content as shown below: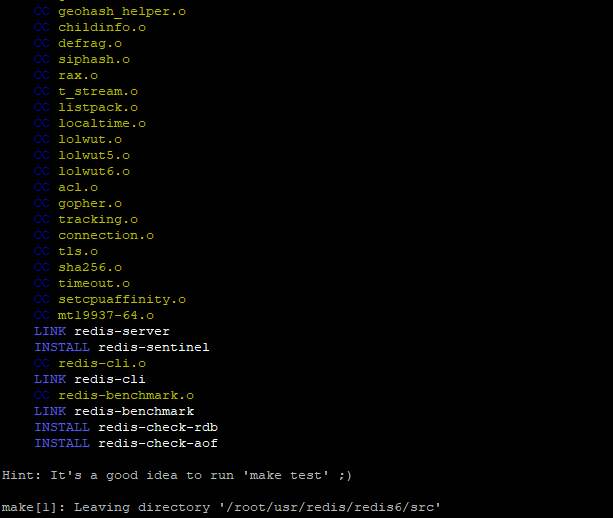
Test
After the previous step is successful, we perform the following steps to test whether Redis is installed successfully:
cd src (进入Redis安装目录下的src目录)
Copy after login-
./redis-server (启动Redis)
Copy after login
If successful, you will see something like the following picture: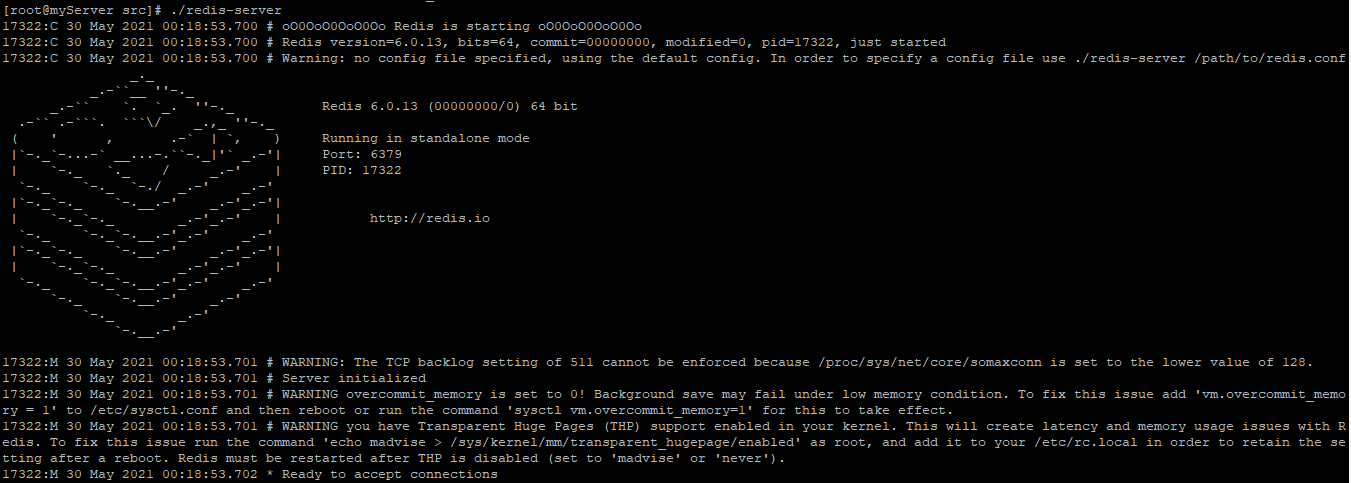
Background startup
If this happens every time If started, we will not be able to continue executing other commands on the server unless Redis is stopped, so we do not want Redis to start in this way, then we have to let it start in the background and execute the following command:
cd /root/redis/redis6/src (进入src目录)
Copy after loginmkdir conf (新建配置文件目录)
Copy after logincp ../redis.conf conf/ (将其原来的配置文件复制一份到刚刚新建的配置文件目录中)
Copy after loginvim conf/redis.conf (编辑这个配置文件)
Copy after login:set nu (这里必须手动输入命令,因为是在文件内部里的vim操作,这个命令是显示文件的行号)
Copy after login然后找到224行左右,将 daemonize no 修改为 daemonize yes (表示由不允许后台允许到允许后台运行)
Copy after login:wq (保存离开)
Copy after login./redis-cli shutdown (关闭一下Redis,以免发生端口占用)
Copy after login./redis-server conf/redis.conf (以指定的配置文件启动Redis,测试其是否变成后台运行,成功的话是没有任何提示的)
Copy after login
Close Redis
Redis will naturally be shut down after it is started. The following is the shutdown command of Redis:
-
cd /root/redis/redis6/src (进入src目录)
Copy after login ./redis-cli shutdown (关闭Redis)
Copy after login
Remote connection
Redis itself does not recommend remote connection due to security issues, but it can also be connected remotely and only needs to be modified. The contents of the configuration file redis.conf are as shown below:
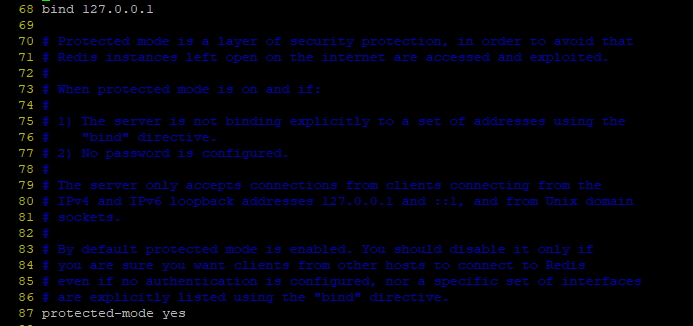
We only need to comment out bind 127.0.0.1 or modify it to bind 0.0.0.0, and then change protected Change -mode yes to protected-mode no. After saving and exiting, restart Redis with this configuration file. It should be noted that the redis port can be set in the following lines of this picture. If it needs to be connected remotely, this port must be open.
Tomcat installation
Preparation
Download the Tomcat compressed package and place it on the server. You can directly download it to the server through the following command:
mkdir /root/tomcat (新建目录放置压缩包)
Copy after logincd /root/tomcat
Copy after loginwget https://mirrors.tuna.tsinghua.edu.cn/apache/tomcat/tomcat-8/v8.5.66/bin/apache-tomcat-8.5.66.tar.gz
Copy after login
You can also click here to download it locally and then upload it to the server.
Unzip
cd /root/tomcat/ (进入压缩包所在目录)
Copy after logintar -zxvf apache-tomcat-8.5.66.tar.gz (解压缩)
Copy after loginmv apache-tomcat-8.5.66 tomcat8 (重命名解压后的目录名)
Copy after login
Modify the configuration file
cd tomcat8 (进入Tomcat安装目录)
Copy after loginvim conf/server.xml (修改端口等信息)
Copy after login

As shown in the picture above, find this location and modify the port. You only need to modify 8080 to another port. Just save and exit. There will be no modifications here for the time being. Use port 8080 directly.
Configure Tomcat environment variables
Execute the following command to configure Tomcat environment variables:
vim /etc/profile
Copy after login在文件末尾加入以下内容: expert CATALINA_HOME=/root/tomcat/tomcat8 (值为Tomcat安装目录) export PATH=$PATH:${CATALINA_HOME}/binCopy after loginsource /etc/profile (使修改生效)
Copy after login
Test Tomcat
Start Tomcat and execute the following command:
startup.sh
Copy after login
Wait quietly for a while...
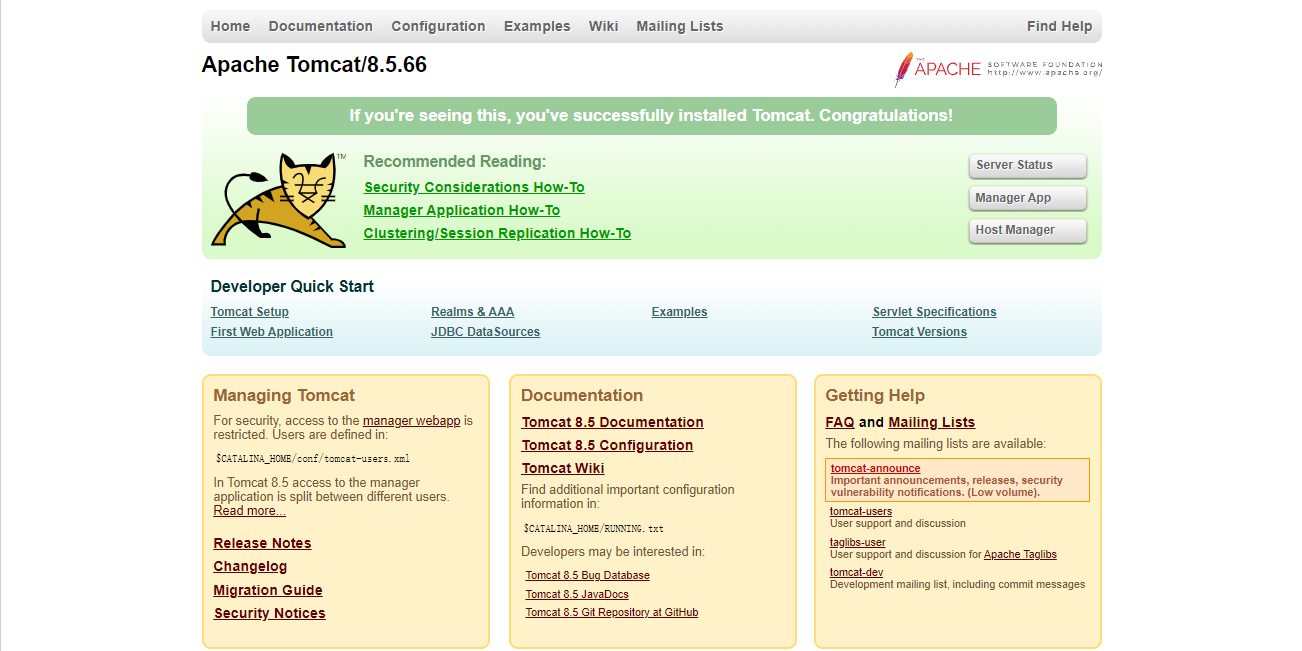
Access in a local browser, assuming your server IP is 112.125.18.23, then the address we are going to access is 112.125.18.23:8080 , just press Enter. If Tomcat is installed and configured successfully, we will see the web page as shown below:

Close Tomcat
Just execute the following command:
shutdown.sh
Copy after login
The above is the detailed content of How to install Redis and Tomcat under Centos. For more information, please follow other related articles on the PHP Chinese website!

Hot AI Tools

Undresser.AI Undress
AI-powered app for creating realistic nude photos

AI Clothes Remover
Online AI tool for removing clothes from photos.

Undress AI Tool
Undress images for free

Clothoff.io
AI clothes remover

AI Hentai Generator
Generate AI Hentai for free.

Hot Article
Hot Tools

Notepad++7.3.1
Easy-to-use and free code editor

SublimeText3 Chinese version
Chinese version, very easy to use

Zend Studio 13.0.1
Powerful PHP integrated development environment

Dreamweaver CS6
Visual web development tools

SublimeText3 Mac version
God-level code editing software (SublimeText3)
Hot Topics
 1382
1382
 52
52

 How to optimize CentOS HDFS configuration
Apr 14, 2025 pm 07:15 PM
How to optimize CentOS HDFS configuration
Apr 14, 2025 pm 07:15 PM
Improve HDFS performance on CentOS: A comprehensive optimization guide to optimize HDFS (Hadoop distributed file system) on CentOS requires comprehensive consideration of hardware, system configuration and network settings. This article provides a series of optimization strategies to help you improve HDFS performance. 1. Hardware upgrade and selection resource expansion: Increase the CPU, memory and storage capacity of the server as much as possible. High-performance hardware: adopts high-performance network cards and switches to improve network throughput. 2. System configuration fine-tuning kernel parameter adjustment: Modify /etc/sysctl.conf file to optimize kernel parameters such as TCP connection number, file handle number and memory management. For example, adjust TCP connection status and buffer size
 Centos shutdown command line
Apr 14, 2025 pm 09:12 PM
Centos shutdown command line
Apr 14, 2025 pm 09:12 PM
The CentOS shutdown command is shutdown, and the syntax is shutdown [Options] Time [Information]. Options include: -h Stop the system immediately; -P Turn off the power after shutdown; -r restart; -t Waiting time. Times can be specified as immediate (now), minutes ( minutes), or a specific time (hh:mm). Added information can be displayed in system messages.
 Difference between centos and ubuntu
Apr 14, 2025 pm 09:09 PM
Difference between centos and ubuntu
Apr 14, 2025 pm 09:09 PM
The key differences between CentOS and Ubuntu are: origin (CentOS originates from Red Hat, for enterprises; Ubuntu originates from Debian, for individuals), package management (CentOS uses yum, focusing on stability; Ubuntu uses apt, for high update frequency), support cycle (CentOS provides 10 years of support, Ubuntu provides 5 years of LTS support), community support (CentOS focuses on stability, Ubuntu provides a wide range of tutorials and documents), uses (CentOS is biased towards servers, Ubuntu is suitable for servers and desktops), other differences include installation simplicity (CentOS is thin)
 What are the backup methods for GitLab on CentOS
Apr 14, 2025 pm 05:33 PM
What are the backup methods for GitLab on CentOS
Apr 14, 2025 pm 05:33 PM
Backup and Recovery Policy of GitLab under CentOS System In order to ensure data security and recoverability, GitLab on CentOS provides a variety of backup methods. This article will introduce several common backup methods, configuration parameters and recovery processes in detail to help you establish a complete GitLab backup and recovery strategy. 1. Manual backup Use the gitlab-rakegitlab:backup:create command to execute manual backup. This command backs up key information such as GitLab repository, database, users, user groups, keys, and permissions. The default backup file is stored in the /var/opt/gitlab/backups directory. You can modify /etc/gitlab
 Centos configuration IP address
Apr 14, 2025 pm 09:06 PM
Centos configuration IP address
Apr 14, 2025 pm 09:06 PM
Steps to configure IP address in CentOS: View the current network configuration: ip addr Edit the network configuration file: sudo vi /etc/sysconfig/network-scripts/ifcfg-eth0 Change IP address: Edit IPADDR= Line changes the subnet mask and gateway (optional): Edit NETMASK= and GATEWAY= Lines Restart the network service: sudo systemctl restart network verification IP address: ip addr
 How to check CentOS HDFS configuration
Apr 14, 2025 pm 07:21 PM
How to check CentOS HDFS configuration
Apr 14, 2025 pm 07:21 PM
Complete Guide to Checking HDFS Configuration in CentOS Systems This article will guide you how to effectively check the configuration and running status of HDFS on CentOS systems. The following steps will help you fully understand the setup and operation of HDFS. Verify Hadoop environment variable: First, make sure the Hadoop environment variable is set correctly. In the terminal, execute the following command to verify that Hadoop is installed and configured correctly: hadoopversion Check HDFS configuration file: The core configuration file of HDFS is located in the /etc/hadoop/conf/ directory, where core-site.xml and hdfs-site.xml are crucial. use
 How to restart the network in centos8
Apr 14, 2025 pm 08:57 PM
How to restart the network in centos8
Apr 14, 2025 pm 08:57 PM
Restarting the network in CentOS 8 requires the following steps: Stop the network service (NetworkManager) and reload the network module (r8169), start the network service (NetworkManager) and check the network status (by ping 8.8.8.8)
 How to install centos
Apr 14, 2025 pm 09:03 PM
How to install centos
Apr 14, 2025 pm 09:03 PM
CentOS installation steps: Download the ISO image and burn bootable media; boot and select the installation source; select the language and keyboard layout; configure the network; partition the hard disk; set the system clock; create the root user; select the software package; start the installation; restart and boot from the hard disk after the installation is completed.
