tar xzvf redis-4.0.8.tar.gz
vim /usr/local/redis/etc/redis.conf
vim /etc/rc.d/rc.local
/usr/local/redis/bin/redis-server /usr/local/redis/etc/redis.conf
redis-cli
How to build fastdfs service and stand-alone redis service
fastdfs service establishment
First you need to install the gcc compiler:
yum -y install gcc-c++

Install the lib dependency package
tar -zxvf V1.0.43.tar.gz
cd libfastcommon-1.0.43
./make.sh
./make.sh install

ln -s /usr/lib64/libfastcommon.so /usr/local/lib/libfastcommon.so
ln -s /usr/lib64/libfastcommon.so /usr/lib/libfastcommon.so
ln -s /usr/lib64/libfdfsclient.so /usr/local/lib/libfdfsclient.so
ln -s /usr/lib64/libfdfsclient.so /usr/lib/libfdfsclient.so
Install fastdfs service
tar -zxvf V6.06.tar.gz
cd fastdfs-6.06
./make.sh
./make.sh install
Configure Tracker service
mkdir -p /data/fastdfs/tracker
cd /etc/fdfs
cp tracker.conf.sample  tracker.conf
vim tracker.conf
The content to be modified is
#启用配置文件(默认启用)
disabled=false
#设置tracker的端口号,通常采用22122这个默认端口
port=22122
#设置tracker的数据文件和日志目录
base_path=/data/fastdfs/tracker
#设置http端口号,默认为8080
http.server_port=80
Start the service
#启动
/usr/bin/fdfs_trackerd /etc/fdfs/tracker.conf start

Check whether it is started
#查看启动端口
ss -ant | grep 22122
Check the startup log
#查看启动日志
tail -f /data/fastdfs/tracker/logs/trackerd.log

Add boot startup
vim /etc/rc.d/rc.local
Add startup command

If you find that it fails to start automatically after restarting, use the command
ll /etc/rc.d/rc.local
to check whether rc.local has executable permissions,If it does not have executable permissions, pass Command to authorize
chmod +x /etc/rc.d/rc.local
Configure Storage service
mkdir -p /data/fastdfs/storage
mkdir -p /data/fastdfs/storage/file
cd /etc/fdfs
cp storage.conf.sample  storage.conf
vim storage.conf
The content to be modified is
#启用配置文件(默认启用)
disabled=false
#组名,根据实际情况修改
group_name=group1
#设置storage的端口号,默认是23000,同一个组的storage端口号必须一致
port=23000
#设置storage数据文件和日志目录
base_path=/data/fastdfs/storage
#存储路径个数,需要和store_path个数匹配
store_path_count=1
#实际文件存储路径
store_path0=/data/fastdfs/storage/file
#tracker 服务器的 IP地址和端口号,如果是单机搭建,IP不要写127.0.0.1,否则启动不成功(此处的ip是我的CentOS虚拟机ip)
tracker_server=172.16.6.50:22122
#设置 http 端口号
http.server_port=8888
Start the service
#启动
/usr/bin/fdfs_storaged /etc/fdfs/storage.conf start
View the startup port
#查看启动端口
ss -ant | grep 23000
View the startup log
#查看启动日志
tail -f /data/fastdfs/storage/logs/storaged.log

[root@localhost /]# /usr/bin/fdfs_monitor /etc/fdfs/storage.conf
[2021-09-23 12:59:26] DEBUG - base_path=/opt/fastdfs_storage, connect_timeout=30, network_timeout=60, tracker_server_count=1, anti_steal_token=0, anti_steal_secret_key length=0, use_connection_pool=0, g_connection_pool_max_idle_time=3600s, use_storage_id=0, storage server id count: 0

server_count=1, server_index=0

tracker server is 172.16.8.11:22122

group count: 1

Group 1:
group name = group1
disk total space = 6818 MB
disk free space = 2169 MB
trunk free space = 0 MB
……
vim /etc/rc.d/rc.local
/usr/bin/fdfs_storaged /etc/fdfs/storage.conf start
[root@localhost ~]# ps -ef|grep fdfs
root     10335 17685  0 23:50 pts/3    00:00:00 grep --color=auto fdfs
root     13335     1  0 13:17 ?        00:00:07 /usr/bin/fdfs_storaged /etc/fdfs/storage.conf start
root     15779     1  0 12:59 ?        00:00:04 /usr/bin/fdfs_trackerd /etc/fdfs/tracker.conf
Copy after login
Test with fdfs client[root@localhost ~]# ps -ef|grep fdfs root 10335 17685 0 23:50 pts/3 00:00:00 grep --color=auto fdfs root 13335 1 0 13:17 ? 00:00:07 /usr/bin/fdfs_storaged /etc/fdfs/storage.conf start root 15779 1 0 12:59 ? 00:00:04 /usr/bin/fdfs_trackerd /etc/fdfs/tracker.conf
cp /etc/fdfs/client.conf.sample /etc/fdfs/client.conf
vim /etc/fdfs/client.conf
#tracker服务器文件路径
base_path=/data/fastdfs/tracker
#tracker服务器IP地址和端口号
tracker_server=172.16.7.50:22122
# tracker 服务器的 http 端口号,必须和tracker的设置对应起来
http.tracker_server_port=80
/usr/bin/fdfs_upload_file /etc/fdfs/client.conf /data/test.txt
tar xzvf redis-4.0.8.tar.gz
Copy after login
2. Installtar xzvf redis-4.0.8.tar.gz
cd redis-4.0.8
make
cd src
make install PREFIX=/usr/local/redis
Copy after login
3. Move the configuration file to the installation directory cd redis-4.0.8 make cd src make install PREFIX=/usr/local/redis
cd ../
mkdir /usr/local/redis/etc
mv redis.conf /usr/local/redis/etc
Copy after login
4. Configure redis to start in the background cd ../ mkdir /usr/local/redis/etc mv redis.conf /usr/local/redis/etc
vim /usr/local/redis/etc/redis.conf
Copy after login
Note , Change daemonize no to daemonize yes, and comment Remove bind 127.0.0.1,You can access it remotely5. Add redis to the bootvim /usr/local/redis/etc/redis.conf
vim /etc/rc.d/rc.local
Copy after loginCopy after loginCopy after login
Add content inside:vim /etc/rc.d/rc.local
/usr/local/redis/bin/redis-server /usr/local/redis/etc/redis.conf
/usr/local/redis/bin/redis-server /usr/local/redis/etc/redis.conf
Copy after loginCopy after login
7. Copy redis-cli and redis-server to bin,so that the redis-cli command can Use /usr/local/redis/bin/redis-server /usr/local/redis/etc/redis.conf
cp /usr/local/redis/bin/redis-server /usr/local/bin/
cp /usr/local/redis/bin/redis-cli /usr/local/bin/
Copy after login
directly in any directory 8. Set the redis password a. Run the command:cp /usr/local/redis/bin/redis-server /usr/local/bin/ cp /usr/local/redis/bin/redis-cli /usr/local/bin/
redis-cli
Copy after login
b. View the existing redis password (optional Operation,optional)Run command:redis-cli
config get requirepass

config set requirepass *******
//****为你设置的密码
redis-cli -h 127.0.0.1 -p 6379 -a ****
#开放6379端口
firewall-cmd --zone=public --add-port=6379/tcp --permanent
#重启防火墙以使配置即时生效
systemctl restart firewalld
#查看系统所有开放的端口
firewall-cmd --zone=public --list-ports
Copy after login
b. If remote access is still not possible:Although the firewall has opened port 6379 at this time, the external network is still inaccessible because of redis What is monitored is 127.0.0.1:6379, and does not monitor requests from the external network. #开放6379端口 firewall-cmd --zone=public --add-port=6379/tcp --permanent #重启防火墙以使配置即时生效 systemctl restart firewalld #查看系统所有开放的端口 firewall-cmd --zone=public --list-ports
- Add # in front of bind 127.0.0.1 in the redis.conf configuration file in the folder directory and comment out the
- command: ;After redis-cli is connected to redis, check whether both config get daemonize and config get protected-mode are no. If not, use config set to change the configuration name attribute to no.
#停止redis
pkill redis
#删除安装目录
rm -rf /usr/local/redis
#删除所有redis相关命令脚本
rm -rf /usr/bin/redis-*
#删除redis解压文件夹
rm -rf /root/download/redis-4.0.4
Copy after login
Report exception,Try to restartReason : Redis has been startedSolution: Turn off Redis and restart it #停止redis pkill redis #删除安装目录 rm -rf /usr/local/redis #删除所有redis相关命令脚本 rm -rf /usr/bin/redis-* #删除redis解压文件夹 rm -rf /root/download/redis-4.0.4
redis-cli shutdown
redis-server &
客户端检测连接是否正常
使用redis-cli客户端检测连接是否正常
$redis-cli
127.0.0.1:6379> keys *
(empty list or set)
127.0.0.1:6379> set key "hello world"
OK
127.0.0.1:6379> get key
"hello world"
Redis客户端常见操作
Redis是key-value数据库,支持五种数据类型:string(字符串),hash(哈希),list(列表),set(集合)及zset(sorted set:有序集合)。
当value是string类型,命令包括set get setnx incr del 等。
> set server:name "fido"  // 设置键值
OK
> get server:name  // 获取键值
"fido"
> setnx connections 10   // set if not exists
OK
> incr connections   // 原子性增加values值
(integer) 11
> incr connections
(integer) 12
> del connections  // 删除key
(integer) 1
> incr connections
(integer) 1
当value是list类型,命令包括rpush lpush llen lrange lpop rpop del 等。
> rpush friends "Alice"   // 在末尾追加
(integer) 1
> rpush friends "Bob"
(integer) 2
> lpush friends "Sam"    // 插入到开头
(integer) 3
> lrange friends 0 -1     // 返回列表的子集,类似切片操作
1) "Sam"
2) "Alice"
3) "Bob"
> lrange friends 0 1
1) "Sam"
2) "Alice"
> lrange friends 1 2
1) "Alice"
2) "Bob"
> llen friends   // 返回列表长度
(integer) 3
> lpop friends   // 删除并返回列表第一个元素
"Sam"
> rpop friends   // 删除并返回列表最后一个元素
"Bob"
> lrange friends 0 -1
1) "Alice"
> del friends    // 删除key
(integer) 1     // 1表示成功,0表示失败
当value是set类型,命令包括sadd srem sismember smembers sunion del等。
> sadd superpowers "flight"     // 添加元素
(integer) 1
> sadd superpowers "x-ray vision"
(integer) 1
> sadd superpowers "reflexes"
(integer) 1
> srem superpowers "reflexes"   // 删除元素1

> sismember superpowers "flight"   // 测试元素是否在集合中
(integer) 1
> sismember superpowers "reflexes"
(integer) 0
> smembers superpowers    // 返回集合中所有元素
1) "x-ray vision"
2) "flight"
> sadd birdpowers "pecking"
(integer) 1
> sadd birdpowers "flight"
(integer) 1
> sunion superpowers birdpowers    // 合并多个set,返回合并后的元素列表
1) "x-ray vision"
2) "flight"
3) "pecking"
> del superpowers   // 删除key
(integer) 1
当value是zset类型,命令包括 zadd zrange del等,注意给value一个编号用于排序。
> zadd hacker 1940 "Alan Kay"     // 给value指定一个编号,比如以年份1940作为编号
(integer) 1
> zadd hacker 1906 "Grace Hopper"
(integer) 1
> zadd hacker 1953 "Richard Stallman"
(integer) 1
> zadd hacker 1965 "Yukihiro Matsumoto"
(integer) 1
> zadd hacker 1916 "Claude Shannon"
(integer) 1
> zadd hacker 1969 "Linux Torvalds"
(integer) 1
> zadd hacker 1957 "Sophie Wilson"
(integer) 1
> zadd hacker 1912 "Alan Turing"
(integer) 1

> zrange hacker 2 4    // 切片返回有序集合中元素
1) "Claude Shannon"
2) "Alan Kay"
3) "Richard Stallman"

> del hacker    // 删除key
(integer) 1
当value是hash类型,hash类型可以理解为字典,需要给value指定一个field用于映射,命令包括hset hmset hget hgetall hdel hincrby del 等。
> hset user:1000 name "John Smith"   // 给value指定一个field,比如name
(integer) 1
> hset user:1000 email "john.smith@example.com"
(integer) 1
> hset user:1000 password "s3cret"
(integer) 1
> hgetall user:1000   // 获得hash表中所有成员,包括field和value
1) "name"
2) "John Smith"
3) "email"
4) "john.smith@example.com"
5) "password"
6) "s3cret"

> hmset user:1001 name "Mary Jones" password "hidden" email
"mjones@example.com"   // 设置多个field和value
OK
> hget user:1001 name   // 根据field获取value
"Mary Jones"

> hset user:1000 visits 10    // field可以映射到数字值
(integer) 1
> hincrby user:1000 visits 1    // 原子性增加value的值,增加1
(integer) 11
> hincrby user:1000 visits 10    // 增加10
(integer) 21
> hdel user:1000 visits      // 删除field及其value
(integer) 1
> hincrby user:1000 visits 1
(integer) 1

> del user:1000     // 删除key
(integer) 1
设置和查看key的生命周期,key过期会被自动删除,命令包括expire ttl 等。
> set resource:lock "Redis Demo"
OK
> expire resource:lock 120   // 设置生命周期为120s
(integer) 1
> ttl resource:lock   // 查看当前生命周期还剩多少时间
(integer) 109
> ttl resource:lock   // 120s后查看,返回-2表示已过期或不存在
(integer) -2

> set resource:lock "Redis Demo 2"
OK
> ttl resource:lock    // 返回-1表示永不过期
(integer) -1
springboot实现h5与fastdfs之间的断点续传,大文件上传,秒传文件和批量上传
对比,只是单纯返回一个String类型?

改为upload_list8888,页面调用是失败的
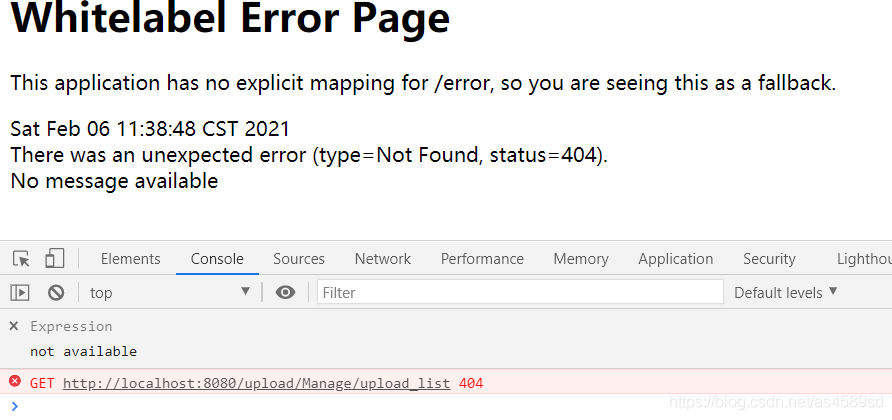
改回upload_list
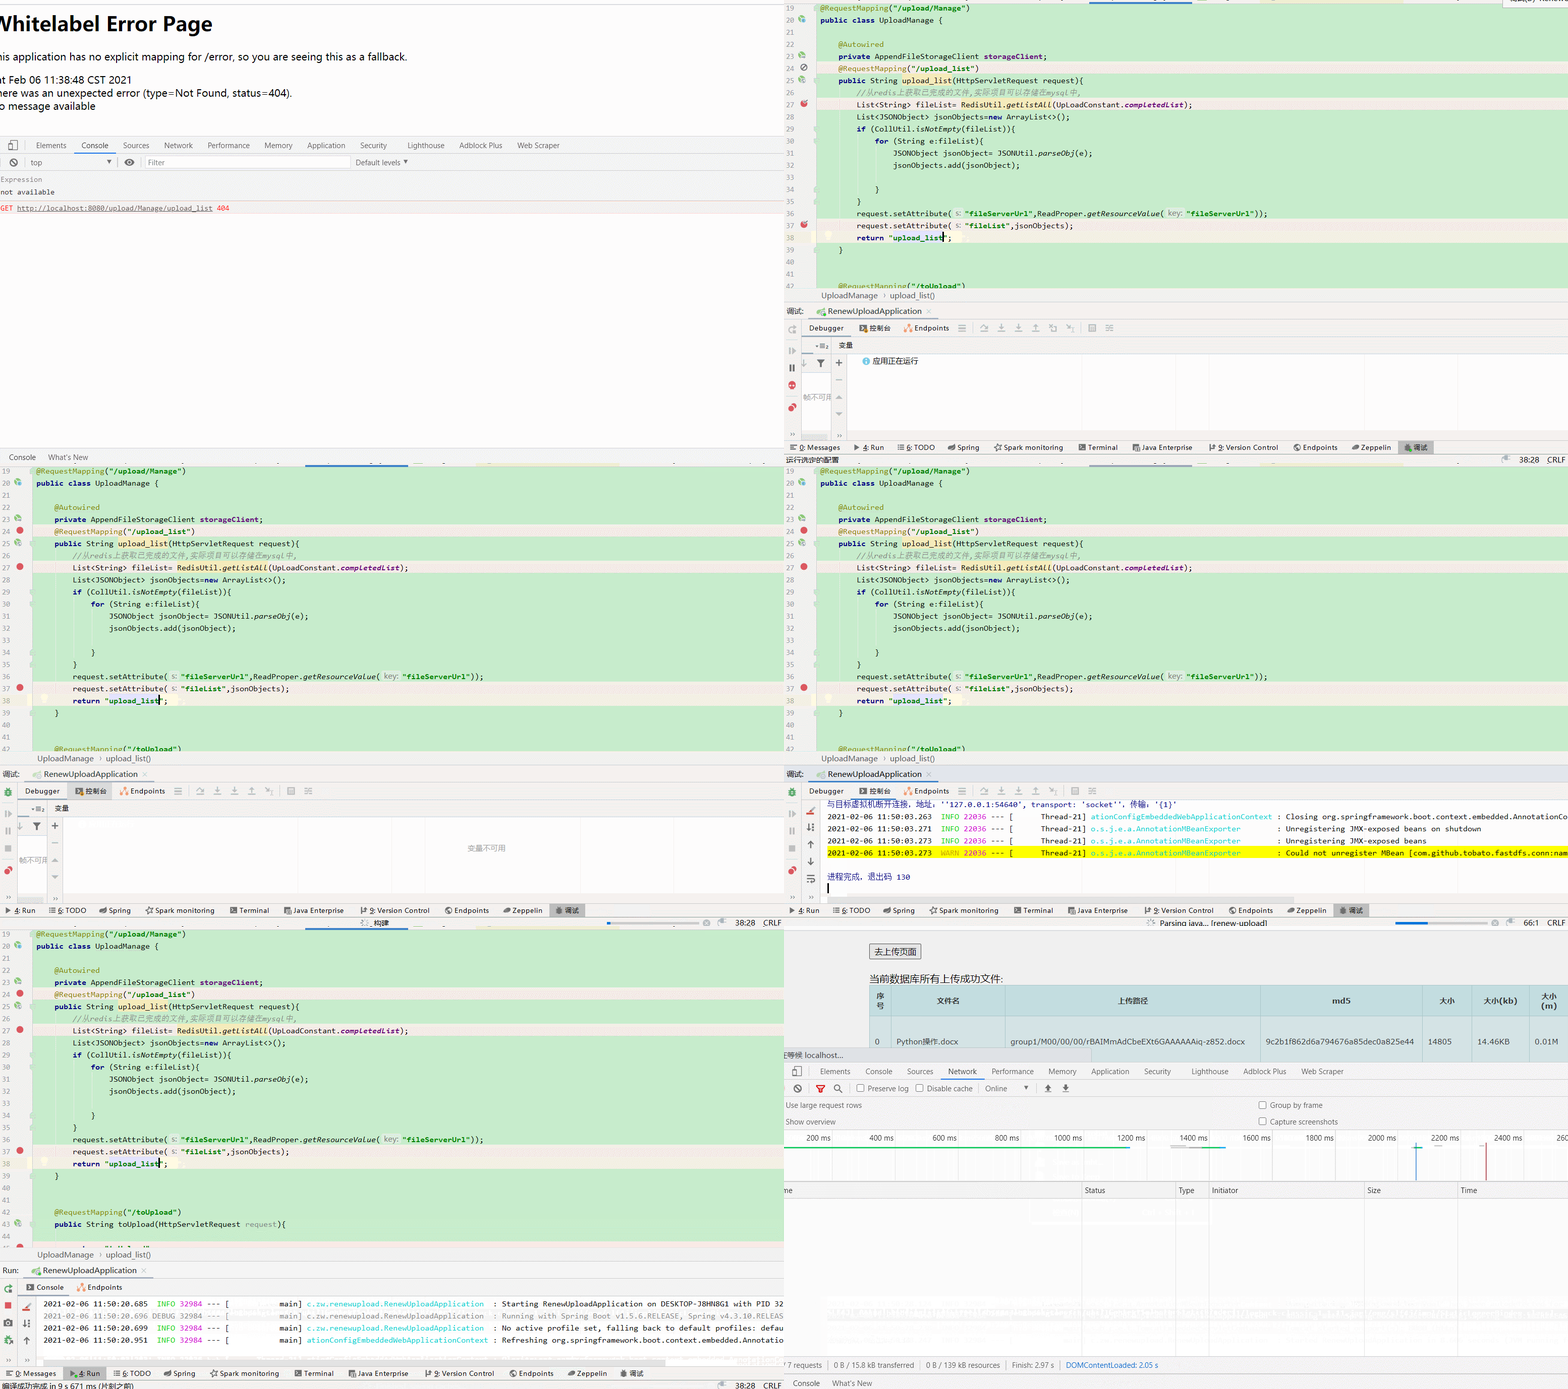
ThreadLocal与redis秒配,解决了redis线程池在被共享访问时带来的线程安全问题
打个比方,现在公司所有人都要填写一个表格,但是只有一支笔,这个时候就只能上个人用完了之后,下个人才可以使用,为了保证"笔"这个资源的可用性,只需要保证在接下来每个人的获取顺序就可以了,这就是 lock 的作用,当这支笔被别人用的时候,我就加 lock ,你来了那就进入队列排队等待获取资源(非公平方式那就另外说了),这支笔用完之后就释放 lock ,然后按照顺序给下个人使用。
但是完全可以一个人一支笔对不对,这样的话,你填写你的表格,我填写我的表格,咱俩谁都不耽搁谁。这就是 ThreadLocal 在做的事情,因为每个 Thread 都有一个副本,就不存在资源竞争,所以也就不需要加锁,这不就是拿空间去换了时间嘛!
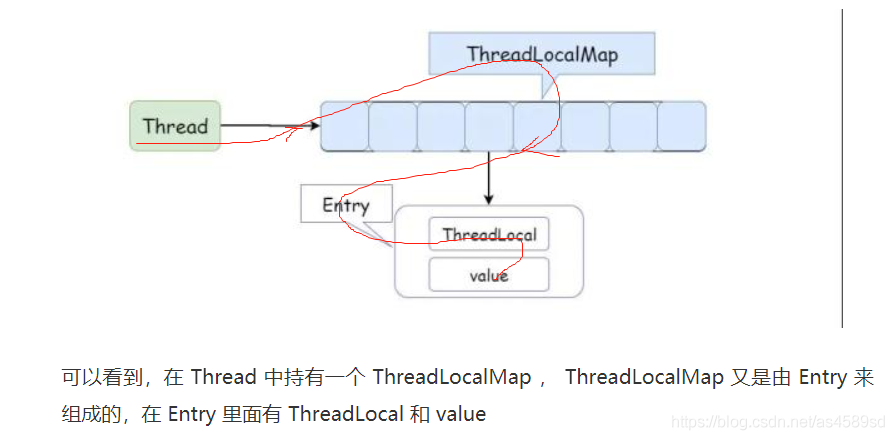
了解决redis线程池对象(笔),不能被多线程(多个人)共享访问的问题,通过 threadLocal.set() 方法,将redis线程池对象实例保存在每个线程,自己所拥有的 threadLocalMap中(生成多个副本)。
这样的话,每个线程都使用自己的redis线程池对象实例,彼此不会影响,从而达到了隔离的作用,这样就解决了redis线程池对象在被共享访问时带来的线程安全问题。
import cn.hutool.core.util.StrUtil;
import org.slf4j.Logger;
import org.slf4j.LoggerFactory;
import redis.clients.jedis.Jedis;
import redis.clients.jedis.JedisPool;
import redis.clients.jedis.JedisPoolConfig;
import java.util.List;
public class RedisUtil {
private RedisUtil() {
}
private static Logger _logger = LoggerFactory.getLogger(RedisUtil.class);
;
protected static final ThreadLocal<Jedis> threadLocalJedis = new ThreadLocal<Jedis>();
//Redis服务器IP
private static String ADDR_ARRAY = ReadProper.getResourceValue("spring.redis.host");
//Redis的端口号
private static int PORT = Integer.parseInt(ReadProper.getResourceValue("spring.redis.port"));
//访问密码
private static String AUTH = ReadProper.getResourceValue("spring.redis.password");
//可用连接实例的最大数目,默认值为8;
//如果赋值为-1,则表示不限制;如果pool已经分配了maxActive个jedis实例,则此时pool的状态为exhausted(耗尽)。
private static int MAX_ACTIVE = -1;
//控制一个pool最多有多少个状态为idle(空闲的)的jedis实例,默认值也是8。
private static int MAX_IDLE = 16;
//等待可用连接的最大时间,单位毫秒,默认值为-1,表示永不超时。如果超过等待时间,则直接抛出JedisConnectionException;
private static int MAX_WAIT = 1000 * 5;
//超时时间
private static int TIMEOUT = 1000 * 5;
//在borrow一个jedis实例时,是否提前进行validate操作;如果为true,则得到的jedis实例均是可用的;
private static boolean TEST_ON_BORROW = true;
private static JedisPool jedisPool ;
//默认的数据库为0
/**
* redis过期时间,以秒为单位
*/
public final static int EXRP_HOUR = 60 * 60; //一小时
public final static int EXRP_DAY = 60 * 60 * 24; //一天
public final static int EXRP_MONTH = 60 * 60 * 24 * 30; //一个月
/**
* 初始化Redis连接池,注意一定要在使用前初始化一次,一般在项目启动时初始化就行了
*/
public static JedisPool initialPool() {
JedisPool jp=null;
try {
JedisPoolConfig config = new JedisPoolConfig();
config.setMaxTotal(MAX_ACTIVE);
config.setMaxIdle(MAX_IDLE);
config.setMaxWaitMillis(MAX_WAIT);
config.setTestOnBorrow(TEST_ON_BORROW);
config.setTestOnCreate(true);
config.setTestWhileIdle(true);
config.setTestOnReturn(true);
config.setNumTestsPerEvictionRun(-1);
jp = new JedisPool(config, ADDR_ARRAY, PORT, TIMEOUT, AUTH);
jedisPool=jp;
threadLocalJedis.set(getJedis());
} catch (Exception e) {
e.printStackTrace();
_logger.error("redis服务器异常",e);
}
return jp;
}
public static void close(Jedis jedis) {
if (threadLocalJedis.get() == null && jedis != null){
jedis.close();
}
}
// /**
// * 在多线程环境同步初始化
// */
// private static synchronized void poolInit() {
// if (jedisPool == null) {
// initialPool();
// }
// }
/**
* 获取Jedis实例,一定先初始化
*
* @return Jedis
*/
public static Jedis getJedis() {
boolean success = false;
Jedis jedis = null;
// if (jedisPool == null) {
// poolInit();
// }
int i=0;
while (!success) {
i++;
try {
if (jedisPool != null) {
jedis=threadLocalJedis.get();
if (jedis==null){
jedis = jedisPool.getResource();
}else {
if(! jedis.isConnected()&&!jedis.getClient().isBroken()){
threadLocalJedis.set(null);
jedis = jedisPool.getResource();
}
//System.out.println(Thread.currentThread().getName()+":第"+i+"次获取成功#@利用了本地缓存redis");
return jedis;
}
}else {
throw new RuntimeException("redis连接池初始化失败");
}
} catch (Exception e) {
System.out.println(Thread.currentThread().getName()+":第"+i+"次获取失败!!!");
success = false;
e.printStackTrace();
_logger.error("redis服务器异常",e);
}
if (jedis!=null){
success=true;
}
if (i>=10&&i<20){
try {
Thread.sleep(1000);
} catch (InterruptedException e) {
e.printStackTrace();
}
}
if (i>=20&&i<30){
try {
Thread.sleep(2000);
} catch (InterruptedException e) {
e.printStackTrace();
}
}
if (i>=30&&i<40){
try {
Thread.sleep(3000);
} catch (InterruptedException e) {
e.printStackTrace();
}
}
if (i>=40){
System.out.println("redis彻底连不上了~~~~(>_<)~~~~");
return null;
}
}
if (threadLocalJedis.get()==null){threadLocalJedis.set(jedis);}
//System.out.println(Thread.currentThread().getName()+":第"+i+"次获取成功@");
return jedis;
}
/**
* 设置 String
*
* @param key
* @param value
*/
public static void setString(String key, String value) {
Jedis jo = null;
try {
value = StrUtil.isBlank(value) ? "" : value;
jo = getJedis();
jo.set(key, value);
} catch (Exception e) {
threadLocalJedis.set(null);
_logger.error("redis服务器异常",e);
throw new RuntimeException("redis服务器异常");
} finally {
if (jo != null) {
close(jo);
}
}
}
/**
* 设置 过期时间
*
* @param key
* @param seconds 以秒为单位
* @param value
*/
public static void setString(String key, int seconds, String value) {
Jedis jo = null;
try {
value = StrUtil.isBlank(value) ? "" : value;
jo = getJedis();
jo.setex(key, seconds, value);
} catch (Exception e) {
threadLocalJedis.set(null);
e.printStackTrace();
_logger.error("redis服务器异常",e);
throw new RuntimeException("redis服务器异常");
} finally {
if (jo != null) {
close(jo);
}
}
}
/**
* 获取String值
*
* @param key
* @return value
*/
public static String getString(String key) {
Jedis jo = null;
try {
jo = getJedis();
if (jo == null || !jo.exists(key)) {
return null;
}
return jo.get(key);
} catch (Exception e) {
threadLocalJedis.set(null);
e.printStackTrace();
_logger.error("redis服务器异常",e);
throw new RuntimeException("redis操作错误");
} finally {
if (jo != null) {
close(jo);
}
}
}
public static long incrBy(String key, long integer) {
Jedis jo = null;
try {
jo = getJedis();
return jo.incrBy(key, integer);
} catch (Exception e) {
threadLocalJedis.set(null);
e.printStackTrace();
_logger.error("redis服务器异常",e);
throw new RuntimeException("redis操作错误");
} finally {
if (jo != null) {
close(jo);
}
}
}
public static long decrBy(String key, long integer) {
Jedis jo = null;
try {
jo = getJedis();
return jo.decrBy(key, integer);
} catch (Exception e) {
threadLocalJedis.set(null);
e.printStackTrace();
_logger.error("redis服务器异常",e);
throw new RuntimeException("redis操作错误");
} finally {
if (jo != null) {
close(jo);
}
}
}
//删除多个key
public static long delKeys(String [] keys){
Jedis jo = null;
try {
jo = getJedis();
return jo.del(keys);
} catch (Exception e) {
threadLocalJedis.set(null);
e.printStackTrace();
_logger.error("redis服务器异常",e);
throw new RuntimeException("redis操作错误");
} finally {
if (jo != null) {
close(jo);
}
}
}
//删除单个key
public static long delKey(String key){
Jedis jo = null;
try {
jo = getJedis();
return jo.del(key);
} catch (Exception e) {
threadLocalJedis.set(null);
e.printStackTrace();
_logger.error("redis服务器异常",e);
throw new RuntimeException("redis操作错误");
} finally {
if (jo != null) {
close(jo);
}
}
}
//添加到队列尾
public static long rpush(String key,String node){
Jedis jo = null;
try {
jo = getJedis();
return jo.rpush(key,node);
} catch (Exception e) {
threadLocalJedis.set(null);
e.printStackTrace();
_logger.error("redis服务器异常",e);
throw new RuntimeException("redis操作错误");
} finally {
if (jo != null) {
close(jo);
}
}
}
//删除list元素
public static long delListNode(String key,int count,String value){
Jedis jo = null;
try {
jo = getJedis();
return jo.lrem(key,count,value);
} catch (Exception e) {
threadLocalJedis.set(null);
e.printStackTrace();
_logger.error("redis服务器异常",e);
throw new RuntimeException("redis操作错误");
} finally {
if (jo != null) {
close(jo);
}
}
}
//获取所有list
public static List getListAll(String key){
Jedis jo = null;
List list=null;
try {
jo = getJedis();
list= jo.lrange(key,0,-1);
} catch (Exception e) {
threadLocalJedis.set(null);
e.printStackTrace();
_logger.error("redis服务器异常",e);
throw new RuntimeException("redis操作错误");
} finally {
if (jo != null) {
close(jo);
}
}
return list;
}
//清理缓存redis
public static void cleanLoacl(Jedis jo){
threadLocalJedis.set(null);
close(jo);
}
static {
initialPool();
}
}使用webuploader组件实现大文件分片上传,断点续传
webuploader:是一个以HTML5为主, Flash为辅的文件上传组件,采用大文件分片/并发上传的方式,极大地提高了文件上传的效率,同时兼容多种浏览器版本;
前端

引入百度Webuploader组件,需要注意标签的id/nama属性,这些将在后面的JavaScript中使用到进行文件切分、验证。

以上js组件,将完成文件上传、MD5验证、删除、切片、上传进度条显示、暂停、继续上传及上传成功/失败时候的回调。
后端
前端,给后端提供封装的chunk,及request
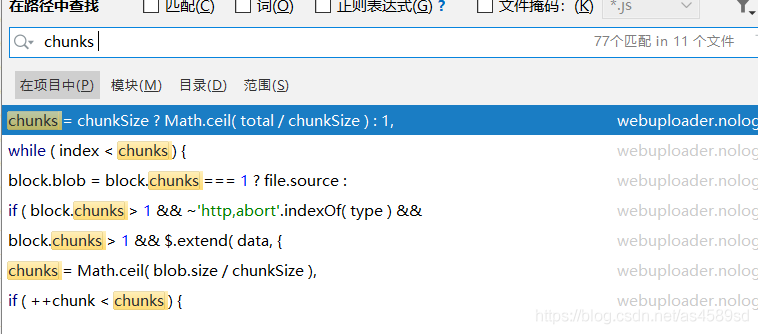
后端,主要是判断文件是否有分片,如果没有,则直接存放到目的目录;
如果存在分片,则创建临时目录,存放分片信息;
之后判断当前分片所属的文件的所有分片是否已经传输完毕,如果当前分片数==所属文件总分片数,则开始合并文件并转移完整文件到目的目录,并且删除临时目录
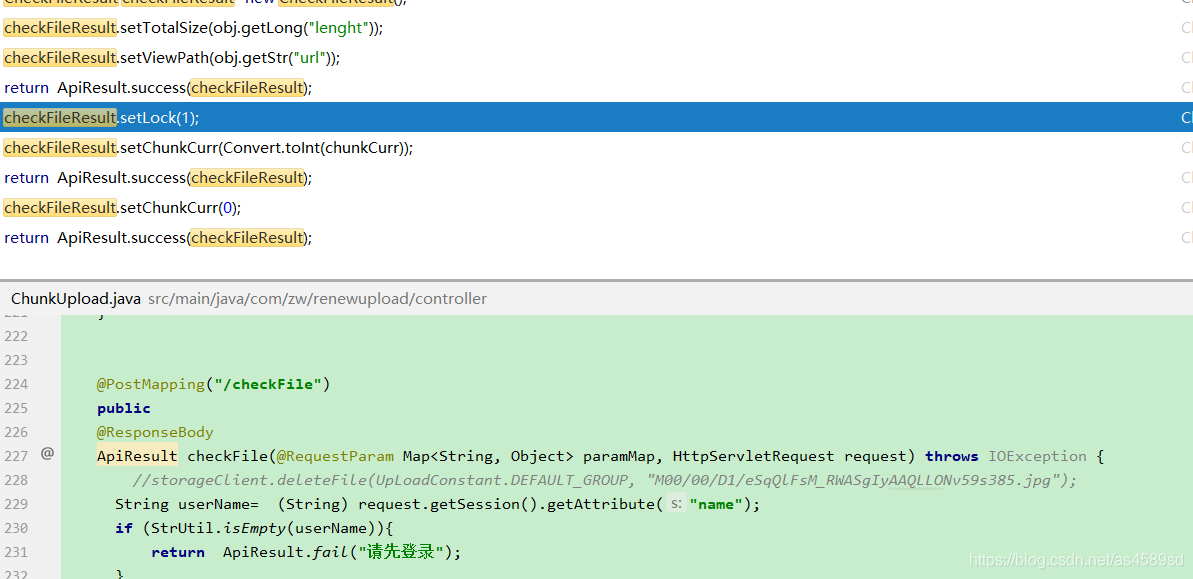
检测完文件,以后,开始上传操作
//上传操作
path = appendFileStorageClient.uploadAppenderFile(UpLoadConstant.DEFAULT_GROUP, file.getInputStream(),file.getSize(), FileUtil.extName((String) paramMap.get("name")));
//更新操作
appendFileStorageClient.modifyFile(UpLoadConstant.DEFAULT_GROUP, noGroupPath, file.getInputStream(),file.getSize(),historyUpload);hutool工具的巧妙运用
可参考hutool资料http://www.mianshigee.com/tutorial/hutool/26e24c7a37d93249.md
<dependency>
    <groupId>cn.hutool</groupId>
    <artifactId>hutool-all</artifactId>
    <version>5.0.6</version>
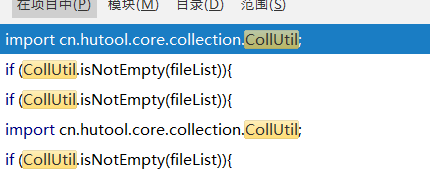
</dependency>cn.hutool.core.collection.CollUtil判断非空
cn.hutool.json.JSONObject与JSONUtil
if (CollUtil.isNotEmpty(fileList)){
            for (String e:fileList){
                JSONObject jsonObject= JSONUtil.parseObj(e);
                jsonObjects.add(jsonObject);

            }
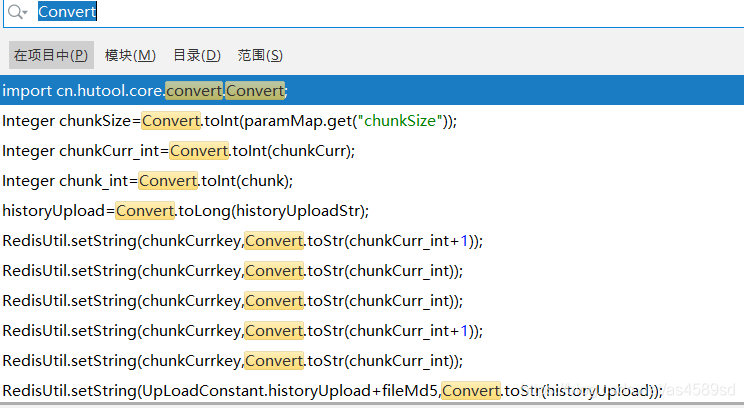
}cn.hutool.core.convert.Convert类型转换
cn.hutool.core.util.RandomUtil生成随机字符串及StrUtil判断字符为空

解析文件的扩展名,来获该文件的类型
import cn.hutool.core.io.FileUtil;
FileUtil.extName((String) paramMap.get("name")));The above is the detailed content of How to build fastdfs service and stand-alone redis service. For more information, please follow other related articles on the PHP Chinese website!

Hot AI Tools

Undresser.AI Undress
AI-powered app for creating realistic nude photos

AI Clothes Remover
Online AI tool for removing clothes from photos.

Undress AI Tool
Undress images for free

Clothoff.io
AI clothes remover

AI Hentai Generator
Generate AI Hentai for free.

Hot Article

Hot Tools

Notepad++7.3.1
Easy-to-use and free code editor

SublimeText3 Chinese version
Chinese version, very easy to use

Zend Studio 13.0.1
Powerful PHP integrated development environment

Dreamweaver CS6
Visual web development tools

SublimeText3 Mac version
God-level code editing software (SublimeText3)

Hot Topics
 1385
1385
 52
52
 How to build the redis cluster mode
Apr 10, 2025 pm 10:15 PM
Redis cluster mode deploys Redis instances to multiple servers through sharding, improving scalability and availability. The construction steps are as follows: Create odd Redis instances with different ports; Create 3 sentinel instances, monitor Redis instances and failover; configure sentinel configuration files, add monitoring Redis instance information and failover settings; configure Redis instance configuration files, enable cluster mode and specify the cluster information file path; create nodes.conf file, containing information of each Redis instance; start the cluster, execute the create command to create a cluster and specify the number of replicas; log in to the cluster to execute the CLUSTER INFO command to verify the cluster status; make
 How to clear redis data
Apr 10, 2025 pm 10:06 PM
How to clear Redis data: Use the FLUSHALL command to clear all key values. Use the FLUSHDB command to clear the key value of the currently selected database. Use SELECT to switch databases, and then use FLUSHDB to clear multiple databases. Use the DEL command to delete a specific key. Use the redis-cli tool to clear the data.
 How to use the redis command
Apr 10, 2025 pm 08:45 PM
Using the Redis directive requires the following steps: Open the Redis client. Enter the command (verb key value). Provides the required parameters (varies from instruction to instruction). Press Enter to execute the command. Redis returns a response indicating the result of the operation (usually OK or -ERR).
 How to use redis lock
Apr 10, 2025 pm 08:39 PM
Using Redis to lock operations requires obtaining the lock through the SETNX command, and then using the EXPIRE command to set the expiration time. The specific steps are: (1) Use the SETNX command to try to set a key-value pair; (2) Use the EXPIRE command to set the expiration time for the lock; (3) Use the DEL command to delete the lock when the lock is no longer needed.
 How to read redis queue
Apr 10, 2025 pm 10:12 PM
To read a queue from Redis, you need to get the queue name, read the elements using the LPOP command, and process the empty queue. The specific steps are as follows: Get the queue name: name it with the prefix of "queue:" such as "queue:my-queue". Use the LPOP command: Eject the element from the head of the queue and return its value, such as LPOP queue:my-queue. Processing empty queues: If the queue is empty, LPOP returns nil, and you can check whether the queue exists before reading the element.
 How to implement the underlying redis
Apr 10, 2025 pm 07:21 PM
Redis uses hash tables to store data and supports data structures such as strings, lists, hash tables, collections and ordered collections. Redis persists data through snapshots (RDB) and append write-only (AOF) mechanisms. Redis uses master-slave replication to improve data availability. Redis uses a single-threaded event loop to handle connections and commands to ensure data atomicity and consistency. Redis sets the expiration time for the key and uses the lazy delete mechanism to delete the expiration key.
 How to read the source code of redis
Apr 10, 2025 pm 08:27 PM
The best way to understand Redis source code is to go step by step: get familiar with the basics of Redis. Select a specific module or function as the starting point. Start with the entry point of the module or function and view the code line by line. View the code through the function call chain. Be familiar with the underlying data structures used by Redis. Identify the algorithm used by Redis.
 How to make message middleware for redis
Apr 10, 2025 pm 07:51 PM
Redis, as a message middleware, supports production-consumption models, can persist messages and ensure reliable delivery. Using Redis as the message middleware enables low latency, reliable and scalable messaging.


