What are the steps to install Redis on Linux system
I believe everyone has seen the red envelope grabbing activity of the 2021 Spring Festival Gala. According to statistics, a total of 70.3 billion red envelope interactions and 1.221 billion viewers in the Spring Festival Gala live broadcast room during the Spring Festival Gala. Faced with such a huge traffic, the test adopted by the Volcano Engine The self-developed redis system plays an important role in this.
Introduction to Redis:
Redis is completely open source, complies with the BSD protocol, and is a high-performance key-value database.
Redis and other key – value caching products have the following three characteristics:
Redis supports data persistence and can save data in memory on disk. , it can be loaded again for use when restarting.
Redis not only supports simple key-value type data, but also provides storage of data structures such as list, set, zset, and hash.
Redis supports data backup, that is, data backup in master-slave mode.
1. Environment description
1.Linux operating system
This article uses the deepin 15.7 distribution, download address: https://www.deepin .org/
2.redis installation package
This article uses redis3.0.0, download address: http://download.redis.io/releases/
3.redis Client
This article uses the open source software RedisPlus, download address: https://gitee.com/MaxBill/RedisPlus
2. Installation process
1. Download redis source code package
We use wget to download or go directly to http://download.redis.io/releases/ to download the source code package
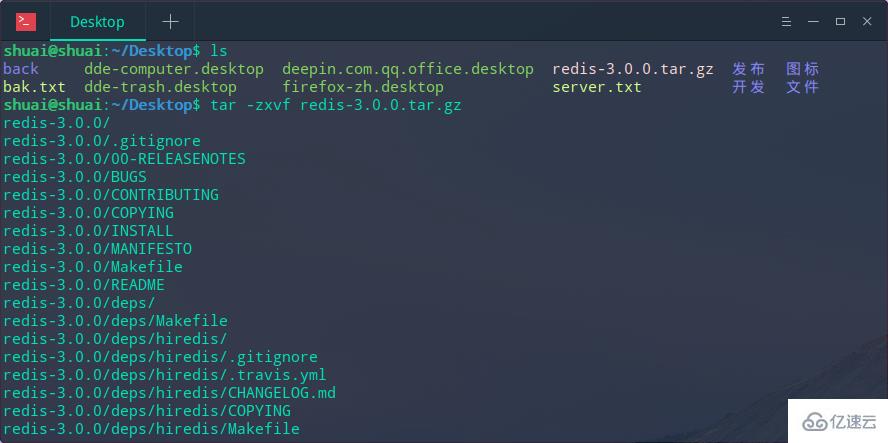
2. Unzip the redis source code package
Use the decompression tool or use the tar -zxvf command to decompress
3. Compile the redis program
What we just downloaded is the source code of redis. We need to compile it before we can use it. Enter the redis installation package directory we just decompressed and use the make command to compile
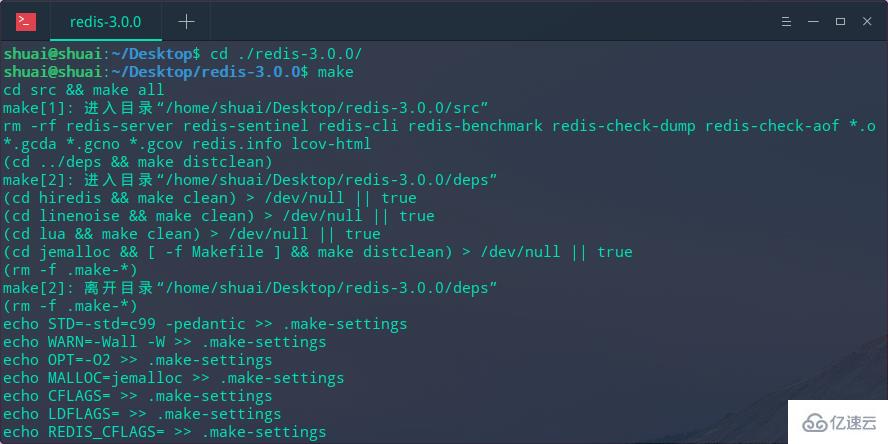
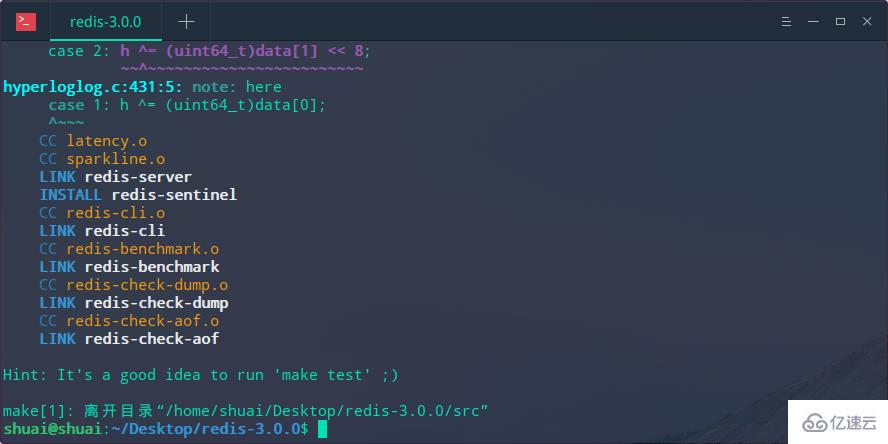
Wait for a while for the compilation process , see the following instructions and the compilation is completed
4. Install the redis program
After the compilation process is completed, it will be generated in the src directory The executable redis program is ready to be installed and used next. You can define the installation directory yourself. Here I installed it to /opt/redis/
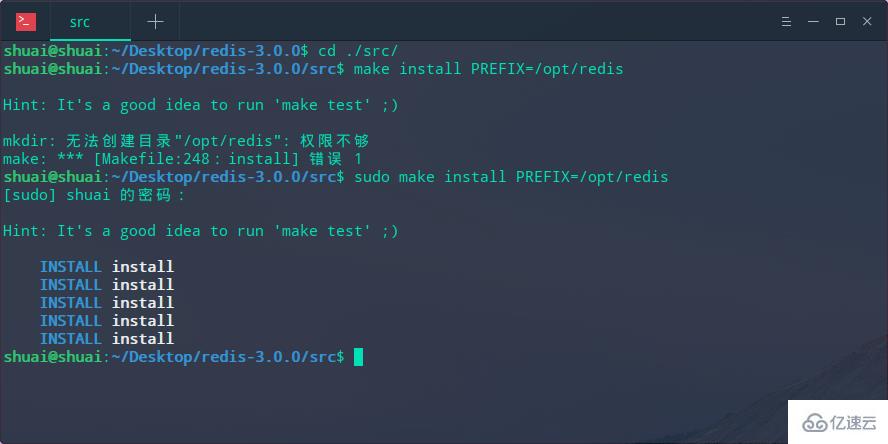
and you can see it. This is a successful installation, but it failed for the first time because the opt directory requires administrator rights. We used sudo to escalate the rights and the installation was successful.
5. Configure the redis service
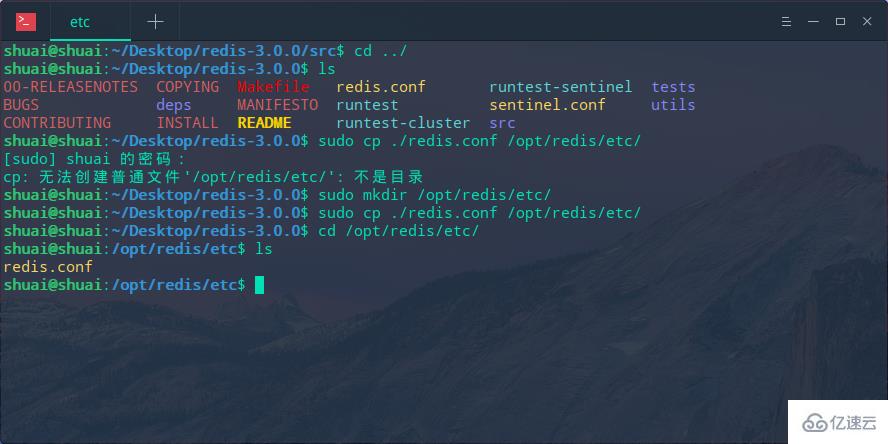
The first choice is to copy the redis.conf configuration file in the source code package to the installation directory /etc/
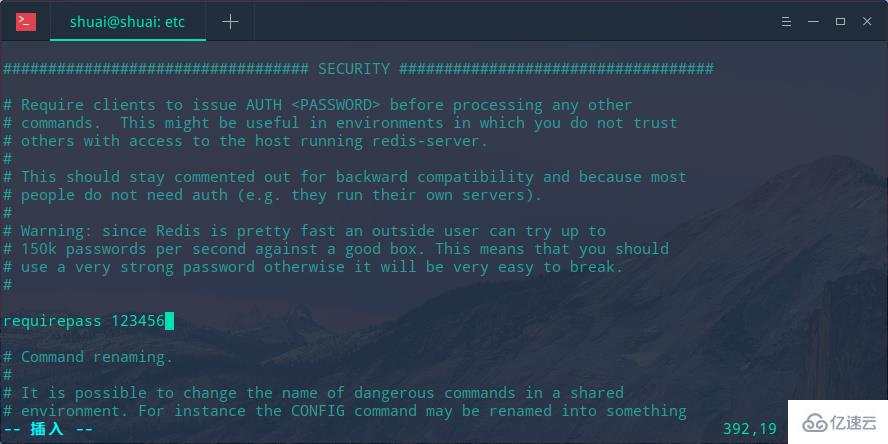
The first choice is to change the redis password and modify /opt/ The requirepass item in redis/redis.conf is commented out by default, which is empty. Here we change it to 123456
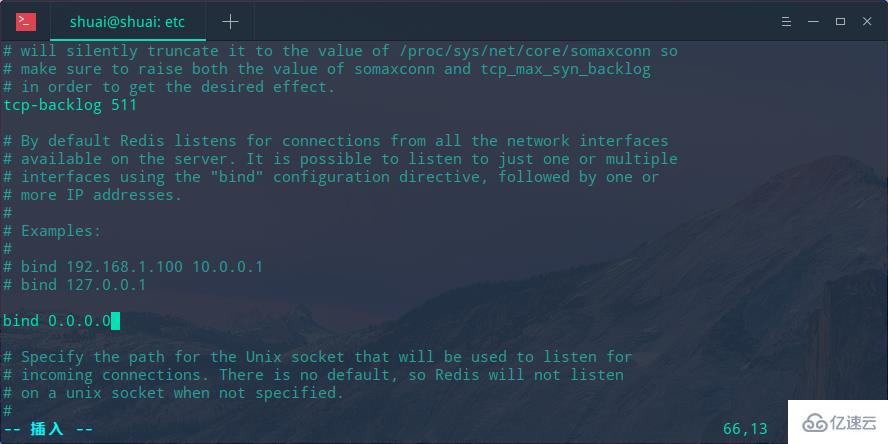
and then modify the ip access. The default is local access. To allow other hosts to access, we modify bind to 0.0.0.0
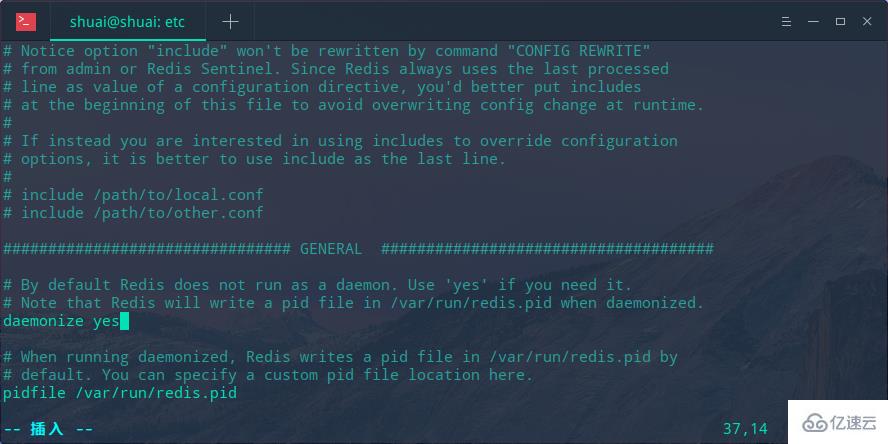
Configure redis to start the background service, modify the daemonize item, the default is no, here change to yes is the background startup mode
6. Start the redis service
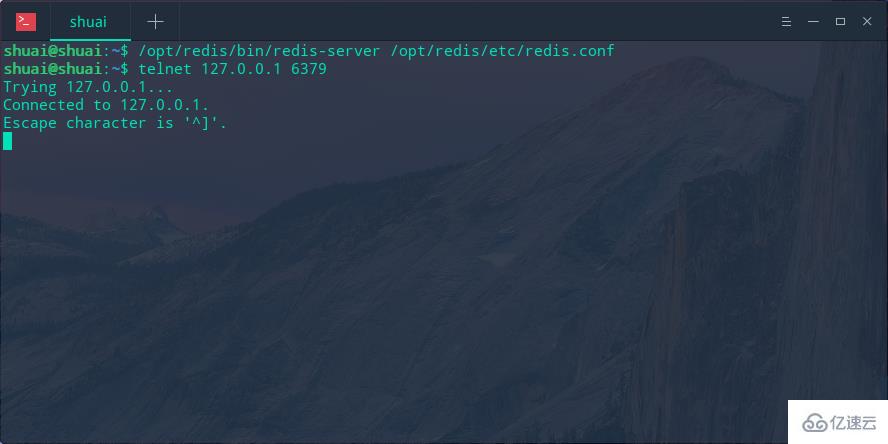
Execute /opt/redis/bin/redis-server /opt/redis/etc/redis.conf in the terminal. For convenience, we can write an sh script. After execution, we telnet 6379 and find that it has been started.
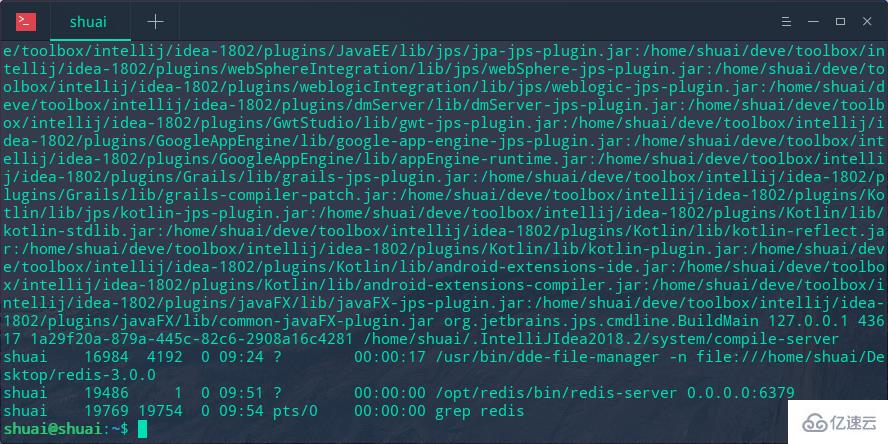
Use ps -ef | grep redis to check whether redis is started.
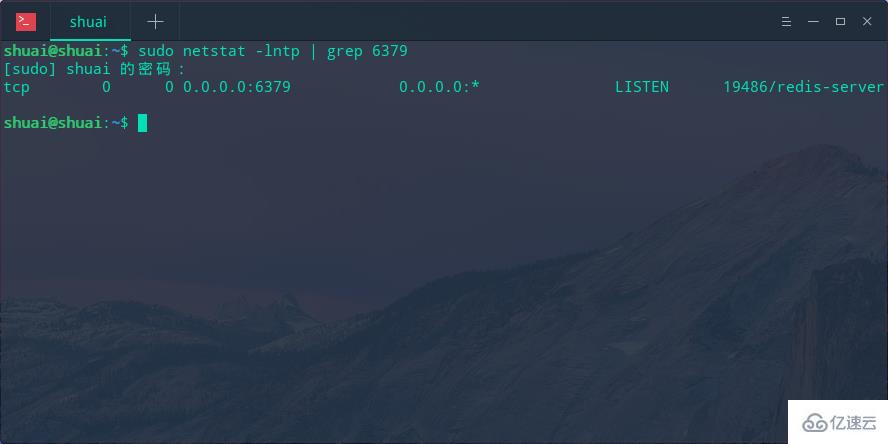
Use netstat -lntp | grep 6379 to check whether redis is started. If Yes LISTEN, indicating that the startup is normal and port 6379 is in the listening state
7. Use the RedisPlus client to connect to redis
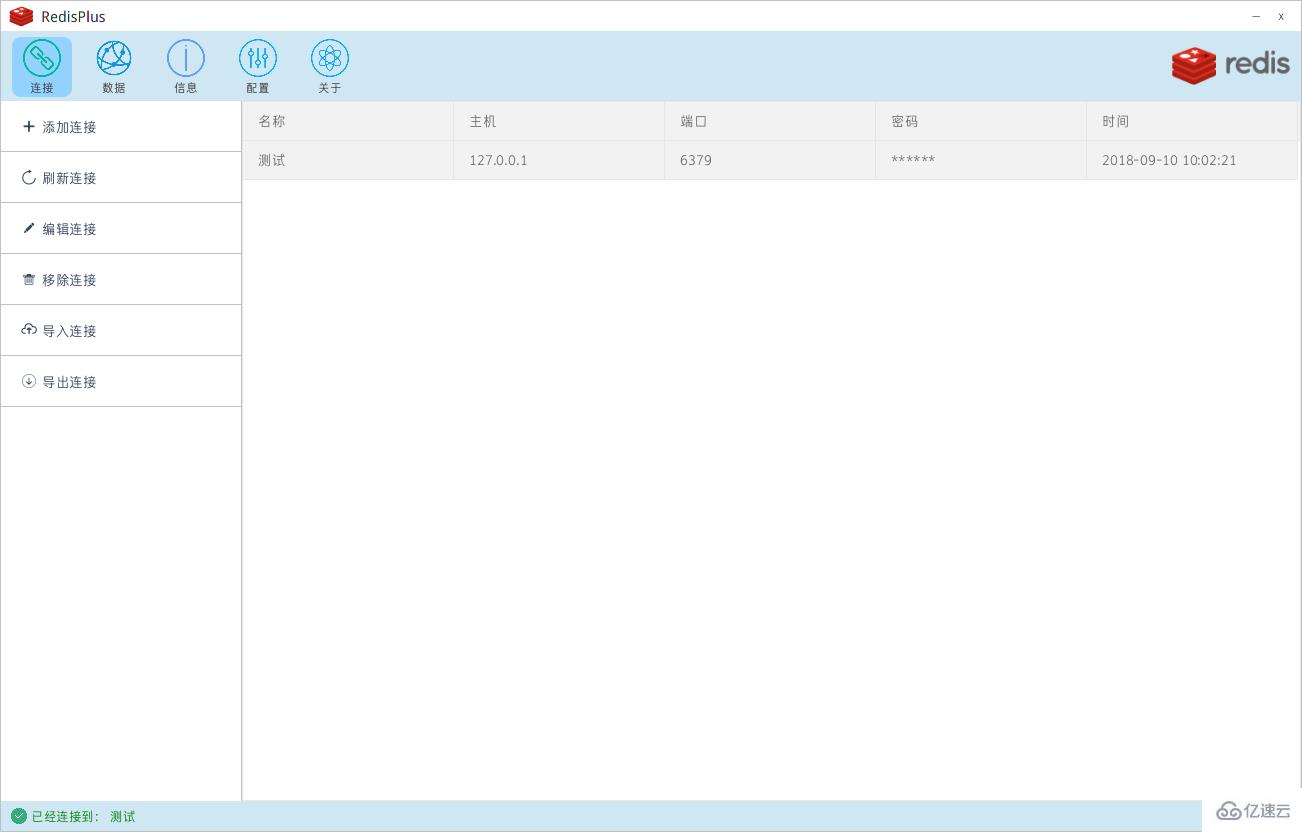
Download and install the RedisPlus client End program, click to open and add connection information:
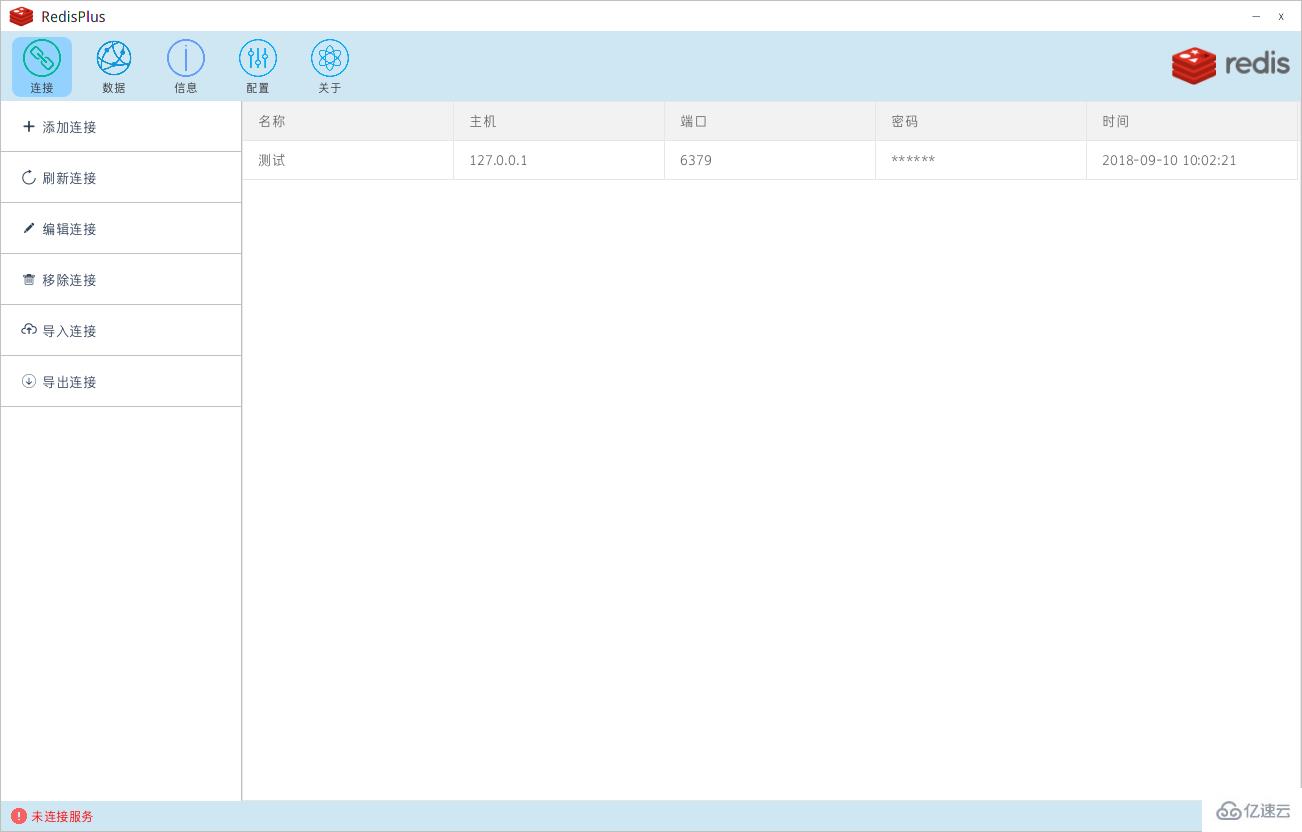
Then double-click the connection, we see that the connection is successful:
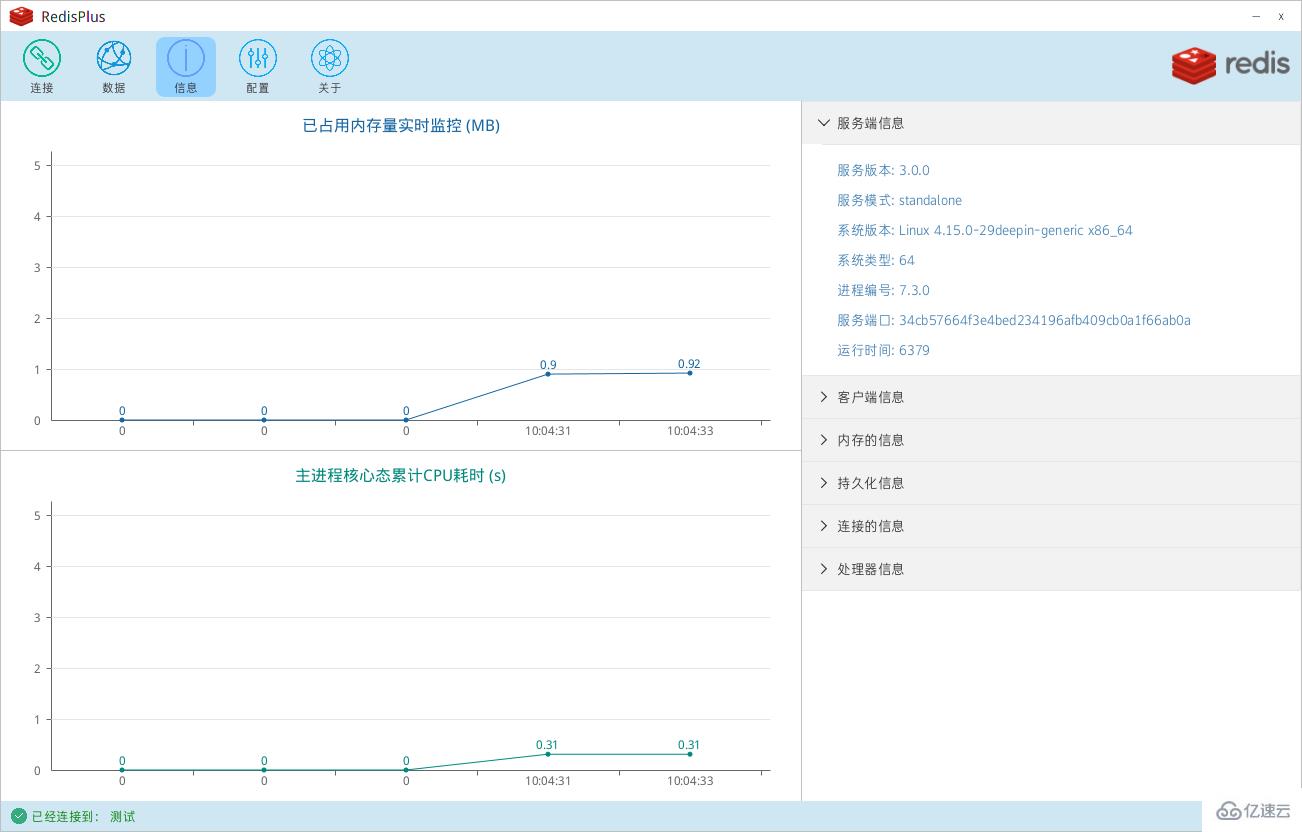
View redis data, information, configuration, etc. For the specific use of RedisPlus, see https://gitee.com/MaxBill/RedisPlus
What is a Linux system
Linux is a UNIX-like operating system that is free to use and spread freely. It is a multi-user, multi-task, multi-thread and multi-CPU operating system based on POSIX. Linux can run major Unix tool software, applications and networks. protocol.
The above is the detailed content of What are the steps to install Redis on Linux system. For more information, please follow other related articles on the PHP Chinese website!

Hot AI Tools

Undresser.AI Undress
AI-powered app for creating realistic nude photos

AI Clothes Remover
Online AI tool for removing clothes from photos.

Undress AI Tool
Undress images for free

Clothoff.io
AI clothes remover

Video Face Swap
Swap faces in any video effortlessly with our completely free AI face swap tool!

Hot Article

Hot Tools

Notepad++7.3.1
Easy-to-use and free code editor

SublimeText3 Chinese version
Chinese version, very easy to use

Zend Studio 13.0.1
Powerful PHP integrated development environment

Dreamweaver CS6
Visual web development tools

SublimeText3 Mac version
God-level code editing software (SublimeText3)

Hot Topics
 1392
1392
 52
52
 How to run java code in notepad
Apr 16, 2025 pm 07:39 PM
Although Notepad cannot run Java code directly, it can be achieved by using other tools: using the command line compiler (javac) to generate a bytecode file (filename.class). Use the Java interpreter (java) to interpret bytecode, execute the code, and output the result.
 What is the main purpose of Linux?
Apr 16, 2025 am 12:19 AM
The main uses of Linux include: 1. Server operating system, 2. Embedded system, 3. Desktop operating system, 4. Development and testing environment. Linux excels in these areas, providing stability, security and efficient development tools.
 How to use VSCode
Apr 15, 2025 pm 11:21 PM
Visual Studio Code (VSCode) is a cross-platform, open source and free code editor developed by Microsoft. It is known for its lightweight, scalability and support for a wide range of programming languages. To install VSCode, please visit the official website to download and run the installer. When using VSCode, you can create new projects, edit code, debug code, navigate projects, expand VSCode, and manage settings. VSCode is available for Windows, macOS, and Linux, supports multiple programming languages and provides various extensions through Marketplace. Its advantages include lightweight, scalability, extensive language support, rich features and version
 vscode Previous Next Shortcut Key
Apr 15, 2025 pm 10:51 PM
VS Code One-step/Next step shortcut key usage: One-step (backward): Windows/Linux: Ctrl ←; macOS: Cmd ←Next step (forward): Windows/Linux: Ctrl →; macOS: Cmd →
 How to switch Chinese mode with vscode
Apr 15, 2025 pm 11:39 PM
VS Code To switch Chinese mode: Open the settings interface (Windows/Linux: Ctrl, macOS: Cmd,) Search for "Editor: Language" settings Select "Chinese" in the drop-down menu Save settings and restart VS Code
 How to set shortcut keys for sublime
Apr 16, 2025 am 09:15 AM
To set the shortcut keys for Sublime Text, follow these steps: Open the shortcut key settings file Key Bindings - User. Add shortcut key settings using the format { "keys": ["key combination"], "command": "command" }. Save changes. Reload the shortcut key settings for the changes to take effect.
 How to check the warehouse address of git
Apr 17, 2025 pm 01:54 PM
To view the Git repository address, perform the following steps: 1. Open the command line and navigate to the repository directory; 2. Run the "git remote -v" command; 3. View the repository name in the output and its corresponding address.
 How to set important Git configuration global properties
Apr 17, 2025 pm 12:21 PM
There are many ways to customize a development environment, but the global Git configuration file is one that is most likely to be used for custom settings such as usernames, emails, preferred text editors, and remote branches. Here are the key things you need to know about global Git configuration files.


