

How Redis implements master-slave replication

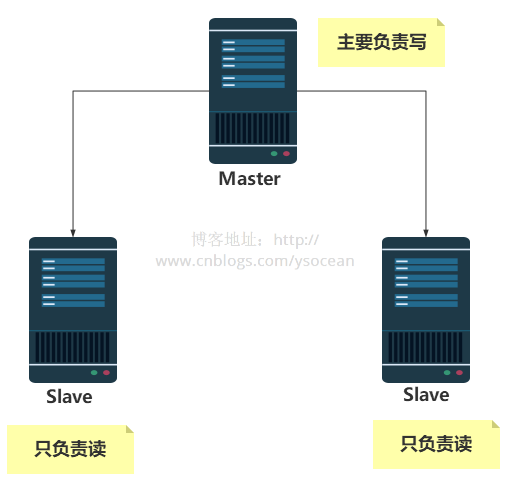
Introducing Redis earlier, we all operate on a server, which means that reading, writing and backup operations are all performed on a Redis server. As the number of project visits increases, the Redis server Operations are also becoming more frequent. Although Redis is very fast in reading and writing, it will also cause a certain delay to a certain extent. In order to solve the problem of large access volume, one method usually adopted is the master-slave architecture Master/ Slave and Master are mainly for writing, and Slave is mainly for reading. After the Master node is updated, it will automatically synchronize to the slave Slave node according to the configuration.
Next we will introduce how to build a master-slave architecture.
ps: Here I am simulating multiple Redis servers on one machine. Compared with the actual production environment, the basic configuration is the same, only the IP address and port number change.
1. Modify the configuration file
First, copy the redis.conf configuration file into three copies and simulate three Redis servers by modifying the ports.

Then we modify these three redis.conf files respectively.
①、Modify daemonize yes

Indicates that the specified Redis will be started as a daemon process (background startup)
②. Configure the PID file path pidfile

Indicates that when redis is running as a daemon process, it will write the pid to /var/redis by default In the /run/redis_6379.pid file
③、Configure port port

④、Configure log file name

⑤、Configure the rdb file name

Change 6380redis.conf, 6381Redis.conf is configured once, and the configuration is complete.
Next we start these three services respectively.

Use the command to check whether Redis is started:

Next, enter the three Redis clients through the following commands Terminal:
|
1 2 3 |
|
2. Set the master-slave relationship
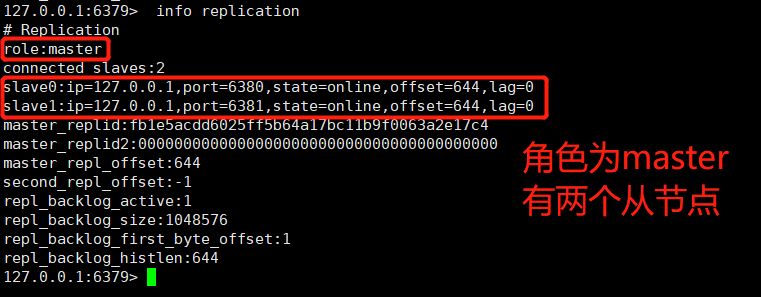
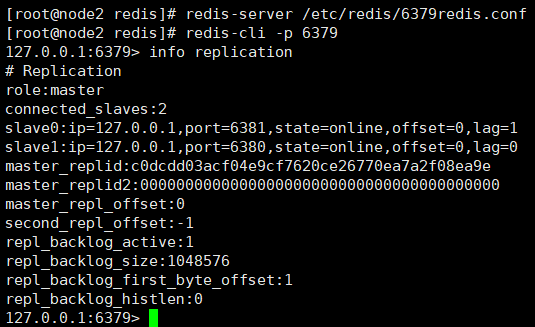
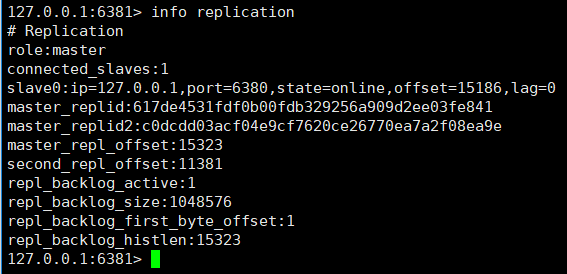
①、View the node role through the info replication command
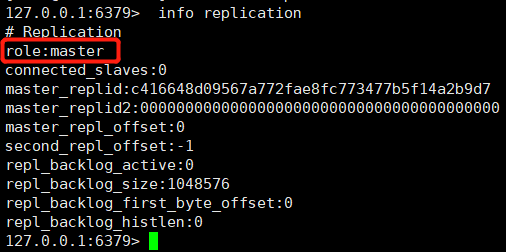

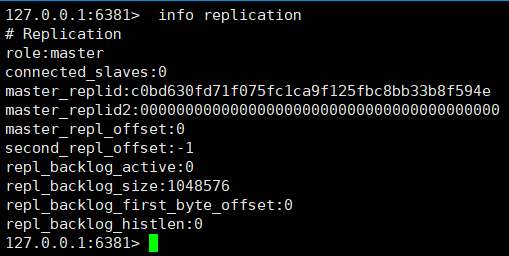
We found that these three nodes all play the role of Master. How to convert nodes 6380 and 6381 to slave node role?
②. Select port 6380 and port 6381 and execute the command: SLAVEOF 127.0.0.1 6379
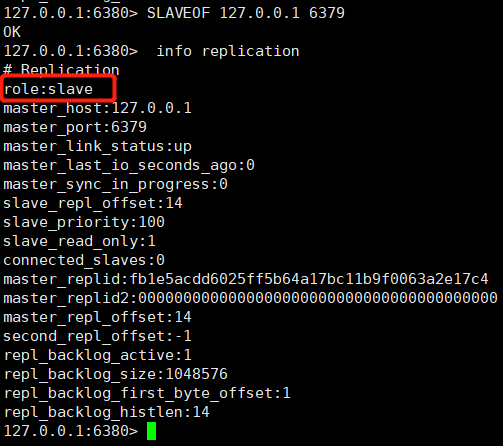

Let’s look at the 6379 node information:
Once the service is restarted, the master-slave relationship previously set through the command will become invalid. This relationship can be permanently saved by configuring the redis.conf file.
3. Test the master-slave relationship
①.Incremental replication
The master node executes the set k1 v1 command. Can the slave node get k1? ?
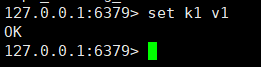
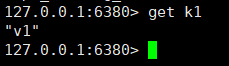
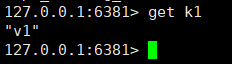
It can be seen from the picture above that it can be obtained.
②、Full copy
By executing SLAVEOF 127.0.0.1 6379, if there are still some keys before the master node 6379, then after executing the command, the slave node will copy the previous Have you copied all the information?
The answer is yes, I won’t post the test results here.
③. Master-slave read and write separation
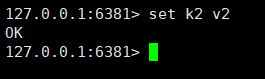
Can the master node execute write commands, and can the slave node execute write commands?

The reason here is the configuration of slave-read-only in the configuration file 6381redis.conf
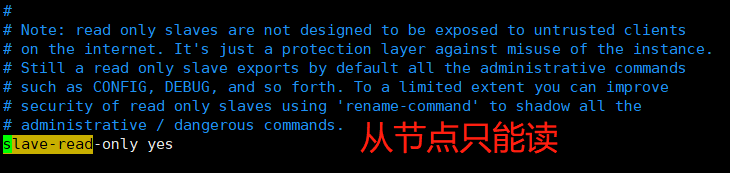
If After we change it to no, it is possible to execute the write command.
But the data of the slave node write command cannot be obtained from the slave node or the master node.
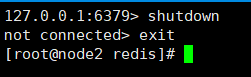
④. Master node downtime
If the master node Master hangs up, will the roles of the two slave nodes change?
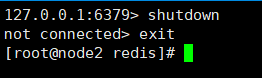
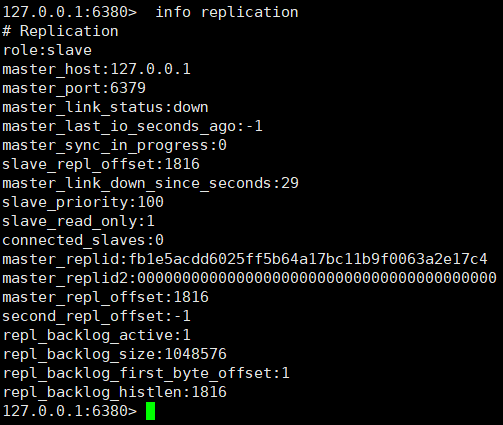
It can be seen from the above figure that after the master node Master hangs up, the role of the slave node will not change.
⑤. Recovery after the master node goes down
After the master node Master hangs up, start the host Master immediately. Does the master node still play the role of Master?
That is to say, after the master node hangs up, it restarts and resumes its role as the master node.
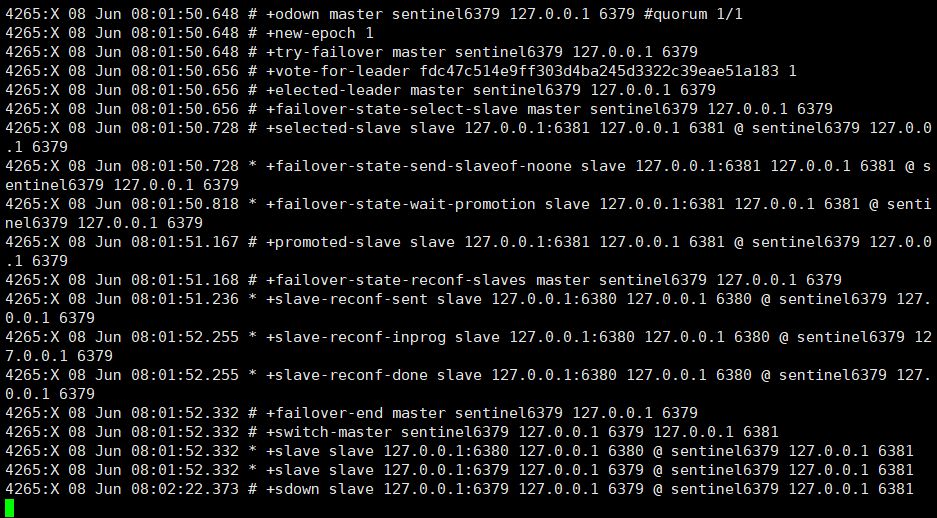
4. Sentinel Mode
Through the previous configuration, there is only one master node Master. Once the master node hangs up, the slave node cannot take on the task of the master node, and the entire system cannot run. The sentinel mode was born from this, because the slave node can automatically take over the responsibilities of the master node, solving the problem of master node downtime.
The sentry mode is to monitor whether redis is running well as expected from time to time (at least to ensure that the master node exists). If there is a problem with a host, the sentry will automatically remove a slave machine under the host. Set it as a new host and let other slaves establish a master-slave relationship with the new host.

Steps to build sentinel mode:
①Create a new sentinel.conf file in the configuration file directory. The name must not be wrong, and then configure the corresponding content

1 |
|

Configure the monitored name, IP address, port number, and number of votes respectively. When the master machine goes down, the slave machine needs to vote to decide who will take over as the master machine. When the number of votes reaches 1, it is not enough to become the master machine. It must exceed 1 to become the master machine.
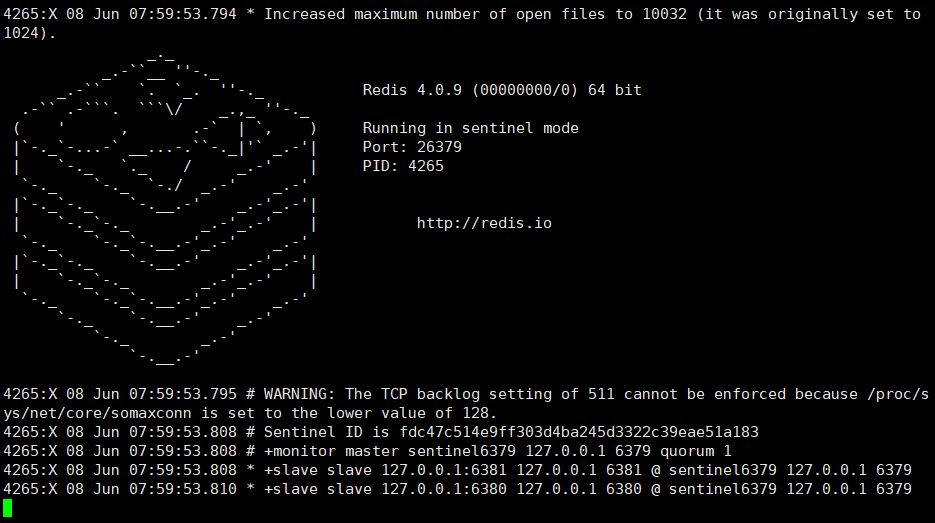
②. Start the sentinel
1 |
##redis-sentinel /etc/redis/sentinel.conf |
The above is the detailed content of How Redis implements master-slave replication. For more information, please follow other related articles on the PHP Chinese website!

Hot AI Tools

Undresser.AI Undress
AI-powered app for creating realistic nude photos

AI Clothes Remover
Online AI tool for removing clothes from photos.

Undress AI Tool
Undress images for free

Clothoff.io
AI clothes remover

AI Hentai Generator
Generate AI Hentai for free.

Hot Article
Hot Tools

Notepad++7.3.1
Easy-to-use and free code editor

SublimeText3 Chinese version
Chinese version, very easy to use

Zend Studio 13.0.1
Powerful PHP integrated development environment

Dreamweaver CS6
Visual web development tools

SublimeText3 Mac version
God-level code editing software (SublimeText3)
Hot Topics
 1378
1378
 52
52

 How to build the redis cluster mode
Apr 10, 2025 pm 10:15 PM
How to build the redis cluster mode
Apr 10, 2025 pm 10:15 PM
Redis cluster mode deploys Redis instances to multiple servers through sharding, improving scalability and availability. The construction steps are as follows: Create odd Redis instances with different ports; Create 3 sentinel instances, monitor Redis instances and failover; configure sentinel configuration files, add monitoring Redis instance information and failover settings; configure Redis instance configuration files, enable cluster mode and specify the cluster information file path; create nodes.conf file, containing information of each Redis instance; start the cluster, execute the create command to create a cluster and specify the number of replicas; log in to the cluster to execute the CLUSTER INFO command to verify the cluster status; make
 How to use the redis command
Apr 10, 2025 pm 08:45 PM
How to use the redis command
Apr 10, 2025 pm 08:45 PM
Using the Redis directive requires the following steps: Open the Redis client. Enter the command (verb key value). Provides the required parameters (varies from instruction to instruction). Press Enter to execute the command. Redis returns a response indicating the result of the operation (usually OK or -ERR).
 How to use single threaded redis
Apr 10, 2025 pm 07:12 PM
How to use single threaded redis
Apr 10, 2025 pm 07:12 PM
Redis uses a single threaded architecture to provide high performance, simplicity, and consistency. It utilizes I/O multiplexing, event loops, non-blocking I/O, and shared memory to improve concurrency, but with limitations of concurrency limitations, single point of failure, and unsuitable for write-intensive workloads.
 How to read the source code of redis
Apr 10, 2025 pm 08:27 PM
How to read the source code of redis
Apr 10, 2025 pm 08:27 PM
The best way to understand Redis source code is to go step by step: get familiar with the basics of Redis. Select a specific module or function as the starting point. Start with the entry point of the module or function and view the code line by line. View the code through the function call chain. Be familiar with the underlying data structures used by Redis. Identify the algorithm used by Redis.
 How to clear redis data
Apr 10, 2025 pm 10:06 PM
How to clear redis data
Apr 10, 2025 pm 10:06 PM
How to clear Redis data: Use the FLUSHALL command to clear all key values. Use the FLUSHDB command to clear the key value of the currently selected database. Use SELECT to switch databases, and then use FLUSHDB to clear multiple databases. Use the DEL command to delete a specific key. Use the redis-cli tool to clear the data.
 How to view all keys in redis
Apr 10, 2025 pm 07:15 PM
How to view all keys in redis
Apr 10, 2025 pm 07:15 PM
To view all keys in Redis, there are three ways: use the KEYS command to return all keys that match the specified pattern; use the SCAN command to iterate over the keys and return a set of keys; use the INFO command to get the total number of keys.
 How to read redis queue
Apr 10, 2025 pm 10:12 PM
How to read redis queue
Apr 10, 2025 pm 10:12 PM
To read a queue from Redis, you need to get the queue name, read the elements using the LPOP command, and process the empty queue. The specific steps are as follows: Get the queue name: name it with the prefix of "queue:" such as "queue:my-queue". Use the LPOP command: Eject the element from the head of the queue and return its value, such as LPOP queue:my-queue. Processing empty queues: If the queue is empty, LPOP returns nil, and you can check whether the queue exists before reading the element.
 How to start the server with redis
Apr 10, 2025 pm 08:12 PM
How to start the server with redis
Apr 10, 2025 pm 08:12 PM
The steps to start a Redis server include: Install Redis according to the operating system. Start the Redis service via redis-server (Linux/macOS) or redis-server.exe (Windows). Use the redis-cli ping (Linux/macOS) or redis-cli.exe ping (Windows) command to check the service status. Use a Redis client, such as redis-cli, Python, or Node.js, to access the server.
