 Database
 Mysql Tutorial
 How to implement the mysql operation of navicat connecting to Ubuntu virtual machine
How to implement the mysql operation of navicat connecting to Ubuntu virtual machine
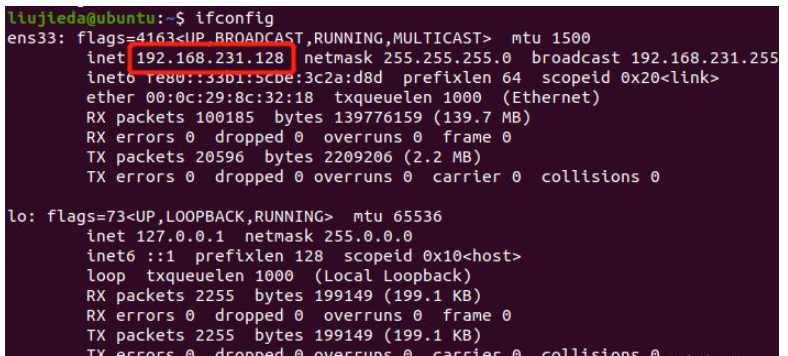
1. Check the ip of the virtual machine
Open the terminal in the virtual machine and enter the command
ifconfig

2. Authorize mysql remote access
Enter the command in the terminal (the configuration file may have a slightly different path due to different versions)
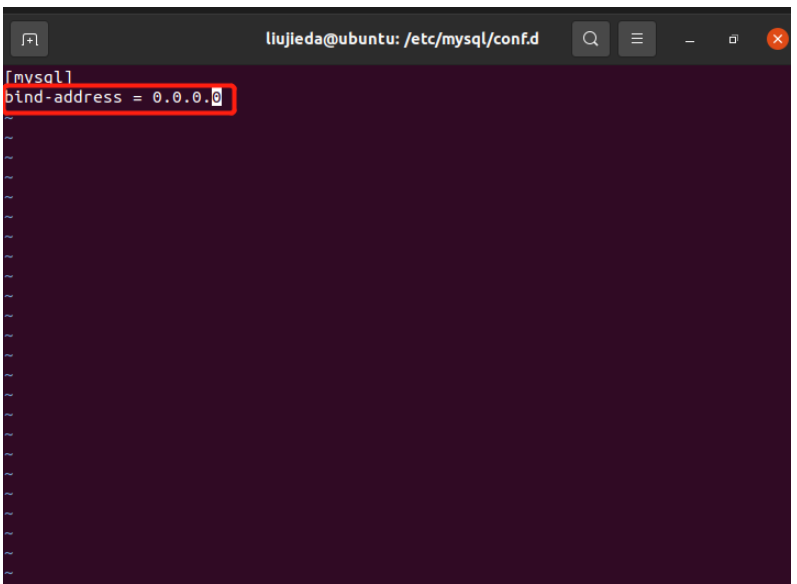
sudo vim /etc/mysql/conf.d/mysql.cnf
Type "i" to start editing, modify bind-address = 0.0.0.0 (set to be accessible externally, If set to 127.0.0.1, it can only be accessed locally.)

esc key to exit editing, enter ":wq" to save and exit.
Then log in to MySQL to change permissions
mysql - uroot -p
GRANT ALL PRIVILEGES ON *.* TO 'root'@'%' IDENTIFIED BY 'passwrd' WITH GRANT OPTION;
FLUSH PRIVILEGES;
# 退出登录MySQL
exit;
# 重启服务器
service mysql restart
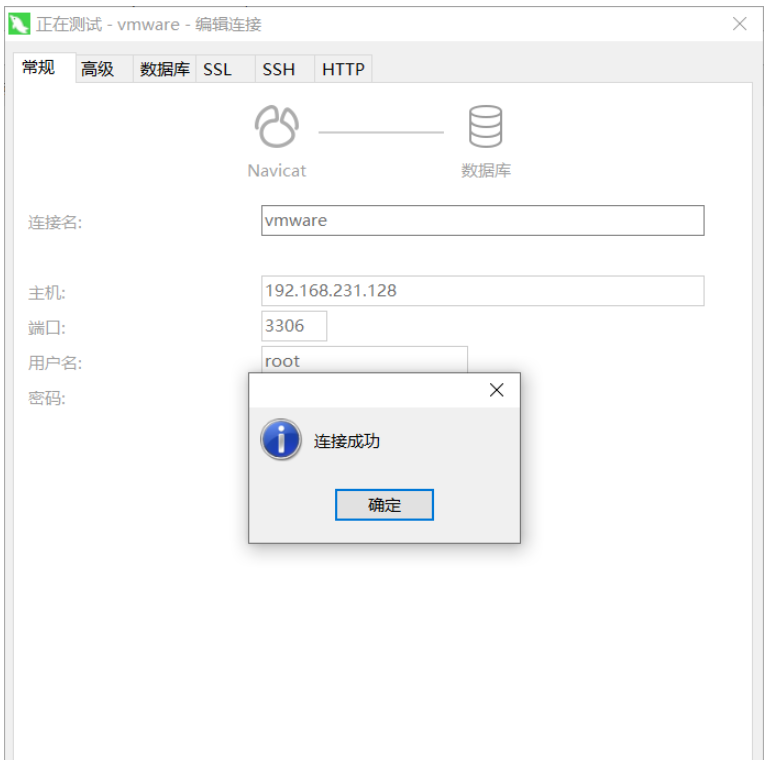
3. Access through navicat

Supplement: Navicat connects to mysql in the virtual machine
The following sql means to add permissions to the root user whose password is 000000
GRANT ALL PRIVILEGES ON *.* TO 'root'@'%' IDENTIFIED BY '000000' WITH GRANT OPTION;
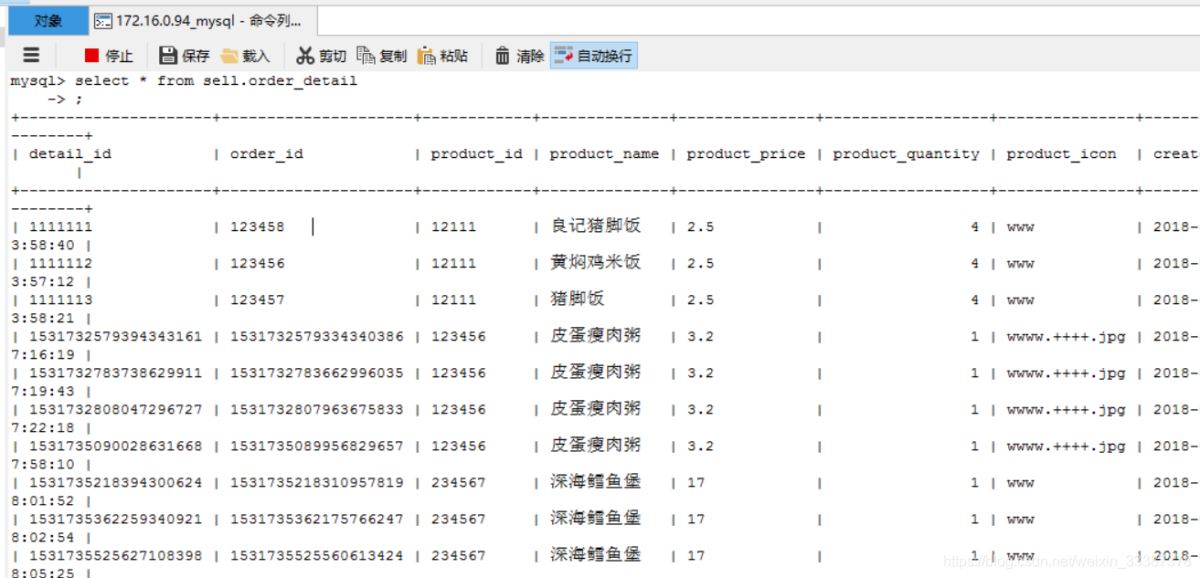
Navicat connects to the mysql command line

The above is the detailed content of How to implement the mysql operation of navicat connecting to Ubuntu virtual machine. For more information, please follow other related articles on the PHP Chinese website!

Hot AI Tools

Undresser.AI Undress
AI-powered app for creating realistic nude photos

AI Clothes Remover
Online AI tool for removing clothes from photos.

Undress AI Tool
Undress images for free

Clothoff.io
AI clothes remover

AI Hentai Generator
Generate AI Hentai for free.

Hot Article

Hot Tools

Notepad++7.3.1
Easy-to-use and free code editor

SublimeText3 Chinese version
Chinese version, very easy to use

Zend Studio 13.0.1
Powerful PHP integrated development environment

Dreamweaver CS6
Visual web development tools

SublimeText3 Mac version
God-level code editing software (SublimeText3)

Hot Topics
 1371
1371
 52
52
 How to use navicat keygen patch
Apr 09, 2025 am 07:18 AM
Navicat Keygen Patch is a key generator that activates Navicat Premium, allowing you to use the full functionality of the software without purchasing a license. How to use: 1) Download and install Keygen Patch; 2) Start Navicat Premium; 3) Generate the serial number and activation code; 4) Copy the key; 5) Activate Navicat Premium, and Navicat Premium can be activated.
 MySQL: The Ease of Data Management for Beginners
Apr 09, 2025 am 12:07 AM
MySQL is suitable for beginners because it is simple to install, powerful and easy to manage data. 1. Simple installation and configuration, suitable for a variety of operating systems. 2. Support basic operations such as creating databases and tables, inserting, querying, updating and deleting data. 3. Provide advanced functions such as JOIN operations and subqueries. 4. Performance can be improved through indexing, query optimization and table partitioning. 5. Support backup, recovery and security measures to ensure data security and consistency.
 How to create stored procedures with navicat
Apr 08, 2025 pm 11:36 PM
You can use Navicat to create a stored procedure, the steps are as follows: Open the database object list and expand the "Procedures" node. Right-click the Procedures node and select Create Procedure. Enter the stored procedure name and body and set the parameters (if required). Select Compile in the File menu to compile the stored procedure. By executing a query or using "E in the "Procedures" list
 How to create a new connection to mysql in navicat
Apr 09, 2025 am 07:21 AM
You can create a new MySQL connection in Navicat by following the steps: Open the application and select New Connection (Ctrl N). Select "MySQL" as the connection type. Enter the hostname/IP address, port, username, and password. (Optional) Configure advanced options. Save the connection and enter the connection name.
 How to Chineseize navicat
Apr 08, 2025 pm 11:30 PM
Navicat Chineseization method: Download the corresponding Chinese version patch and back up the original file; copy the Chinese version patch to the Navicat installation directory to overwrite the original file; restart Navicat; verify whether the menu, options, and prompts have been Chinese versioned.
 How to generate sql query statement in navicat
Apr 08, 2025 pm 11:39 PM
To generate SQL query statements using Navicat, perform the following steps: Connect to the database. Select the lookup table. Open the query builder. Select the query type. Set query conditions. Adjust sorting, grouping, and summarizing. Gets and executes the generated SQL query statement.
 How to view fields in navicat
Apr 08, 2025 pm 11:45 PM
To view database fields through Navicat: 1. Connect to the database; 2. Select the database; 3. Select the table; 4. View field information in the "Fields" tab, such as name, data type, length, primary key, etc.
 How to view table notes in navicat
Apr 09, 2025 am 06:00 AM
How to view table notes in Navicat: Connect to the database and navigate to the target table. Switch to the Notes tab. Check whether there is any table notes.


