

How to use Nginx web server caddy

Introduction to Caddy
Caddy is a powerful, highly scalable web server that has currently gained 38K Stars on GitHub. Caddy is written in Go language and can be used for static resource hosting and reverse proxy.
Caddy has the following main features:
Compared with Nginx’s complex configuration, its original Caddyfile configuration is very simple;
The configuration can be dynamically modified through the Admin API it provides;
supports automated HTTPS configuration by default, and can automatically apply for HTTPS certificates and configure them;
Can be expanded to tens of thousands of sites;
can be executed anywhere, with no additional dependencies;
is written in Go language , memory security is more guaranteed.
Installation
First of all, we install Caddy directly on CentOS 8. Installation using the DNF tool is undoubtedly the simplest. The Docker installation method will be introduced later.
Use the following command to install Caddy through the DNF tool. After successful installation, Caddy will be registered as a system service;
dnf install 'dnf-command(copr)'
dnf copr enable @caddy/caddy
dnf install caddy
Use systemctl status caddy to check the status of Caddy. You can find that Caddy has been registered as a system service. service, but it is not enabled yet.

Usage
Let’s experience the basic use of Caddy. They are common operations for web servers. You can definitely use them!
Basic usage
Let us try to use Caddy to get started, specifying that Caddy runs on the 2015 port and returns the "Hello, world!" message.
Using the caddy command directly will output the common commands of Caddy. Basically, you will know how to use it by reading the introduction. The common commands are marked;
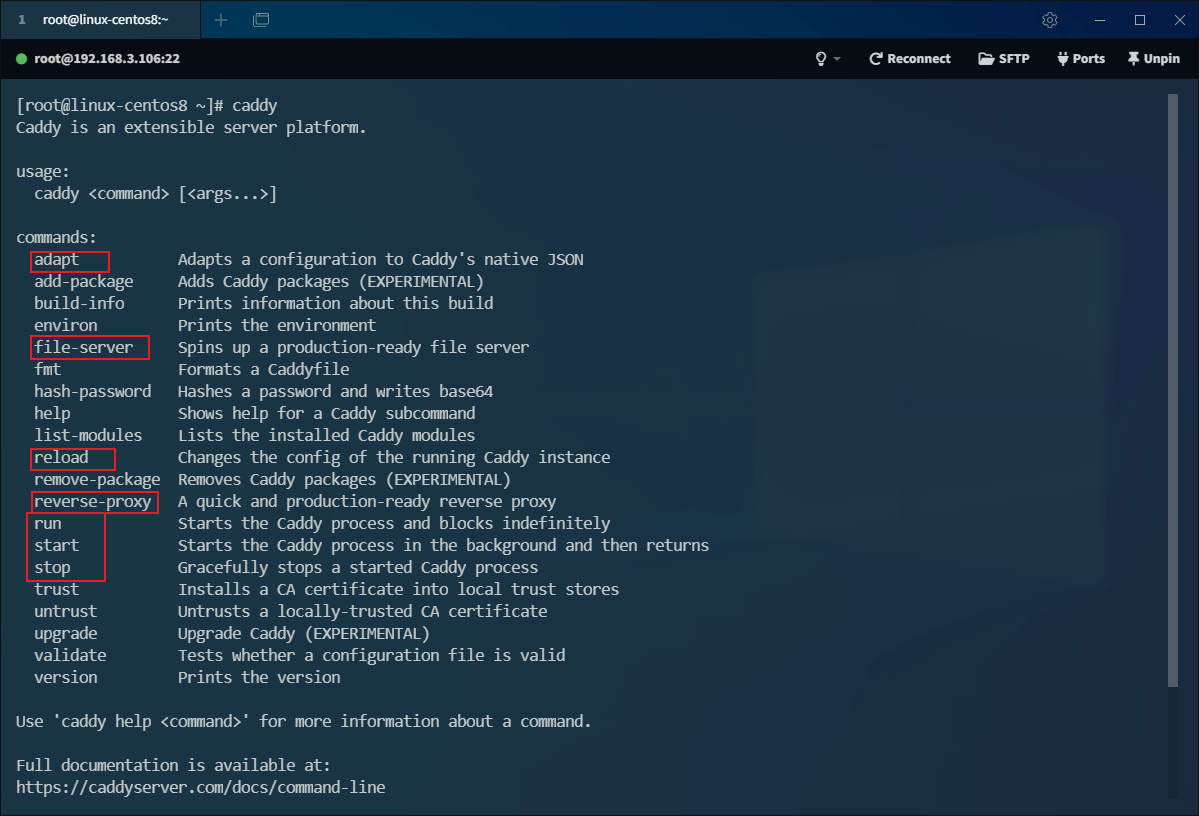
Use caddy The start command allows the Caddy service to run in the background;

Caddy uses the JSON format configuration file by default. However, since it is more troublesome to write the JSON format configuration, Caddyfile is also provided. Simple configuration form, use the following command to automatically convert Caddyfile into JSON configuration;
caddy adapter
We can first create a file named Caddyfile with the following content, and then use caddy adapter to convert it into JSON configuration, Then use caddy reload to make the configuration effective. The configuration will listen to the 2015 port and return Hello, world!;
:2015

respond "Hello, world!"
Then we use the curl command to access localhost:2015 and the specified information will be returned;

Of course we can also use the Admin API provided by Caddy to view the configuration information, just use the following command;
curl localhost:2019/config/
The current JSON configuration is as follows, if you use JSON configuration directly You need to write the following configuration, using Caddyfile is indeed much more convenient!
{
	"apps": {
		"http": {
			"servers": {
				"srv0": {
					"listen": [":2015"],
					"routes": [{
						"handle": [{
							"body": "Hello, world!",
							"handler": "static_response"
						}]
					}]
				}
			}
		}
	}
}Basic syntax of Caddyfile
The following case will use Caddyfile for configuration. We need to understand its syntax. The specific syntax rules of Caddyfile are as follows.
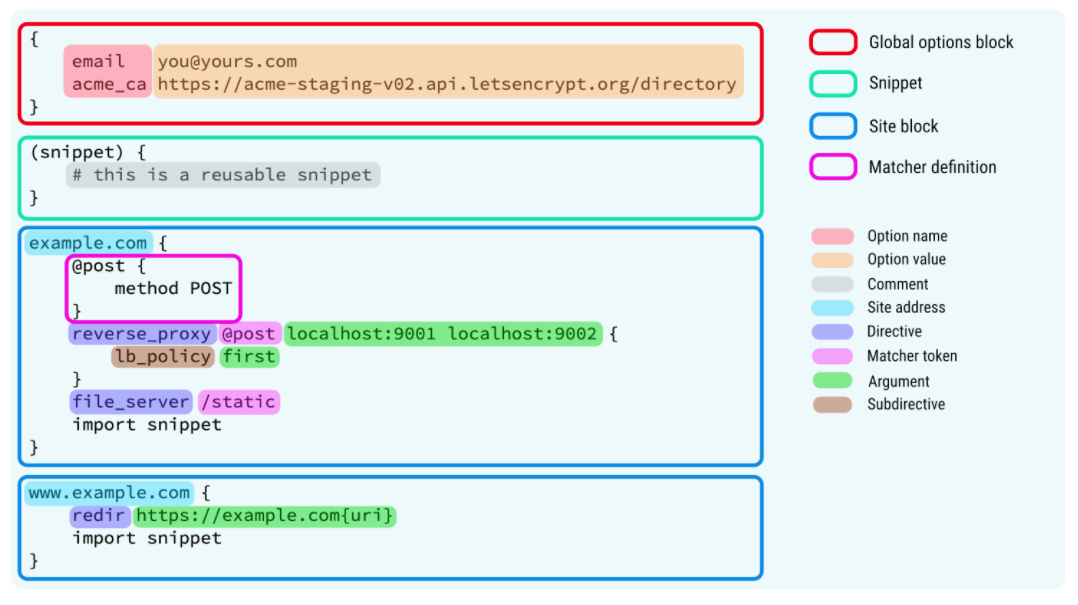
Introduce the keywords in the above picture to help understanding.
| Keyword | Explanation | Use |
|---|---|---|
| Global options block | Server global configuration | Can be used to configure whether to enable HTTPS and Admin API, etc. |
| Snippet | Reusable configuration snippets | After definition, it can be referenced through the import keyword |
| Site Block | Single website configuration | Static proxy can be configured through file_server and reverse_proxy Dynamic agents can be configured |
| Matcher definition | Match definition | By default the directive will have a global impact, through which the scope of influence can be specified |
| Comment | Comment | Use the # symbol starting with |
| Site address | Website address | HTTPS is used by default. If you need to enable HTTP, you need to specify the |
| Directive | directive | directive given at the beginning of http:// Caddy’s powerful features |
反向代理
反向代理就是当请求访问你的代理服务器时,代理服务器会对你的请求进行转发,可以转发到静态的资源路径上去,也可以转发到动态的服务接口上去。我们以代理域名为例,讲解如何进行静态和动态代理。
静态代理
静态代理就是将请求代理到不同的静态资源路径上去,这里我们将对docs.macrozheng.com的请求代理到我的文档项目中,对mall.macrozheng.com的请求代理到mall的前端项目中。
首先我们修改下本机的host文件:
192.168.3.106 docs.macrozheng.com
192.168.3.106 mall.macrozheng.com
然后将我们的文档项目和mall前端项目上传到Caddy的html目录中去,并进行解压操作:
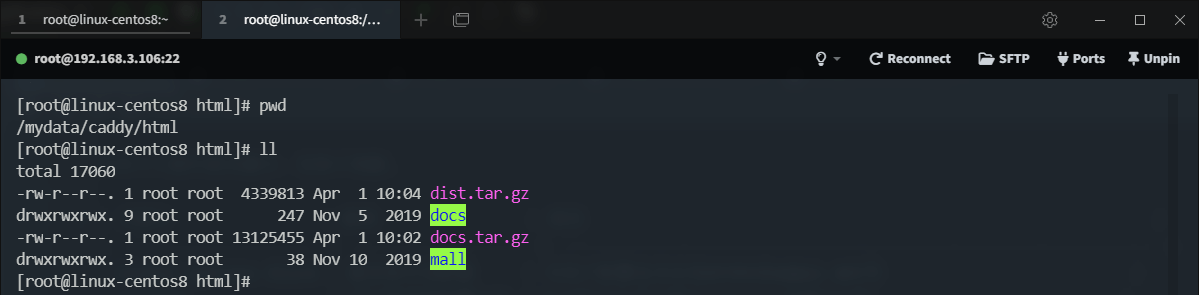
修改Caddyfile文件,使用如下配置,修改完成后使用caddy reload命令刷新配置;
http://docs.macrozheng.com {
        root * /mydata/caddy/html/docs
        file_server browse
}

http://mall.macrozheng.com {
        root * /mydata/caddy/html/mall
        file_server browse
}如果你的Caddyfile文件格式不太合格的话,会出现如下警告,直接使用caddy fmt --overwrite格式化并重写配置即可解决;

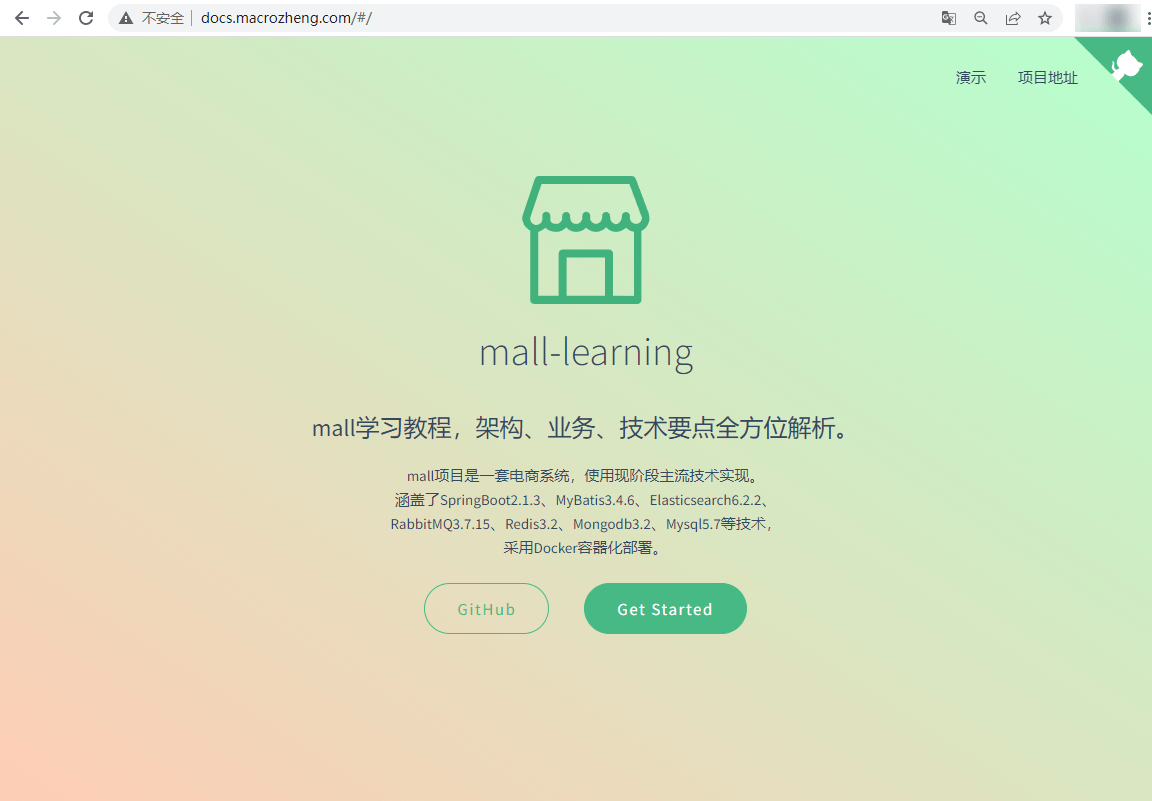
通过docs.macrozheng.com即可访问部署好的文档项目了:
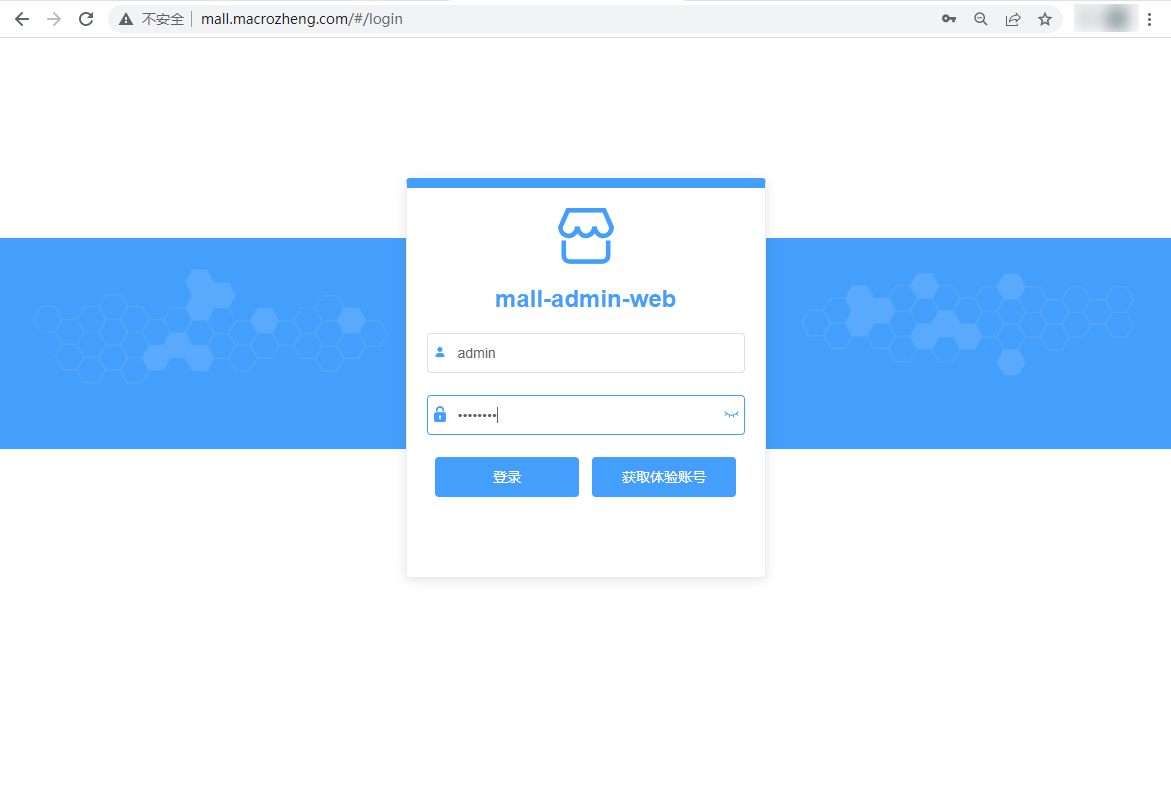
通过mall.macrozheng.com即可访问到部署好的前端项目了。
动态代理
动态代理就是把代理服务器的请求转发到另一个服务上去,这里我们将把对api.macrozheng.com的请求代理到演示环境的API服务上去。
首先我们修改下本机的host文件,添加如下规则
192.168.3.106 api.macrozheng.com
修改Caddyfile文件,使用如下配置,修改完成后使用caddy reload命令刷新配置;
http://api.macrozheng.com {
        reverse_proxy http://admin-api.macrozheng.com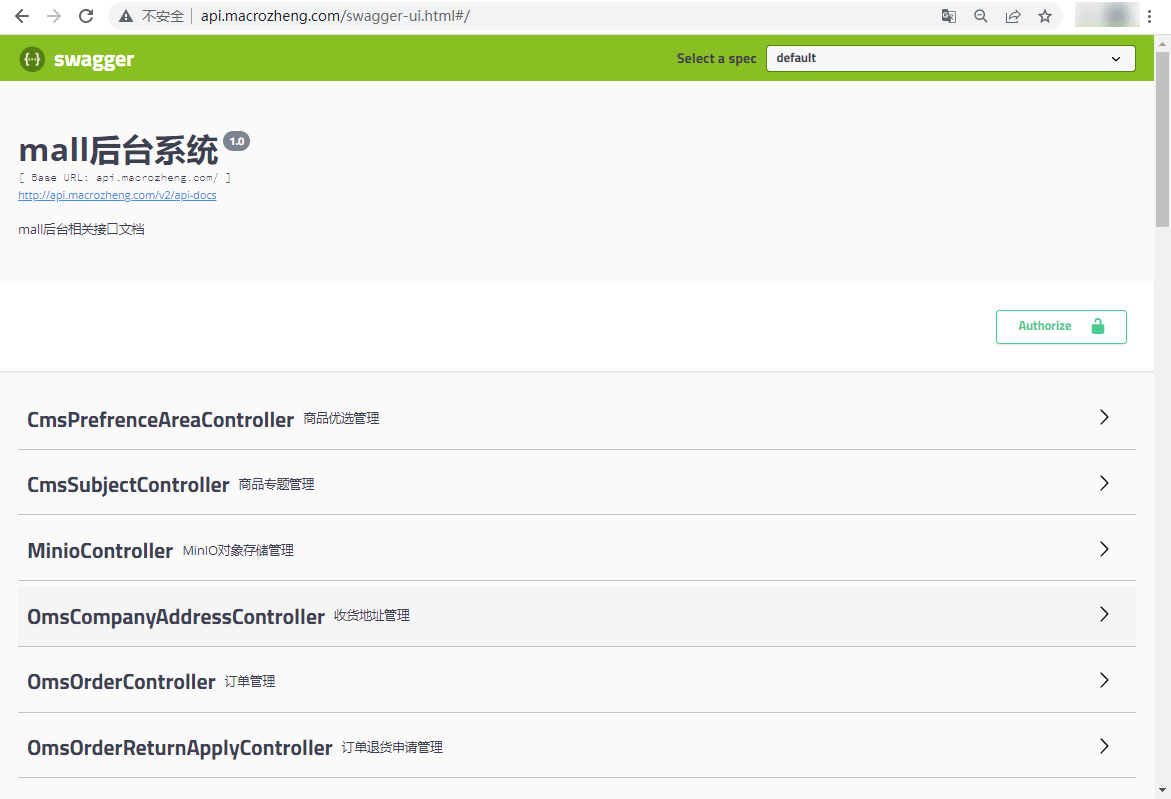
}之后通过api.macrozheng.com/swagger-ui.html即可访问到mall-admin的API文档页面了。
文件压缩
如果我们的服务器带宽比较低,网站访问速度会很慢,这时我们可以通过让Caddy开启Gzip压缩来提高网站的访问速度。这里我们以mall的前端项目为例来演示下它的提速效果。
我们需要修改Caddyfile文件,使用encode指令开启Gzip压缩,修改完成后使用caddy reload命令刷新配置;
http://mall.macrozheng.com {
        root * /mydata/caddy/html/mall
        encode {
            gzip
        }
        file_server browse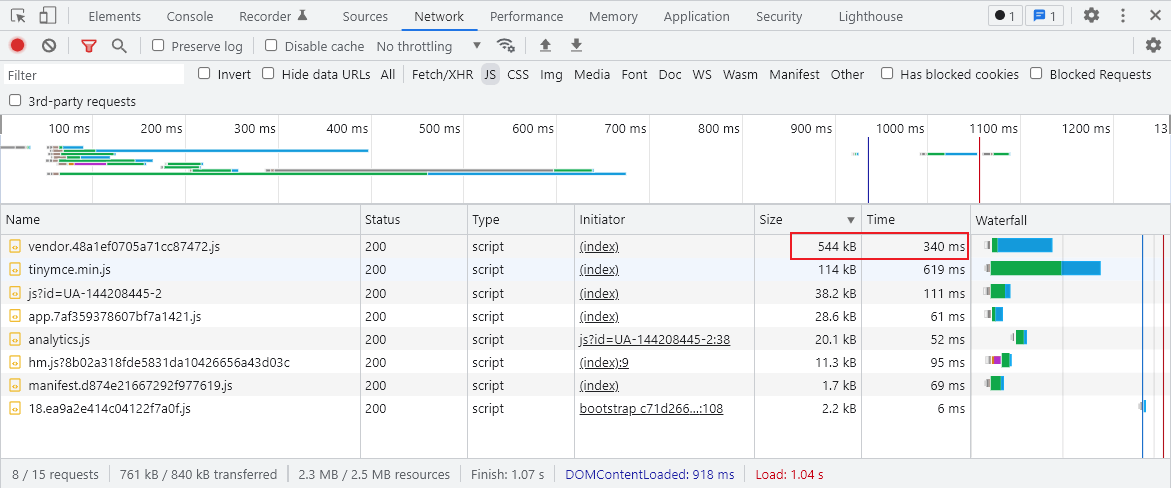
}有个比较大的JS文件压缩前是1.7M;

压缩后为544K,访问速度也有很大提示;
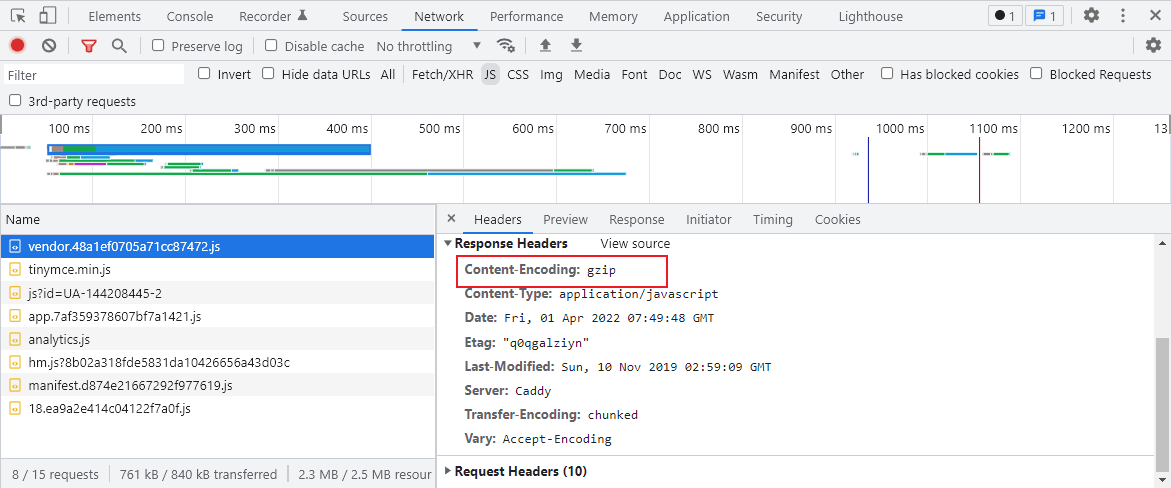
另外我们可以看下响应信息,如果有Content-Encoding: gzip这个响应头表明Gzip压缩已经启用了。
地址重写
有的时候我们的网站更换了域名,但还有用户在使用老的域名访问,这时可以通过Caddy的地址重写功能来让用户跳转到新的域名进行访问。
我们需要修改Caddyfile文件,使用redir指令重写地址,修改完成后使用caddy reload命令刷新配置;
http://docs.macrozheng.com {
        redir http://www.macrozheng.com
}此时访问旧域名docs.macrozheng.com会直接跳转到www.macrozheng.com去。
按目录划分
有时候我们需要使用同一个域名来访问不同的前端项目,这时候就需要通过子目录来区分前端项目了。
比如说我们需要按以下路径来访问各个前端项目;
www.macrozheng.com #访问文档项目
www.macrozheng.com/admin #访问后台项目
www.macrozheng.com/app #访问移动端项目
我们需要修改Caddyfile文件,使用route指令定义路由,修改完成后使用caddy reload命令刷新配置。
http://www.macrozheng.com {
        route /admin/* {
                uri strip_prefix /admin
                file_server {
                        root /mydata/caddy/html/admin
                }
        }
        route /app/* {
                uri strip_prefix /app
                file_server {
                        root /mydata/caddy/html/app
                }
        }
        file_server * {
                root /mydata/caddy/html/www
        }
}HTTPS
Caddy能自动支持HTTPS,无需手动配置证书,这就是之前我们在配置域名时需要使用http://开头的原因,要想使用Caddy默认的HTTPS功能,按如下步骤操作即可。
首先我们需要修改域名的DNS解析,直接在购买域名的网站上设置即可,这里以docs.macrozheng.com域名为例;
请使用以下命令确认DNS解析记录是否正确,注意所配置的服务器的80和443端口需要在外网中可以正常访问:
curl "https://cloudflare-dns.com/dns-query?name=docs.macrozheng.com&type=A" \
  -H "accept: application/dns-json"
修改Caddyfile配置文件,进行如下配置;
docs.macrozheng.com {
        root * /mydata/caddy/html/docs
        file_server browse
}然后使用caddy run命令启动Caddy服务器即可,是不是非常方便!
caddy run
Docker支持
当然Caddy也是支持使用Docker进行安装使用的,其使用和直接在CentOS上安装基本一致。
首先使用如下命令下载Caddy的Docker镜像;
docker pull caddy
然后在/mydata/caddy/目录下创建Caddyfile配置文件,文件内容如下;
http://192.168.3.105:80

respond "Hello, world!"
之后使用如下命令启动caddy服务,这里将宿主机上的Caddyfile配置文件、Caddy的数据目录和网站目录挂载到了容器中;
docker run -p 80:80 -p 443:443 --name caddy \
    -v /mydata/caddy/Caddyfile:/etc/caddy/Caddyfile \
    -v /mydata/caddy/data:/data \
    -v /mydata/caddy/html:/usr/share/caddy \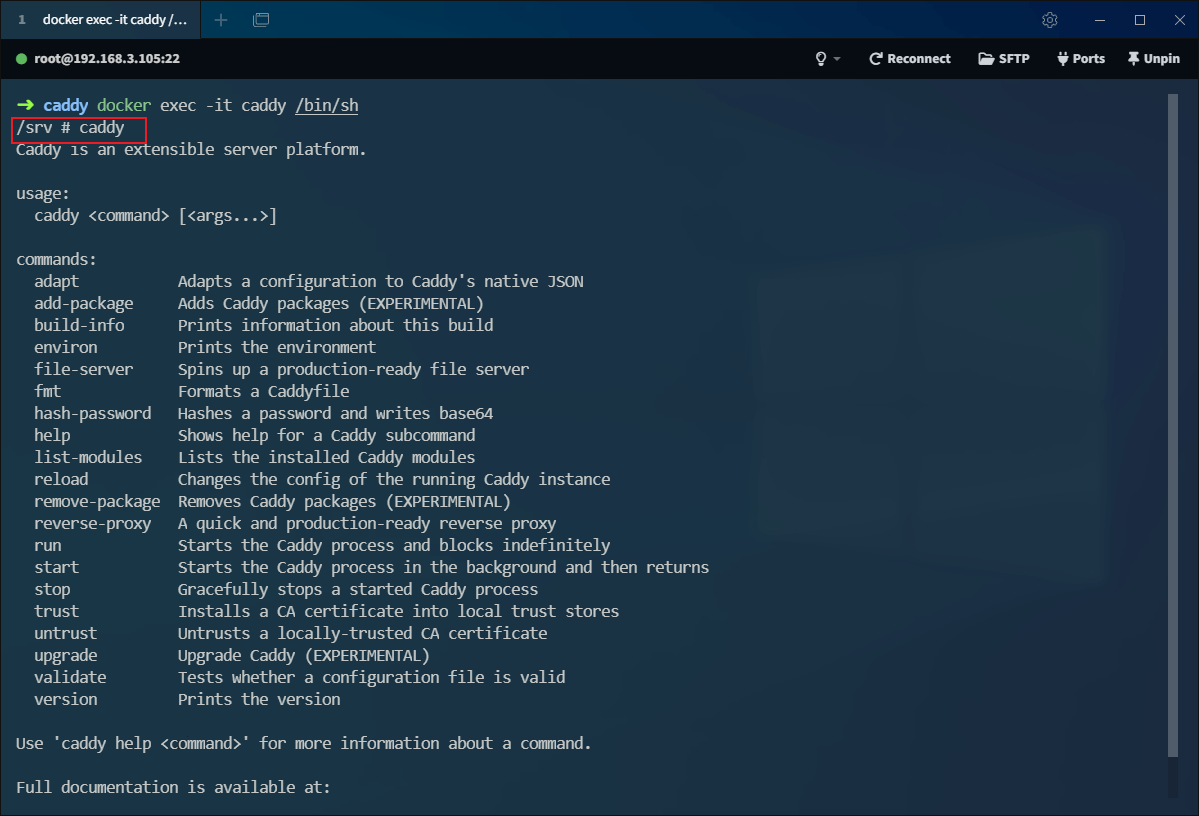
-d caddy之后使用docker exec进入caddy容器内部执行命令;
docker exec -it caddy /bin/sh
输入Caddy命令即可操作,之后的操作就和我们直接在CentOS上安装一样了。
The above is the detailed content of How to use Nginx web server caddy. For more information, please follow other related articles on the PHP Chinese website!

Hot AI Tools

Undresser.AI Undress
AI-powered app for creating realistic nude photos

AI Clothes Remover
Online AI tool for removing clothes from photos.

Undress AI Tool
Undress images for free

Clothoff.io
AI clothes remover

AI Hentai Generator
Generate AI Hentai for free.

Hot Article
Hot Tools

Notepad++7.3.1
Easy-to-use and free code editor

SublimeText3 Chinese version
Chinese version, very easy to use

Zend Studio 13.0.1
Powerful PHP integrated development environment

Dreamweaver CS6
Visual web development tools

SublimeText3 Mac version
God-level code editing software (SublimeText3)
Hot Topics
 1376
1376
 52
52

 How to allow external network access to tomcat server
Apr 21, 2024 am 07:22 AM
How to allow external network access to tomcat server
Apr 21, 2024 am 07:22 AM
To allow the Tomcat server to access the external network, you need to: modify the Tomcat configuration file to allow external connections. Add a firewall rule to allow access to the Tomcat server port. Create a DNS record pointing the domain name to the Tomcat server public IP. Optional: Use a reverse proxy to improve security and performance. Optional: Set up HTTPS for increased security.
 How to run thinkphp
Apr 09, 2024 pm 05:39 PM
How to run thinkphp
Apr 09, 2024 pm 05:39 PM
Steps to run ThinkPHP Framework locally: Download and unzip ThinkPHP Framework to a local directory. Create a virtual host (optional) pointing to the ThinkPHP root directory. Configure database connection parameters. Start the web server. Initialize the ThinkPHP application. Access the ThinkPHP application URL and run it.
 Welcome to nginx!How to solve it?
Apr 17, 2024 am 05:12 AM
Welcome to nginx!How to solve it?
Apr 17, 2024 am 05:12 AM
To solve the "Welcome to nginx!" error, you need to check the virtual host configuration, enable the virtual host, reload Nginx, if the virtual host configuration file cannot be found, create a default page and reload Nginx, then the error message will disappear and the website will be normal show.
 How to generate URL from html file
Apr 21, 2024 pm 12:57 PM
How to generate URL from html file
Apr 21, 2024 pm 12:57 PM
Converting an HTML file to a URL requires a web server, which involves the following steps: Obtain a web server. Set up a web server. Upload HTML file. Create a domain name. Route the request.
 How to deploy nodejs project to server
Apr 21, 2024 am 04:40 AM
How to deploy nodejs project to server
Apr 21, 2024 am 04:40 AM
Server deployment steps for a Node.js project: Prepare the deployment environment: obtain server access, install Node.js, set up a Git repository. Build the application: Use npm run build to generate deployable code and dependencies. Upload code to the server: via Git or File Transfer Protocol. Install dependencies: SSH into the server and use npm install to install application dependencies. Start the application: Use a command such as node index.js to start the application, or use a process manager such as pm2. Configure a reverse proxy (optional): Use a reverse proxy such as Nginx or Apache to route traffic to your application
 Can nodejs be accessed from the outside?
Apr 21, 2024 am 04:43 AM
Can nodejs be accessed from the outside?
Apr 21, 2024 am 04:43 AM
Yes, Node.js can be accessed from the outside. You can use the following methods: Use Cloud Functions to deploy the function and make it publicly accessible. Use the Express framework to create routes and define endpoints. Use Nginx to reverse proxy requests to Node.js applications. Use Docker containers to run Node.js applications and expose them through port mapping.
 How to deploy and maintain a website using PHP
May 03, 2024 am 08:54 AM
How to deploy and maintain a website using PHP
May 03, 2024 am 08:54 AM
To successfully deploy and maintain a PHP website, you need to perform the following steps: Select a web server (such as Apache or Nginx) Install PHP Create a database and connect PHP Upload code to the server Set up domain name and DNS Monitoring website maintenance steps include updating PHP and web servers, and backing up the website , monitor error logs and update content.
 How to use Fail2Ban to protect your server from brute force attacks
Apr 27, 2024 am 08:34 AM
How to use Fail2Ban to protect your server from brute force attacks
Apr 27, 2024 am 08:34 AM
An important task for Linux administrators is to protect the server from illegal attacks or access. By default, Linux systems come with well-configured firewalls, such as iptables, Uncomplicated Firewall (UFW), ConfigServerSecurityFirewall (CSF), etc., which can prevent a variety of attacks. Any machine connected to the Internet is a potential target for malicious attacks. There is a tool called Fail2Ban that can be used to mitigate illegal access on the server. What is Fail2Ban? Fail2Ban[1] is an intrusion prevention software that protects servers from brute force attacks. It is written in Python programming language
