 Database
 Mysql Tutorial
 How SpringBoot connects to MySQL to obtain data and write back-end interface
How SpringBoot connects to MySQL to obtain data and write back-end interface
1. Create a new project

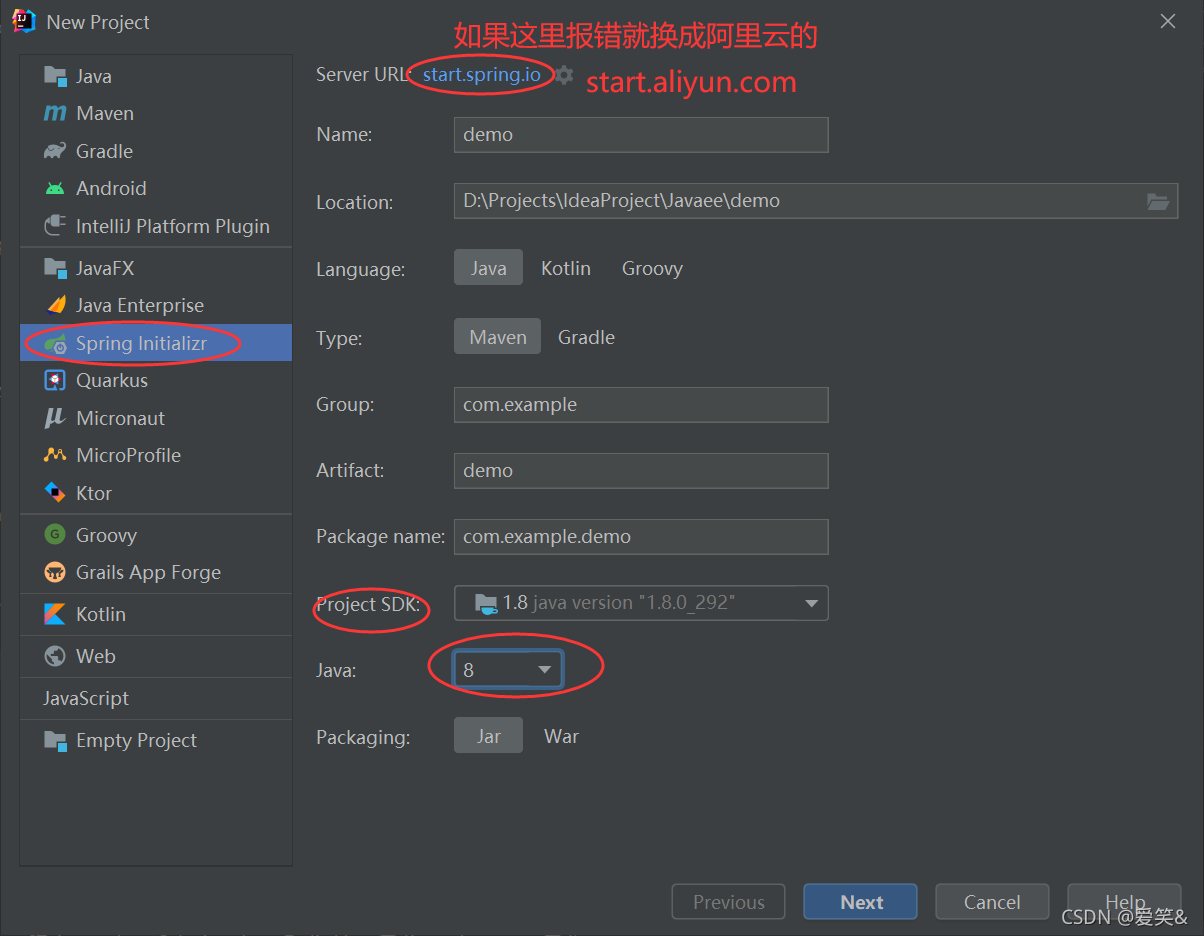
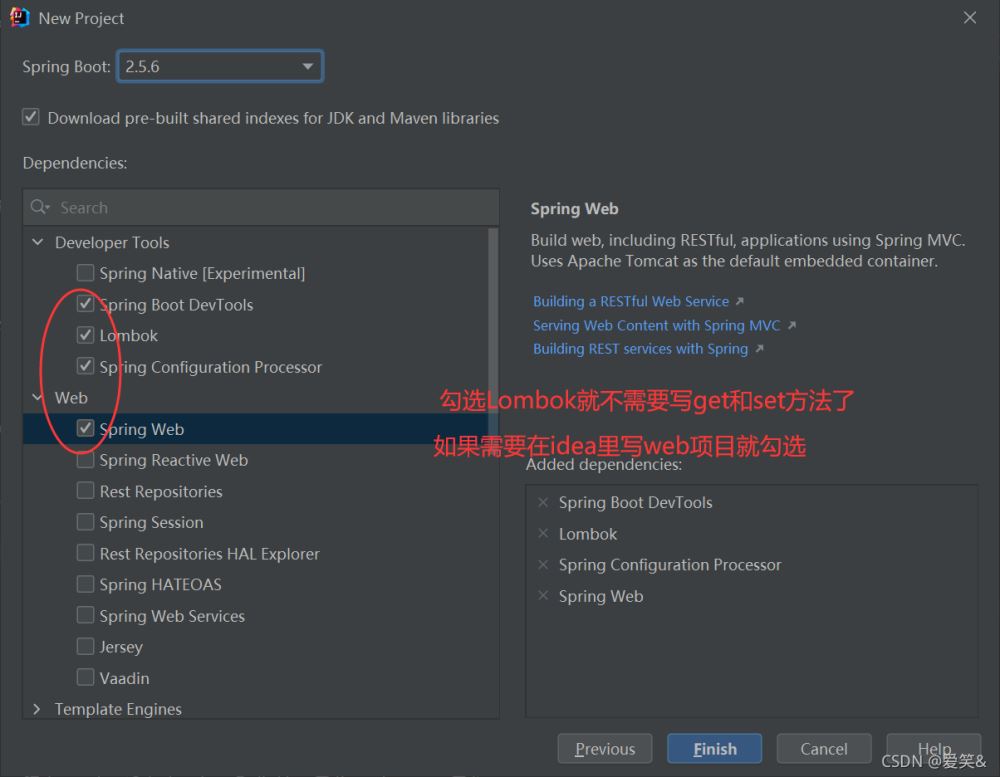
2.Add dependencies
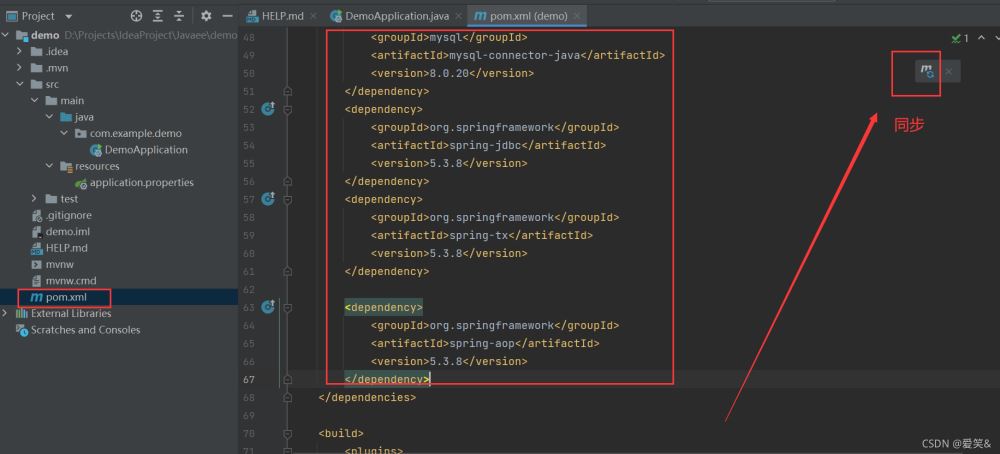
<dependency>
      <groupId>mysql</groupId>
      <artifactId>mysql-connector-java</artifactId>
      <version>8.0.20</version>
    </dependency>
    <dependency>
      <groupId>org.springframework</groupId>
      <artifactId>spring-jdbc</artifactId>
      <version>5.3.8</version>
    </dependency>
    <dependency>
      <groupId>org.springframework</groupId>
      <artifactId>spring-tx</artifactId>
      <version>5.3.8</version>
    </dependency>

    <dependency>
      <groupId>org.springframework</groupId>
      <artifactId>spring-aop</artifactId>
      <version>5.3.8</version>
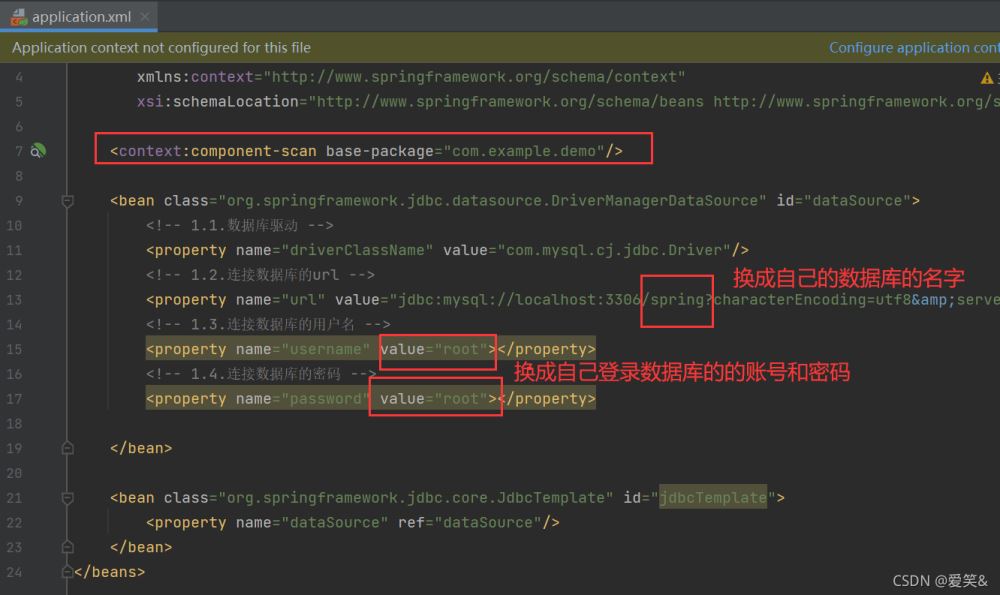
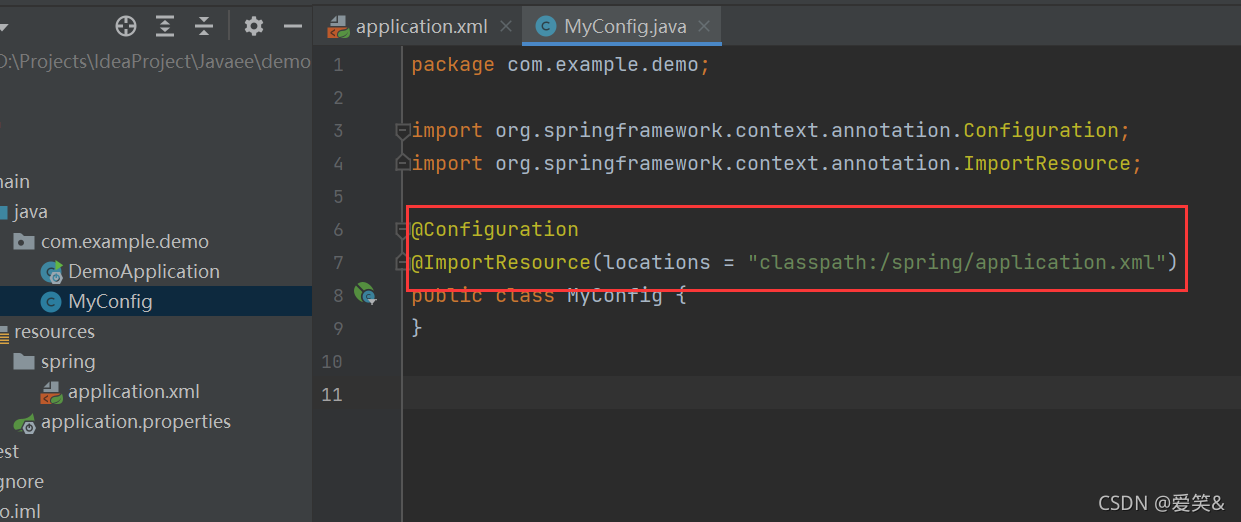
</dependency>3. Create DriverManagerDataSource and JdbcTemplate objects in spring container 3.1 Method to load spring container in springboot 1. Create spring container file under resource
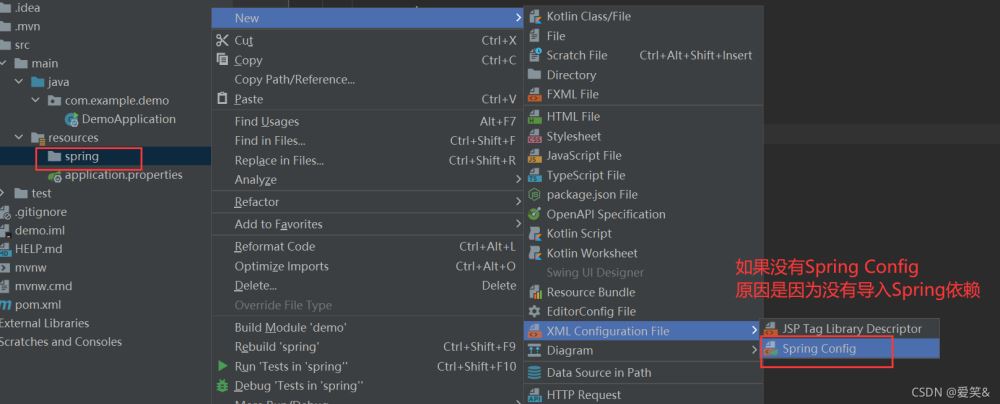
resource ---->new- --->Directory---->new Directory(application)
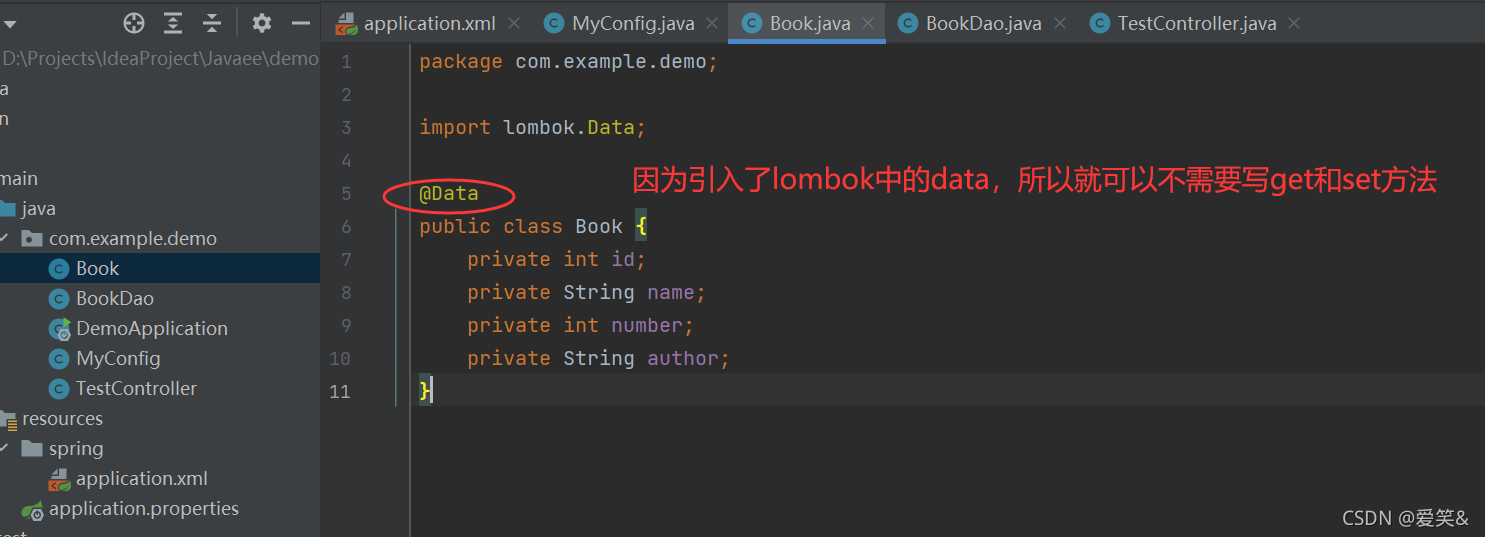
##2. Define a common class and add Add the above annotation to automatically load the spring container after springboot starts<bean class="org.springframework.jdbc.datasource.DriverManagerDataSource" id="dataSource"> <!-- 1.1.数据库驱动 --> <property name="driverClassName" value="com.mysql.cj.jdbc.Driver"/> <!-- 1.2.连接数据库的url --> <property name="url" value="jdbc:mysql://localhost:3306/spring?characterEncoding=utf8&serverTimezone=UTC"/> <!-- 1.3.连接数据库的用户名 --> <property name="username" value="root"></property> <!-- 1.4.连接数据库的密码 --> <property name="password" value="root"></property> </bean> <bean class="org.springframework.jdbc.core.JdbcTemplate" id="jdbcTemplate"> <property name="dataSource" ref="dataSource"/> </bean>Copy after login4. Create an object class and control class BookPay attention to the @Data annotation here , it is a part of lombok, its main function is to automatically generate get and set methods during compilation, so we do not need to manually write get and set methods in this class, reducing our workload, very convenient, highly recommended
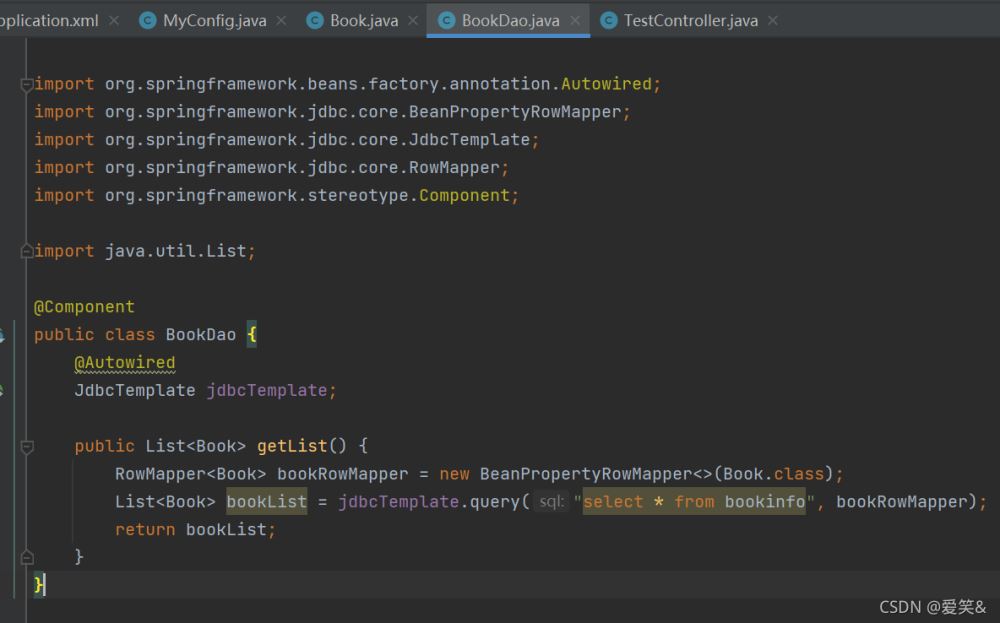
BookDao
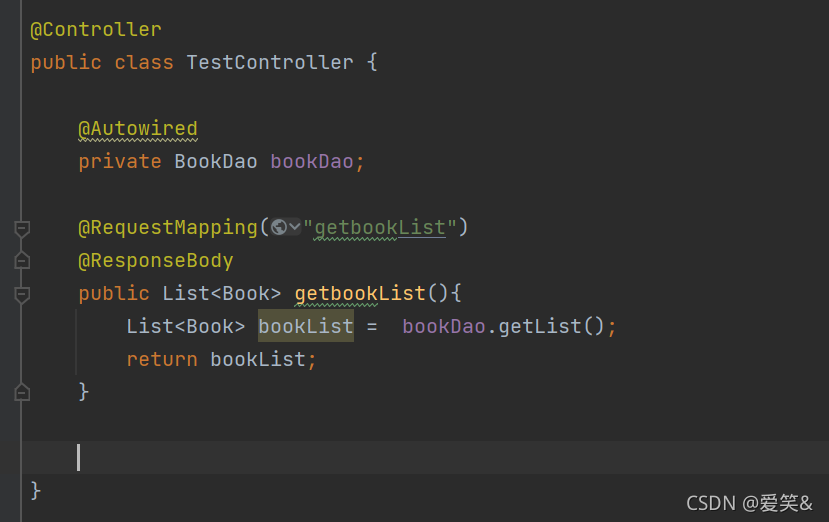
TestController
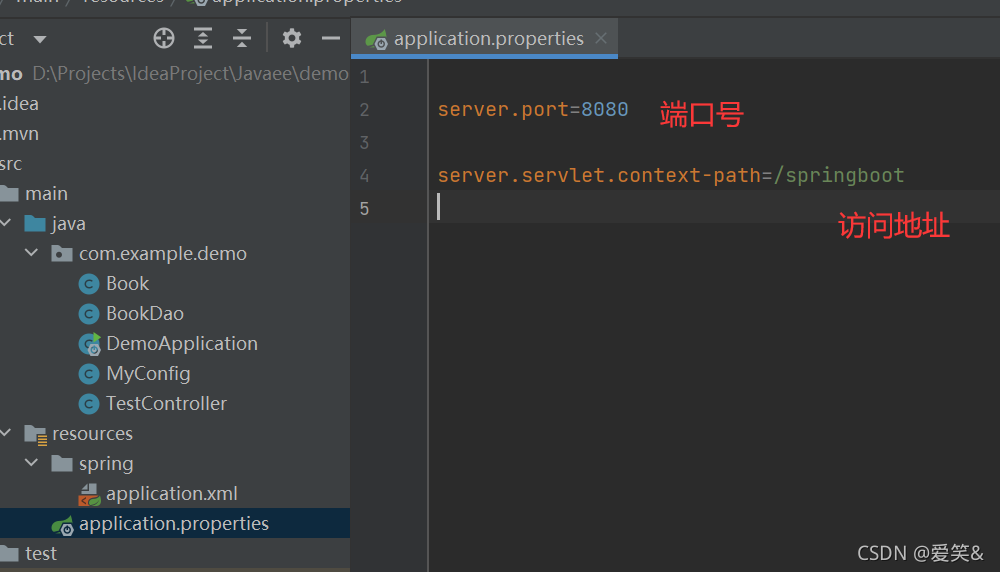
##application.properties
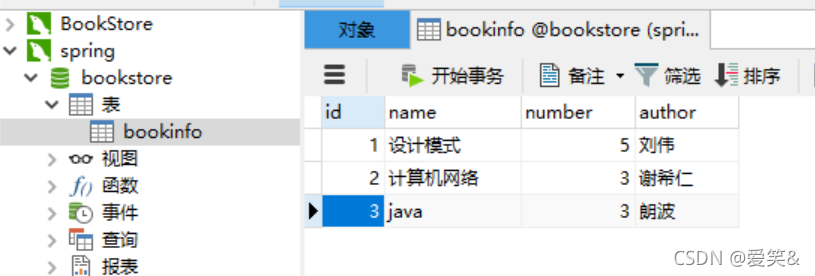
5. Start the MySQL database
You can refer to the previous article
Install MySQL8.0 and operate visually in Navicat
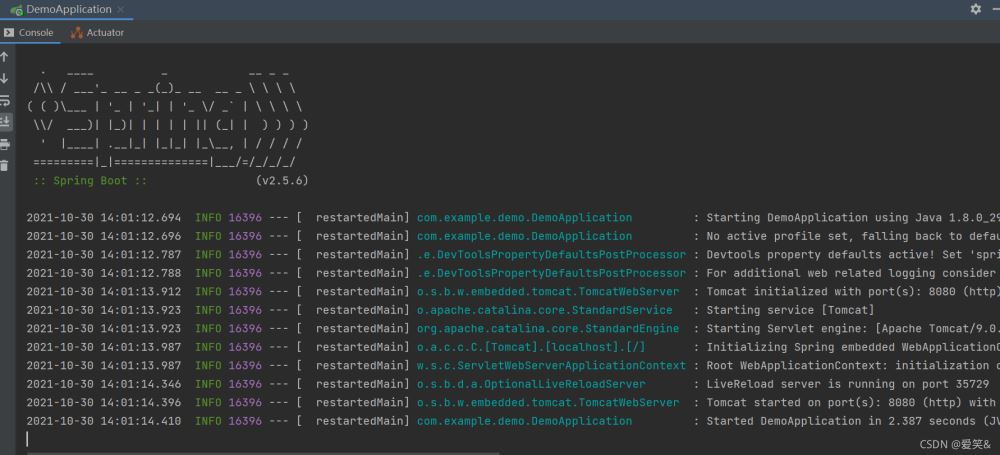
6. Run the test
As shown below, the operation is successful
Enter in the browser to see if the acquisition is successful
Note:
8080 and springboot refer to application.propertiesgetbookList is customized in RequestMapping in TestController
At this point, the SpringBoot backend interface is written alrightThe above is the detailed content of How SpringBoot connects to MySQL to obtain data and write back-end interface. For more information, please follow other related articles on the PHP Chinese website!

Hot AI Tools

Undresser.AI Undress
AI-powered app for creating realistic nude photos

AI Clothes Remover
Online AI tool for removing clothes from photos.

Undress AI Tool
Undress images for free

Clothoff.io
AI clothes remover

AI Hentai Generator
Generate AI Hentai for free.

Hot Article

Hot Tools

Notepad++7.3.1
Easy-to-use and free code editor

SublimeText3 Chinese version
Chinese version, very easy to use

Zend Studio 13.0.1
Powerful PHP integrated development environment

Dreamweaver CS6
Visual web development tools

SublimeText3 Mac version
God-level code editing software (SublimeText3)

Hot Topics
 1376
1376
 52
52
 The relationship between mysql user and database
Apr 08, 2025 pm 07:15 PM
In MySQL database, the relationship between the user and the database is defined by permissions and tables. The user has a username and password to access the database. Permissions are granted through the GRANT command, while the table is created by the CREATE TABLE command. To establish a relationship between a user and a database, you need to create a database, create a user, and then grant permissions.
 RDS MySQL integration with Redshift zero ETL
Apr 08, 2025 pm 07:06 PM
Data Integration Simplification: AmazonRDSMySQL and Redshift's zero ETL integration Efficient data integration is at the heart of a data-driven organization. Traditional ETL (extract, convert, load) processes are complex and time-consuming, especially when integrating databases (such as AmazonRDSMySQL) with data warehouses (such as Redshift). However, AWS provides zero ETL integration solutions that have completely changed this situation, providing a simplified, near-real-time solution for data migration from RDSMySQL to Redshift. This article will dive into RDSMySQL zero ETL integration with Redshift, explaining how it works and the advantages it brings to data engineers and developers.
 How to fill in mysql username and password
Apr 08, 2025 pm 07:09 PM
To fill in the MySQL username and password: 1. Determine the username and password; 2. Connect to the database; 3. Use the username and password to execute queries and commands.
 Query optimization in MySQL is essential for improving database performance, especially when dealing with large data sets
Apr 08, 2025 pm 07:12 PM
1. Use the correct index to speed up data retrieval by reducing the amount of data scanned select*frommployeeswherelast_name='smith'; if you look up a column of a table multiple times, create an index for that column. If you or your app needs data from multiple columns according to the criteria, create a composite index 2. Avoid select * only those required columns, if you select all unwanted columns, this will only consume more server memory and cause the server to slow down at high load or frequency times For example, your table contains columns such as created_at and updated_at and timestamps, and then avoid selecting * because they do not require inefficient query se
 How to view mysql
Apr 08, 2025 pm 07:21 PM
View the MySQL database with the following command: Connect to the server: mysql -u Username -p Password Run SHOW DATABASES; Command to get all existing databases Select database: USE database name; View table: SHOW TABLES; View table structure: DESCRIBE table name; View data: SELECT * FROM table name;
 MySQL: The Ease of Data Management for Beginners
Apr 09, 2025 am 12:07 AM
MySQL is suitable for beginners because it is simple to install, powerful and easy to manage data. 1. Simple installation and configuration, suitable for a variety of operating systems. 2. Support basic operations such as creating databases and tables, inserting, querying, updating and deleting data. 3. Provide advanced functions such as JOIN operations and subqueries. 4. Performance can be improved through indexing, query optimization and table partitioning. 5. Support backup, recovery and security measures to ensure data security and consistency.
 How to optimize MySQL performance for high-load applications?
Apr 08, 2025 pm 06:03 PM
MySQL database performance optimization guide In resource-intensive applications, MySQL database plays a crucial role and is responsible for managing massive transactions. However, as the scale of application expands, database performance bottlenecks often become a constraint. This article will explore a series of effective MySQL performance optimization strategies to ensure that your application remains efficient and responsive under high loads. We will combine actual cases to explain in-depth key technologies such as indexing, query optimization, database design and caching. 1. Database architecture design and optimized database architecture is the cornerstone of MySQL performance optimization. Here are some core principles: Selecting the right data type and selecting the smallest data type that meets the needs can not only save storage space, but also improve data processing speed.
 Can I retrieve the database password in Navicat?
Apr 08, 2025 pm 09:51 PM
Navicat itself does not store the database password, and can only retrieve the encrypted password. Solution: 1. Check the password manager; 2. Check Navicat's "Remember Password" function; 3. Reset the database password; 4. Contact the database administrator.


 ##application.properties
 5. Start the MySQL database
 6. Run the test
 Enter in the browser to see if the acquisition is successful
