sudo ufw status
How to install Mysql in Ubuntu to enable remote connections
Background
The cloud server used is Baidu Cloud (the same applies to other cloud servers). The system is Ubuntu 20.04 LTS, Mysql version 8.0. The requirement is to develop on Windows, and you can remotely connect to the read and write server at any time. Mysql on the server
Establish a remote connection to the server
You can use the ssh client or the web console provided by the cloud server manufacturer, as long as you can connect to the server
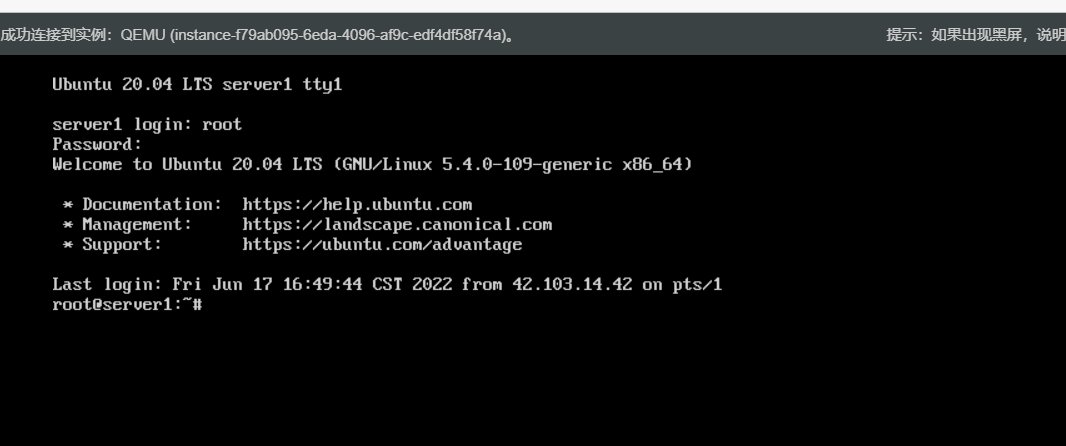
By the way, I would like to recommend a good-looking and easy-to-use ssh client: NextSSH
Use apt-get to install mysql
Update the apt warehouse first:
sudo apt-get update
By the way, because I don’t know what accounts you are using, and I can’t figure out which commands require higher permissions, so I added sudo to all commands, so no matter what Anyone who can copy and paste can use it directly without any permission issues.
Then install mysql-server:
sudo apt-get install mysql-server -y
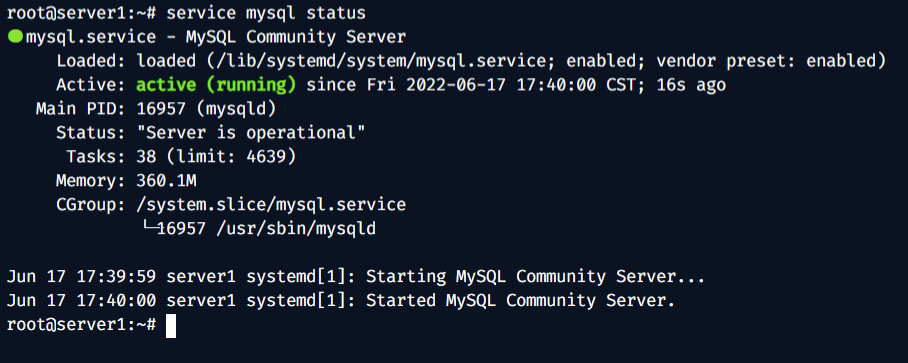
At this step, mysql has been installed and started automatically. You can take a look:
sudo service mysql status
Set the root password
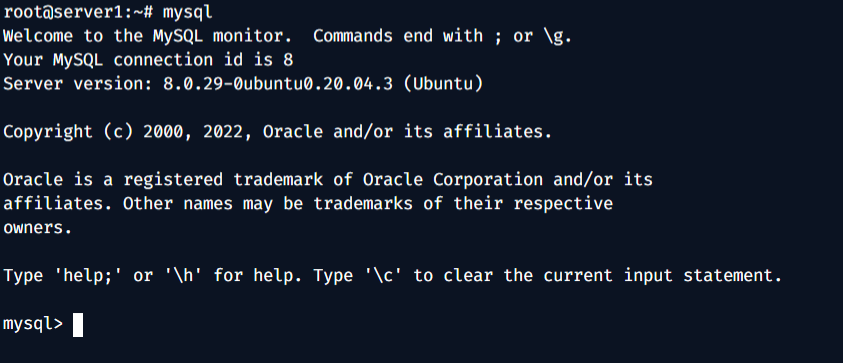
At this time, the mysql root account does not have a password set. You can log in directly with the mysql command:
Set the root Password (change the mynewpassword part to the password you want to set):
ALTER USER 'root'@'localhost' IDENTIFIED WITH mysql_native_password by 'mynewpassword';

Exit, enter the mysql command and find that it cannot Logged in directly:

#So far, I can use mysql directly on the server.
Edit the configuration file to monitor remote connections
By default, the MySQL database only monitors local connections. If you want the external network to connect to the database remotely, we need to modify the configuration file so that MySQL can monitor remote connections. Fixed IP or listen on all remote IPs.
You need to use a command line text editor here. I use vim, so I will teach you vim. If you know nano or other things, you will know how to do it. If you don’t understand, just follow my instructions. Install vim:
sudo apt-get install vim -y
Then use vim to open the mysqld.cnf configuration file:
sudo vim /etc/mysql/mysql.conf.d/mysqld.cnf
Find the line bind-address = 127.0.0.1:
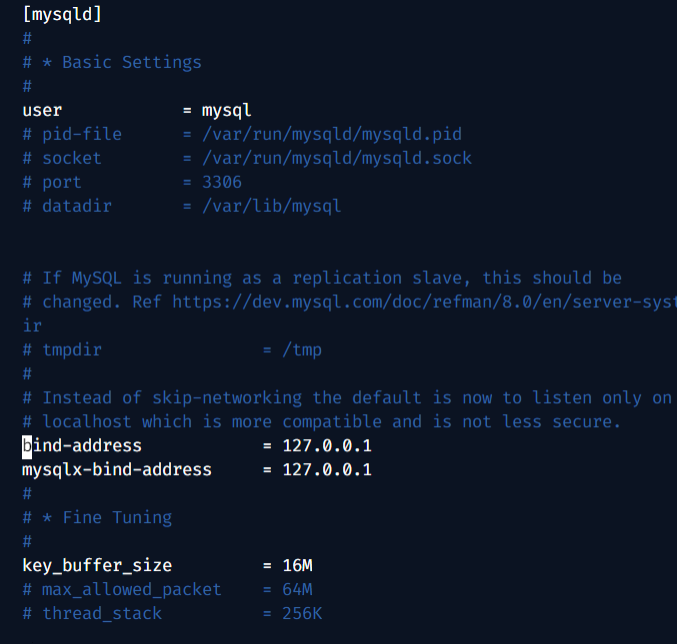
When this value is 127.0.0.1, it only monitors local connections. Change it to 0.0.0.0 to monitor all connections. Or you can change it to only allow connections from specified IPs.
Now vim is in reading mode. Click i to enter editing mode, and then use the up, down, left and right keys to locate this line (when INSERT is displayed at the bottom, it indicates that it is in editing mode. Press Esc to exit and return to reading. Mode):
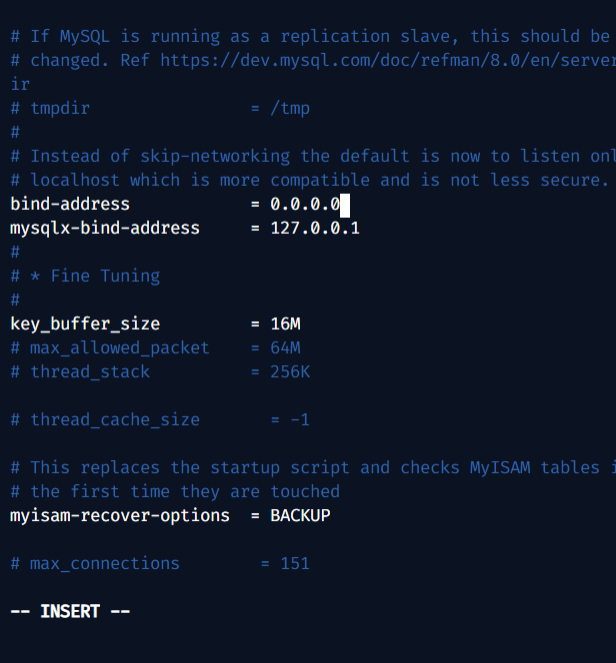
After making changes, press Esc to exit the editing mode, then enter :wq to save and exit. (If you enter :q, you will exit without saving)
Restart the mysql service to make the changes take effect:
sudo service mysql restart
Allow the root account to use remote connections
mysql default Only the root account is allowed to be used locally. You need to modify it to allow the root account to be used remotely (I have not tried other accounts, but the principle is the same). First log in to mysql:
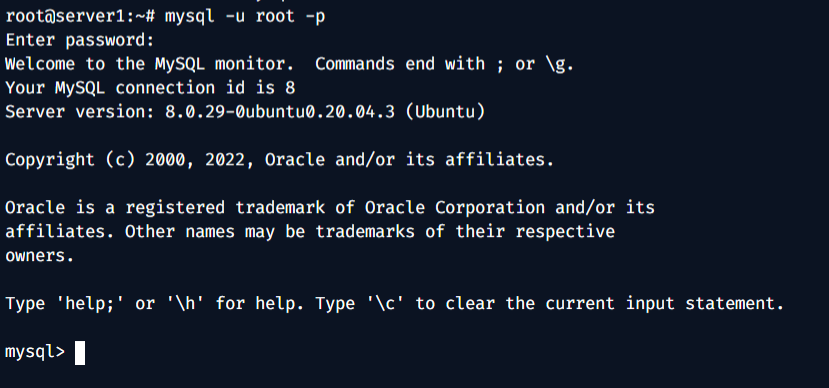
mysql -u root -p
Enter the password and log in.
Then select mysql Database:
use mysql;

View the account’s host permissions:
select user, host from user;
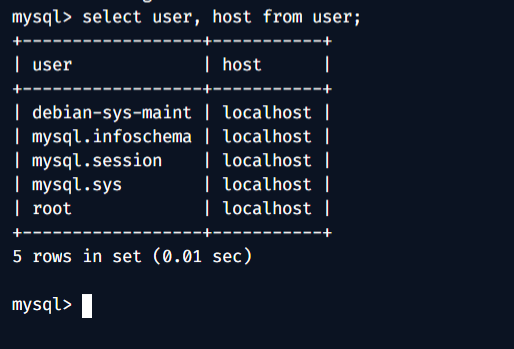
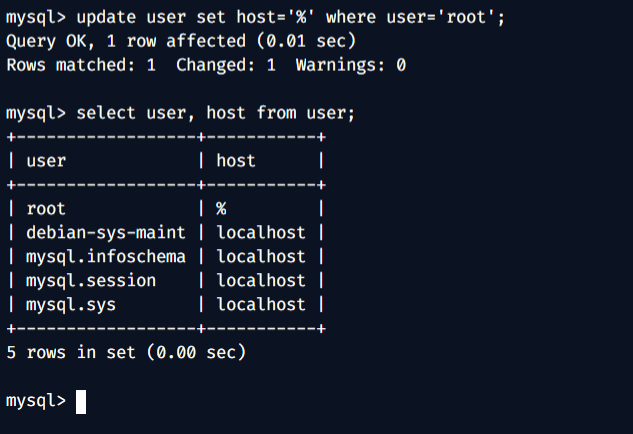
##host is localhost, only local use is allowed. Change it to % for remote use:
update user set host='%' where user='root';
sudo ufw status
Copy after login
sudo ufw status

inactive, it means the firewall is not turned on, then don’t worry about it. What is the purpose of the firewall? My own understanding is that if the firewall is turned on, all ports on the server are prohibited from connecting by default. Only the ports you allow are allowed to connect, similar to this:
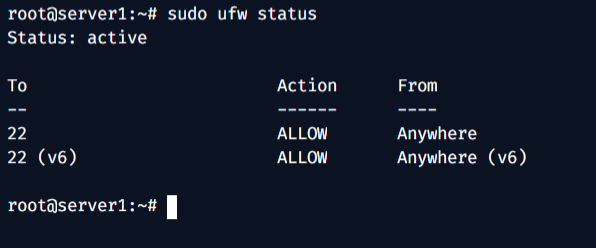
所以如果防火墙开了,那要么把防火墙直接关了:
sudo ufw disable
要么添加一条规则让防火墙放行3306端口(mysql的默认端口):
sudo ufw allow 3306
检查云服务器厂商的防火墙状态
打开云服务器的后台管理页面,找到防火墙:

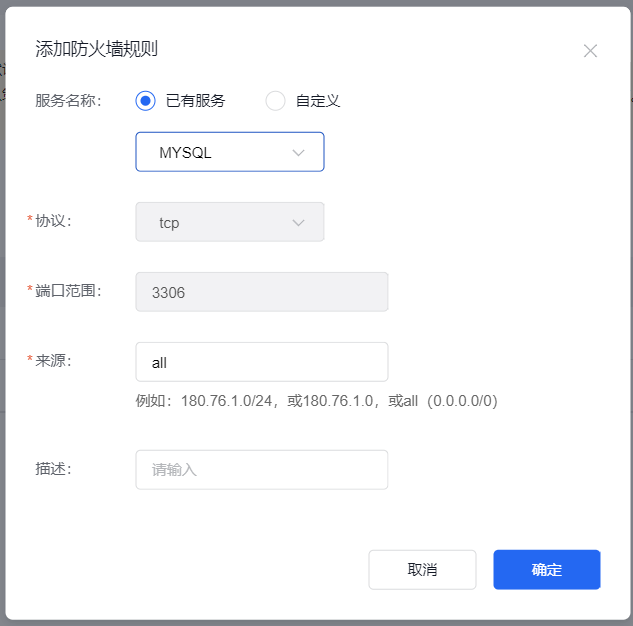
云服务器厂商默认只开启几个最常用的端口,其他端口都是默认关闭的,所以也要在这里添加一条规则放行3306端口:
测试连接
随便找个数据库管理的软件测试一下:

The above is the detailed content of How to install Mysql in Ubuntu to enable remote connections. For more information, please follow other related articles on the PHP Chinese website!

Hot AI Tools

Undresser.AI Undress
AI-powered app for creating realistic nude photos

AI Clothes Remover
Online AI tool for removing clothes from photos.

Undress AI Tool
Undress images for free

Clothoff.io
AI clothes remover

AI Hentai Generator
Generate AI Hentai for free.

Hot Article

Hot Tools

Notepad++7.3.1
Easy-to-use and free code editor

SublimeText3 Chinese version
Chinese version, very easy to use

Zend Studio 13.0.1
Powerful PHP integrated development environment

Dreamweaver CS6
Visual web development tools

SublimeText3 Mac version
God-level code editing software (SublimeText3)

Hot Topics
 PHP's big data structure processing skills
May 08, 2024 am 10:24 AM
Big data structure processing skills: Chunking: Break down the data set and process it in chunks to reduce memory consumption. Generator: Generate data items one by one without loading the entire data set, suitable for unlimited data sets. Streaming: Read files or query results line by line, suitable for large files or remote data. External storage: For very large data sets, store the data in a database or NoSQL.
 Android TV Box gets unofficial Ubuntu 24.04 upgrade
Sep 05, 2024 am 06:33 AM
For many users, hacking an Android TV box sounds daunting. However, developer Murray R. Van Luyn faced the challenge of looking for suitable alternatives to the Raspberry Pi during the Broadcom chip shortage. His collaborative efforts with the Armbia
 How to use MySQL backup and restore in PHP?
Jun 03, 2024 pm 12:19 PM
Backing up and restoring a MySQL database in PHP can be achieved by following these steps: Back up the database: Use the mysqldump command to dump the database into a SQL file. Restore database: Use the mysql command to restore the database from SQL files.
 How to optimize MySQL query performance in PHP?
Jun 03, 2024 pm 08:11 PM
MySQL query performance can be optimized by building indexes that reduce lookup time from linear complexity to logarithmic complexity. Use PreparedStatements to prevent SQL injection and improve query performance. Limit query results and reduce the amount of data processed by the server. Optimize join queries, including using appropriate join types, creating indexes, and considering using subqueries. Analyze queries to identify bottlenecks; use caching to reduce database load; optimize PHP code to minimize overhead.
 How to insert data into a MySQL table using PHP?
Jun 02, 2024 pm 02:26 PM
How to insert data into MySQL table? Connect to the database: Use mysqli to establish a connection to the database. Prepare the SQL query: Write an INSERT statement to specify the columns and values to be inserted. Execute query: Use the query() method to execute the insertion query. If successful, a confirmation message will be output.
 How to create a MySQL table using PHP?
Jun 04, 2024 pm 01:57 PM
Creating a MySQL table using PHP requires the following steps: Connect to the database. Create the database if it does not exist. Select a database. Create table. Execute the query. Close the connection.
 How to use MySQL stored procedures in PHP?
Jun 02, 2024 pm 02:13 PM
To use MySQL stored procedures in PHP: Use PDO or the MySQLi extension to connect to a MySQL database. Prepare the statement to call the stored procedure. Execute the stored procedure. Process the result set (if the stored procedure returns results). Close the database connection.
 How to fix mysql_native_password not loaded errors on MySQL 8.4
Dec 09, 2024 am 11:42 AM
One of the major changes introduced in MySQL 8.4 (the latest LTS release as of 2024) is that the "MySQL Native Password" plugin is no longer enabled by default. Further, MySQL 9.0 removes this plugin completely. This change affects PHP and other app


