
Overview
The previous article recorded the installation and configuration of MySQL 5.7 in the Windows system. Due to the need for installation and deployment of the big data environment, it is now necessary to install and configure MySQL 5.7 in the CentOS 7 system. The installation and configuration of the CentOS 7 environment have also been recorded, so the installation and configuration are carried out directly here.
Install MySQL 5.7 from yum source
Install MySQL 5.7
In the CentOS 7 system, the default source file of the system does not contain MySQL. If you directly use the yum source to execute the installation command, you will be prompted "There is no available package mysql-community-server.": 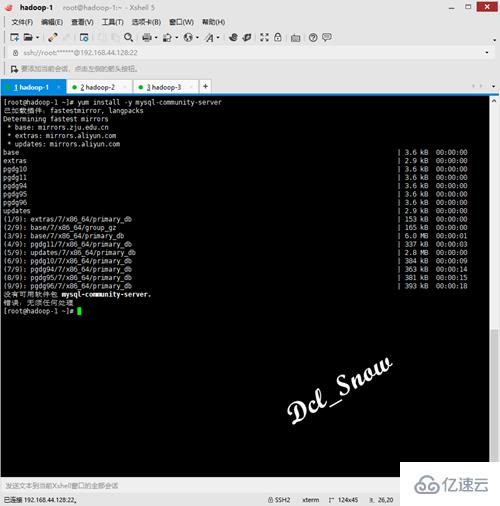
Therefore, you need to manually execute the following command to download the source file installation file:
  1 # cd /home
  2 # wget 'https://dev.mysql.com/get/mysql57-community-release-el7-11.noarch.rpm'
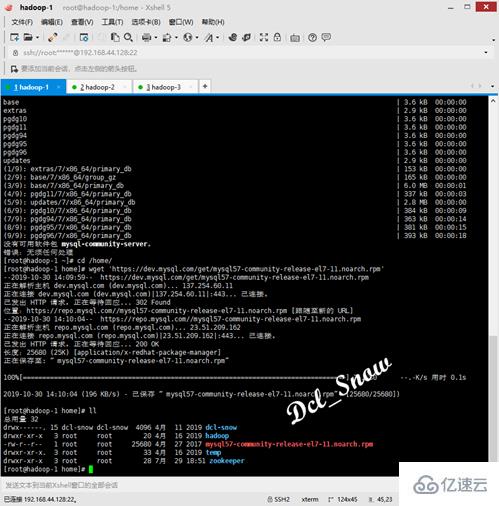
Then execute the source file installation command:
1 # rpm -ivh mysql57-community-release-el7-11.noarch.rpm
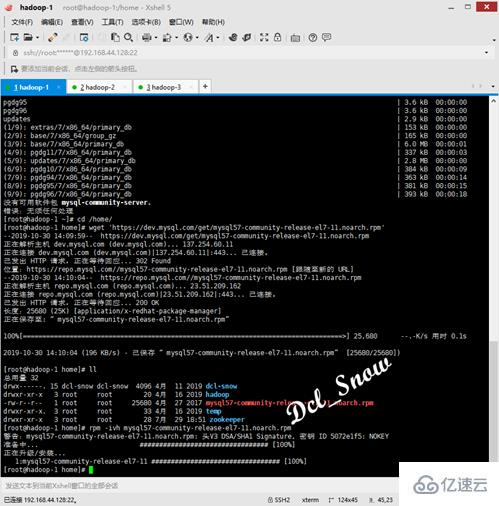
Now you can install MySQL, execute the following command:
1 # yum install -y mysql-community-server
Wait for a moment, wait for the download and installation to complete: 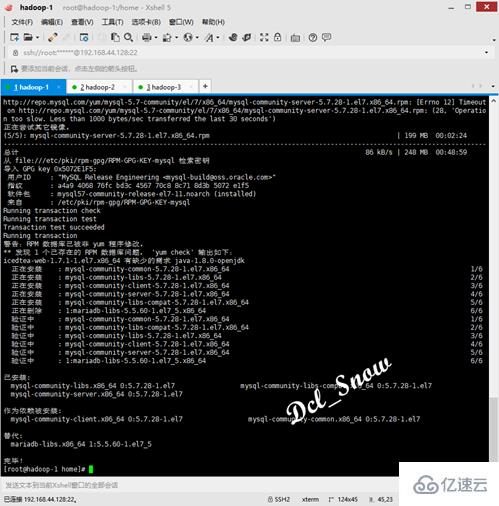
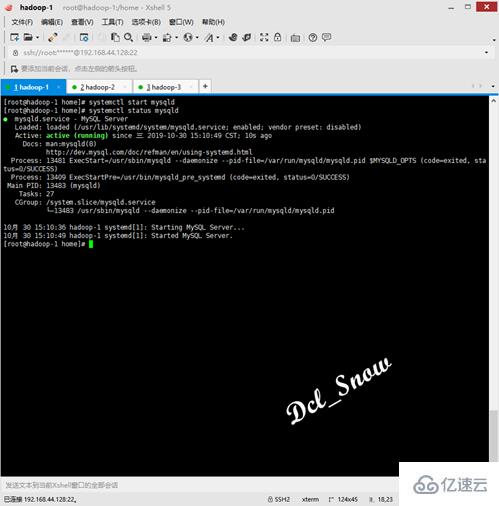
Execute as follows Command, start the database and check the database status:
  1 # systemctl start mysqld
  2 # systemctl status mysqld
Configure MySQL 5.7
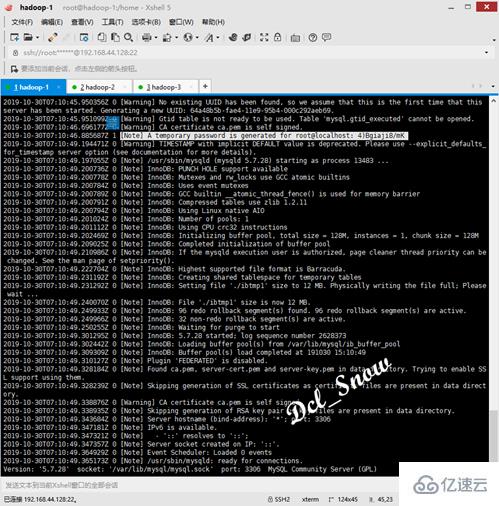
This version of the database will be installed in /var/log/mysqld Generate a random root user password in the .log file. View the file to obtain the password:
1 # cat /var/log/mysqld.log
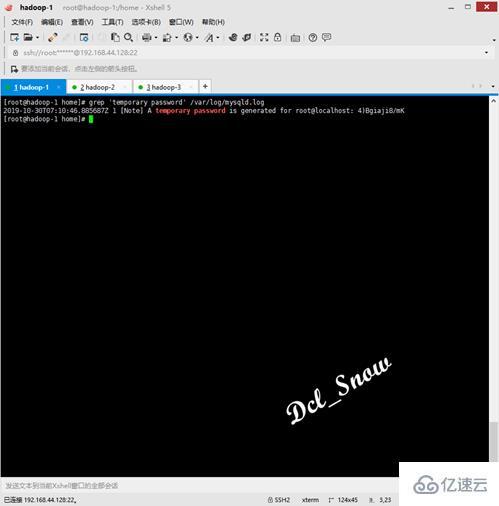
or use the following command:
1 # grep 'temporary password' /var/log/mysqld.log
Use the following command to log in to the MySQL database:
1 # mysql -uroot -p
Password Enter the password you just found to log in to the database: 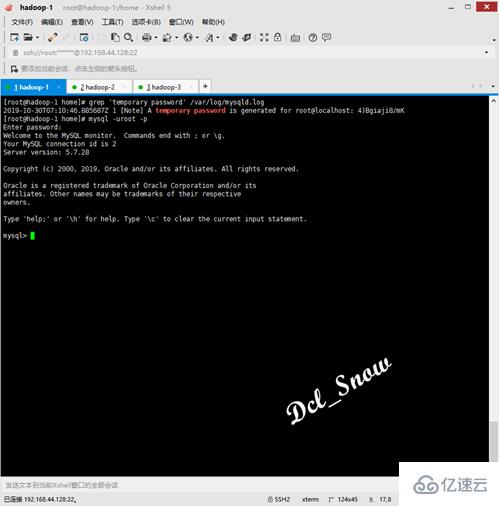
Use the following command to change the root user password:
1 > SET PASSWORD = PASSWORD('Password@123!');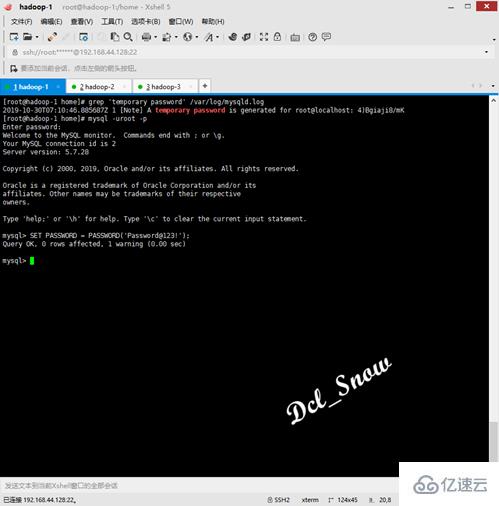
Remote access to the database is not open by default. Use the following command to configure:
1 > GRANT ALL PRIVILEGES ON *.* TO 'root'@'%' IDENTIFIED BY 'Password@123!' WITH GRANT OPTION;
Then enter quit, press Enter to exit the database login, and use the command to open the database configuration file:
1 # vim /etc/my.cnf
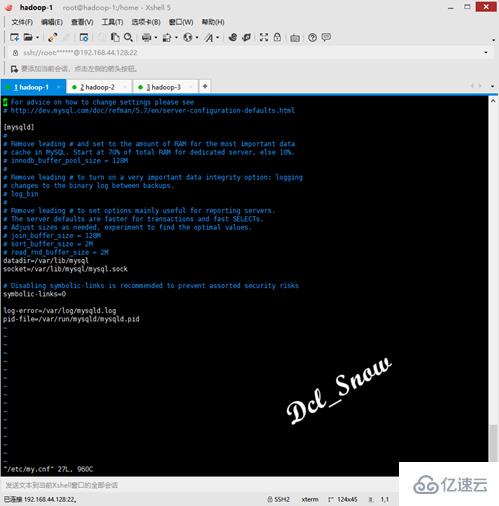
Set the database character set to utf8mb4, and set sql_mode to support group by statement. The complete configuration file content is as follows:
  1 [mysqld]
  2 datadir=/var/lib/mysql
  3 socket=/var/lib/mysql/mysql.sock
  4 symbolic-links=0
  5 log-error=/var/log/mysqld.log
  6 pid-file=/var/run/mysqld/mysqld.pid
  7 character-set-server = utf8mb4
  8 collation-server = utf8mb4_unicode_ci
  9 sql_mode=STRICT_TRANS_TABLES,NO_ZERO_IN_DATE,NO_ZERO_DATE,ERROR_FOR_DIVISION_BY_ZERO,NO_AUTO_CREATE_USER,NO_ENGINE_SUBSTITUTION
 10
 11 [mysql]
 12 default-character-set = utf8mb4
 13
 14 [client]
 15 default-character-set = utf8mb4
 16
Notice:
It is set to utf8mb4 here: First, because utf8 encoding only supports 3-byte data, and the emoticon data on the mobile terminal is 4-byte characters, so directly inserting emoticon data into the utf-8 encoded database will report an exception; Second, I read an article by a master who mentioned that utf8 in MySQL is not real utf8, so utf8mb4 is used.
After the configuration is complete, execute the following command to restart the database service:
1 # systemctl restart mysqld
Use the modified password to log in to the database, and execute the following command to view the character set settings:
1 # SHOW VARIABLES LIKE 'character%';
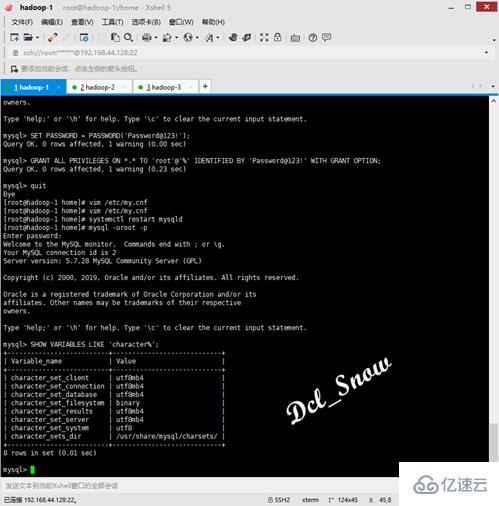
Execute the following command to set up the database service to start:
1 # systemctl enable mysqld
Compressed package to install MySQL 5.7
If the server cannot be connected to the Internet, you cannot use the yum source for installation. You can use a computer with Internet access, go to the official website to download the compressed package for installation, and then change the server to install the compressed package.
First go to the official website: https://www.mysql.com/ to download the relevant installation package: 
Remotely connect to the /usr directory on the server to create mysql57:
  1 # cd /usr
  2 # mkdir mysql57
Use Xftp to upload the compressed package to the mysql57 directory on the server: 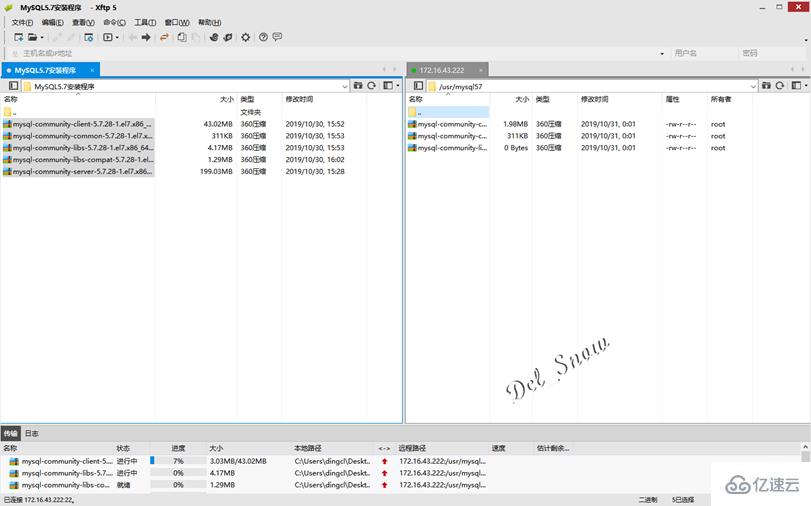
Since mariadb is installed by default in the CentOS 7 system, use the following command to view and uninstall mariadb:
  1 # rpm -qa | grep mariadb
  2 # rpm -e --nodeps mariadb-libs-5.5.56-2.el7.x86_64
Then use the rpm command to install:
1 # rpm -ivh *.rpm

Use the following command to start the MySQL service and check the service running status :
  1 # systemctl start mysqld
  2 # systemctl status mysqld
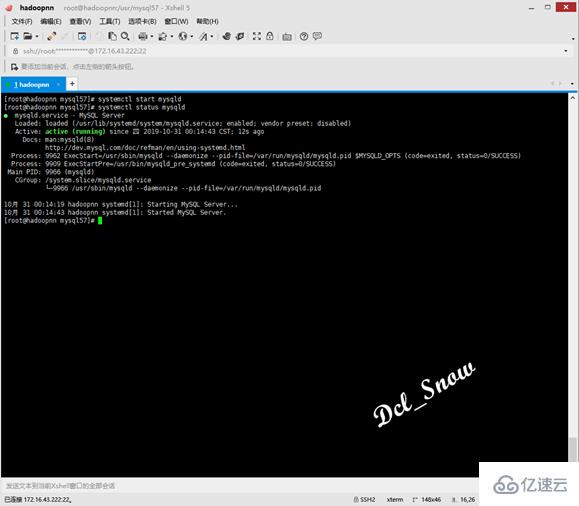
MySQL 5.7 database installation is completed.
Configuring MySQL 5.7
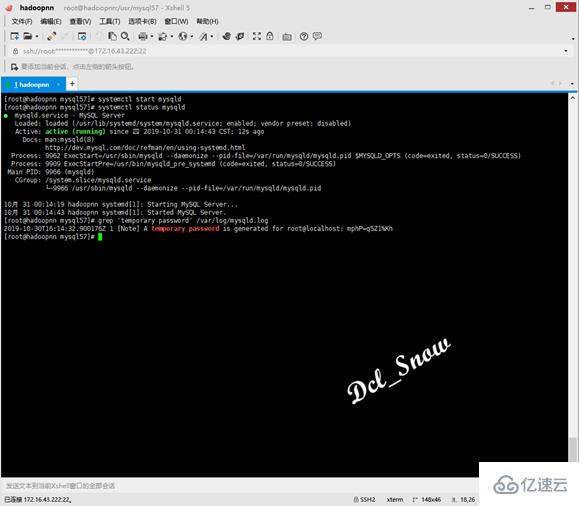
View the log file to obtain the password:
1 # grep 'temporary password' /var/log/mysqld.log
使用如下命令登录MySQL数据库:
1 # mysql -uroot -p
密码输入刚才查到的密码,即可登录数据库: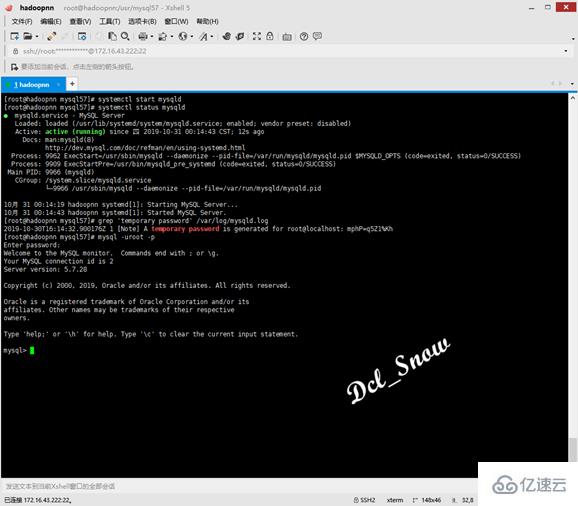
使用如下命令,修改root用户密码:
1 > SET PASSWORD = PASSWORD('******');
数据库默认远程访问未开放,使用如下命令进行配置:
1 > GRANT ALL PRIVILEGES ON *.* TO 'root'@'%' IDENTIFIED BY '******' WITH GRANT OPTION;
星号为root用户的密码(下图红色覆盖区域):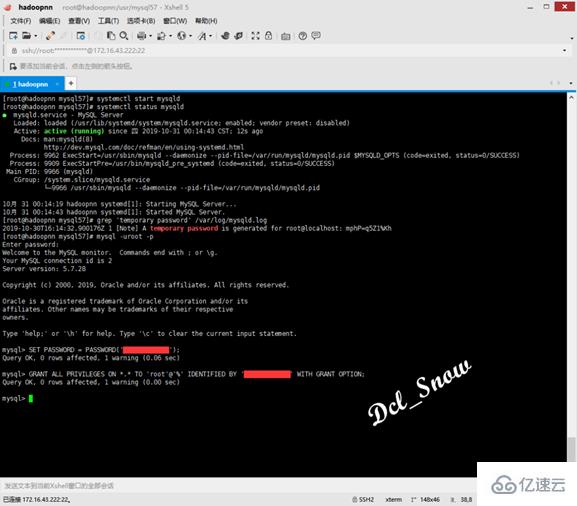
然后输入quit,回车退出数据库登录,使用命令打开数据库的配置文件:
1 # vim /etc/my.cnf
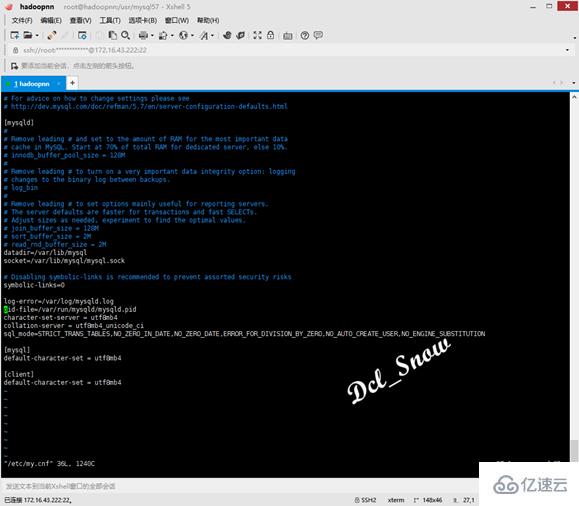
设置数据库字符集为utf8mb4,并设置sql_mode支持group by语句,完整的配置文件内容如下:
  1 [mysqld]
  2 character-set-server = utf8mb4
  3 collation-server = utf8mb4_unicode_ci
  4  sql_mode=STRICT_TRANS_TABLES,NO_ZERO_IN_DATE,NO_ZERO_DATE,ERROR_FOR_DIVISION_BY_ZERO,NO_AUTO_CREATE_USER,NO_ENGINE_SUBSTITUTION
  5
  6 [mysql]
  7 default-character-set = utf8mb4
  8
  9 [client]
 10 default-character-set = utf8mb4
 11
注意:
此处设置为utf8mb4:一是因为utf8编码只支持3字节的数据,而移动端的表情数据是4个字节的字符,所以直接往utf-8编码的数据库中插入表情数据,会报异常;二是看过一位大神的文章提到,MySQL中的utf8并不是真正的utf8,所以使用utf8mb4。
配置完成后,执行如下命令重启数据库服务:
1 # systemctl restart mysqld
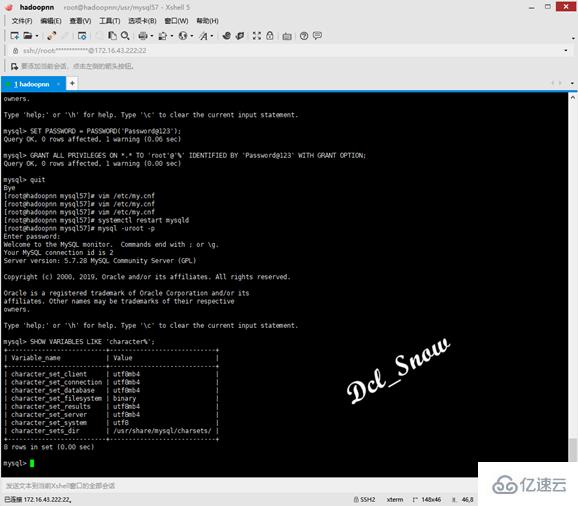
使用修改后的密码,登录数据库,执行如下命令查看字符集设置:
1 # SHOW VARIABLES LIKE 'character%';
执行如下命令,设置数据库服务开机启动:
1 # systemctl enable mysqld
为了方便查看不同安装方式的朋友,将记录了两种不同的安装方式的配置都记录下来,避免他们需要回头去查找配置信息。
The above is the detailed content of How to install and configure MySQL 5.7 on CentOS 7. For more information, please follow other related articles on the PHP Chinese website!


