

How to build a redis-sentinel cluster based on docker

1. Overview
redis cluster can achieve high availability and sharding among a group of redis nodes. There will be 1 master and multiple slave nodes in the cluster. When the master node fails, a slave node should be elected as the new master. However, redis itself (including many of its clients) does not have the ability to implement automatic fault discovery and perform active-standby switching, and requires an external monitoring solution to achieve automatic fault recovery.
redis sentinel is the officially recommended high availability solution. It is a monitoring and management tool for redis clusters, which can provide node monitoring, notification, automatic failure recovery and client configuration discovery services.
2. Problems encountered
1. Docker host network
When docker uses the host network, for windows and mac It didn't work (no solution was found), so I finally gave up on windows and used centos to deploy the cluster.
2. Sentinel connection problem without using the host network
When connecting to the sentinel cluster without using the host network, you can specify the master node port, so the connection can be normal. , but when the master node fails, the IP obtained by sentinel from the master node is the virtual IP in the container, causing the cluster to be unable to connect normally.
3. Building process
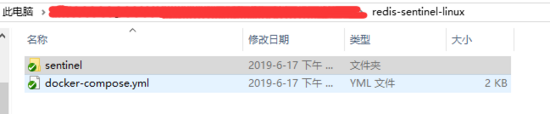
1. Directory structure

2, sentinel configuration file
1, sentinel1.conf
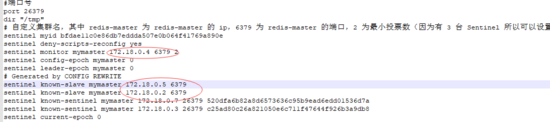
#端口号
port 26379
dir /tmp
# mymaster:自定义集群名,2:投票数量必须2个sentinel才能判断主节点是否失败
sentinel monitor mymaster <ip> <port> 2
# 指的是超过5000秒,且没有回复,则判定主节点不可达
sentinel down-after-milliseconds mymaster 5000
# 表示在故障转移的时候最多有numslaves在同步更新新的master
sentinel parallel-syncs mymaster 1
# 故障转移超时时间
sentinel failover-timeout mymaster 5000
2, sentinel2.conf
#端口号
port 26380
dir /tmp
# mymaster:自定义集群名,2:投票数量必须2个sentinel才能判断主节点是否失败
sentinel monitor mymaster <ip> <port> 2
# 指的是超过5000秒,且没有回复,则判定主节点不可达
sentinel down-after-milliseconds mymaster 5000
# 表示在故障转移的时候最多有numslaves在同步更新新的master
sentinel parallel-syncs mymaster 1
# 故障转移超时时间
sentinel failover-timeout mymaster 5000
3, sentinel3.conf
#端口号
port 26381
dir /tmp
# mymaster:自定义集群名,2:投票数量必须2个sentinel才能判断主节点是否失败
sentinel monitor mymaster <ip> <port> 2
# 指的是超过5000秒,且没有回复,则判定主节点不可达
sentinel down-after-milliseconds mymaster 5000
# 表示在故障转移的时候最多有numslaves在同步更新新的master
sentinel parallel-syncs mymaster 1
# 故障转移超时时间
sentinel failover-timeout mymaster 5000
3. docker-compose.yml
version: '2'
services:
 master:
 image: redis:4.0
 restart: always
 container_name: redis-master
 #使用主机网络
 network_mode: "host"
 command: redis-server --port 16379

 slave1:
 image: redis:4.0
 restart: always
 container_name: redis-slave-1
 network_mode: "host"
 # 指定端口并指定master ip 端口
 command: redis-server --port 16380 --slaveof <master ip> 16379

 slave2:
 image: redis:4.0
 restart: always
 container_name: redis-slave-2
 network_mode: "host"
 command: redis-server --port 16381 --slaveof <master ip> 16379

 sentinel1:
 image: redis:4.0
 restart: always
 container_name: redis-sentinel-1
 network_mode: "host"
 # 指定sentinel文件位置
 command: redis-sentinel /usr/local/etc/redis/sentinel.conf
 # 使用数据卷映射文件到指定sentinel位置
 volumes:
  - ./sentinel/sentinel1.conf:/usr/local/etc/redis/sentinel.conf

 sentinel2:
 image: redis:4.0
 restart: always
 container_name: redis-sentinel-2
 network_mode: "host"
 command: redis-sentinel /usr/local/etc/redis/sentinel.conf
 volumes:
  - ./sentinel/sentinel2.conf:/usr/local/etc/redis/sentinel.conf

 sentinel3:
 image: redis:4.0
 restart: always
 container_name: redis-sentinel-3
 network_mode: "host"
 command: redis-sentinel /usr/local/etc/redis/sentinel.conf
 volumes:
  - ./sentinel/sentinel3.conf:/usr/local/etc/redis/sentinel.conf
4. Use centos to deploy the cluster to test the effect
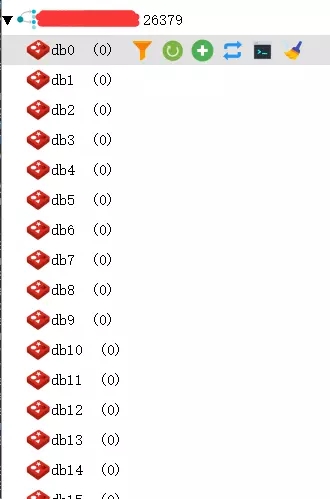
1. Test to connect to the cluster through sentinel1
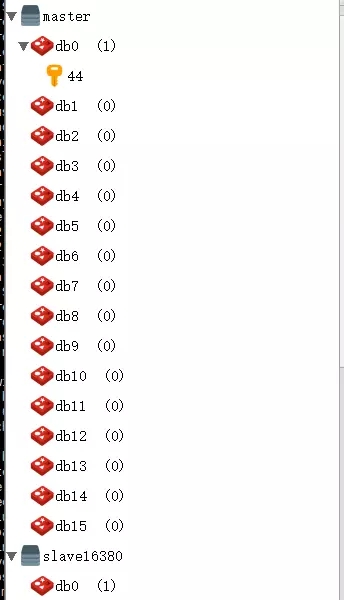
2. Test the data synchronization of the master node and child nodes

3. Close the master to view the master-standby switch

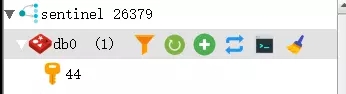
sentinel normal connection
The master node switched from 16379 to 16381

The above is the detailed content of How to build a redis-sentinel cluster based on docker. For more information, please follow other related articles on the PHP Chinese website!

Hot AI Tools

Undresser.AI Undress
AI-powered app for creating realistic nude photos

AI Clothes Remover
Online AI tool for removing clothes from photos.

Undress AI Tool
Undress images for free

Clothoff.io
AI clothes remover

Video Face Swap
Swap faces in any video effortlessly with our completely free AI face swap tool!

Hot Article
Hot Tools

Notepad++7.3.1
Easy-to-use and free code editor

SublimeText3 Chinese version
Chinese version, very easy to use

Zend Studio 13.0.1
Powerful PHP integrated development environment

Dreamweaver CS6
Visual web development tools

SublimeText3 Mac version
God-level code editing software (SublimeText3)
Hot Topics
 1386
1386
 52
52

 How to update the image of docker
Apr 15, 2025 pm 12:03 PM
How to update the image of docker
Apr 15, 2025 pm 12:03 PM
The steps to update a Docker image are as follows: Pull the latest image tag New image Delete the old image for a specific tag (optional) Restart the container (if needed)
 How to use docker desktop
Apr 15, 2025 am 11:45 AM
How to use docker desktop
Apr 15, 2025 am 11:45 AM
How to use Docker Desktop? Docker Desktop is a tool for running Docker containers on local machines. The steps to use include: 1. Install Docker Desktop; 2. Start Docker Desktop; 3. Create Docker image (using Dockerfile); 4. Build Docker image (using docker build); 5. Run Docker container (using docker run).
 How to create a mirror in docker
Apr 15, 2025 am 11:27 AM
How to create a mirror in docker
Apr 15, 2025 am 11:27 AM
Steps to create a Docker image: Write a Dockerfile that contains the build instructions. Build the image in the terminal, using the docker build command. Tag the image and assign names and tags using the docker tag command.
 How to exit the container by docker
Apr 15, 2025 pm 12:15 PM
How to exit the container by docker
Apr 15, 2025 pm 12:15 PM
Four ways to exit Docker container: Use Ctrl D in the container terminal Enter exit command in the container terminal Use docker stop <container_name> Command Use docker kill <container_name> command in the host terminal (force exit)
 How to check the name of the docker container
Apr 15, 2025 pm 12:21 PM
How to check the name of the docker container
Apr 15, 2025 pm 12:21 PM
You can query the Docker container name by following the steps: List all containers (docker ps). Filter the container list (using the grep command). Gets the container name (located in the "NAMES" column).
 What to do if the docker image fails
Apr 15, 2025 am 11:21 AM
What to do if the docker image fails
Apr 15, 2025 am 11:21 AM
Troubleshooting steps for failed Docker image build: Check Dockerfile syntax and dependency version. Check if the build context contains the required source code and dependencies. View the build log for error details. Use the --target option to build a hierarchical phase to identify failure points. Make sure to use the latest version of Docker engine. Build the image with --t [image-name]:debug mode to debug the problem. Check disk space and make sure it is sufficient. Disable SELinux to prevent interference with the build process. Ask community platforms for help, provide Dockerfiles and build log descriptions for more specific suggestions.
 How to copy files in docker to outside
Apr 15, 2025 pm 12:12 PM
How to copy files in docker to outside
Apr 15, 2025 pm 12:12 PM
Methods for copying files to external hosts in Docker: Use the docker cp command: Execute docker cp [Options] <Container Path> <Host Path>. Using data volumes: Create a directory on the host, and use the -v parameter to mount the directory into the container when creating the container to achieve bidirectional file synchronization.
 How to save docker image
Apr 15, 2025 am 11:54 AM
How to save docker image
Apr 15, 2025 am 11:54 AM
To save the image in Docker, you can use the docker commit command to create a new image, containing the current state of the specified container, syntax: docker commit [Options] Container ID Image name. To save the image to the repository, you can use the docker push command, syntax: docker push image name [: tag]. To import saved images, you can use the docker pull command, syntax: docker pull image name [: tag].
