In SpringBoot, the cache management and storage of data relies on the cache-related org.springframework.cache.Cache and org.springframework.cache.CacheManager cache manager interfaces in the Spring framework. .
If there is no Bean component of type CacheManager or a CacheResolver cache resolver named cacheResolver defined in the program, SpringBoot will try to enable the following cache components (in the specified order):
( 1) Generic
(2) JCache (JSR-107) (EhCache 3, Hazelcast, Infinispan, etc.)
(3) EhCache 2.x
(4) Hazelcast
(5)Infinispan
(6)Couchbase
(7)Redis
(8)Caffeine
(9)Simple
The above lists 9 cache components supported by SpringBoot according to the loading order of SpringBoot cache components. After adding a cache management component (such as Redis) to the project, the SpringBoot project will select and enable the corresponding cache manager. . If multiple cache components are added to the project at the same time, and no cache manager or cache resolver (CacheManager or cacheResolver) is specified, SpringBoot will preferentially enable the first one among the multiple cache components added in the above order. The cache component performs cache management (for example, if the two cache components Couchbase and Redis are added at the same time, then the Couchbase component is enabled first).
In the default cache management introduced in the previous article SpringBoot Cache Management (1) Default Cache Management, the project we built did not add any cache management components, but cache management was still implemented. This is because after cache management is enabled, SpringBoot will search for valid cache components for cache management in the order of the above cache components. If there is no cache component, the last Simple cache component will be used by default for management . The Simple cache component is SpringBoot's default cache management component. It uses ConcurrentMap in memory for cache storage by default, so without adding any third-party cache components, in-memory cache management can still be achieved, but it is not recommended. This cache management method.
Introduce the Redis cache component based on the project built by SpringBoot Cache Management (1) Default Cache Management, and use annotation-based methods to explain the specific details of SpringBoot's integration of Redis cache accomplish.
(1) Add Spring Data Redis dependency starter
Add Spring Data Redis dependency starter in the pom.xml file:
<dependency>
  <groupId>org.springframework.boot</groupId>
  <artifactId>spring-boot-starter-data-redis</artifactId></dependency>
When we add Redis-related dependencies After the launcher, SpringBoot will use RedisCacheConfigratioin as the automatic configuration class to carry out cache-related automatic assembly classes (previously the default SimpleCacheConfiguration), the cache manager used in the container becomes RedisCacheManager (previously the default cacheManager), this cache manager creates The Cache is RedisCache, which controls Redis to cache data.
(2) Redis server connection configuration
Add the connection configuration of the Redis database in the global configuration file application.properties of the project. The sample code is as follows:
# Redis服务器地址
spring.redis.host=127.0.0.1
# Redis服务器连接端口
spring.redis.port=6379
# Redis服务器连接密码(默认为空)
spring.redis.password=
(3) Modify the methods in the CommentService class
Use the three annotations @Cacheable, @CachePut, and @CacheEvict for cache management, and perform operations such as cache storage, cache update, and cache deletion respectively:
package com.hardy.springbootdatacache.service;import com.hardy.springbootdatacache.entity.Comment;import com.hardy.springbootdatacache.repository.CommentRepository;import org.springframework.beans.factory.annotation.Autowired;import org.springframework.cache.annotation.CacheEvict;import org.springframework.cache.annotation.CachePut;import org.springframework.cache.annotation.Cacheable;import org.springframework.stereotype.Service;import java.util.Optional;/**
 * @Author: HardyYao
 * @Date: 2021/6/19 */@Servicepublic class CommentService {

    @Autowiredprivate CommentRepository commentRepository;/** * 根据评论id查询评论
     * @Cacheable:将该方法的查询结果comment存放在SpringBoot默认缓存中
     * cacheNames:起一个缓存命名空间,对应缓存唯一标识
     * @param id
     * @return */@Cacheable(cacheNames = "comment", unless = "#result==null")public Comment findCommentById(Integer id){
        Optional<Comment> comment = commentRepository.findById(id);if(comment.isPresent()){
            Comment comment1 = comment.get();return comment1;
        }return null;
    }/** * 更新评论
     * @param comment
     * @return */@CachePut(cacheNames = "comment",key = "#result.id")public Comment updateComment(Comment comment) {
        commentRepository.updateComment(comment.getAuthor(), comment.getaId());return comment;
    }/** * 删除评论
     * @param comment_id     */@CacheEvict(cacheNames = "comment")public void deleteComment(int comment_id) {
        commentRepository.deleteById(comment_id);
    }

}In the above code, the @Cacheable, @CachePut, and @CacheEvict annotations are used to perform cache management on data query, data update, and data deletion methods.
Among them, there is no mark key value in the query cache @Cacheable annotation, and the default parameter value comment_id will be used as the key to save the data. The same key must be used when updating the cache; similarly, when using the query cache In the @Cacheable annotation, unless= "#result==null" is defined, which means that the query result will not be cached if it is empty.
(4) Add two new interfaces to the CommentController class
Add new update and delete interfaces:
package com.hardy.springbootdatacache.controller;import com.hardy.springbootdatacache.entity.Comment;import com.hardy.springbootdatacache.service.CommentService;import org.springframework.beans.factory.annotation.Autowired;import org.springframework.web.bind.annotation.RequestMapping;import org.springframework.web.bind.annotation.RestController;/**
 * @Author: HardyYao
 * @Date: 2021/6/19 */@RestControllerpublic class CommentController {

    @Autowiredprivate CommentService commentService;

    @RequestMapping(value = "/findCommentById")public Comment findCommentById(Integer id){
        Comment comment = commentService.findCommentById(id);return comment;
    }

    @RequestMapping(value = "/updateComment")public Comment updateComment(Comment comment){
        Comment oldComment = commentService.findCommentById(comment.getId());
        oldComment.setAuthor(comment.getAuthor());
        Comment comment1 = commentService.updateComment(oldComment);return comment1;
    }

    @RequestMapping(value = "/deleteComment")public void deleteComment(Integer id){
        commentService.deleteComment(id);
    }

}(5) Annotation-based Redis query cache test
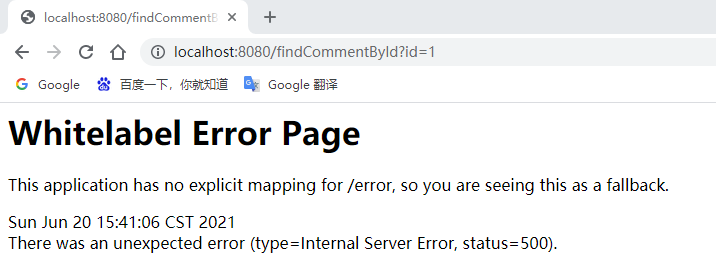
Enter in the browser: http://localhost:8080/findCommentById?id=1 to access:


在浏览器中输入:http://localhost:8080/findCommentById?id=1 进行访问(连续访问三次):


打开Redis客户端可视化工具Redis Desktop Manager,连接本地启用的Redis服务,查看具体的数据缓存效果:

执行findById()方法查询出的用户评论信息Comment正确存储到了Redis缓存库中名为comment的名称空间下。
其中缓存数据的唯一标识key值是以“名称空间comment::+参数值(comment::1)”的字符串形式体现的,而value值则是经过JDK默认序列格式化后的HEX格式存储。这种JDK默认序列格式化后的数据显然不方便缓存数据的可视化查看和管理,所以在实际开发中,通常会自定义数据的序列化格式,这方面的内容在后面会介绍。
(8)基于注解的Redis缓存更新测试
先通过浏览器访问:http://localhost:8080/updateComment?id=1&author=hardy;
接着在访问:http://localhost:8080/findCommentById?id=1,查看浏览器返回信息及控制台打印信息:


可以看到,执行updateComment()更新id为1的数据时执行了一条更新的SQL语句,后续调用findById()方法查询id为1的用户评论信息时没有再次执行查询的SQL语句,且浏览器返回了更新后的正确结果,这说明@CachePut缓存更新配置成功。
(9)基于注解的Redis缓存删除测试
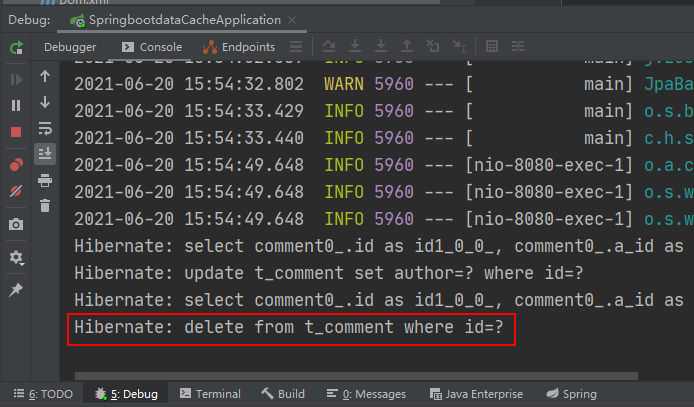
通过浏览器访问:http://localhost:8080/deleteComment?id=1 和 http://localhost:8080/findCommentById?id=1


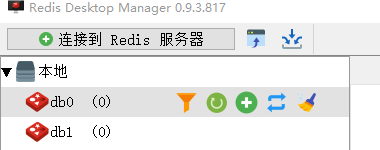
执行deleteComment()方法删除id为1的数据后查询结果为空,查看Redis缓存数据库:

可以看到之前存储的comment相关数据被删除掉了,这表明@CacheEvict注解缓存删除成功实现。
通过上面的案例可以看出:使用基于注解的Redis缓存实现只需要添加Redis依赖、并使用几个注解在对应的方法上,就可以实现对数据的缓存管理。
另外,还可以在SpringBoot全局配置文件中配置Redis有效期,示例代码如下:
# 对基于注解的Redis缓存数据统一设置有效期为1分钟,单位毫秒
spring.cache.redis.time-to-live=60000
上述代码中,在SpringBoot全局配置文件中添加了“spring.cache.redis.time-to-live”属性统一设置Redis数据的有效期(单位为毫秒),但这种方式不够灵活,因此一般不用。
在SpringBoot整合Redis缓存实现中,除了基于注解形式的Redis缓存形式外,还有一种开发中更常用的方式——基于API的Redis缓存实现。这种基于API的Redis缓存实现,需要在某种业务需求下通过Redis提供的API调用相关方法实现数据缓存管理。同时,这种方法还可以手动管理缓存的有效期。
下面,通过Redis API的方式讲解SpringBoot整合Redis缓存的具体实现。
(1)使用Redis API进行业务数据缓存管理
在 com.hardy.springbootdatacache.service 包下新建一个 ApiCommentService:
package com.hardy.springbootdatacache.service;import com.hardy.springbootdatacache.entity.Comment;import com.hardy.springbootdatacache.repository.CommentRepository;import org.springframework.beans.factory.annotation.Autowired;import org.springframework.cache.annotation.CacheEvict;import org.springframework.cache.annotation.CachePut;import org.springframework.cache.annotation.Cacheable;import org.springframework.data.redis.core.RedisTemplate;import org.springframework.stereotype.Service;import java.util.Optional;import java.util.concurrent.TimeUnit;/**
 * @Author: HardyYao
 * @Date: 2021/6/19 */@Servicepublic class ApiCommentService {

    @Autowiredprivate CommentRepository commentRepository;

    @Autowiredprivate RedisTemplate redisTemplate;/** * 根据评论id查询评论
     * @param id
     * @return */public Comment findCommentById(Integer id){// 先查Redis缓存Object o = redisTemplate.opsForValue().get("comment_" + id);if (o != null) {return (Comment) o;
        } else {// 如果缓存中没有,则从数据库查询Optional<Comment> dbComment = commentRepository.findById(id);if (dbComment.isPresent()) {
                Comment redisComment = dbComment.get();// 将查询结果存储到缓存中,并设置有效期为1天redisTemplate.opsForValue().set("comment_"+id, redisComment,1, TimeUnit.DAYS);return redisComment;
            } else {return null;
            }
        }

    }/** * 更新评论
     * @param comment
     * @return */public Comment updateComment(Comment comment) {
        commentRepository.updateComment(comment.getAuthor(), comment.getId());// 更新数据库数据后进行缓存更新redisTemplate.opsForValue().set("comment_" + comment.getId(), comment);return comment;
    }/** * 删除评论
     * @param comment_id     */public void deleteComment(int comment_id) {
        commentRepository.deleteById(comment_id);// 删除数据库数据后进行缓存删除redisTemplate.delete("comment_" + comment_id);
    }

}(2)编写Web访问层ApiCommentController
package com.hardy.springbootdatacache.controller;import com.hardy.springbootdatacache.entity.Comment;import com.hardy.springbootdatacache.service.ApiCommentService;import org.springframework.beans.factory.annotation.Autowired;import org.springframework.web.bind.annotation.RequestMapping;import org.springframework.web.bind.annotation.RestController;/**
 * @Author: HardyYao
 * @Date: 2021/6/19 */@RestController
@RequestMapping("api")  // 改变请求路径public class ApiCommentController {

    @Autowiredprivate ApiCommentService apiCommentService;

    @RequestMapping(value = "/findCommentById")public Comment findCommentById(Integer id){
        Comment comment = apiCommentService.findCommentById(id);return comment;
    }

    @RequestMapping(value = "/updateComment")public Comment updateComment(Comment comment){
        Comment oldComment = apiCommentService.findCommentById(comment.getId());
        oldComment.setAuthor(comment.getAuthor());
        Comment comment1 = apiCommentService.updateComment(oldComment);return comment1;
    }

    @RequestMapping(value = "/deleteComment")public void deleteComment(Integer id){
        apiCommentService.deleteComment(id);
    }

}(3)测试基于API的Redis缓存实现
输入:http://localhost:8080/api/findCommentById?id=2(连续输入三次)、http://localhost:8080/api/updateComment?id=2&author=hardy、http://localhost:8080/deleteComment?id=2进行访问:


View console messages and Redis database:


API-based Relevant configuration of Redis cache implementation: The API-based Redis cache implementation does not require the @EnableCaching annotation to enable annotation-based caching support, so here you can choose to delete or annotate the @EnableCaching annotation added to the project startup class. No Influence the functional implementation of the project.
The above is the detailed content of How to implement SpringBoot integration with Redis cache. For more information, please follow other related articles on the PHP Chinese website!
 SpringBoot project building steps
 Commonly used database software
 What are the in-memory databases?
 Which one has faster reading speed, mongodb or redis?
 How to use redis as a cache server
 How redis solves data consistency
 How do mysql and redis ensure double-write consistency?
 What data does redis cache generally store?


