 Database
 Redis
Redis
 How Springboot implements Redis distributed reentrant lock source code analysis based on Redisson
How Springboot implements Redis distributed reentrant lock source code analysis based on Redisson
1. Preface
We are using Redis to implement distributed locks. At first, we generally use SET resource-name anystring NX EX max-lock-timeTo lock, use Lua script to ensure atomicity to release the lock. This manual implementation is troublesome. The Redis official website also clearly states that the Java version uses Redisson to implement it. The editor also looked at the official website and slowly figured it out, and took a close-up to record it. From the official website to integrating Springboot to source code interpretation, take a single node as an example.
2. Why use Redisson
1. We open the official website
redis Chinese official website
2. We can see that the official allows us to use other
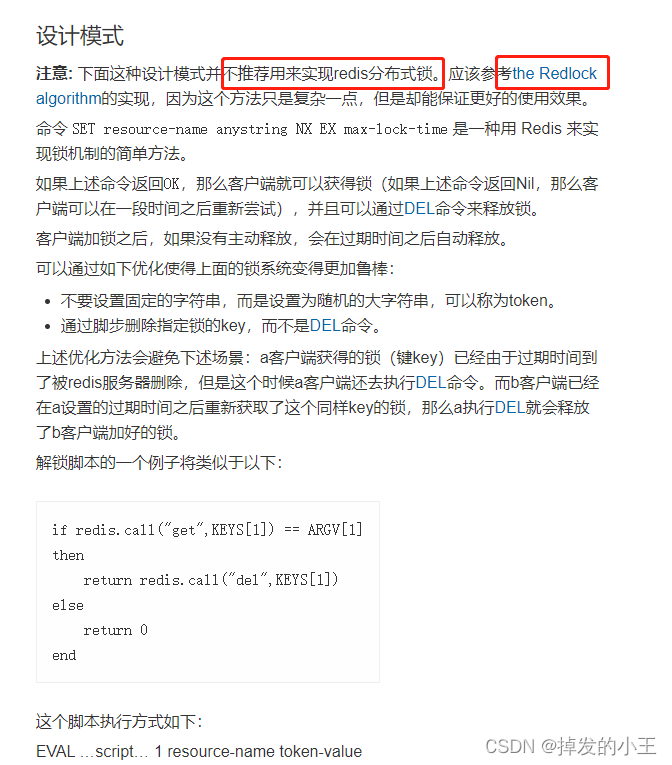
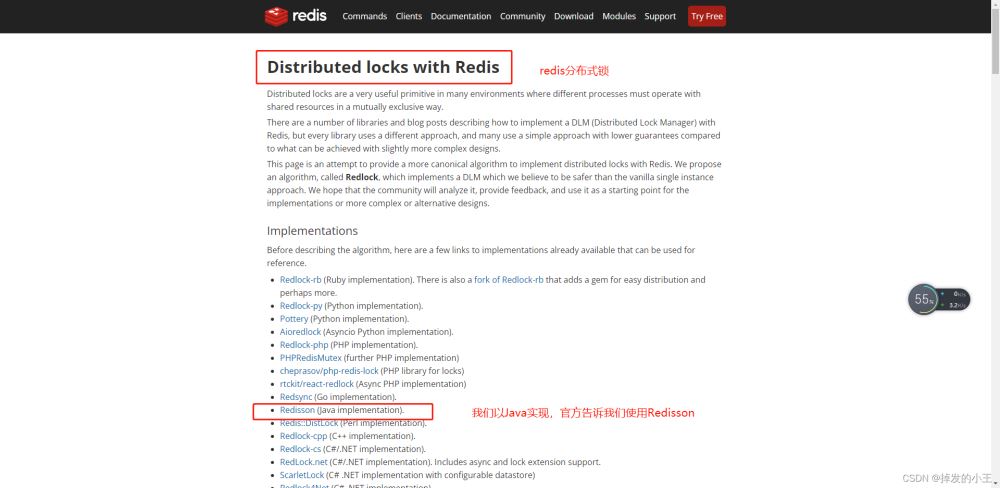
3. Open the official recommendation
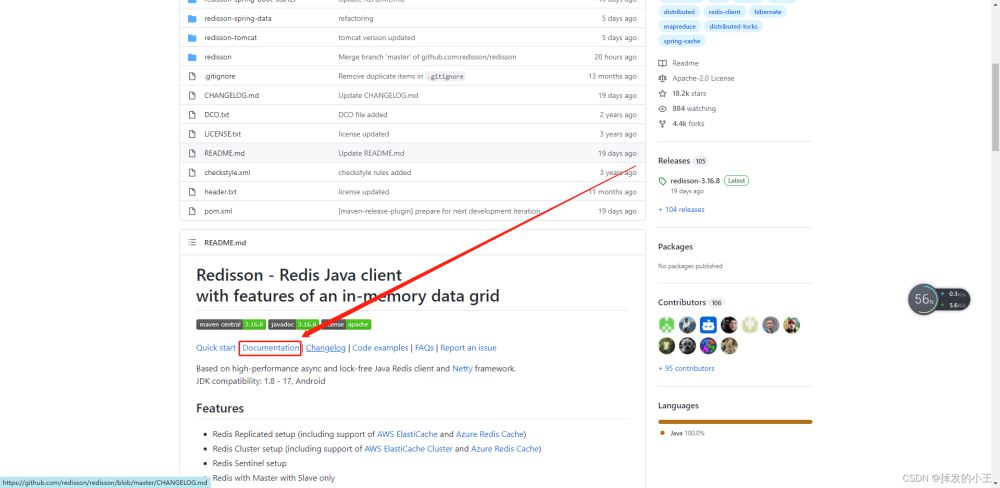
4. Find the document
Redisson address
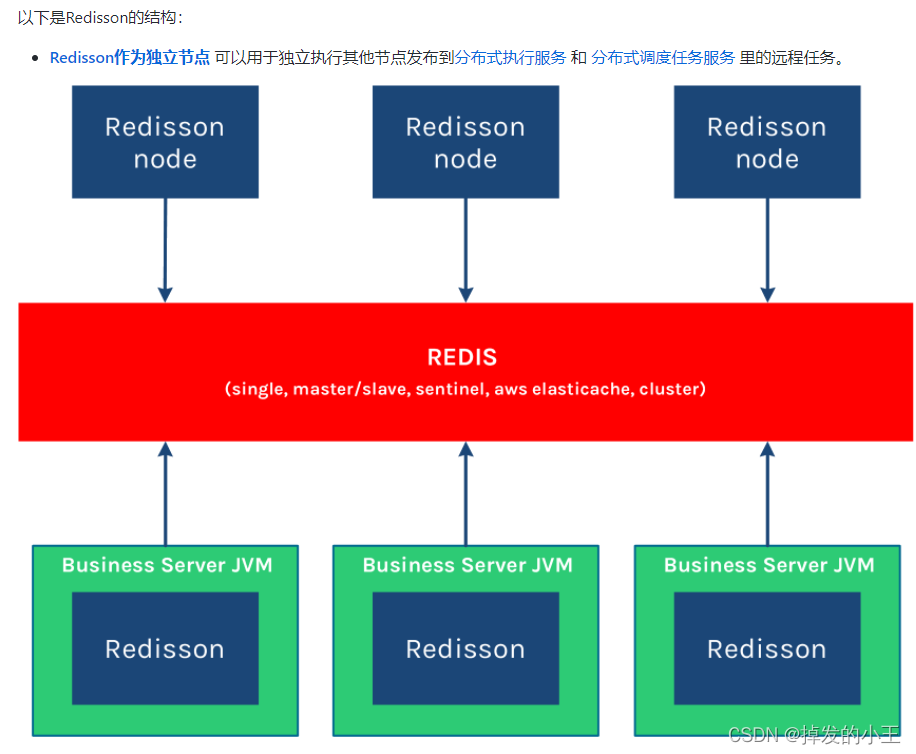
5. Redisson structure
3. Springboot integrates Redisson
1. Import dependencies
<dependency>
    <groupId>org.springframework.boot</groupId>
    <artifactId>spring-boot-starter-data-redis</artifactId>
</dependency>
<dependency>
    <groupId>redis.clients</groupId>
    <artifactId>jedis</artifactId>
</dependency>
<!--redis分布式锁-->
<dependency>
    <groupId>org.redisson</groupId>
    <artifactId>redisson</artifactId>
    <version>3.12.0</version>
</dependency>2. Take the official website as an example to see how to configure

3. Write the configuration class
import org.redisson.Redisson;
import org.redisson.api.RedissonClient;
import org.redisson.config.Config;
import org.springframework.context.annotation.Bean;
import org.springframework.context.annotation.Configuration;

/**
 * @author wangzhenjun
 * @date 2022/2/9 9:57
 */
@Configuration
public class MyRedissonConfig {

    /**
     * 所有对redisson的使用都是通过RedissonClient来操作的
     * @return
     */
    @Bean(destroyMethod="shutdown")
    public RedissonClient redisson(){
        // 1. 创建配置
        Config config = new Config();
        // 一定要加redis://
        config.useSingleServer().setAddress("redis://192.168.17.130:6379");
        // 2. 根据config创建出redissonClient实例
        RedissonClient redissonClient = Redisson.create(config);
        return redissonClient;
    }
}4. Official website test locking example
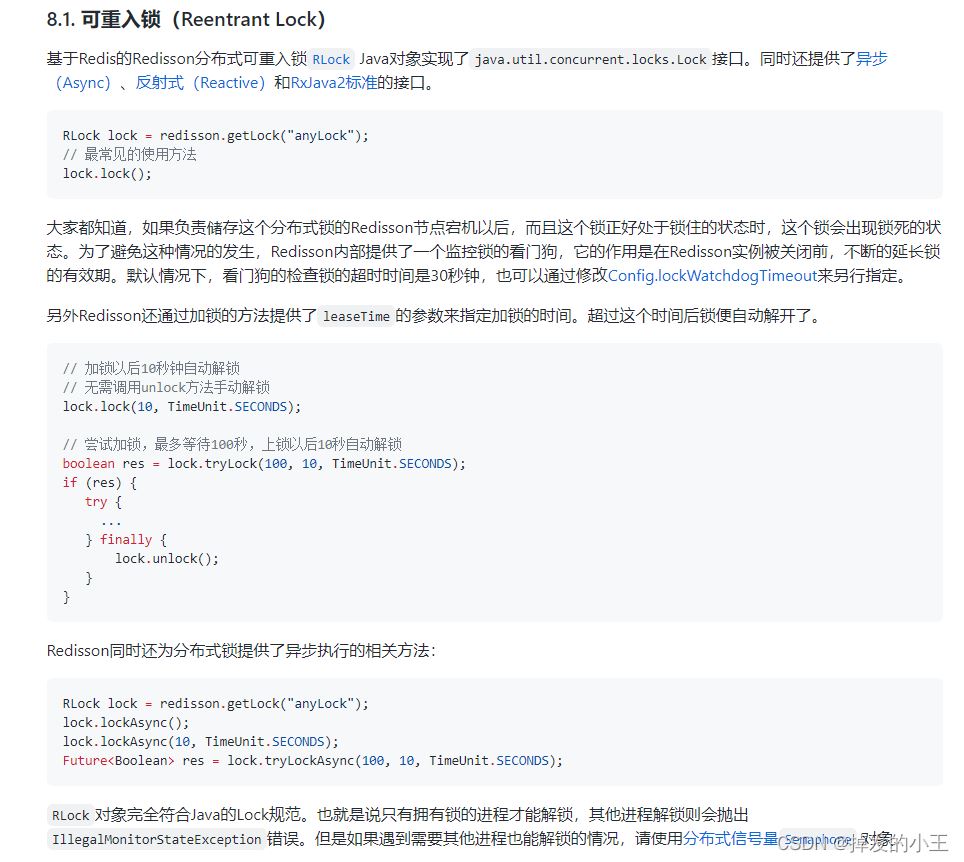
5. Write according to the simple Controller interface on the official website
@ResponseBody
@GetMapping("/hello")
public String hello(){
    // 1.获取一把锁,只要锁名字一样,就是同一把锁
    RLock lock = redisson.getLock("my-lock");
    // 2. 加锁
    lock.lock();// 阻塞试等待  默认加的都是30s
    // 带参数情况
    // lock.lock(10, TimeUnit.SECONDS);// 10s自动解锁,自动解锁时间一定要大于业务的执行时间。
    try {
        System.out.println("加锁成功" + Thread.currentThread().getId());
        Thread.sleep(30000);
    } catch (InterruptedException e) {
        e.printStackTrace();
    } finally {
        // 3. 解锁
        System.out.println("解锁成功:" + Thread.currentThread().getId());
        lock.unlock();
    }
    return "hello";
}6. Test
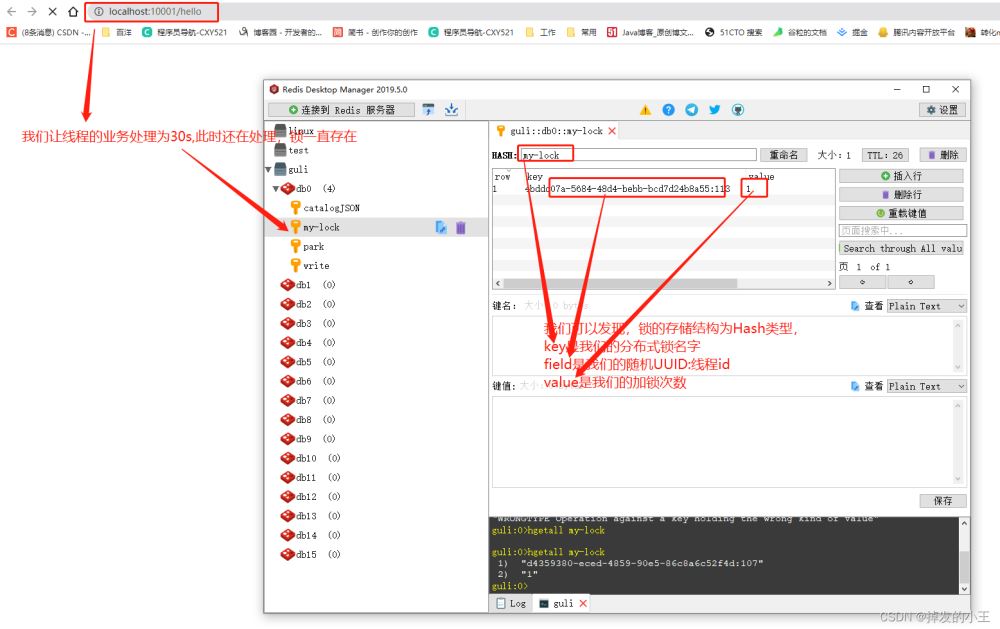

@Override
public void lock() {
    try {
    	// 我们发现不穿过期时间源码默认过期时间为-1
        lock(-1, null, false);
    } catch (InterruptedException e) {
        throw new IllegalStateException();
    }
}
Copy after login
3. Press Ctrl to enter the lock method@Override
public void lock() {
try {
// 我们发现不穿过期时间源码默认过期时间为-1
lock(-1, null, false);
} catch (InterruptedException e) {
throw new IllegalStateException();
}
}private void lock(long leaseTime, TimeUnit unit, boolean interruptibly) throws InterruptedException {
// 获取线程的id,占有锁的时候field的值为UUID:线程号id
long threadId = Thread.currentThread().getId();
// 尝试获得锁
Long ttl = tryAcquire(leaseTime, unit, threadId);
// lock acquired 获得锁,返回
if (ttl == null) {
return;
}
// 这里说明获取锁失败,就通过线程id订阅这个锁
RFuture<RedissonLockEntry> future = subscribe(threadId);
if (interruptibly) {
commandExecutor.syncSubscriptionInterrupted(future);
} else {
commandExecutor.syncSubscription(future);
}
try {
// 这里进行自旋,不断尝试获取锁
while (true) {
// 继续尝试获取锁
ttl = tryAcquire(leaseTime, unit, threadId);
// lock acquired 获取成功
if (ttl == null) {
// 直接返回,挑出自旋
break;
}
// waiting for message 继续等待获得锁
if (ttl >= 0) {
try {
future.getNow().getLatch().tryAcquire(ttl, TimeUnit.MILLISECONDS);
} catch (InterruptedException e) {
if (interruptibly) {
throw e;
}
future.getNow().getLatch().tryAcquire(ttl, TimeUnit.MILLISECONDS);
}
} else {
if (interruptibly) {
future.getNow().getLatch().acquire();
} else {
future.getNow().getLatch().acquireUninterruptibly();
}
}
}
} finally {
// 取消订阅
unsubscribe(future, threadId);
}
// get(lockAsync(leaseTime, unit));
}Copy after login
4. Go in and try to acquire the lock methodprivate void lock(long leaseTime, TimeUnit unit, boolean interruptibly) throws InterruptedException {
// 获取线程的id,占有锁的时候field的值为UUID:线程号id
long threadId = Thread.currentThread().getId();
// 尝试获得锁
Long ttl = tryAcquire(leaseTime, unit, threadId);
// lock acquired 获得锁,返回
if (ttl == null) {
return;
}
// 这里说明获取锁失败,就通过线程id订阅这个锁
RFuture<RedissonLockEntry> future = subscribe(threadId);
if (interruptibly) {
commandExecutor.syncSubscriptionInterrupted(future);
} else {
commandExecutor.syncSubscription(future);
}
try {
// 这里进行自旋,不断尝试获取锁
while (true) {
// 继续尝试获取锁
ttl = tryAcquire(leaseTime, unit, threadId);
// lock acquired 获取成功
if (ttl == null) {
// 直接返回,挑出自旋
break;
}
// waiting for message 继续等待获得锁
if (ttl >= 0) {
try {
future.getNow().getLatch().tryAcquire(ttl, TimeUnit.MILLISECONDS);
} catch (InterruptedException e) {
if (interruptibly) {
throw e;
}
future.getNow().getLatch().tryAcquire(ttl, TimeUnit.MILLISECONDS);
}
} else {
if (interruptibly) {
future.getNow().getLatch().acquire();
} else {
future.getNow().getLatch().acquireUninterruptibly();
}
}
}
} finally {
// 取消订阅
unsubscribe(future, threadId);
}
// get(lockAsync(leaseTime, unit));
}
private Long tryAcquire(long leaseTime, TimeUnit unit, long threadId) {
	// 直接进入异步方法
    return get(tryAcquireAsync(leaseTime, unit, threadId));
}

private <T> RFuture<Long> tryAcquireAsync(long leaseTime, TimeUnit unit, long threadId) {
    // 这里进行判断如果没有设置参数leaseTime = -1
    if (leaseTime != -1) {
        return tryLockInnerAsync(leaseTime, unit, threadId, RedisCommands.EVAL_LONG);
    }
    // 此方法进行获得锁,过期时间为看门狗的默认时间
    // private long lockWatchdogTimeout = 30 * 1000;看门狗默认过期时间为30s
    // 加锁和过期时间要保证原子性,这个方法后面肯定调用执行了Lua脚本,我们下面在看
    RFuture<Long> ttlRemainingFuture = tryLockInnerAsync(commandExecutor.getConnectionManager().getCfg().getLockWatchdogTimeout(), TimeUnit.MILLISECONDS, threadId, RedisCommands.EVAL_LONG);
    // 开启一个定时任务进行不断刷新过期时间
    ttlRemainingFuture.onComplete((ttlRemaining, e) -> {
        if (e != null) {
            return;
        }
        // lock acquired 获得锁
        if (ttlRemaining == null) {
        	// 刷新过期时间方法,我们下一步详细说一下
            scheduleExpirationRenewal(threadId);
    });
return ttlRemainingFuture;<T> RFuture<T> tryLockInnerAsync(long leaseTime, TimeUnit unit, long threadId, RedisStrictCommand<T> command) {
internalLockLeaseTime = unit.toMillis(leaseTime);
return commandExecutor.evalWriteAsync(getName(), LongCodec.INSTANCE, command,
// 首先判断锁是否存在
"if (redis.call('exists', KEYS[1]) == 0) then " +
// 存在则获取锁
"redis.call('hset', KEYS[1], ARGV[2], 1); " +
// 然后设置过期时间
"redis.call('pexpire', KEYS[1], ARGV[1]); " +
"return nil; " +
"end; " +
// hexists查看哈希表的指定字段是否存在,存在锁并且是当前线程持有锁
"if (redis.call('hexists', KEYS[1], ARGV[2]) == 1) then " +
// hincrby自增一
"redis.call('hincrby', KEYS[1], ARGV[2], 1); " +
// 锁的值大于1,说明是可重入锁,重置过期时间
"redis.call('pexpire', KEYS[1], ARGV[1]); " +
"return nil; " +
"end; " +
// 锁已存在,且不是本线程,则返回过期时间ttl
"return redis.call('pttl', KEYS[1]);",
Collections.<Object>singletonList(getName()), internalLockLeaseTime, getLockName(threadId));
}Copy after loginCopy after login
6. Enter what is left in 4 ScheduleExpirationRenewal() method of scheduled tasksGo to the source code step by step: scheduleExpirationRenewal --->renewExpirationAccording to the source code below, the refresh time of scheduled tasks is: internalLockLeaseTime / 3, which is a watchdog 1/3, which is refreshed every 10 seconds<T> RFuture<T> tryLockInnerAsync(long leaseTime, TimeUnit unit, long threadId, RedisStrictCommand<T> command) {
internalLockLeaseTime = unit.toMillis(leaseTime);
return commandExecutor.evalWriteAsync(getName(), LongCodec.INSTANCE, command,
// 首先判断锁是否存在
"if (redis.call('exists', KEYS[1]) == 0) then " +
// 存在则获取锁
"redis.call('hset', KEYS[1], ARGV[2], 1); " +
// 然后设置过期时间
"redis.call('pexpire', KEYS[1], ARGV[1]); " +
"return nil; " +
"end; " +
// hexists查看哈希表的指定字段是否存在,存在锁并且是当前线程持有锁
"if (redis.call('hexists', KEYS[1], ARGV[2]) == 1) then " +
// hincrby自增一
"redis.call('hincrby', KEYS[1], ARGV[2], 1); " +
// 锁的值大于1,说明是可重入锁,重置过期时间
"redis.call('pexpire', KEYS[1], ARGV[1]); " +
"return nil; " +
"end; " +
// 锁已存在,且不是本线程,则返回过期时间ttl
"return redis.call('pttl', KEYS[1]);",
Collections.<Object>singletonList(getName()), internalLockLeaseTime, getLockName(threadId));
}private void renewExpiration() {
ExpirationEntry ee = EXPIRATION_RENEWAL_MAP.get(getEntryName());
if (ee == null) {
return;
}
Timeout task = commandExecutor.getConnectionManager().newTimeout(new TimerTask() {
@Override
public void run(Timeout timeout) throws Exception {
ExpirationEntry ent = EXPIRATION_RENEWAL_MAP.get(getEntryName());
if (ent == null) {
return;
}
Long threadId = ent.getFirstThreadId();
if (threadId == null) {
return;
}
RFuture<Boolean> future = renewExpirationAsync(threadId);
future.onComplete((res, e) -> {
if (e != null) {
log.error("Can't update lock " + getName() + " expiration", e);
return;
}
if (res) {
// reschedule itself
renewExpiration();
}
});
}
}, internalLockLeaseTime / 3, TimeUnit.MILLISECONDS);
ee.setTimeout(task);
}@Override
public void lock(long leaseTime, TimeUnit unit) {
try {
// 这里的过期时间为我们输入的10
lock(leaseTime, unit, false);
} catch (InterruptedException e) {
throw new IllegalStateException();
}
}lock() implements display, same as 3.3 source code
tryAcquireAsync()method
private <T> RFuture<Long> tryAcquireAsync(long leaseTime, TimeUnit unit, long threadId) {
    // 这里进行判断如果没有设置参数leaseTime = -1,此时我们为10
    if (leaseTime != -1) {
    	// 来到此方法
        return tryLockInnerAsync(leaseTime, unit, threadId, RedisCommands.EVAL_LONG);
    }
    // 此处省略后面内容,前面以详细说明。。。。
}tryLockInnerAsync()method
<T> RFuture<T> tryLockInnerAsync(long leaseTime, TimeUnit unit, long threadId, RedisStrictCommand<T> command) {
internalLockLeaseTime = unit.toMillis(leaseTime);
return commandExecutor.evalWriteAsync(getName(), LongCodec.INSTANCE, command,
// 首先判断锁是否存在
"if (redis.call('exists', KEYS[1]) == 0) then " +
// 存在则获取锁
"redis.call('hset', KEYS[1], ARGV[2], 1); " +
// 然后设置过期时间
"redis.call('pexpire', KEYS[1], ARGV[1]); " +
"return nil; " +
"end; " +
// hexists查看哈希表的指定字段是否存在,存在锁并且是当前线程持有锁
"if (redis.call('hexists', KEYS[1], ARGV[2]) == 1) then " +
// hincrby自增一
"redis.call('hincrby', KEYS[1], ARGV[2], 1); " +
// 锁的值大于1,说明是可重入锁,重置过期时间
"redis.call('pexpire', KEYS[1], ARGV[1]); " +
"return nil; " +
"end; " +
// 锁已存在,且不是本线程,则返回过期时间ttl
"return redis.call('pttl', KEYS[1]);",
Collections.<Object>singletonList(getName()), internalLockLeaseTime, getLockName(threadId));
}@Override
public void unlock() {
try {
// 点击进入释放锁方法
get(unlockAsync(Thread.currentThread().getId()));
} catch (RedisException e) {
if (e.getCause() instanceof IllegalMonitorStateException) {
throw (IllegalMonitorStateException) e.getCause();
} else {
throw e;
}
}
// Future<Void> future = unlockAsync();
// future.awaitUninterruptibly();
// if (future.isSuccess()) {
// return;
// }
// if (future.cause() instanceof IllegalMonitorStateException) {
// throw (IllegalMonitorStateException)future.cause();
// }
// throw commandExecutor.convertException(future);
}unlockAsync()method
@Override
public RFuture<Void> unlockAsync(long threadId) {
    RPromise<Void> result = new RedissonPromise<Void>();
    // 解锁方法,后面展开说
    RFuture<Boolean> future = unlockInnerAsync(threadId);
	// 完成
    future.onComplete((opStatus, e) -> {
        if (e != null) {
        	// 取消到期续订
            cancelExpirationRenewal(threadId);
            // 将这个未来标记为失败并通知所有人
            result.tryFailure(e);
            return;
        }
		// 状态为空,说明解锁的线程和当前锁不是同一个线程
        if (opStatus == null) {
            IllegalMonitorStateException cause = new IllegalMonitorStateException("attempt to unlock lock, not locked by current thread by node id: "
                    + id + " thread-id: " + threadId);
            result.tryFailure(cause);
            return;
        }

        cancelExpirationRenewal(threadId);
        result.trySuccess(null);
    });

    return result;
}unlockInnerAsync()method
protected RFuture<Boolean> unlockInnerAsync(long threadId) {
return commandExecutor.evalWriteAsync(getName(), LongCodec.INSTANCE, RedisCommands.EVAL_BOOLEAN,
// 判断释放锁的线程和已存在锁的线程是不是同一个线程,不是返回空
"if (redis.call('hexists', KEYS[1], ARGV[3]) == 0) then " +
"return nil;" +
"end; " +
// 释放锁后,加锁次数减一
"local counter = redis.call('hincrby', KEYS[1], ARGV[3], -1); " +
// 判断剩余数量是否大于0
"if (counter > 0) then " +
// 大于0 ,则刷新过期时间
"redis.call('pexpire', KEYS[1], ARGV[2]); " +
"return 0; " +
"else " +
// 释放锁,删除key并发布锁释放的消息
"redis.call('del', KEYS[1]); " +
"redis.call('publish', KEYS[2], ARGV[1]); " +
"return 1; "+
"end; " +
"return nil;",
Arrays.<Object>asList(getName(), getChannelName()), LockPubSub.UNLOCK_MESSAGE, internalLockLeaseTime, getLockName(threadId));
}The above is the detailed content of How Springboot implements Redis distributed reentrant lock source code analysis based on Redisson. For more information, please follow other related articles on the PHP Chinese website!

Hot AI Tools

Undresser.AI Undress
AI-powered app for creating realistic nude photos

AI Clothes Remover
Online AI tool for removing clothes from photos.

Undress AI Tool
Undress images for free

Clothoff.io
AI clothes remover

AI Hentai Generator
Generate AI Hentai for free.

Hot Article

Hot Tools

Notepad++7.3.1
Easy-to-use and free code editor

SublimeText3 Chinese version
Chinese version, very easy to use

Zend Studio 13.0.1
Powerful PHP integrated development environment

Dreamweaver CS6
Visual web development tools

SublimeText3 Mac version
God-level code editing software (SublimeText3)

Hot Topics
 Solution to 0x80242008 error when installing Windows 11 10.0.22000.100
May 08, 2024 pm 03:50 PM
1. Start the [Start] menu, enter [cmd], right-click [Command Prompt], and select Run as [Administrator]. 2. Enter the following commands in sequence (copy and paste carefully): SCconfigwuauservstart=auto, press Enter SCconfigbitsstart=auto, press Enter SCconfigcryptsvcstart=auto, press Enter SCconfigtrustedinstallerstart=auto, press Enter SCconfigwuauservtype=share, press Enter netstopwuauserv , press enter netstopcryptS
 Golang API caching strategy and optimization
May 07, 2024 pm 02:12 PM
The caching strategy in GolangAPI can improve performance and reduce server load. Commonly used strategies are: LRU, LFU, FIFO and TTL. Optimization techniques include selecting appropriate cache storage, hierarchical caching, invalidation management, and monitoring and tuning. In the practical case, the LRU cache is used to optimize the API for obtaining user information from the database. The data can be quickly retrieved from the cache. Otherwise, the cache can be updated after obtaining it from the database.
 Caching mechanism and application practice in PHP development
May 09, 2024 pm 01:30 PM
In PHP development, the caching mechanism improves performance by temporarily storing frequently accessed data in memory or disk, thereby reducing the number of database accesses. Cache types mainly include memory, file and database cache. Caching can be implemented in PHP using built-in functions or third-party libraries, such as cache_get() and Memcache. Common practical applications include caching database query results to optimize query performance and caching page output to speed up rendering. The caching mechanism effectively improves website response speed, enhances user experience and reduces server load.
 How to upgrade Win11 English 21996 to Simplified Chinese 22000_How to upgrade Win11 English 21996 to Simplified Chinese 22000
May 08, 2024 pm 05:10 PM
First you need to set the system language to Simplified Chinese display and restart. Of course, if you have changed the display language to Simplified Chinese before, you can just skip this step. Next, start operating the registry, regedit.exe, directly navigate to HKEY_LOCAL_MACHINESYSTEMCurrentControlSetControlNlsLanguage in the left navigation bar or the upper address bar, and then modify the InstallLanguage key value and Default key value to 0804 (if you want to change it to English en-us, you need First set the system display language to en-us, restart the system and then change everything to 0409) You must restart the system at this point.
 How to use Redis cache in PHP array pagination?
May 01, 2024 am 10:48 AM
Using Redis cache can greatly optimize the performance of PHP array paging. This can be achieved through the following steps: Install the Redis client. Connect to the Redis server. Create cache data and store each page of data into a Redis hash with the key "page:{page_number}". Get data from cache and avoid expensive operations on large arrays.
 Can navicat connect to redis?
Apr 23, 2024 pm 05:12 PM
Yes, Navicat can connect to Redis, which allows users to manage keys, view values, execute commands, monitor activity, and diagnose problems. To connect to Redis, select the "Redis" connection type in Navicat and enter the server details.
 How to find the update file downloaded by Win11_Share the location of the update file downloaded by Win11
May 08, 2024 am 10:34 AM
1. First, double-click the [This PC] icon on the desktop to open it. 2. Then double-click the left mouse button to enter [C drive]. System files will generally be automatically stored in C drive. 3. Then find the [windows] folder in the C drive and double-click to enter. 4. After entering the [windows] folder, find the [SoftwareDistribution] folder. 5. After entering, find the [download] folder, which contains all win11 download and update files. 6. If we want to delete these files, just delete them directly in this folder.
 PHP Redis caching applications and best practices
May 04, 2024 am 08:33 AM
Redis is a high-performance key-value cache. The PHPRedis extension provides an API to interact with the Redis server. Use the following steps to connect to Redis, store and retrieve data: Connect: Use the Redis classes to connect to the server. Storage: Use the set method to set key-value pairs. Retrieval: Use the get method to obtain the value of the key.


