

Explorer.exe does not start on system startup [Fix]

Now, many users using Windows are beginning to encounter serious system problems. The user cannot open the file or folder because Explorer.exe failed to start after the system loads.
Although, Windows users can manually open Windows Explorer using Command Prompt in some cases and must do so every time the system restarts or after system startup.
This can be problematic and is due to the following factors mentioned below.
- Corrupted system files.
- Enable fast startup settings.
- Outdated or problematic display driver.
- Changes were made to some services in the system.
- Modified registry file.
We have come up with some solutions that take into account all the above factors and will surely help the users. If you are also facing the same problem, don’t worry. This article will guide you through a number of ways to resolve the issue.
Some solutions to try ahead of time:
- Try updating the Windows system and then restarting the system to see if it works.
- Sometimes, the problem lies with the user accounts on the system. So we advise our users to try to create a new user account on the system and try to log in to the system using the newly created account.
- Uninstall any third-party applications on your system that are actually causing this issue. To find out which application is causing this issue, you need to safely boot your system after disabling all services.
Fix 1 – Disable Fast Startup Settings
Some users claim to resolve this issue by turning off Fast Startup Settings on the Power Options page. Please follow the steps below.
Step 1: Press the Windows and R keys simultaneously to open the Run box.
Step 2: Type powercfg.cpl into the text box and press Enter.
![Explorer.exe 在系统启动时不启动 [修复]](https://img.php.cn/upload/article/000/887/227/168575230272699.png)
Step 3: This will open the Power Options page.
Step 4: Click the on the left to select the power button function option.
![Explorer.exe 在系统启动时不启动 [修复]](https://img.php.cn/upload/article/000/887/227/168575230236943.png)
Step 5: Now click on to change the settings that are currently unavailable.
![Explorer.exe 在系统启动时不启动 [修复]](https://img.php.cn/upload/article/000/887/227/168575230232997.png)
Step 6: Then uncheck the Turn on fast startup (recommended) checkbox.
Step 7: Click Save Changes for these changes to take effect.
![Explorer.exe 在系统启动时不启动 [修复]](https://img.php.cn/upload/article/000/887/227/168575230252168.png)
Step 8: Restart the system and check if the problem is resolved.
Step 9: If not, you can try renaming the system.
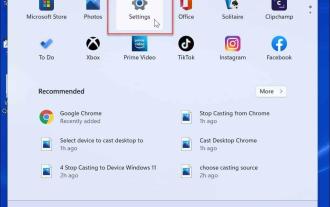
Step 10: To do this, press the Windows key and type rename your PC.
Step 11: Rename your PC System Settings by clicking to select .
![Explorer.exe 在系统启动时不启动 [修复]](https://img.php.cn/upload/article/000/887/227/168575230229369.png)
Step 12: Once the About page opens, click Rename this PC at the top of the page.
![Explorer.exe 在系统启动时不启动 [修复]](https://img.php.cn/upload/article/000/887/227/168575230272254.png)
Step 13: Enter the name you want to give your PC in the available text box and click Next.
![Explorer.exe 在系统启动时不启动 [修复]](https://img.php.cn/upload/article/000/887/227/168575230379404.png)
Step 14: In the next window, enter your credentials and rename the PC.
Step 15: Restart the system.
Fix 2 – Perform SFC Scan and Restoration of DISM Tool
We recommend running System File Checker on the system in order to repair any corrupted system files. Additionally, it is recommended to use the DISM tool to restore the health of the system.
Here are the steps on how to do this.
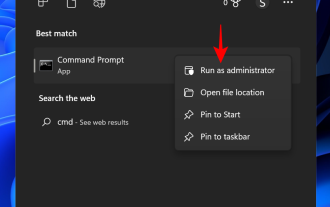
Step 1: Press the Windows and R keys simultaneously and enter cmd.
Step 2: Then press the Ctrl Shift Enter keys simultaneously, this will open an elevated Command Prompt window on your system.
Note – Click Yes to accept the on-screen UAC prompt.
![Explorer.exe 在系统启动时不启动 [修复]](https://img.php.cn/upload/article/000/887/227/168575230351836.png)
Step 3: Type sfc /scannow at the command prompt and press Enter.
![Explorer.exe 在系统启动时不启动 [修复]](https://img.php.cn/upload/article/000/887/227/168575230330882.png)
Step 4: This will start scanning the system for all corrupted files and repair them.
Step 5: Then execute the following lines to restore the health of the system.
DISM /在线 /Cleanup-Image /RestoreHealth
![Explorer.exe 在系统启动时不启动 [修复]](https://img.php.cn/upload/article/000/887/227/168575230393578.png)
Step 7: Once completed, you can close the command prompt window.
Fix 3 – Modify necessary services
Note that the App Preparation service should be stopped, and then the Shell Infrastructure Host service should be started. So, follow the steps explained below.
Step 1: Press the Windows and R keys simultaneously on your keyboard and enter services.msc.
Step 2: Then press Enter key to open the service application.
![Explorer.exe 在系统启动时不启动 [修复]](https://img.php.cn/upload/article/000/887/227/168575230314846.png)
Step 3: Once the Services Application window opens, find the service named App Readiness and right-click on it .
Step 4: Select Properties from the context menu as shown in the image below.
![Explorer.exe 在系统启动时不启动 [修复]](https://img.php.cn/upload/article/000/887/227/168575230389062.png)
Step 5: In the Properties window, go to the General tab and select the Startup Type option from the drop-down menu Select "Disable".
Step 6: Then click Apply and OK.
![Explorer.exe 在系统启动时不启动 [修复]](https://img.php.cn/upload/article/000/887/227/168575230345568.png)
Step 7: Close the service window and restart the system.
Step 8: If the problem persists, you need to press the Ctrl, Shift, and Esc keys simultaneously to open ## on your system #Task ManagerWindow.
Step 9: In the Processes tab, check if there is any service namedShell Infrastructure Host. If it exists, right-click it and select End task.
![Explorer.exe 在系统启动时不启动 [修复]](https://img.php.cn/upload/article/000/887/227/168575230452341.png)
Run new task at the top of the window.
![Explorer.exe 在系统启动时不启动 [修复]](https://img.php.cn/upload/article/000/887/227/168575230432859.png)
sihost.exe in the Create new task window and click OK.
![Explorer.exe 在系统启动时不启动 [修复]](https://img.php.cn/upload/article/000/887/227/168575230497040.png)
Run box by pressing the Windows and R keys simultaneously on your keyboard.
Step 2: Enterdesk.cpl in its text box and press the Enter key.
![Explorer.exe 在系统启动时不启动 [修复]](https://img.php.cn/upload/article/000/887/227/168575230457325.png)
Scale & layout section.
Step 5: Under this section, select125% (recommended) from the drop-down list of Scale options.
Step 6: Next, make sure theDisplay Resolution is 1920 x 1080 (recommended) from the drop-down menu as shown below.
![Explorer.exe 在系统启动时不启动 [修复]](https://img.php.cn/upload/article/000/887/227/168575230421454.png)
Windows and X keys simultaneously, then press the M key on the keyboard to open Device Management Server application.
Step 2: Once the Device Manager window opens, go to the "Display Adapters" option and expand it by double-clicking .
步骤 3:右键单击图形驱动程序,然后从上下文菜单中选择更新驱动程序。
![Explorer.exe 在系统启动时不启动 [修复]](https://img.php.cn/upload/article/000/887/227/168575230470077.png)
第 4 步:选择自动搜索驱动程序选项以开始在线更新驱动程序。
![Explorer.exe 在系统启动时不启动 [修复]](https://img.php.cn/upload/article/000/887/227/168575230439871.png)
第5步:完成后,检查问题是否仍然存在。
第 6 步:如果这没有解决问题,则必须重新安装显示适配器。
第 7 步:为此,请像第 2 步一样展开显示适配器,然后右键单击图形驱动程序。
第 8 步:现在从上下文菜单中单击卸载设备。
![Explorer.exe 在系统启动时不启动 [修复]](https://img.php.cn/upload/article/000/887/227/168575230485561.png)
第九步:卸载显卡驱动后,关闭设备管理器,重启系统。
第 10 步:当系统启动时,它会搜索合适的驱动程序并安装它。
修复 6 – 编辑注册表文件中的 Shell 键
许多 Windows 用户通过更改注册表文件来解决了这个问题,正如他们所声称的。注册表中有一个项名为 Shell,存储了 explorer.exe 文件的路径。如果由于某种原因更改了此值,则会导致问题。所以,我们建议您尝试使用以下步骤,按照说明修改 Shell 键值。
警告– 在继续之前,请通过将注册表文件导出到 Windows 系统来保留注册表文件的备份。因此,如果在编辑时出现任何问题,您可以恢复此注册表文件。
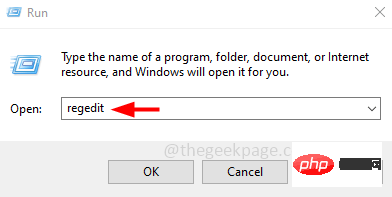
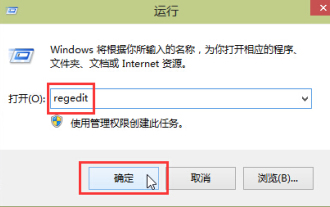
步骤 1:按键盘上的Windows键并键入注册表编辑器。
第 2 步:从搜索结果中选择注册表编辑器应用程序,如下面的屏幕截图所示。
![Explorer.exe 在系统启动时不启动 [修复]](https://img.php.cn/upload/article/000/887/227/168575230553179.jpg)
第 3 步:在屏幕上提示的任何 UAC 上单击“是”以继续。
第 4 步:一旦注册表编辑器窗口打开,清除地址栏。
第 5 步:在地址栏中输入以下路径,然后按Enter键。
HKEY_CURRENT_USER\SOFTWARE\Microsoft\Windows NT\CurrentVersion\Winlogon
第 6 步:这会将您带到编辑器左侧名为Winlogon的注册表项。
第 7 步:在编辑器窗口的右侧,您可能会找到名为Shell 的字符串值。
注意– 如果您没有找到 Shell 字符串值,请通过右键单击Winlogon注册表项并从上下文菜单中导航到新建 > 字符串值来创建它。然后将其重命名为Shell。
![Explorer.exe 在系统启动时不启动 [修复]](https://img.php.cn/upload/article/000/887/227/168575230516132.png)
步骤 8:双击Shell字符串值并在其值数据文本框中输入C : \Windows\explorer.exe并单击OK。
![Explorer.exe 在系统启动时不启动 [修复]](https://img.php.cn/upload/article/000/887/227/168575230530001.png)
第 9 步:重新启动系统,看看这是否有助于解决问题。
第 10 步:如果没有,您需要使用下面给出的路径访问Winlogon注册表项。
HKEY_LOCAL_MACHINE\SOFTWARE\Microsoft\Windows NT\CurrentVersion\Winlogon
第 11 步:现在确保 Shell 字符串值为explorer.exe。
![Explorer.exe 在系统启动时不启动 [修复]](https://img.php.cn/upload/article/000/887/227/168575230580449.png)
第 12 步:重新启动系统,看看这是否有效。
注意– 如果这不能解决问题,您可以尝试删除此 Shell 字符串值一次,然后检查问题是否已解决。
The above is the detailed content of Explorer.exe does not start on system startup [Fix]. For more information, please follow other related articles on the PHP Chinese website!

Hot AI Tools

Undresser.AI Undress
AI-powered app for creating realistic nude photos

AI Clothes Remover
Online AI tool for removing clothes from photos.

Undress AI Tool
Undress images for free

Clothoff.io
AI clothes remover

AI Hentai Generator
Generate AI Hentai for free.

Hot Article
Hot Tools

Notepad++7.3.1
Easy-to-use and free code editor

SublimeText3 Chinese version
Chinese version, very easy to use

Zend Studio 13.0.1
Powerful PHP integrated development environment

Dreamweaver CS6
Visual web development tools

SublimeText3 Mac version
God-level code editing software (SublimeText3)
Hot Topics
 1376
1376
 52
52

 4 Ways to Quickly Rename a Printer on Windows 11
Sep 11, 2023 pm 03:26 PM
4 Ways to Quickly Rename a Printer on Windows 11
Sep 11, 2023 pm 03:26 PM
If you have a lot of printers in your office, the printer list can be long and make getting work done tedious. What's more, multiple printers usually mean similar names, which can be a bit confusing. The last thing you want is to scroll through an endless list and still end up sending your print job to the wrong printer. Fortunately, you can solve all of these problems with a simple renaming trick, which we'll show you below. How do I rename my printer in Windows 11? 1. Using the Settings app tap the key and click Settings. Windows click Bluetooth and Devices and select Printers and Scanners. Select the printer you want to rename. Click Printer Properties. Navigate to the General tab, key
 How to disable core parking on Windows 10
May 16, 2023 pm 01:07 PM
How to disable core parking on Windows 10
May 16, 2023 pm 01:07 PM
If you are a Windows user and want to disable the core parking functionality in your system, this article will guide you through the process. What is core parking? The core parking function is a power saving mechanism. It puts some of your processors into a sleep mode that doesn't perform any tasks and consumes very little or no power. This helps reduce energy consumption and therefore heat in the system. These cores are unparked when needed. Few users need to disable this feature, especially gamers. Disabling this feature will improve your system performance. Disable Windows Core Parking using Windows Registry Editor Step 1: Use Windows + R keys simultaneously to open the run prompt. Step 2: At the run prompt
 Fix: WD My Cloud doesn't show up on the network in Windows 11
Oct 02, 2023 pm 11:21 PM
Fix: WD My Cloud doesn't show up on the network in Windows 11
Oct 02, 2023 pm 11:21 PM
If WDMyCloud is not showing up on the network in Windows 11, this can be a big problem, especially if you store backups or other important files in it. This can be a big problem for users who frequently need to access network storage, so in today's guide, we'll show you how to fix this problem permanently. Why doesn't WDMyCloud show up on Windows 11 network? Your MyCloud device, network adapter, or internet connection is not configured correctly. The SMB function is not installed on the computer. A temporary glitch in Winsock can sometimes cause this problem. What should I do if my cloud doesn't show up on the network? Before we start fixing the problem, you can perform some preliminary checks:
 How to add jump list items on Windows 10 and 11
May 11, 2023 pm 04:31 PM
How to add jump list items on Windows 10 and 11
May 11, 2023 pm 04:31 PM
Jump list on Windows provides easy access to recent files. If you want to add jump list items on Windows, this tutorial will help you get started. Jump Lists on Windows 10 and Windows 11 allow easy access to recently used files, folders, and websites. However, you may want to display more than the 10 most recent items that Windows displays by default. You can make Windows display more items in your jump list by adjusting the registry. For example, you can set it to display about 15-20 items, which will display well on most monitors. This tutorial will show you how to use Windows 10 and Windows 10
 10 Ways to Fix Corrupted Registry Keys in Windows 11: A Step-by-Step Guide
May 15, 2023 pm 04:10 PM
10 Ways to Fix Corrupted Registry Keys in Windows 11: A Step-by-Step Guide
May 15, 2023 pm 04:10 PM
Click to enter: ChatGPT tool plug-in navigation. Ordinary Windows users may never have to access the Windows registry, but various applications and Windows services do. If the registry keys go bad, you will experience various issues such as higher CPU usage, random system crashes, extended startup and shutdown times, and sub-par global performance. Needless to say, the registry must remain functioning properly. What is the Windows Registry? The Windows Registry is a system-wide repository of files and settings that stores important information about Windows, user preferences, applications, hardware, and many other important parts that make up your personal computer. This data is stored in "
 How to disable 'Let's finish setting up the device' on Windows
May 12, 2023 pm 10:43 PM
How to disable 'Let's finish setting up the device' on Windows
May 12, 2023 pm 10:43 PM
Windows 11 comes with many features out of the box, as long as you attach a Microsoft account to them. When you clean install Windows 11, it asks you to set up Microsoft Office, OneDrive, Windows Hello, PhoneLinks (formerly YourPhone), and more. If you don't set up these Microsoft services, you will receive a message reminding you to complete the setup every few days. You can click Continue or Remind Me within 3 days. Both options are annoying, and there's no option to say no. Instead, you need to try a workaround. This is done on Windows by disabling "Let
 How to improve computer startup speed by modifying Windows 10 registry
Apr 19, 2024 am 08:01 AM
How to improve computer startup speed by modifying Windows 10 registry
Apr 19, 2024 am 08:01 AM
In the process of using the Windows 10 operating system, many users find that it takes a long time to start up their computers, which affects the user experience. In order to optimize the boot speed, some people have suggested that the purpose can be achieved by modifying the system registry. In response to this demand, this article will provide an in-depth analysis of how to effectively improve computer startup speed by properly adjusting Windows 10 registry settings. Let’s take a look below. Operation method 1. Use the "win+R" shortcut key to start running, enter "regedit", and click "OK" to open. 2. After entering the Registry Editor, click "HKEY_CURRENT_USERSoftwareMicrosoftWindowsCurren" in the left column
![Explorer.exe does not start on system startup [Fix]](https://img.php.cn/upload/article/000/887/227/168575230155539.png?x-oss-process=image/resize,m_fill,h_207,w_330) Explorer.exe does not start on system startup [Fix]
Jun 03, 2023 am 08:31 AM
Explorer.exe does not start on system startup [Fix]
Jun 03, 2023 am 08:31 AM
Nowadays, many Windows users start encountering severe Windows system problems. The problem is that Explorer.exe cannot start after the system is loaded, and users cannot open files or folders. Although, Windows users can open Windows Explorer manually using Command Prompt in some cases and this must be done every time the system restarts or after system startup. This can be problematic and is due to the following factors mentioned below. Corrupted system files. Enable fast startup settings. Outdated or problematic display drivers. Changes were made to some services in the system. Modified registry file. Keeping all the above factors in mind, we have come up with some that will surely help the users