

How to install Microsoft Windows 11 on your Apple Mac using Parallels

Installing Parallels Desktop 18
The first step in installing Windows 11 on your Mac is to download Parallels 18 Desktop. You can do this by going to the Parallels 18 trial page and clicking the Download Free Trial button.
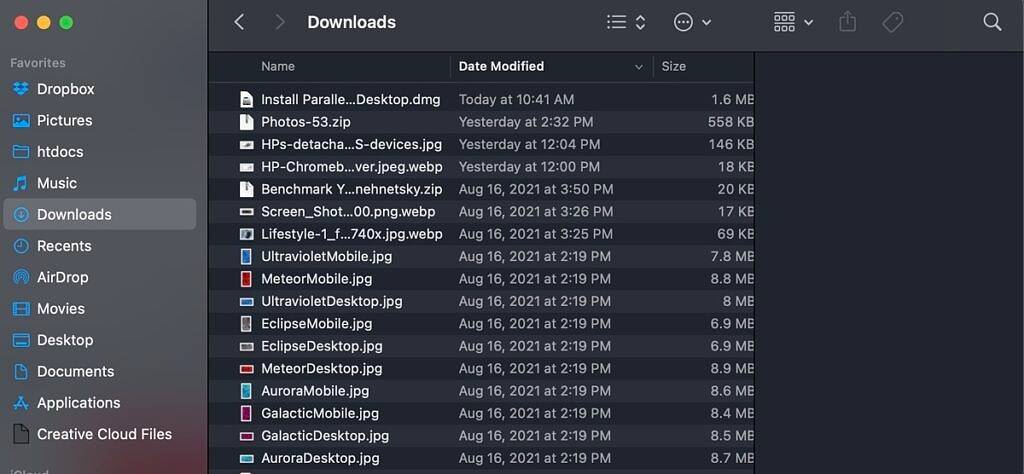
The Parallels Desktop 18 installer DMG file will appear in your Downloads folder and you can double-click the folder to start the installation.
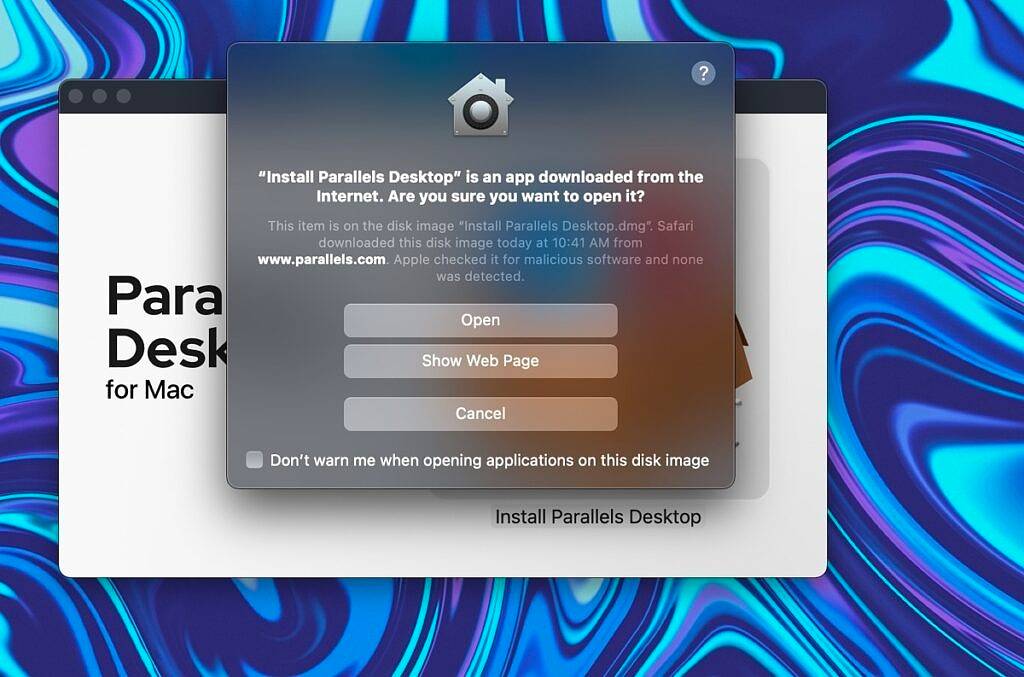
#You may receive a warning that Parallels Desktop is an application you downloaded from the Internet. This is a standard Apple dialog box for security purposes. Just click "Open" to continue.
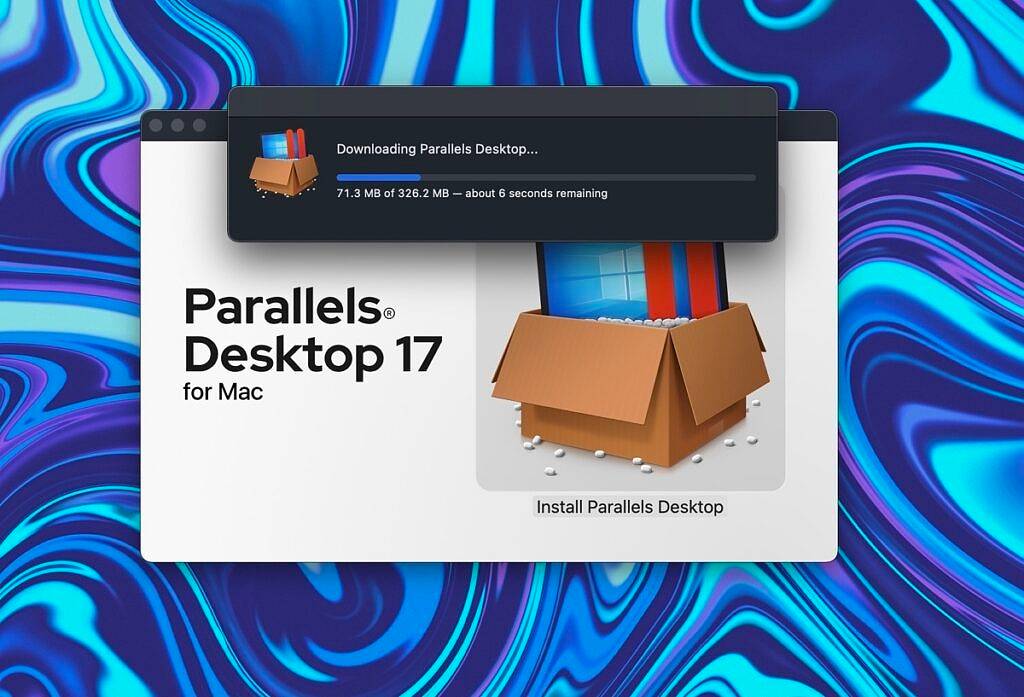
Double-click the box icon with the Windows display (see below). At this point, the installer is downloading the complete Parallels Desktop 18 package ready for installation.
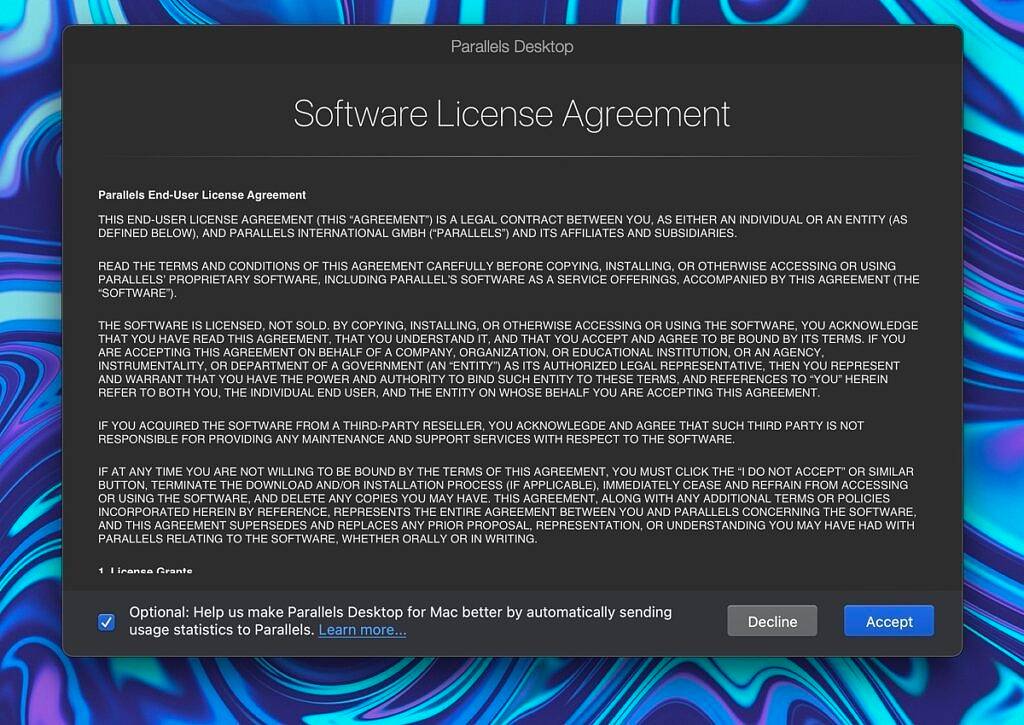
Next, you need to accept the Parallels 18 Software License Agreement. You can also choose to share information with Parallels to help improve the stability of the software. If you don't want to share this information, just uncheck the box.
You now have Parallels installed and need to download Windows 11. It’s great news that Parallels will manage the entire Windows 11 download process for you.
Download and Install Windows 11
The Parallels 18 Setup Assistant will show you a dialog box to download Windows 11. Note that you can use Parallels to run other operating systems, such as Linux or older macOS versions. Technically, you can skip this step when installing Parallels 18.
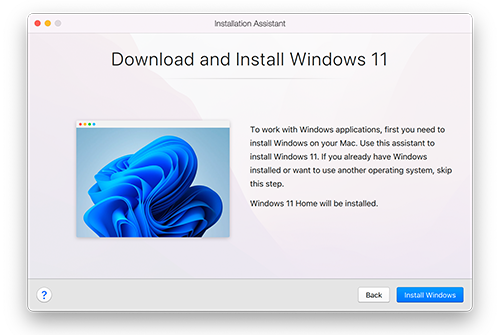
After selecting the Install Windows option, Parallels will begin downloading Windows 11. The downloads are as big as you'd expect. Depending on your internet speed, this step may take quite a while.
After you have fully downloaded Windows 11, you will need to accept some permissions to complete the installation and set up Windows 11 with Parallels 18. The microphone permissions below may look a little strange, but this is just a required process to run Windows 11 on startup.

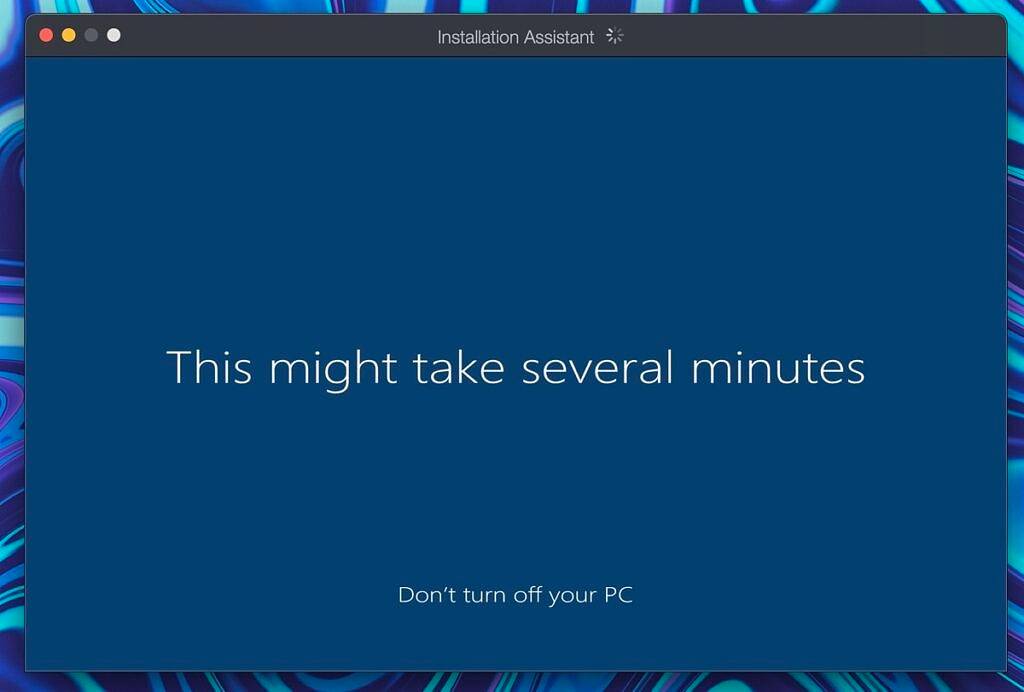
After accepting the permissions, Windows 11 will complete the startup process, which may also take about 10 minutes, depending on the Mac you are using.
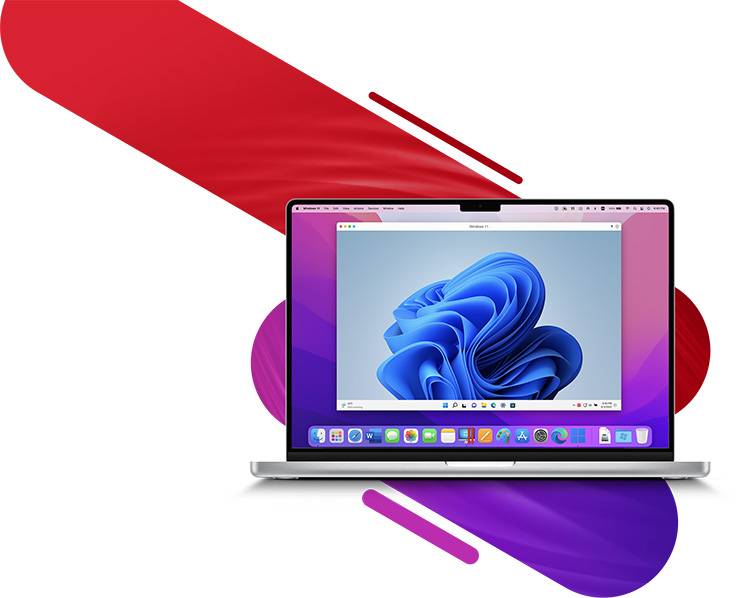
Finally, you will see a completion screen with a big green check mark. Windows 11 is now installed and running as a virtual machine in Parallels Desktop 18 for Mac.
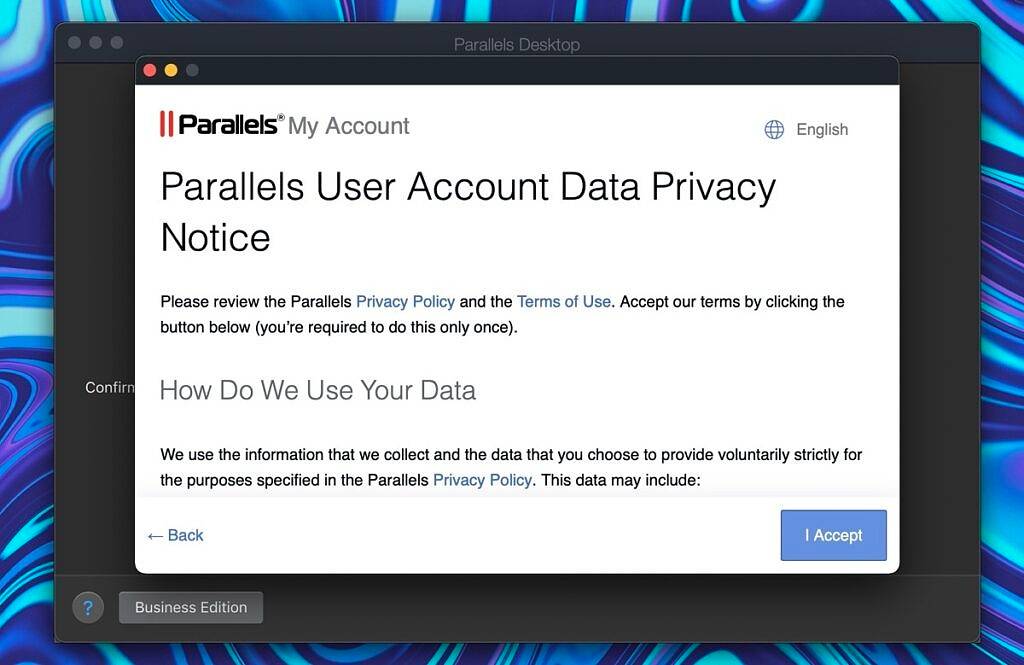
To actually use Windows 11 in a virtual machine, you need to read and accept more data privacy-related agreements. These are fairly standard legal terms, but you should read them to understand what goes into using this software.
After you accept these privacy agreements, Windows 11 will open Microsoft Edge and display the Parallels 18 splash screen, indicating that you have successfully installed Windows. Let’s check out some helpful tips, as there is indeed some valuable information on this page.
The first suggestion is to install all the necessary Windows applications you want to use.

Another suggestion is to choose how you interact with macOS and other Mac applications, and determine how Windows appears. The options are Continuous mode or Full screen mode. Before you make your decision, I recommend you consider your plans to use Windows on your Mac.
Coherence mode is great if you like to occasionally run a Windows application or two because you can completely forget you have Windows installed. Full screen mode is probably the best option when using Windows in most situations. You can go ahead and select the appropriate mode in this step.
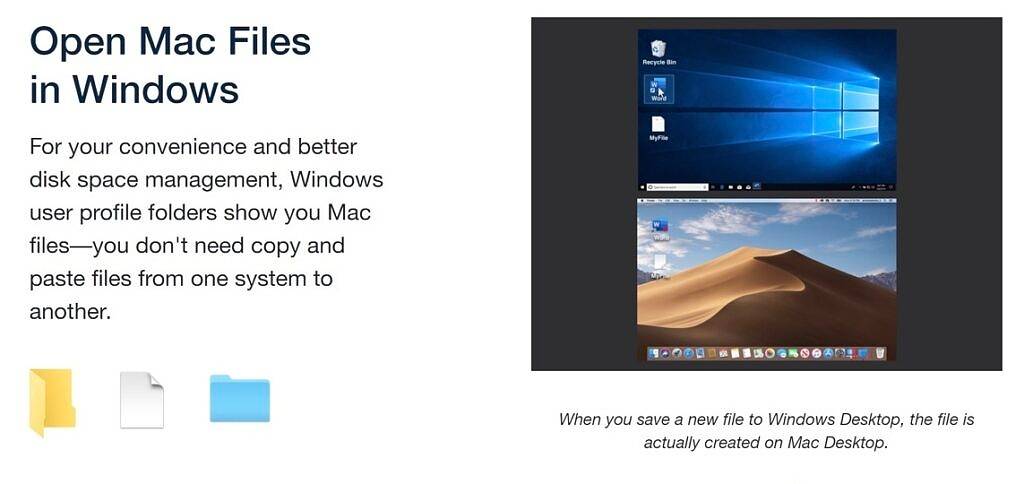
You can access all of your Mac files in the Windows user profile folder, which is what the last dialog box mentioned. This is one of the best features of Parallels as it allows you to use macOS and Windows side by side in a seamless manner. You can even choose to set files in macOS to open in Windows applications by default, which is really cool.
Install Parallels Toolbox for Mac and Windows (optional)
At this point, I recommend that you take a few minutes to install Parallels Toolbox for Mac and Windows. Although the program is a standalone product, it is bundled with Parallels Desktop 18. On macOS and Windows, these toolboxes help you complete many common tasks.
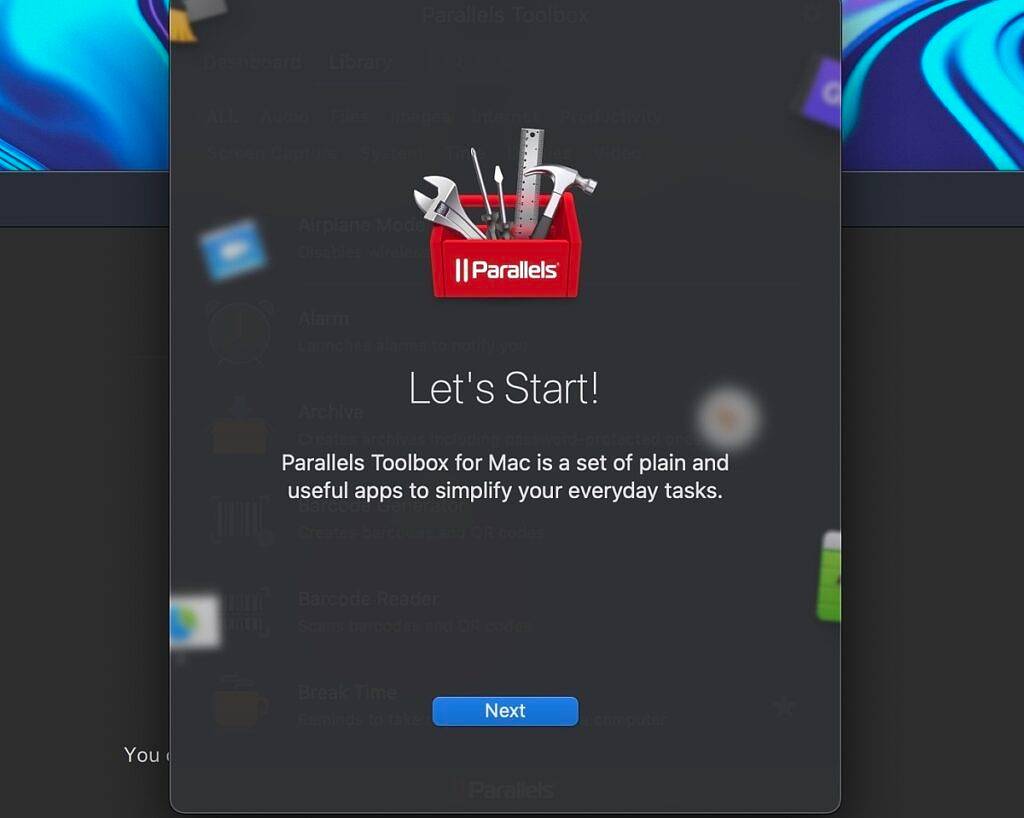
A window will pop up and offer to install Mac and Windows toolboxes. These programs are useful if you frequently switch between macOS and Windows because they install very quickly. On Mac, the toolbox options are even richer, including presentation mode, image resizing, and the ability to uninstall programs.
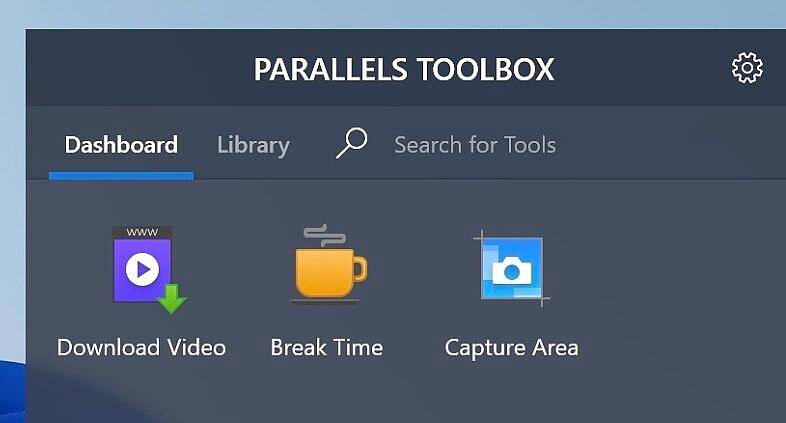
#The Windows toolbox is a bit limited, offering the ability to download videos, take a break from get off work, and a few other various screenshot tools in the dashboard.
Personalizing Windows Settings for Parallels
Now that you have Windows 11 installed on your Mac, you should configure some settings for Windows in Parallels Desktop 18 . To do this, go to the Actions menu at the top of your Mac. Select the Configure option at the bottom of this menu.

#When the Configuration menu is open, you can configure your Windows installation for different use cases. This changes the total amount of storage reserved for Windows 11 on your Mac.
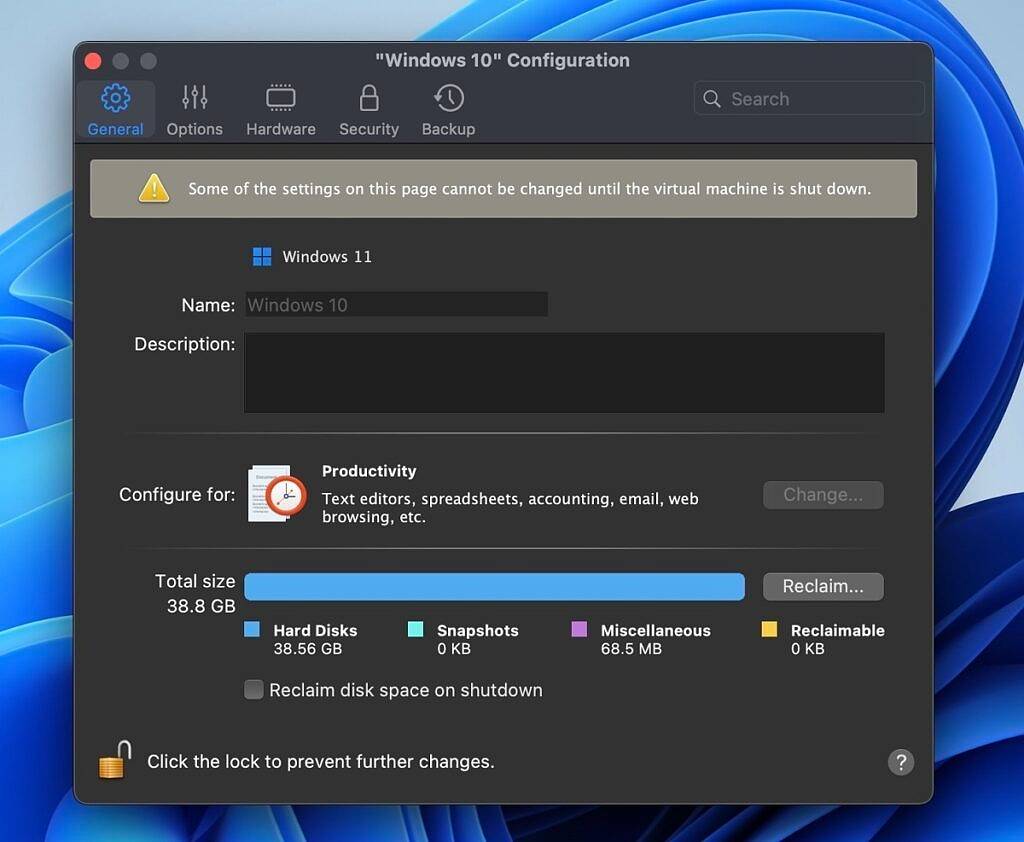
In this menu, you can modify how Windows starts up and shuts down, implement energy-saving optimizations, and set sharing options. It's worth spending some time adjusting these settings in each tab, especially if you plan on switching back and forth between Windows and macOS.
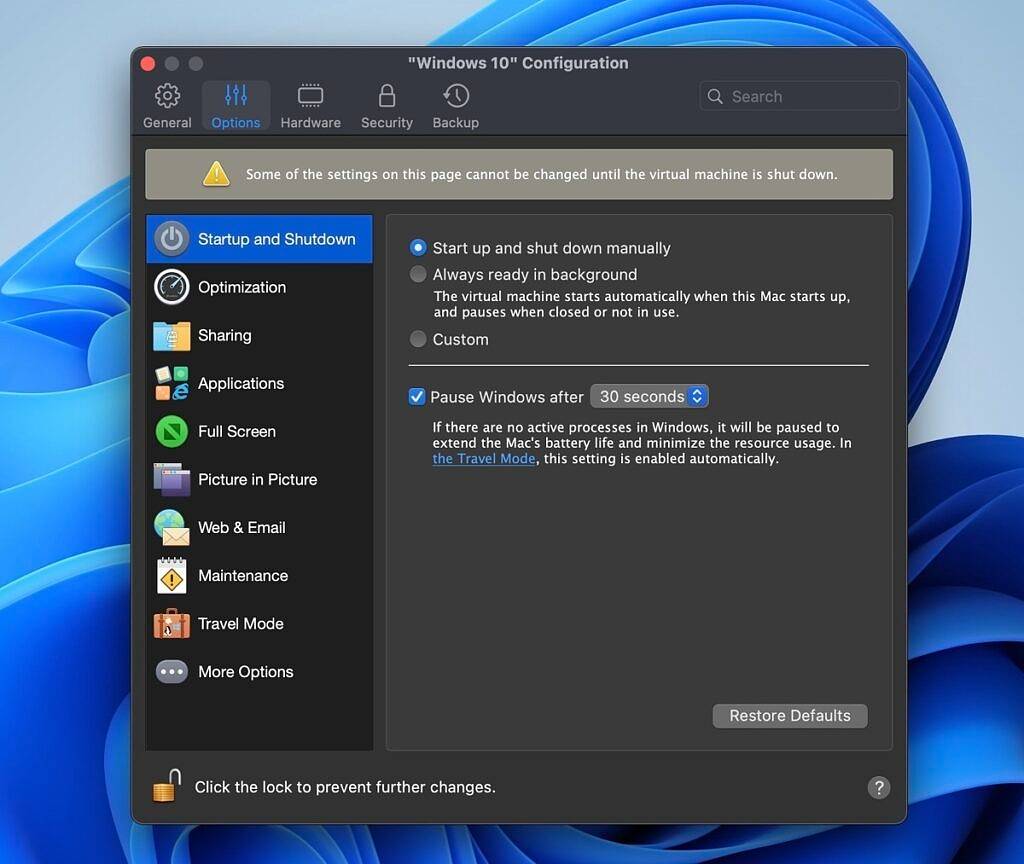
#Finally, remember that if you don’t plan on using Windows for a long time, it’s best to pause it. Although Parallels Desktop 18 is better optimized than ever, it still uses a lot of system resources when running. This is important if you only plan to use Windows for a few programs and spend most of your time on macOS.
At this point, you should be able to use Windows 11 on your Mac. Parallels Desktop 18 is an excellent product, especially for students. I'm very pleased with my overall experience using Parallels Desktop 18 so far. Personally, I prefer to use unified mode so I can use both Mac and Windows apps. This ability to use Windows 11 on any Mac is very important.
The above is the detailed content of How to install Microsoft Windows 11 on your Apple Mac using Parallels. For more information, please follow other related articles on the PHP Chinese website!

Hot AI Tools

Undresser.AI Undress
AI-powered app for creating realistic nude photos

AI Clothes Remover
Online AI tool for removing clothes from photos.

Undress AI Tool
Undress images for free

Clothoff.io
AI clothes remover

AI Hentai Generator
Generate AI Hentai for free.

Hot Article
Hot Tools

Notepad++7.3.1
Easy-to-use and free code editor

SublimeText3 Chinese version
Chinese version, very easy to use

Zend Studio 13.0.1
Powerful PHP integrated development environment

Dreamweaver CS6
Visual web development tools

SublimeText3 Mac version
God-level code editing software (SublimeText3)
Hot Topics
 1377
1377
 52
52

 3 tips to easily customize your Mac computer name, host name and Bonjour name
Mar 06, 2024 pm 12:20 PM
3 tips to easily customize your Mac computer name, host name and Bonjour name
Mar 06, 2024 pm 12:20 PM
Many Mac users tend to keep the default name of their device and may never consider changing it. Many people choose to stick with the name from the initial setup, such as "Johnny's MacBook Air" or simply "iMac." Learning how to change the name of your Mac is a very useful skill, especially when you have multiple devices, as it can help you quickly distinguish and manage them. Next, we will teach you step by step how to change the computer name, host name and Bonjour name (local host name) in macOS system. Why should you change your Mac name? Changing the name of your Mac can not only show your personality, but also help improve the user experience: Personalize your Mac: The default name may not be to your taste, change it to a name you like.
 What software is crystaldiskmark? -How to use crystaldiskmark?
Mar 18, 2024 pm 02:58 PM
What software is crystaldiskmark? -How to use crystaldiskmark?
Mar 18, 2024 pm 02:58 PM
CrystalDiskMark is a small HDD benchmark tool for hard drives that quickly measures sequential and random read/write speeds. Next, let the editor introduce CrystalDiskMark to you and how to use crystaldiskmark~ 1. Introduction to CrystalDiskMark CrystalDiskMark is a widely used disk performance testing tool used to evaluate the read and write speed and performance of mechanical hard drives and solid-state drives (SSD). Random I/O performance. It is a free Windows application and provides a user-friendly interface and various test modes to evaluate different aspects of hard drive performance and is widely used in hardware reviews
 CrystalDiskinfo usage tutorial-What software is CrystalDiskinfo?
Mar 18, 2024 pm 04:50 PM
CrystalDiskinfo usage tutorial-What software is CrystalDiskinfo?
Mar 18, 2024 pm 04:50 PM
CrystalDiskInfo is a software used to check computer hardware devices. In this software, we can check our own computer hardware, such as reading speed, transmission mode, interface, etc.! So in addition to these functions, how to use CrystalDiskInfo and what exactly is CrystalDiskInfo? Let me sort it out for you! 1. The Origin of CrystalDiskInfo As one of the three major components of a computer host, a solid-state drive is the storage medium of a computer and is responsible for computer data storage. A good solid-state drive can speed up file reading and affect consumer experience. When consumers receive new devices, they can use third-party software or other SSDs to
 How to set up WeChat Mac to automatically convert voice messages into text - How to set up voice to text conversion
Mar 19, 2024 am 08:28 AM
How to set up WeChat Mac to automatically convert voice messages into text - How to set up voice to text conversion
Mar 19, 2024 am 08:28 AM
Recently, some friends have consulted the editor about how to set up WeChat Mac to automatically convert voice messages into text. The following is a method for setting up WeChat Mac to automatically convert voice messages into text. Friends in need can come and learn more. Step 1: First, open the Mac version of WeChat. As shown in the picture: Step 2: Next, click "Settings". As shown in the picture: Step 3: Then, click "General". As shown in the picture: Step 4: Then check the option "Automatically convert voice messages in chat to text". As shown in the picture: Step 5: Finally, close the window. As shown in the picture:
 System76 tips Fedora Cosmic spin for 2025 release with Fedora 42
Aug 01, 2024 pm 09:54 PM
System76 tips Fedora Cosmic spin for 2025 release with Fedora 42
Aug 01, 2024 pm 09:54 PM
System76 has made waves recently with its Cosmic desktop environment, which is slated to launch with the next major alpha build of Pop!_OS on August 8. However, a recent post on X by System76 CEO, Carl Richell, has tipped that the Cosmic DE developer
 How to resolve an incompatible software attempt to load with Edge?
Mar 15, 2024 pm 01:34 PM
How to resolve an incompatible software attempt to load with Edge?
Mar 15, 2024 pm 01:34 PM
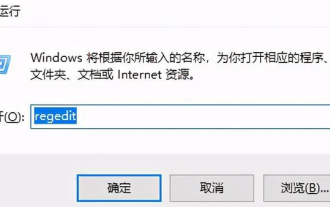
When we use the Edge browser, sometimes incompatible software attempts to be loaded together, so what is going on? Let this site carefully introduce to users how to solve the problem of trying to load incompatible software with Edge. How to solve an incompatible software trying to load with Edge Solution 1: Search IE in the start menu and access it directly with IE. Solution 2: Note: Modifying the registry may cause system failure, so operate with caution. Modify registry parameters. 1. Enter regedit during operation. 2. Find the path\HKEY_LOCAL_MACHINE\SOFTWARE\Policies\Micros
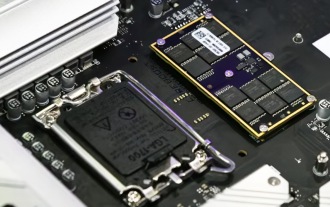 CAMM2 for desktop PCs: MSI explains the benefits of the new RAM standard for gaming towers
Aug 17, 2024 pm 06:47 PM
CAMM2 for desktop PCs: MSI explains the benefits of the new RAM standard for gaming towers
Aug 17, 2024 pm 06:47 PM
The first LPCAMM2 modules for laptops are already being delivered, and desktop mainboards are also expected to be equipped with CAMM2 in future. CAMM2 and LPCAMM2 are not compatible with each other, and even on desktop PCs, customers need to be caref
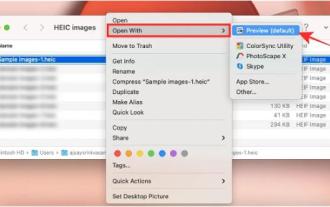 3 Ways to Convert HEIC Photos to JPG on Mac
Mar 15, 2024 pm 08:43 PM
3 Ways to Convert HEIC Photos to JPG on Mac
Mar 15, 2024 pm 08:43 PM
By default, iPhone takes photos from the camera in HEIC format. HEIC stands for High Efficiency Image Container and can hold more pixel data than PNG or JPG files, taking up significantly less space on iPhone storage compared to other formats. These files work best on iPhones but are not widely accepted on the internet because they often result in blurry/grainy pictures when you share them with non-Apple devices. To ensure that HEIC images are compatible on other devices, you may need to convert them to JPG format. This article will introduce how to convert HEIC images to JPG on Mac. How to Convert HEIC Photos to JPG on Mac [3 Methods] Method