

How Springboot implements authentication and dynamic permission management

Knowledge point supplement
Shiro cache
Process analysis
In the original project, since there is no cache configured, it is necessary to verify whether the current subject has access rights each time Every time, the database will be queried. Since permission data is typically data with more reading and less writing, we should add caching support to it.
When we add the cache, Shiro will first query the cache for relevant data when doing authentication. If there is no data in the cache, it will query the database and write the found data to the cache. The next time it is checked, it can be retrieved from the cache. Get the data from the cache instead of from the database. This will improve the performance of our application.
Next, let’s implement the cache management part of shiro.
Shiro session mechanism
Shiro provides a complete enterprise-level session management function, which does not depend on the underlying container (such as web container tomcat). It can be used in both JavaSE and JavaEE environments and provides session Management, session event monitoring, session storage/persistence, container-independent clustering, invalidation/expiration support, transparent support for the Web, SSO single sign-on support and other features.
We will use Shiro's session management to take over our application's web session and store session information through Redis.
Integration steps
Add cache
CacheManager
In Shiro, it provides the CacheManager class for cache management.
Use Shiro's default EhCache implementation
In shiro, the EhCache cache framework is used by default. EhCache is a pure Java in-process caching framework that is fast and lean.
Introducing shiro-EhCache dependency
<dependency>
    <groupId>org.apache.shiro</groupId>
    <artifactId>shiro-ehcache</artifactId>
    <version>1.4.0</version>
</dependency>In the process of integrating Redis with SpringBoot, we must also pay attention to the issue of version matching, otherwise an exception of method not found may be reported.
Add cache configuration in ShiroConfig
private void enableCache(MySQLRealm realm){
    //开启全局缓存配置
    realm.setCachingEnabled(true);
    //开启认证缓存配置
    realm.setAuthenticationCachingEnabled(true);
    //开启授权缓存配置
    realm.setAuthorizationCachingEnabled(true);

    //为了方便操作,我们给缓存起个名字
    realm.setAuthenticationCacheName("authcCache");
    realm.setAuthorizationCacheName("authzCache");
    //注入缓存实现
    realm.setCacheManager(new EhCacheManager());
}Then call this method in getRealm.
Tips: In this implementation, only local caching is implemented. In other words, the cached data shares the same machine memory as the application. If the server goes down or has an unexpected power outage, the cached data will no longer exist. Of course, you can also give the cache more configurations through the cacheManager.setCacheManagerConfigFile() method.
Next we will cache our permission data through Redis
Use Redis to implement
Add dependencies
<!--shiro-redis相关依赖-->
        <dependency>
            <groupId>org.crazycake</groupId>
            <artifactId>shiro-redis</artifactId>
            <version>3.1.0</version>
            <!--    里面这个shiro-core版本较低,会引发一个异常
					ClassNotFoundException: org.apache.shiro.event.EventBus
                    需要排除,直接使用上面的shiro
                    shiro1.3 加入了时间总线。-->
            <exclusions>
                <exclusion>
                    <groupId>org.apache.shiro</groupId>
                    <artifactId>shiro-core</artifactId>
                </exclusion>
            </exclusions>
</dependency>Configure redis
In Add redis-related configuration to application.yml
spring:
   redis:
     host: 127.0.0.1
     port: 6379
     password: hewenping
     timeout: 3000
     jedis:
       pool:
         min-idle: 5
         max-active: 20
max-idle: 15Modify the ShiroConfig configuration class and add the shiro-redis plug-in configuration
/**shiro配置类
 * @author 赖柄沣 bingfengdev@aliyun.com
 * @version 1.0
 * @date 2020/10/6 9:11
 */
@Configuration
public class ShiroConfig {

    private static final String CACHE_KEY = "shiro:cache:";
    private static final String SESSION_KEY = "shiro:session:";
    private static final int EXPIRE = 18000;
    @Value("${spring.redis.host}")
    private String host;
    @Value("${spring.redis.port}")
    private int port;
    @Value("${spring.redis.timeout}")
    private int timeout;
    @Value("${spring.redis.password}")
    private String password;

    @Value("${spring.redis.jedis.pool.min-idle}")
    private int minIdle;
    @Value("${spring.redis.jedis.pool.max-idle}")
    private int maxIdle;
    @Value("${spring.redis.jedis.pool.max-active}")
    private int maxActive;

    @Bean
    public AuthorizationAttributeSourceAdvisor authorizationAttributeSourceAdvisor(org.apache.shiro.mgt.SecurityManager securityManager) {
        AuthorizationAttributeSourceAdvisor authorizationAttributeSourceAdvisor = new AuthorizationAttributeSourceAdvisor();
        authorizationAttributeSourceAdvisor.setSecurityManager(securityManager);
        return authorizationAttributeSourceAdvisor;
    }


    /**
     * 创建ShiroFilter拦截器
     * @return ShiroFilterFactoryBean
     */
    @Bean(name = "shiroFilterFactoryBean")
    public ShiroFilterFactoryBean getShiroFilterFactoryBean(DefaultWebSecurityManager securityManager){
        ShiroFilterFactoryBean shiroFilterFactoryBean = new ShiroFilterFactoryBean();
        shiroFilterFactoryBean.setSecurityManager(securityManager);

        //配置不拦截路径和拦截路径,顺序不能反
        HashMap<String, String> map = new HashMap<>(5);

        map.put("/authc/**","anon");
        map.put("/login.html","anon");
        map.put("/js/**","anon");
        map.put("/css/**","anon");

        map.put("/**","authc");
        shiroFilterFactoryBean.setFilterChainDefinitionMap(map);

        //覆盖默认的登录url
        shiroFilterFactoryBean.setLoginUrl("/authc/unauthc");
        return shiroFilterFactoryBean;
    }

    @Bean
    public Realm getRealm(){
        //设置凭证匹配器,修改为hash凭证匹配器
        HashedCredentialsMatcher myCredentialsMatcher = new HashedCredentialsMatcher();
        //设置算法
        myCredentialsMatcher.setHashAlgorithmName("md5");
        //散列次数
        myCredentialsMatcher.setHashIterations(1024);
        MySQLRealm realm = new MySQLRealm();
        realm.setCredentialsMatcher(myCredentialsMatcher);
        //开启缓存
        realm.setCachingEnabled(true);
        realm.setAuthenticationCachingEnabled(true);
        realm.setAuthorizationCachingEnabled(true);
        return realm;
    }

    /**
     * 创建shiro web应用下的安全管理器
     * @return DefaultWebSecurityManager
     */
    @Bean
    public DefaultWebSecurityManager getSecurityManager( Realm realm){
        DefaultWebSecurityManager securityManager = new DefaultWebSecurityManager();
        securityManager.setRealm(realm);

        securityManager.setCacheManager(cacheManager());
        SecurityUtils.setSecurityManager(securityManager);
        return securityManager;
    }


    /**
     * 配置Redis管理器
     * @Attention 使用的是shiro-redis开源插件
     * @return
     */
    @Bean
    public RedisManager redisManager() {
        RedisManager redisManager = new RedisManager();
        redisManager.setHost(host);
        redisManager.setPort(port);
        redisManager.setTimeout(timeout);
        redisManager.setPassword(password);
        JedisPoolConfig jedisPoolConfig = new JedisPoolConfig();
        jedisPoolConfig.setMaxTotal(maxIdle+maxActive);
        jedisPoolConfig.setMaxIdle(maxIdle);
        jedisPoolConfig.setMinIdle(minIdle);
        redisManager.setJedisPoolConfig(jedisPoolConfig);
        return redisManager;
    }


    @Bean
    public RedisCacheManager cacheManager() {
        RedisCacheManager redisCacheManager = new RedisCacheManager();
        redisCacheManager.setRedisManager(redisManager());
        redisCacheManager.setKeyPrefix(CACHE_KEY);
        // shiro-redis要求放在session里面的实体类必须有个id标识
        //这是组成redis中所存储数据的key的一部分
        redisCacheManager.setPrincipalIdFieldName("username");
        return redisCacheManager;
    }

}Modify doGetAuthenticationInfo## in MySQLRealm #Method, use the entire User object as the first parameter of SimpleAuthenticationInfo. shiro-redis will obtain the id value from the first parameter as part of the key of the data in redis based on the principalIdFieldName attribute value of RedisCacheManager.
/**
 * 认证
 * @param token
 * @return
 * @throws AuthenticationException
 */
@Override
protected AuthenticationInfo doGetAuthenticationInfo(AuthenticationToken token) throws AuthenticationException {

    if(token==null){
        return null;
    }
    String principal = (String) token.getPrincipal();
    User user = userService.findByUsername(principal);
    SimpleAuthenticationInfo simpleAuthenticationInfo = new MyAuthcInfo(
            //由于shiro-redis插件需要从这个属性中获取id作为redis的key
            //所有这里传的是user而不是username
            user,
            //凭证信息
            user.getPassword(),
            //加密盐值
            new CurrentSalt(user.getSalt()),
            getName());

    return simpleAuthenticationInfo;
}doGetAuthorizationInfo method in MySQLRealm to obtain the primary identity information from the User object.
/**
 * 授权
 * @param principals
 * @return
 */
@Override
protected AuthorizationInfo doGetAuthorizationInfo(PrincipalCollection principals) {
   User user = (User) principals.getPrimaryPrincipal();
    String username = user.getUsername();
    List<Role> roleList = roleService.findByUsername(username);
    SimpleAuthorizationInfo authorizationInfo = new SimpleAuthorizationInfo();
    for (Role role : roleList) {
        authorizationInfo.addRole(role.getRoleName());
    }
    List<Long> roleIdList  = new ArrayList<>();
    for (Role role : roleList) {
        roleIdList.add(role.getRoleId());
    }

    List<Resource> resourceList = resourceService.findByRoleIds(roleIdList);
    for (Resource resource : resourceList) {
        authorizationInfo.addStringPermission(resource.getResourcePermissionTag());
    }
    return authorizationInfo;
}SimpleByteSource in Shiro does not implement the serialization interface, the salt generated by ByteSource.Util.bytes() causes an error during serialization , so you need to customize the Salt class and implement the serialization interface. And use new CurrentSalt(user.getSalt()) to pass in the salt value in the custom Realm authentication method.
/**由于shiro当中的ByteSource没有实现序列化接口,缓存时会发生错误
 * 因此,我们需要通过自定义ByteSource的方式实现这个接口
 * @author 赖柄沣 bingfengdev@aliyun.com
 * @version 1.0
 * @date 2020/10/8 16:17
 */
public class CurrentSalt extends SimpleByteSource implements Serializable {
    public CurrentSalt(String string) {
        super(string);
    }

    public CurrentSalt(byte[] bytes) {
        super(bytes);
    }

    public CurrentSalt(char[] chars) {
        super(chars);
    }

    public CurrentSalt(ByteSource source) {
        super(source);
    }

    public CurrentSalt(File file) {
        super(file);
    }

    public CurrentSalt(InputStream stream) {
        super(stream);
    }
}/**SessionId生成器
* <p>@author 赖柄沣 laibingf_dev@outlook.com</p>
* <p>@date 2020/8/15 15:19</p>
*/
public class ShiroSessionIdGenerator implements SessionIdGenerator {
/**
*实现SessionId生成
* @param session
* @return
*/
@Override
public Serializable generateId(Session session) {
Serializable sessionId = new JavaUuidSessionIdGenerator().generateId(session);
return String.format("login_token_%s", sessionId);
}
}Copy after login
Add custom session manager/**SessionId生成器
* <p>@author 赖柄沣 laibingf_dev@outlook.com</p>
* <p>@date 2020/8/15 15:19</p>
*/
public class ShiroSessionIdGenerator implements SessionIdGenerator {
/**
*实现SessionId生成
* @param session
* @return
*/
@Override
public Serializable generateId(Session session) {
Serializable sessionId = new JavaUuidSessionIdGenerator().generateId(session);
return String.format("login_token_%s", sessionId);
}
}/**
* <p>@author 赖柄沣 laibingf_dev@outlook.com</p>
* <p>@date 2020/8/15 15:40</p>
*/
public class ShiroSessionManager extends DefaultWebSessionManager {
//定义常量
private static final String AUTHORIZATION = "Authorization";
private static final String REFERENCED_SESSION_ID_SOURCE = "Stateless request";
//重写构造器
public ShiroSessionManager() {
super();
this.setDeleteInvalidSessions(true);
}
/**
* 重写方法实现从请求头获取Token便于接口统一
* * 每次请求进来,
* Shiro会去从请求头找Authorization这个key对应的Value(Token)
* @param request
* @param response
* @return
*/
@Override
public Serializable getSessionId(ServletRequest request, ServletResponse response) {
String token = WebUtils.toHttp(request).getHeader(AUTHORIZATION);
//如果请求头中存在token 则从请求头中获取token
if (!StringUtils.isEmpty(token)) {
request.setAttribute(ShiroHttpServletRequest.REFERENCED_SESSION_ID_SOURCE, REFERENCED_SESSION_ID_SOURCE);
request.setAttribute(ShiroHttpServletRequest.REFERENCED_SESSION_ID, token);
request.setAttribute(ShiroHttpServletRequest.REFERENCED_SESSION_ID_IS_VALID, Boolean.TRUE);
return token;
} else {
// 这里禁用掉Cookie获取方式
return null;
}
}
}Copy after login
Configure custom session management Add the configuration of the session manager in ShiroConfig/**
* <p>@author 赖柄沣 laibingf_dev@outlook.com</p>
* <p>@date 2020/8/15 15:40</p>
*/
public class ShiroSessionManager extends DefaultWebSessionManager {
//定义常量
private static final String AUTHORIZATION = "Authorization";
private static final String REFERENCED_SESSION_ID_SOURCE = "Stateless request";
//重写构造器
public ShiroSessionManager() {
super();
this.setDeleteInvalidSessions(true);
}
/**
* 重写方法实现从请求头获取Token便于接口统一
* * 每次请求进来,
* Shiro会去从请求头找Authorization这个key对应的Value(Token)
* @param request
* @param response
* @return
*/
@Override
public Serializable getSessionId(ServletRequest request, ServletResponse response) {
String token = WebUtils.toHttp(request).getHeader(AUTHORIZATION);
//如果请求头中存在token 则从请求头中获取token
if (!StringUtils.isEmpty(token)) {
request.setAttribute(ShiroHttpServletRequest.REFERENCED_SESSION_ID_SOURCE, REFERENCED_SESSION_ID_SOURCE);
request.setAttribute(ShiroHttpServletRequest.REFERENCED_SESSION_ID, token);
request.setAttribute(ShiroHttpServletRequest.REFERENCED_SESSION_ID_IS_VALID, Boolean.TRUE);
return token;
} else {
// 这里禁用掉Cookie获取方式
return null;
}
}
}/**
* SessionID生成器
*
*/
@Bean
public ShiroSessionIdGenerator sessionIdGenerator(){
return new ShiroSessionIdGenerator();
}
/**
* 配置RedisSessionDAO
*/
@Bean
public RedisSessionDAO redisSessionDAO() {
RedisSessionDAO redisSessionDAO = new RedisSessionDAO();
redisSessionDAO.setRedisManager(redisManager());
redisSessionDAO.setSessionIdGenerator(sessionIdGenerator());
redisSessionDAO.setKeyPrefix(SESSION_KEY);
redisSessionDAO.setExpire(EXPIRE);
return redisSessionDAO;
}
/**
* 配置Session管理器
* @Author Sans
*
*/
@Bean
public SessionManager sessionManager() {
ShiroSessionManager shiroSessionManager = new ShiroSessionManager();
shiroSessionManager.setSessionDAO(redisSessionDAO());
//禁用cookie
shiroSessionManager.setSessionIdCookieEnabled(false);
//禁用会话id重写
shiroSessionManager.setSessionIdUrlRewritingEnabled(false);
return shiroSessionManager;
}/**
* 认证
* @param token
* @return
* @throws AuthenticationException
*/
@Override
protected AuthenticationInfo doGetAuthenticationInfo(AuthenticationToken token) throws AuthenticationException {
if(token==null){
return null;
}
String principal = (String) token.getPrincipal();
User user = userService.findByUsername(principal);
SimpleAuthenticationInfo simpleAuthenticationInfo = new MyAuthcInfo(
//由于shiro-redis插件需要从这个属性中获取id作为redis的key
//所有这里传的是user而不是username
user,
//凭证信息
user.getPassword(),
//加密盐值
new CurrentSalt(user.getSalt()),
getName());
//清除当前主体旧的会话,相当于你在新电脑上登录系统,把你之前在旧电脑上登录的会话挤下去
ShiroUtils.deleteCache(user.getUsername(),true);
return simpleAuthenticationInfo;
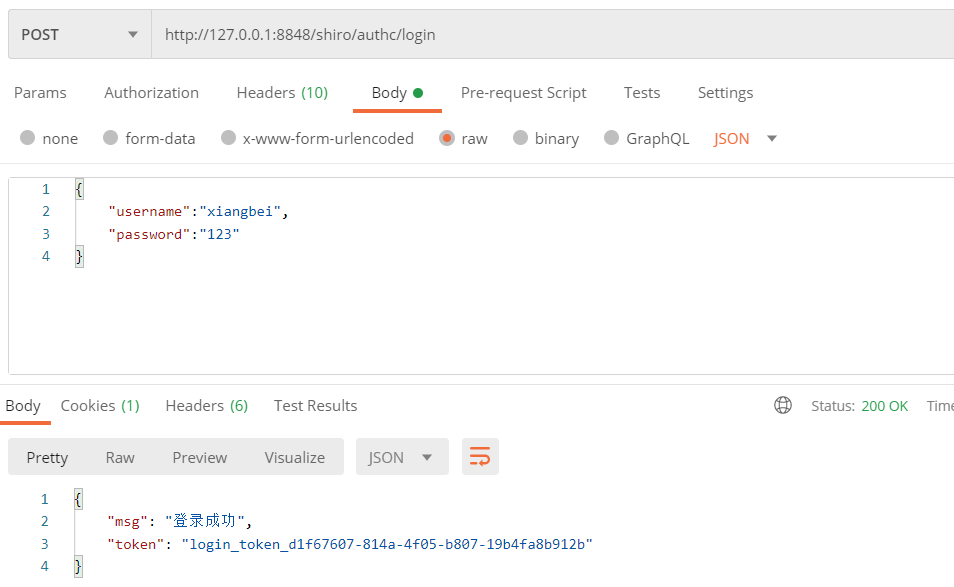
}@PostMapping("/login")
public HashMap<Object, Object> login(@RequestBody LoginVO loginVO) throws AuthenticationException {
boolean flags = authcService.login(loginVO);
HashMap<Object, Object> map = new HashMap<>(3);
if (flags){
Serializable id = SecurityUtils.getSubject().getSession().getId();
map.put("msg","登录成功");
map.put("token",id);
return map;
}else {
return null;
}
}/**shiro异常处理
* @author 赖柄沣 bingfengdev@aliyun.com
* @version 1.0
* @date 2020/10/7 18:01
*/
@ControllerAdvice(basePackages = "pers.lbf.springbootshiro")
public class AuthExceptionHandler {
//==================认证异常====================//
@ExceptionHandler(ExpiredCredentialsException.class)
@ResponseBody
public String expiredCredentialsExceptionHandlerMethod(ExpiredCredentialsException e) {
return "凭证已过期";
}
@ExceptionHandler(IncorrectCredentialsException.class)
@ResponseBody
public String incorrectCredentialsExceptionHandlerMethod(IncorrectCredentialsException e) {
return "用户名或密码错误";
}
@ExceptionHandler(UnknownAccountException.class)
@ResponseBody
public String unknownAccountExceptionHandlerMethod(IncorrectCredentialsException e) {
return "用户名或密码错误";
}
@ExceptionHandler(LockedAccountException.class)
@ResponseBody
public String lockedAccountExceptionHandlerMethod(IncorrectCredentialsException e) {
return "账户被锁定";
}
//=================授权异常=====================//
@ExceptionHandler(UnauthorizedException.class)
@ResponseBody
public String unauthorizedExceptionHandlerMethod(UnauthorizedException e){
return "未授权!请联系管理员授权";
}
}Copy after loginIn actual development, the returned results should be unified and business error codes should be given. This is beyond the scope of this article. If necessary, please consider it based on the characteristics of your own system.
TestAuthentication
/**shiro异常处理
 * @author 赖柄沣 bingfengdev@aliyun.com
 * @version 1.0
 * @date 2020/10/7 18:01
 */
@ControllerAdvice(basePackages = "pers.lbf.springbootshiro")
public class AuthExceptionHandler {

    //==================认证异常====================//

    @ExceptionHandler(ExpiredCredentialsException.class)
    @ResponseBody
    public String expiredCredentialsExceptionHandlerMethod(ExpiredCredentialsException e) {
        return "凭证已过期";
    }

    @ExceptionHandler(IncorrectCredentialsException.class)
    @ResponseBody
    public String incorrectCredentialsExceptionHandlerMethod(IncorrectCredentialsException e) {
        return "用户名或密码错误";
    }

    @ExceptionHandler(UnknownAccountException.class)
    @ResponseBody
    public String unknownAccountExceptionHandlerMethod(IncorrectCredentialsException e) {
        return "用户名或密码错误";
    }


    @ExceptionHandler(LockedAccountException.class)
    @ResponseBody
    public String lockedAccountExceptionHandlerMethod(IncorrectCredentialsException e) {
        return "账户被锁定";
    }

    //=================授权异常=====================//

    @ExceptionHandler(UnauthorizedException.class)
    @ResponseBody
    public String unauthorizedExceptionHandlerMethod(UnauthorizedException e){
        return "未授权!请联系管理员授权";
    }
}Successful login
Incorrect username or password

For the sake of security, do not reveal whether the username or password is wrong.
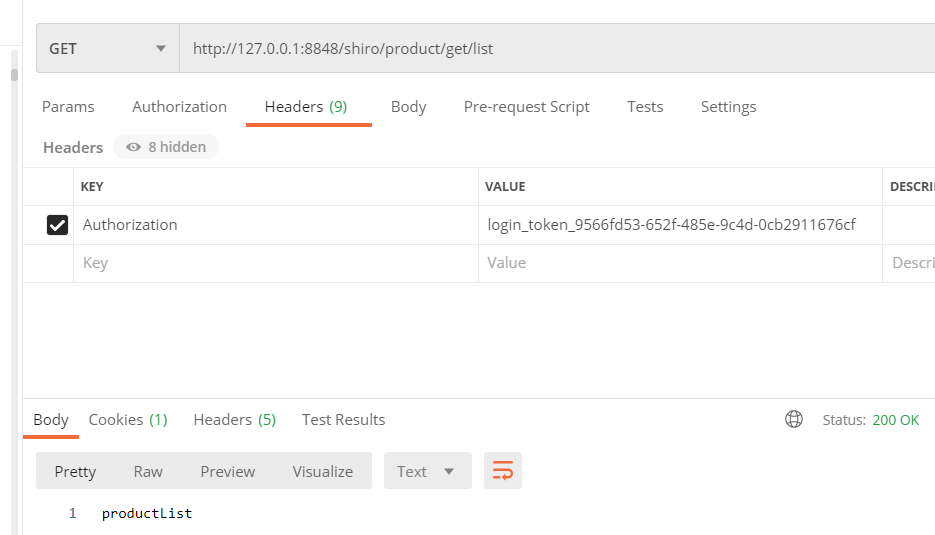
Access protected resources
Access authorized resources after authentication
Access after authentication Unauthorized resources

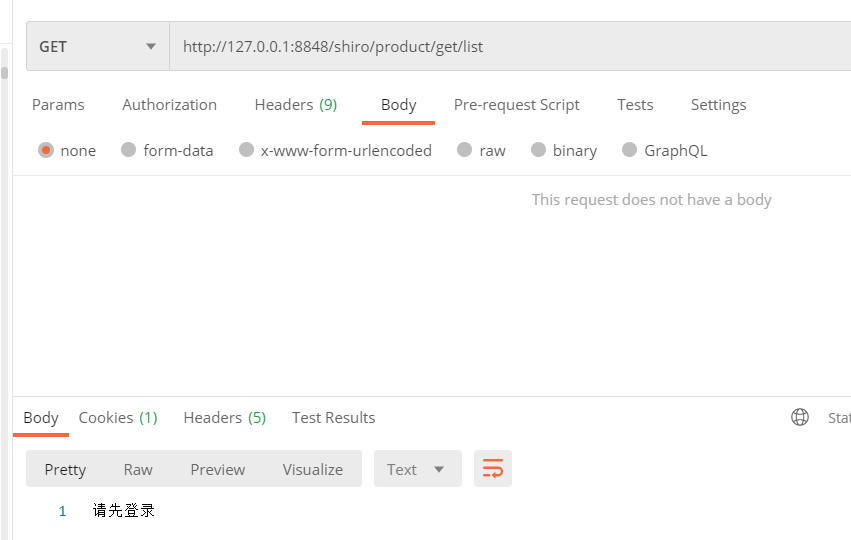
Direct access without authentication
View The three key values of redis

respectively correspond to the authentication information cache, authorization information cache and session information cache.
The above is the detailed content of How Springboot implements authentication and dynamic permission management. For more information, please follow other related articles on the PHP Chinese website!

Hot AI Tools

Undresser.AI Undress
AI-powered app for creating realistic nude photos

AI Clothes Remover
Online AI tool for removing clothes from photos.

Undress AI Tool
Undress images for free

Clothoff.io
AI clothes remover

AI Hentai Generator
Generate AI Hentai for free.

Hot Article
Hot Tools

Notepad++7.3.1
Easy-to-use and free code editor

SublimeText3 Chinese version
Chinese version, very easy to use

Zend Studio 13.0.1
Powerful PHP integrated development environment

Dreamweaver CS6
Visual web development tools

SublimeText3 Mac version
God-level code editing software (SublimeText3)
Hot Topics
 1371
1371
 52
52

 How Springboot integrates Jasypt to implement configuration file encryption
Jun 01, 2023 am 08:55 AM
How Springboot integrates Jasypt to implement configuration file encryption
Jun 01, 2023 am 08:55 AM
Introduction to Jasypt Jasypt is a java library that allows a developer to add basic encryption functionality to his/her project with minimal effort and does not require a deep understanding of how encryption works. High security for one-way and two-way encryption. , standards-based encryption technology. Encrypt passwords, text, numbers, binaries... Suitable for integration into Spring-based applications, open API, for use with any JCE provider... Add the following dependency: com.github.ulisesbocchiojasypt-spring-boot-starter2. 1.1Jasypt benefits protect our system security. Even if the code is leaked, the data source can be guaranteed.
 How SpringBoot integrates Redisson to implement delay queue
May 30, 2023 pm 02:40 PM
How SpringBoot integrates Redisson to implement delay queue
May 30, 2023 pm 02:40 PM
Usage scenario 1. The order was placed successfully but the payment was not made within 30 minutes. The payment timed out and the order was automatically canceled. 2. The order was signed and no evaluation was conducted for 7 days after signing. If the order times out and is not evaluated, the system defaults to a positive rating. 3. The order is placed successfully. If the merchant does not receive the order for 5 minutes, the order is cancelled. 4. The delivery times out, and push SMS reminder... For scenarios with long delays and low real-time performance, we can Use task scheduling to perform regular polling processing. For example: xxl-job Today we will pick
 How to use Redis to implement distributed locks in SpringBoot
Jun 03, 2023 am 08:16 AM
How to use Redis to implement distributed locks in SpringBoot
Jun 03, 2023 am 08:16 AM
1. Redis implements distributed lock principle and why distributed locks are needed. Before talking about distributed locks, it is necessary to explain why distributed locks are needed. The opposite of distributed locks is stand-alone locks. When we write multi-threaded programs, we avoid data problems caused by operating a shared variable at the same time. We usually use a lock to mutually exclude the shared variables to ensure the correctness of the shared variables. Its scope of use is in the same process. If there are multiple processes that need to operate a shared resource at the same time, how can they be mutually exclusive? Today's business applications are usually microservice architecture, which also means that one application will deploy multiple processes. If multiple processes need to modify the same row of records in MySQL, in order to avoid dirty data caused by out-of-order operations, distribution needs to be introduced at this time. The style is locked. Want to achieve points
 How to solve the problem that springboot cannot access the file after reading it into a jar package
Jun 03, 2023 pm 04:38 PM
How to solve the problem that springboot cannot access the file after reading it into a jar package
Jun 03, 2023 pm 04:38 PM
Springboot reads the file, but cannot access the latest development after packaging it into a jar package. There is a situation where springboot cannot read the file after packaging it into a jar package. The reason is that after packaging, the virtual path of the file is invalid and can only be accessed through the stream. Read. The file is under resources publicvoidtest(){Listnames=newArrayList();InputStreamReaderread=null;try{ClassPathResourceresource=newClassPathResource("name.txt");Input
 How to implement Springboot+Mybatis-plus without using SQL statements to add multiple tables
Jun 02, 2023 am 11:07 AM
How to implement Springboot+Mybatis-plus without using SQL statements to add multiple tables
Jun 02, 2023 am 11:07 AM
When Springboot+Mybatis-plus does not use SQL statements to perform multi-table adding operations, the problems I encountered are decomposed by simulating thinking in the test environment: Create a BrandDTO object with parameters to simulate passing parameters to the background. We all know that it is extremely difficult to perform multi-table operations in Mybatis-plus. If you do not use tools such as Mybatis-plus-join, you can only configure the corresponding Mapper.xml file and configure The smelly and long ResultMap, and then write the corresponding sql statement. Although this method seems cumbersome, it is highly flexible and allows us to
 Comparison and difference analysis between SpringBoot and SpringMVC
Dec 29, 2023 am 11:02 AM
Comparison and difference analysis between SpringBoot and SpringMVC
Dec 29, 2023 am 11:02 AM
SpringBoot and SpringMVC are both commonly used frameworks in Java development, but there are some obvious differences between them. This article will explore the features and uses of these two frameworks and compare their differences. First, let's learn about SpringBoot. SpringBoot was developed by the Pivotal team to simplify the creation and deployment of applications based on the Spring framework. It provides a fast, lightweight way to build stand-alone, executable
 How SpringBoot customizes Redis to implement cache serialization
Jun 03, 2023 am 11:32 AM
How SpringBoot customizes Redis to implement cache serialization
Jun 03, 2023 am 11:32 AM
1. Customize RedisTemplate1.1, RedisAPI default serialization mechanism. The API-based Redis cache implementation uses the RedisTemplate template for data caching operations. Here, open the RedisTemplate class and view the source code information of the class. publicclassRedisTemplateextendsRedisAccessorimplementsRedisOperations, BeanClassLoaderAware{//Declare key, Various serialization methods of value, the initial value is empty @NullableprivateRedisSe
 How to get the value in application.yml in springboot
Jun 03, 2023 pm 06:43 PM
How to get the value in application.yml in springboot
Jun 03, 2023 pm 06:43 PM
In projects, some configuration information is often needed. This information may have different configurations in the test environment and the production environment, and may need to be modified later based on actual business conditions. We cannot hard-code these configurations in the code. It is best to write them in the configuration file. For example, you can write this information in the application.yml file. So, how to get or use this address in the code? There are 2 methods. Method 1: We can get the value corresponding to the key in the configuration file (application.yml) through the ${key} annotated with @Value. This method is suitable for situations where there are relatively few microservices. Method 2: In actual projects, When business is complicated, logic
