
Draw a standard arc
Before we start, let’s optimize our drawing environment. The inspiration comes from the texture of the previous class. If you don't like this background, I also provide other background images in the images directory for you to choose from. In addition, all style sheets are written under .
Run result: 
The reason why we need to draw a blank rectangle to fill the canvas is because as we said before, the canvas is transparent. If the background color is not set, it will be covered by the texture I set. I think To make it have a background color (white), there is only one way to draw a rectangle covering the canvas.
How about it? Isn’t it very cool?
Use arc() to draw an arc
The method of using arc() is as follows:
The first three parameters are the circle center coordinates and circle radius. startAngle and endAngle use radian values, not angle values. The regulation of radians is absolute, as shown in the figure below. 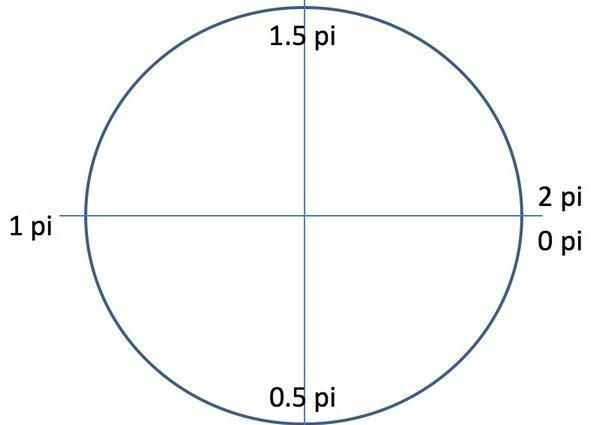
anticlockwise indicates the drawing method, whether it is drawn clockwise or counterclockwise. It passes in a Boolean value, true means drawing counterclockwise, false means drawing clockwise, and the default value is false.
The regulation of radians is absolute. What does it mean? It means what kind of arc you want to draw. Just fill in the arc according to the standard above.
For example, if you draw an arc of 0.5pi ~ 1pi, if you draw it clockwise, it will be only the 1/4 arc in the lower left corner; if you draw it counterclockwise, it will be the complementary 3/4 arc in the upper right corner. Try it yourself here without giving examples.
Use tangent points to draw arcs
arcTo() introduction: The
arcTo() method receives 5 parameters, which are the coordinates of the two tangent points and the arc radius. This method draws an arc based on tangents, that is, an arc is determined by two tangents.
The details are as follows.
This function draws an arc with a given radius. The starting point of the arc is tangent to the straight line from the current path position to point (x1, y1). The end point of the arc is tangent to the straight line from point (x1, y1) to point (x2). , y2) is tangent to the straight line. Therefore, it is usually used with moveTo() or lineTo(). Its ability can be replaced by the simpler arc(), which is complex because it uses pointcuts in the drawing method.
Use tangent points to draw arcs:
In the following case, I also drew the tangent lines to see it more clearly.
Run result: 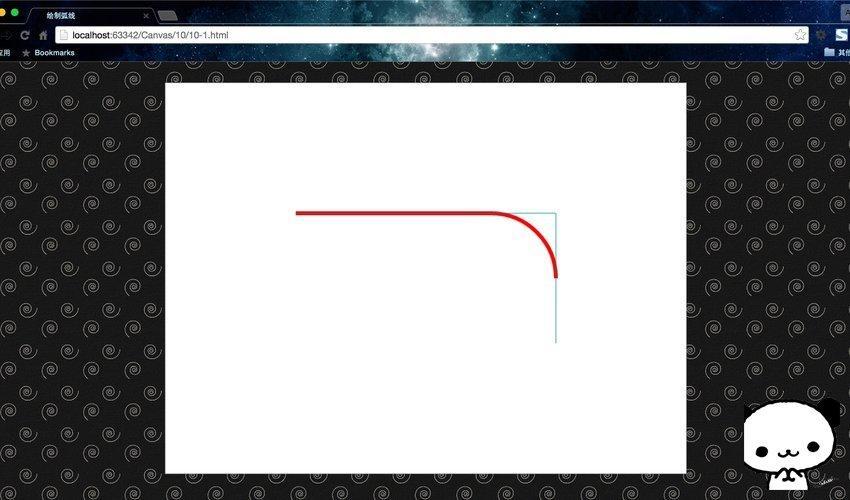
This case also illustrates the role of various key points of arcTo(). For a clearer explanation, I will mark another analysis diagram. 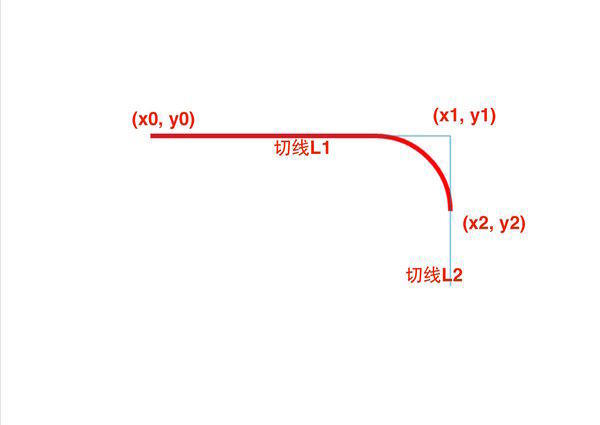
Please note here that the starting point of arcTo() drawing is (x0, y0), but (x0, y0) is not necessarily the tangent point of the arc. The real arcTo() function only passes in (x1, y1) and (x2, y2). Among them (x1, y1) is called the control point, (x2, y2) is the tangent point of the arc end point, which is not necessarily on the arc. But (x0, y0) must be on the arc.
It’s a little convoluted. Let’s try it out by changing the parameters of the drawArcTo() function.
(x2, y2) is not necessarily on the arc:
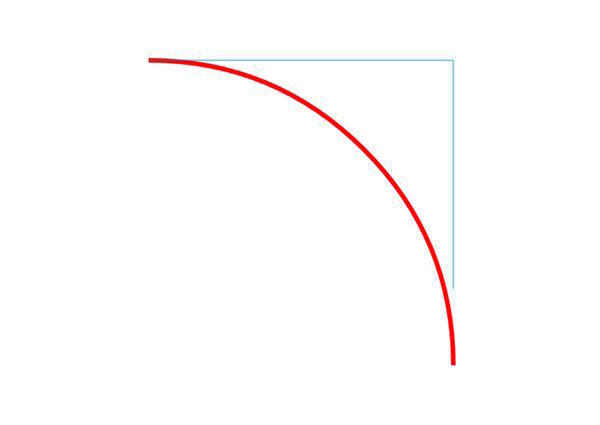
(x0, y0) must be on the arc:
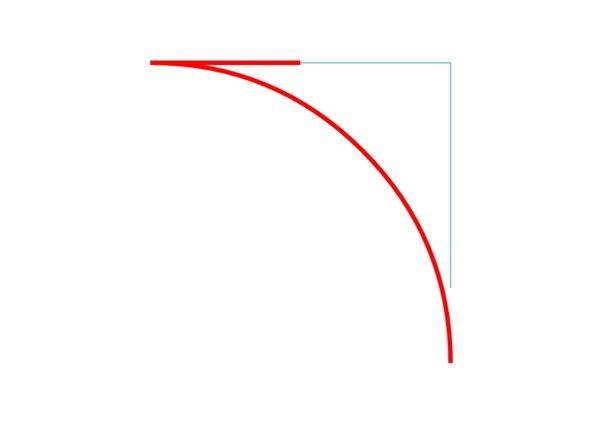
It’s quite interesting. It directly connects the tangent point and (x0, y0) to form a line segment in order to pass through (x0, y0). What a persistent arc...
 What are the production methods of html5 animation production?
 The difference between HTML and HTML5
 What are the configuration management tools?
 console.readline
 freelaunchbar
 How to restore IE browser to automatically jump to EDGE
 What is the difference between css framework and component library
 Solution to slow access speed when renting a US server
 How to optimize the performance of Tomcat


