

Analysis of the usage and differences of dynamic components in Vue

Usage and Difference Analysis of Dynamic Components in Vue
Vue is a progressive JavaScript framework that can be used to build large-scale, efficient Web applications. At its core, Vue is a responsive data binding and componentized system. In Vue, a component is usually represented as a branch in the DOM node tree, which achieves the separation of code and interface in a modular and reusable way. Vue provides a variety of component types, among which dynamic components are a very powerful and practical type.
What are dynamic components?
Dynamic components are a special component type in Vue that allow components to be dynamically loaded and replaced as part of the parent component at runtime. Dynamic components are implemented using the
Basic usage of dynamic components
The basic usage of dynamic components is very simple and clear. Here is an example:
<template>
  <div>
    <component v-bind:is="currentComponent"></component>
  </div>
</template>

<script>
export default {
  data() {
    return {
      currentComponent: 'ComponentA'
    }
  }
}
</script>In the above example, we defined a dynamic component that decides which component to load based on the state of the parent component. By default, we set currentComponent to ComponentA, which means that the code written for ComponentA will be a child node of the tag. When we want to switch to ComponentB, we only need to set currentComponent to ComponentB.
Advantages of dynamic components
There are several advantages to using dynamic components. First, dynamic components improve code reusability and maintainability. Rather than encapsulating all logic in one component, we can encapsulate each small piece of logic into a separate component and then use dynamic components to load these components on demand. Second, dynamic components provide greater flexibility and customizability. Dynamic components allow us to dynamically select and switch components and customize them according to different situations and needs.
The difference between dynamic components and v-if
Although both v-if and dynamic components can dynamically render components based on state, there are some differences between them. v-if is a directive that can be used to control whether to render a specific DOM node. When the condition is true, v-if will render the node, otherwise it will remove it. Therefore, v-if can be used to switch between two or more static components, but the state of those components will not be preserved once the switch is completed.
In contrast, dynamic components can dynamically switch between multiple sub-components and maintain their state and data. When we use dynamic components, we actually use them as dynamic slots and bind their state and data to the parent component's state and data.
Conclusion
Dynamic components are a very practical and powerful component type in Vue. It improves code reusability and maintainability, provides greater flexibility and customizability, and can dynamically switch between multiple sub-components and maintain their state and data. Compared to v-if, dynamic components can be used to dynamically switch between multiple sub-components and maintain their state and data. Therefore, in Vue applications, dynamic components are a very important part, allowing us to write more efficient, flexible and maintainable code.
The above is the detailed content of Analysis of the usage and differences of dynamic components in Vue. For more information, please follow other related articles on the PHP Chinese website!

Hot AI Tools

Undresser.AI Undress
AI-powered app for creating realistic nude photos

AI Clothes Remover
Online AI tool for removing clothes from photos.

Undress AI Tool
Undress images for free

Clothoff.io
AI clothes remover

AI Hentai Generator
Generate AI Hentai for free.

Hot Article
Hot Tools

Notepad++7.3.1
Easy-to-use and free code editor

SublimeText3 Chinese version
Chinese version, very easy to use

Zend Studio 13.0.1
Powerful PHP integrated development environment

Dreamweaver CS6
Visual web development tools

SublimeText3 Mac version
God-level code editing software (SublimeText3)
Hot Topics
 1378
1378
 52
52

 Samsung Galaxy Buds Pro Bluetooth headset pairing guide and usage tutorial
Dec 30, 2023 pm 03:44 PM
Samsung Galaxy Buds Pro Bluetooth headset pairing guide and usage tutorial
Dec 30, 2023 pm 03:44 PM
Samsung's Galaxy Buds series of headphones are uniquely designed and ergonomically designed, making them very comfortable to wear. In addition to being comfortable to wear, Samsung Buds series headphones also provide excellent sound quality experience, which has attracted many users. Next, we will introduce to you the usage tutorial of Samsung Buds headphones, especially the pairing process of Samsung Galaxy Buds Pro Bluetooth headphones and mobile phones. How to pair Samsung Galaxy Buds Pro Bluetooth headsets. Pairing with Samsung Buds headsets is very simple. Just follow the steps below to complete the pairing. The first step is to turn on the Bluetooth function of the phone. You can find the Bluetooth setting option in the settings interface of your phone. Step 2: Place GalaxyBu
 How to use Aisi Assistant-Aisi Assistant usage tutorial
Mar 06, 2024 pm 12:10 PM
How to use Aisi Assistant-Aisi Assistant usage tutorial
Mar 06, 2024 pm 12:10 PM
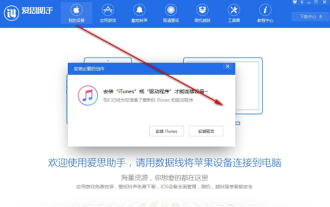
Many novice friends still don’t know how to use Aisi Assistant, so the editor below has brought a tutorial on how to use Aisi Assistant. Friends who need it can quickly take a look. 1. Operation interface, check whether necessary components are installed (as shown in the figure below); 2. My device window, read the relevant description information (as shown in the figure below); 3. If the link cannot be made, according to Instructions for related operations (as shown in the figure below); 4. Use the game window to quickly complete the experience of related popular games (as shown in the figure below); 5. Download and select the various ringtones you need to use (as shown in the figure below) shown); 6. Quickly download various high-definition wallpapers (as shown in the figure below); 7. Support the function of rooting and jailbreaking (as shown in the figure below). above
 How to use exescope? Detailed usage tutorial
Mar 13, 2024 pm 10:40 PM
How to use exescope? Detailed usage tutorial
Mar 13, 2024 pm 10:40 PM
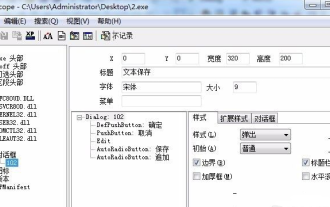
exescope is a powerful program resource editing tool that can easily convert the English version of the software into the Chinese version. So how to use the newly downloaded exescope? If you are also a novice user, come and take a look at the detailed tutorial below. Exescope usage tutorial 1. Open eXeScope, click on the file in the upper left corner, click [Open] in the pop-up options, and select the file you want to open. 2. After opening the software, you can see many controls. 3. You can directly modify the size, position, and content of each control by inputting data, or you can directly click on the dialog box editor above and directly drag the controls on the program interface. After adjusting the controls, click [Save].
 Little black box usage tutorial
Feb 23, 2024 pm 05:10 PM
Little black box usage tutorial
Feb 23, 2024 pm 05:10 PM
Little Black Box is a very easy to use game platform, so how to use this software specifically? Users will encounter many problems when using this software and have different solutions. This tutorial summary of the multi-functional use of the small black box will tell you how to use it. The following is a detailed introduction, so take a look! Tutorial on using Little Black Box [2024-01-31] How to redeem the cdkey purchased from Little Black Box [2024-01-31] How to store games purchased from Little Black Box into Steam [2024-01-31] The CDkey purchased from Little Black Box can be returned Payment?
 How to use Enterprise WeChat - Tutorial on using Enterprise WeChat
Mar 04, 2024 pm 02:28 PM
How to use Enterprise WeChat - Tutorial on using Enterprise WeChat
Mar 04, 2024 pm 02:28 PM
Many friends don’t know how to use Enterprise WeChat, so the editor below will share the tutorial for using Enterprise WeChat. Let’s take a look. I believe it will be helpful to everyone. Step 1: Click the "Enterprise WeChat" icon to enter Enterprise WeChat. In the message section, we can join the group chat to chat with colleagues (as shown in the picture). Step 2: On the main interface of Enterprise WeChat, click "Contact Book" (as shown in the picture). Step 3: Enter the address book section, where we can view our contacts (as shown in the picture). Step 4: On the main interface of Enterprise WeChat, click "Workbench" (as shown in the picture). Step 5: Enter the workbench section, where we can carry out the company's daily small work (as shown in the picture). Step 6: On the main interface of Enterprise WeChat, click "Me" (as shown in the picture
 How to use Thunder magnet link - Tutorial on using Thunder magnet link
Mar 05, 2024 pm 05:22 PM
How to use Thunder magnet link - Tutorial on using Thunder magnet link
Mar 05, 2024 pm 05:22 PM
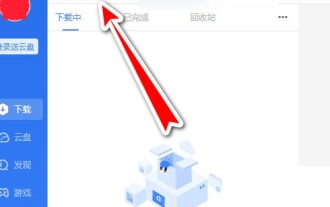
Recently, many friends have asked the editor how to use Thunder Magnet Links. Next, let us learn the tutorial on using Thunder Magnet Links. I hope it can help everyone. Step 1: First, we open the installed Thunder and click the New button, as shown in the picture. Step 2: Then find a magnet link on the Internet, copy and paste it to the location shown in the picture below, and click OK, as shown in the picture. Step 3: The detailed download directory of the resource pops up. We check the resource to be downloaded, select the storage directory, and click Download Now, as shown in the figure. Step 4: Finally, we wait for the resources to download, as shown in the picture. The above is all the content on how to use Thunder magnet links brought to you by the editor. I hope it can be helpful to everyone.
 How to use ons simulator - ons simulator usage tutorial
Mar 04, 2024 pm 01:10 PM
How to use ons simulator - ons simulator usage tutorial
Mar 04, 2024 pm 01:10 PM
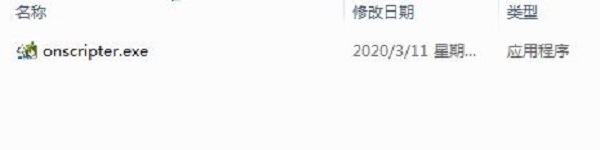
Recently, many friends have asked me how to use the ons simulator. Next, let us learn the tutorial on how to use the ons simulator. I hope it can help everyone. Step 1: First download the onscripter tool as shown below. Step 2: Then download the ons emulator game. Step 3: Then drag the simulator onscripter.exe file you just downloaded directly into the game directory and double-click onscripter.exe to open it. Step 4: Just run the game directly. The above is all the content on how to use the ons simulator brought by the editor. I hope it can be helpful to everyone.
 How to use Sunflower remote control software-Sunflower remote control software usage tutorial
Mar 04, 2024 pm 10:20 PM
How to use Sunflower remote control software-Sunflower remote control software usage tutorial
Mar 04, 2024 pm 10:20 PM
Nowadays, many friends will use the Sunflower remote control software, but many friends still don’t know how to use the Sunflower remote control software. Today, I will introduce in detail all the tutorials on how to use the Sunflower remote control software. I hope it can help everyone. Step 1: First open the Sunflower remote control software and ensure that the software successfully connects to the server (as shown in the picture). Step 2: Then enter the remote Sunflower identification code (as shown in the picture). Step 3: You can directly enter the remote verification code for unattended remote connection, or click to confirm the connection through the remote terminal without verification code (as shown in the figure). Step 4: Then click "Remote Connection", and the desktop control will start to connect to the remote desktop (as shown in the picture). Step 5: After the connection is completed, the system automatically enters the desktop environment of the remote computer.
