

How to restore system settings and configurations on a Windows computer

With the passage of time and the installation and uninstallation of software, the system settings and configuration of Windows computers will inevitably be damaged or malfunction. At this time, some recovery operations are required to ensure the stability and normal operation of the system. This article will introduce some common methods to restore the system settings and configuration of Windows computers.
1. Use the system restore function
System restore is a function that comes with Windows, which can restore the system to a previous point in time. The steps are as follows:
- Open the "Control Panel", click "System and Security"->"System".
- Click "System Protection" in the left menu and check "Turn on System Protection".
- Select the drive that needs to be restored and click the "Configure" button.
- In the pop-up "System Protection Settings" window, click the "Create" button to create a system restore point.
- When recovery is required, restart the computer and press the F8 key during startup to enter the "Advanced Startup Options" interface, select "Repair your computer" to enter the "System Recovery Options" interface.
- Select "System Restore", click "Next", select the restore point to be restored, and follow the steps to complete the restore operation.
2. Use the disk cleanup tool
The disk cleanup tool can clear useless files, temporary files, recycle bin, etc., free up disk space, and can also clean up system files and configurations. The steps are as follows:
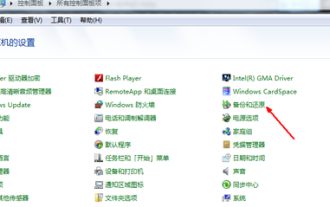
- Open "Computer", right-click the disk that needs to be cleaned, and select "Properties".
- In the pop-up window, click "Disk Cleanup".
- In the next window, select the file types that need to be cleaned and click "OK".
- The system will automatically scan and list the number of files that need to be cleaned. Click "Clean System Files" to continue.
3. Use the system repair tool
The system repair tool can repair some Windows system files or settings and perform repair operations. The steps are as follows:
- Find the "System Repair" or "System Recovery" option in the Windows installation CD or USB flash drive.
- Use this option to repair system files or settings that need to be restored.
- After the repair operation is completed, restart the computer.
4. Reinstall the Windows system
If the above methods fail to solve the problem, you can try to reinstall the Windows system. Before reinstalling, you need to back up important data and prepare a Windows installation CD or USB flash drive. The steps are as follows:
- Insert the Windows installation CD or USB flash drive into the computer to start.
- Follow the prompts to select the system version to be installed and perform the installation operation.
- After the installation is completed, follow the prompts to set up and configure the system.
Summary:
The above methods can help us restore the system settings and configuration of Windows computers. Before proceeding, important data needs to be backed up to prevent data loss. If the problem cannot be solved, you can contact professional technicians for help. At the same time, in daily use, system files and configurations can be cleaned regularly to prevent system failures.
The above is the detailed content of How to restore system settings and configurations on a Windows computer. For more information, please follow other related articles on the PHP Chinese website!

Hot AI Tools

Undresser.AI Undress
AI-powered app for creating realistic nude photos

AI Clothes Remover
Online AI tool for removing clothes from photos.

Undress AI Tool
Undress images for free

Clothoff.io
AI clothes remover

AI Hentai Generator
Generate AI Hentai for free.

Hot Article
Hot Tools

Notepad++7.3.1
Easy-to-use and free code editor

SublimeText3 Chinese version
Chinese version, very easy to use

Zend Studio 13.0.1
Powerful PHP integrated development environment

Dreamweaver CS6
Visual web development tools

SublimeText3 Mac version
God-level code editing software (SublimeText3)
Hot Topics


 How to turn off AirPlay on Mac
Apr 16, 2023 am 09:49 AM
How to turn off AirPlay on Mac
Apr 16, 2023 am 09:49 AM
Turn off AirPlay on Mac via Control Center You can quickly turn off AirPlay in Mac OS Ventura 13 or later by doing the following: On a Mac with AirPlay enabled, go to Control Center in the upper right corner by clicking the two switch appearance icon and select " "Screen Mirroring" From the menu that appears, select the screen your Mac is AirPlay mirroring to. This will disconnect AirPlay and turn it off. You can also turn on ScreenMirroring and AirPlay this way, which you probably already know by now if you enabled it in the first place. . Disconnect AirPla on Mac via system settings
 How to restore win11 system restore win10
Jun 29, 2023 pm 02:31 PM
How to restore win11 system restore win10
Jun 29, 2023 pm 02:31 PM
How to restore win10 system restore in win11? How to return to win10 system when using win11 system? Many friends don’t know how to operate in detail. The editor has compiled the methods of returning win11 to win10 below. If you are interested, follow the editor to read below. How to return win11 to win10 1. Go to Windows 11 Settings, Windows Update, Advanced Options; 2. Other options, restore, click Return after previous version of Windows. 3. After clicking the return button, the rollback process will be executed. The rollback process may take twenty minutes. If you are unlucky, the rollback may fail. Note: If there is a reply
 Can't start Win11 after update? These methods can help you solve the problem!
Mar 08, 2024 pm 12:09 PM
Can't start Win11 after update? These methods can help you solve the problem!
Mar 08, 2024 pm 12:09 PM
Can't start Win11 after update? These methods can help you solve the problem! In recent years, with the development of the digital age, people have become more and more dependent on computer systems. In the Windows operating system, Win11, as the latest version, brings many new features and experiences. However, as Win11 continues to be updated, some problems sometimes occur, such as the system failing to start. If you encounter such a problem after updating Win11, don’t worry, here are some solutions to help you restart the system
 How to restore win11 to its original state
Dec 30, 2023 am 09:41 AM
How to restore win11 to its original state
Dec 30, 2023 am 09:41 AM
If you feel that the system is not very easy to use after the win11 update, we can initialize the settings, which is to restore the computer to factory settings. This may improve the running speed. Let's take a look at how to operate it. How to restore factory settings in win11: 1. First, we click "win+r" on the keyboard to enter settings. 2. Then click "Windows Update". 3. Then click “Restore”. 4. Finally click "Reset Computer". Reading expansion: Is win11 easy to use?
 How to set up USB disk boot in the system
Feb 12, 2024 pm 07:45 PM
How to set up USB disk boot in the system
Feb 12, 2024 pm 07:45 PM
Many friends don’t know how to enter the BIOS interface of a laptop, set the startup options and then create a U disk boot tool. First, you need to know what brand your laptop is. Next, I will teach you how to enter the BIOS interface. Friends in need can refer to it. After using Xiaobai's one-click reinstallation system to create a U disk boot tool, insert the U disk into the reinstalled computer. I don’t know how to enter the BIOS to set the USB boot options, so I can’t enter the Xiaobai PE interface to install the system. How to enter the BIOS interface on a laptop? In fact, this is a great solution. Let’s learn how to enter your laptop’s BIOS! Laptop startup BIOS shortcut keys: General brands of laptops include
 Steps to set up automatic network search in WIN10 system
Mar 27, 2024 pm 05:00 PM
Steps to set up automatic network search in WIN10 system
Mar 27, 2024 pm 05:00 PM
1. Open the [Start] menu and click the [Settings] option in the list. 2. Click [Network and Internet] in settings. 3. After opening the network and Internet interface, if you are currently using a wired network, select [Ethernet] network; if it is a wireless network, select [WiFi]. 4. Click on the currently active network signal, and a [Find Devices and Content] switch will appear. If it is off, just drag the slider to turn it on.
 How to restore factory settings of win7 system
Jul 07, 2023 pm 09:05 PM
How to restore factory settings of win7 system
Jul 07, 2023 pm 09:05 PM
How to restore win7 to factory settings? How to restore factory settings in win7? Restore factory settings in win7 with one click. Some computer users feel that their computers are too stuck and want to restore factory settings. So today I will tell you how to restore factory settings in win7/restore factory settings in win7 system. 1. Enter the control panel and find and turn on the backup and recovery function. 2. Click Backup and Restore, then click Restore system settings and computer. 3. Click the Open System Restore button. 4. Continue to click Next. 5. Continue to click Next. 6. Then a confirmation page will appear, click Confirm, and then the computer will automatically restart and start the system recovery work. Here is the sharing of the tutorial on how to restore factory settings in win7. I hope it will be helpful to you.
 How to effectively solve the problem of automatic lock screen in win10
Dec 28, 2023 pm 10:37 PM
How to effectively solve the problem of automatic lock screen in win10
Dec 28, 2023 pm 10:37 PM
The automatic lock screen interface of win10 is very annoying. We can turn it off to avoid affecting our normal use. But sometimes we find that closing the lock screen is useless. At this time, it may be because we have not completely closed it. We can check each place that needs to be closed one by one to solve the problem. Solution to disabling automatic screen lock in win10 is useless 1. First, we enter settings and select "Personalization" 2. Then click "Lock Screen" on the left 3. Find "Screen Saver Settings" below and confirm that the screen saver is "None" 4. Then click "Change Power Settings" below. 5. Click the icon button on the left. 6. Confirm that turning off the monitor is "Never" 7. Return to the previous interface and select "Change computer sleep time" 8. Confirm that turning off the monitor is "Never"