

Build Web GIS applications based on Django

With the rapid development of Global Positioning System (GPS) and satellite imaging technology, Geographic Information System (GIS) has become an important application field. GIS is not limited to map production and analysis, but is also widely used in environmental management, land management, urban planning and other fields. The development of Web GIS applications allows users to query, analyze and manage GIS data at any place, at any time and through any device, which has great application prospects.
Django is a web development framework based on the Python language. It provides a series of development tools and technologies that can help us quickly build efficient web applications. This article will introduce how to use Django to build a simple Web GIS application.
1. Environment preparation
Before starting, we need to ensure that the following necessary environments have been installed:
- Python 3.x
- Django
- GDAL
Among them, GDAL is a commonly used geographic data processing library, we will use it to process GIS data.
2. Create a new Django project
You can create a new Django project through the following command:
django-admin startproject webgis
This command creates a Django project named webgis. We can enter the root directory of the project through the following command:
cd webgis
Next, we can create an application named gisapp through the following command:
python manage.py startapp gisapp
This command creates an application called gisapp Django application and create a subdirectory with the same name in the project directory.
3. Configure the Django project
We need to configure GDAL and the application in the settings.py file of the project:
# settings.py

# 导入GDAL库
from django.contrib.gis import gdal

# 数据库设置
DATABASES = {
    'default': {
        'ENGINE': 'django.contrib.gis.db.backends.postgis', # 使用PostGIS数据库
        'NAME': 'webgis', # 数据库名称
        'USER': 'postgres', # 数据库用户名
        'PASSWORD': '****', # 数据库密码
        'HOST': '127.0.0.1', # 数据库地址
        'PORT': '5432', # 数据库端口
    }
}

# 应用设置
INSTALLED_APPS = [
    'django.contrib.admin',
    'django.contrib.auth',
    'django.contrib.contenttypes',
    'django.contrib.sessions',
    'django.contrib.messages',
    'django.contrib.staticfiles',
    'django.contrib.gis',
    'gisapp', # 加入我们的应用程序
]

# 时间区域设置
TIME_ZONE = 'Asia/Shanghai'

# GDAL设置
gdal.HAS_GDAL = True
gdal.HAS_SRS = True4. Create a geographical feature model
We need to create some geographic feature models in the application's models.py file to store geographic feature data in the database. For example, we can create a model called "WorldBorder" to store border information of countries in the world. The following is the definition of the model:
# models.py

from django.contrib.gis.db import models

class WorldBorder(models.Model):
    name = models.CharField(max_length=50)
    area = models.IntegerField(default=0)
    pop2005 = models.IntegerField(default=0)
    fips = models.CharField(max_length=2)
    iso2 = models.CharField(max_length=2)
    iso3 = models.CharField(max_length=3)
    un = models.IntegerField(default=0)
    region = models.IntegerField(default=0)
    subregion = models.IntegerField(default=0)
    lon = models.FloatField()
    lat = models.FloatField()
    mpoly = models.MultiPolygonField()

    def __str__(self):
return self.nameIn this model, we define some fields to store basic information of the country/region (such as name, area, population, etc.), and we also define a MultiPolygonField type fields to store boundary information.
5. Create geographical feature data
We need to create some geographical feature data for storage in the database. We can import data into the database through the following command:
ogr2ogr -f "PostgreSQL" PG:"dbname=webgis user=postgres host=127.0.0.1 password=**** port=5432" -nln worldborder -nlt MULTIPOLYGON -update -overwrite -lco GEOMETRY_NAME=mpoly -skipfailures ./world_borders.shp
This command imports the data in the world_borders.shp file into a table named "worldborder".
6. Write view functions
We need to write some view functions in the views.py file of the application in order to respond to user requests. For example, we can write a view function named "map" to display the border information of countries around the world on the map. The following is the definition of the view function:
# views.py

from django.shortcuts import render
from django.contrib.gis.geos import GEOSGeometry
from .models import WorldBorder

def map(request):
    # 获取所有国家/地区
    countries = WorldBorder.objects.all()

    # 构造GeoJSON格式数据
    geojson = {
        "type": "FeatureCollection",
        "features": []
    }
    for country in countries:
        feature = {
            "type": "Feature",
            "geometry": country.mpoly.geojson,
            "properties": {
                "name": country.name,
                "area": country.area,
                "pop2005": country.pop2005,
                "fips": country.fips,
                "iso2": country.iso2,
                "iso3": country.iso3,
                "un": country.un,
                "region": country.region,
                "subregion": country.subregion
            }
        }
        geojson["features"].append(feature)

    # 返回地图页面
return render(request, 'map.html', {'geojson': geojson})This function first gets the information of all countries/regions and then converts them into GeoJSON format data. Finally, the data is passed to a template named "map.html" for display.
7. Writing templates
We need to create a template named "map.html" in the templates directory of the application to display maps and data. The following is the definition of the template:
<!DOCTYPE html>
<html>
<head>
    <meta charset="utf-8">
    <title>Web GIS Application</title>
    <style>
        #map {
            width: 100%;
            height: 100%;
            position: absolute;
            top: 0;
            left: 0;
            z-index: -1;
        }
    </style>
    <script src="{% static 'leaflet/leaflet.js' %}"></script>
    <link rel="stylesheet" href="{% static 'leaflet/leaflet.css' %}"/>
</head>
<body>
<div id="map"></div>
<script>
    // 初始化地图
    var map = L.map('map').setView([39.9, 116.4], 3);

    // 添加图层
    var geojson = {{ geojson | safe }};
    var countries = L.geoJSON(geojson, {
        onEachFeature: function (feature, layer) {
            layer.bindPopup(feature.properties.name);
        }
    }).addTo(map);

    // 添加控件
    L.control.scale().addTo(map);

    // 添加底图
    var osm = L.tileLayer('http://{s}.tile.osm.org/{z}/{x}/{y}.png', {
        attribution: 'Map data © <a href="http://openstreetmap.org">OpenStreetMap</a> contributors'
    });
    osm.addTo(map);
</script>
</body>
</html>This template uses a JavaScript map library called "Leaflet".
8. Run the application
We can execute the following command in the command line to start the Django server:
python manage.py runserver
Then, visit the following address to open the Django server in the browser View Web GIS Applications:
http://127.0.0.1:8000/map
Summary
This article explains how to build a simple Web GIS application using Django and GDAL. By using these tools and techniques, we can easily develop efficient web applications in which to display and analyze geographic data. Additionally, we can use other map libraries and GIS data sources to further extend and optimize our application.
The above is the detailed content of Build Web GIS applications based on Django. For more information, please follow other related articles on the PHP Chinese website!

Hot AI Tools

Undresser.AI Undress
AI-powered app for creating realistic nude photos

AI Clothes Remover
Online AI tool for removing clothes from photos.

Undress AI Tool
Undress images for free

Clothoff.io
AI clothes remover

Video Face Swap
Swap faces in any video effortlessly with our completely free AI face swap tool!

Hot Article
Hot Tools

Notepad++7.3.1
Easy-to-use and free code editor

SublimeText3 Chinese version
Chinese version, very easy to use

Zend Studio 13.0.1
Powerful PHP integrated development environment

Dreamweaver CS6
Visual web development tools

SublimeText3 Mac version
God-level code editing software (SublimeText3)
Hot Topics
 1387
1387
 52
52

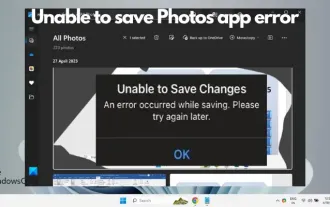 Unable to save changes to Photos app error in Windows 11
Mar 04, 2024 am 09:34 AM
Unable to save changes to Photos app error in Windows 11
Mar 04, 2024 am 09:34 AM
If you encounter the Unable to save changes error while using the Photos app for image editing in Windows 11, this article will provide you with solutions. Unable to save changes. An error occurred while saving. Please try again later. This problem usually occurs due to incorrect permission settings, file corruption, or system failure. So, we’ve done some deep research and compiled some of the most effective troubleshooting steps to help you resolve this issue and ensure you can continue to use the Microsoft Photos app seamlessly on your Windows 11 device. Fix Unable to Save Changes to Photos App Error in Windows 11 Many users have been talking about Microsoft Photos app error on different forums
 Photos cannot open this file because the format is not supported or the file is corrupted
Feb 22, 2024 am 09:49 AM
Photos cannot open this file because the format is not supported or the file is corrupted
Feb 22, 2024 am 09:49 AM
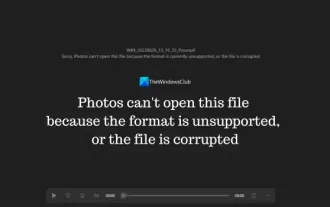
In Windows, the Photos app is a convenient way to view and manage photos and videos. Through this application, users can easily access their multimedia files without installing additional software. However, sometimes users may encounter some problems, such as encountering a "This file cannot be opened because the format is not supported" error message when using the Photos app, or file corruption when trying to open photos or videos. This situation can be confusing and inconvenient for users, requiring some investigation and fixes to resolve the issues. Users see the following error when they try to open photos or videos on the Photos app. Sorry, Photos cannot open this file because the format is not currently supported, or the file
 How to connect Apple Vision Pro to PC
Apr 08, 2024 pm 09:01 PM
How to connect Apple Vision Pro to PC
Apr 08, 2024 pm 09:01 PM
The Apple Vision Pro headset is not natively compatible with computers, so you must configure it to connect to a Windows computer. Since its launch, Apple Vision Pro has been a hit, and with its cutting-edge features and extensive operability, it's easy to see why. Although you can make some adjustments to it to suit your PC, and its functionality depends heavily on AppleOS, so its functionality will be limited. How do I connect AppleVisionPro to my computer? 1. Verify system requirements You need the latest version of Windows 11 (Custom PCs and Surface devices are not supported) Support 64-bit 2GHZ or faster fast processor High-performance GPU, most
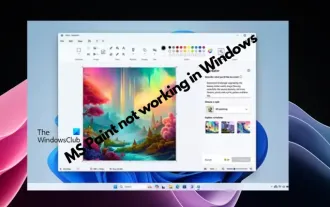 MS Paint not working properly in Windows 11
Mar 09, 2024 am 09:52 AM
MS Paint not working properly in Windows 11
Mar 09, 2024 am 09:52 AM
Microsoft Paint not working in Windows 11/10? Well, this seems to be a common problem and we have some great solutions to fix it. Users have been complaining that when trying to use MSPaint, it doesn't work or open. Scrollbars in the app don't work, paste icons don't show up, crashes, etc. Luckily, we've collected some of the most effective troubleshooting methods to help you resolve issues with Microsoft Paint app. Why doesn't Microsoft Paint work? Some possible reasons why MSPaint is not working on Windows 11/10 PC are as follows: The security identifier is corrupted. hung system
 Fix caa90019 Microsoft Teams error
Feb 19, 2024 pm 02:30 PM
Fix caa90019 Microsoft Teams error
Feb 19, 2024 pm 02:30 PM
Many users have been complaining about encountering error code caa90019 every time they try to log in using Microsoft Teams. Even though this is a convenient communication app, this mistake is very common. Fix Microsoft Teams Error: caa90019 In this case, the error message displayed by the system is: "Sorry, we are currently experiencing a problem." We have prepared a list of ultimate solutions that will help you resolve Microsoft Teams error caa90019. Preliminary steps Run as administrator Clear Microsoft Teams application cache Delete settings.json file Clear Microsoft from Credential Manager
 Shazam app not working in iPhone: Fix
Jun 08, 2024 pm 12:36 PM
Shazam app not working in iPhone: Fix
Jun 08, 2024 pm 12:36 PM
Having issues with the Shazam app on iPhone? Shazam helps you find songs by listening to them. However, if Shazam isn't working properly or doesn't recognize the song, you'll have to troubleshoot it manually. Repairing the Shazam app won't take long. So, without wasting any more time, follow the steps below to resolve issues with Shazam app. Fix 1 – Disable Bold Text Feature Bold text on iPhone may be the reason why Shazam is not working properly. Step 1 – You can only do this from your iPhone settings. So, open it. Step 2 – Next, open the “Display & Brightness” settings there. Step 3 – If you find that “Bold Text” is enabled
 High CPU usage of Feature Access Manager service in Windows 11
Feb 19, 2024 pm 03:06 PM
High CPU usage of Feature Access Manager service in Windows 11
Feb 19, 2024 pm 03:06 PM
Some PC users and gamers may experience abnormally high CPU usage when using Windows 11 or Windows 10, especially when running certain applications or games. This article provides some suggestions to help users alleviate this problem. Some affected PC users noted that when experiencing this issue, they observed Task Manager showing other applications using only 0% to 5% of the CPU, while the Service Host: Capability Access Manager service was seeing usage as high as 80%. % to 100%. What is the Service Host: Feature Access Manager service? The function of the Function Access Manager service is to confirm whether the application has permission to access the camera and microphone and grant the necessary permissions. It facilitates the management of UWP applications
 Move photos from old Photos to the new Photos app in Windows 11
Mar 10, 2024 am 09:37 AM
Move photos from old Photos to the new Photos app in Windows 11
Mar 10, 2024 am 09:37 AM
This article will guide you on how to migrate photos from Photos Legacy to the new Photos app in Windows 11. Microsoft has introduced a revamped Photos app in Windows 11, giving users a simpler and more feature-rich experience. The new Photos app sorts photos differently than the past PhotosLegacy app. It organizes photos into folders like other Windows files instead of creating albums. However, users still using the Photos Legacy app can easily migrate their photos to the new version of Microsoft Photos. What is Phot
