

How to use Elasticsearch with ThinkPHP6

In the current Internet era, with the explosive growth of massive data, search engines have become more and more important. As a highly scalable full-text search engine, Elasticsearch has gradually become the first choice for developers to solve search problems.
This article will introduce how to use Elasticsearch in ThinkPHP6 to implement data retrieval and search functions, let's get started.
Step one: Install elasticsearch-php
Use composer to install the official elasticsearch-php library
composer require elasticsearch/elasticsearch
After that we need to write the Elasticsearch connection configuration information in the configuresearch.php file, as follows :
return [
    'host' => ['your.host.com'],
    'port' => 9200,
    'scheme' => 'http',
    'user' => '',
    'pass' => ''
];Note that there is no password here. When deploying online, you need to add a password and connect using https to ensure that the connection is secure.
Step 2: Install laravel-scout
laravel-scout is an Eloquent ORM full-text search extension package for Laravel. We need to install it in ThinkPHP6 to achieve Elasticsearch integration. Use the following command to install:
composer require laravel/scout
Step 3: Install laravel-scout-elastic package
In ThinkPHP6, we need to use the extension package laravel-scout-elastic to connect to Elasticsearch. Similarly, use the following command to install:
composer require babenkoivan/scout-elasticsearch-driver:^7.0
Configure scout and elastic driver in app.php
return [
    'providers' => [
        //...
        LaravelScoutScoutServiceProvider::class,
        ScoutElasticsearchElasticsearchServiceProvider::class,
        //...
    ],
    'aliases' => [
        //...
        'Elasticsearch' => ScoutElasticsearchFacadesElasticsearch::class,
        //...
    ],
];Next, configure the search engine of the model in configscout.php, as follows:
'searchable' => [
        AppModelsModel::class => [
            'index' => 'model_index',
            'type' => 'model_type'
        ],
],The above configuration shows that we use the Model::class model object to retrieve data, and define the index name corresponding to the Model::class object as model_index and the type as model_type.
Step 4: Define search logic
We use the Searchable trait in the Model class and declare a public function toSearchableArray() function, as follows:
<?php

namespace AppModels;

use LaravelScoutSearchable;

class Model extends Model
{
    // 使用scout可搜索的trait
    use Searchable;

    // 返回可被搜索的模型数据
    public function toSearchableArray()
    {
        return [
            'title' => $this->title,
            'content' => $this->content
        ];
}toSearchableArray() function is used to return Data fields that can be searched, here we give examples of title and content fields.
Step 5: Search-related API
Finally we write search-related APIs, such as search result lists, search statistics, etc. This requires us to have a certain understanding of the official Elasticsearch API. For details, please refer to the official Elasticsearch documentation.
For example, the code of the search result list API may be as follows:
use ElasticsearchClientBuilder;

class SearchController extends Controller
{
    //搜索结果列表
    public function list(Request $request)
    {
        $searchQuery = $request->input('q'); //搜索关键字

        //搜索操作
        $elasticsearch = ClientBuilder::create()->setHosts(config('elasticsearch.host'))->build();
        $response = $elasticsearch->search([
            'index' => 'model_index', // 索引名称
            'type' => 'model_type',   // 类型
            'size' => 1000,
            'body' => [
                'query' => [
                    'bool' => [
                        'should' => [
                            ['match' => ['title' => $request->input('q')]],
                            ['match' => ['content' => $request->input('q')]]
                        ]
                    ]
                ]
            ]
        ]);

        //格式化返回结果
        $result = [];
        foreach ($response['hits']['hits'] as $hit) {
            //搜索评分
            $hit['_score'];
            //搜索到的数据
            $result[] = $hit['_source'];
        }

        return json_encode($result);
    }
}The above code uses the ElasticsearchClientBuilder class officially provided by Elasticsearch to create a connection, query keywords, and retrieve results list. You can replace $request->input('q') in this API with any keyword you want.
The article ends here. I believe you can basically use Elasticsearch to implement search functions. If you encounter problems in practice, please refer to the official documentation or raise an issue for more help.
The above is the detailed content of How to use Elasticsearch with ThinkPHP6. For more information, please follow other related articles on the PHP Chinese website!

Hot AI Tools

Undresser.AI Undress
AI-powered app for creating realistic nude photos

AI Clothes Remover
Online AI tool for removing clothes from photos.

Undress AI Tool
Undress images for free

Clothoff.io
AI clothes remover

AI Hentai Generator
Generate AI Hentai for free.

Hot Article
Hot Tools

Notepad++7.3.1
Easy-to-use and free code editor

SublimeText3 Chinese version
Chinese version, very easy to use

Zend Studio 13.0.1
Powerful PHP integrated development environment

Dreamweaver CS6
Visual web development tools

SublimeText3 Mac version
God-level code editing software (SublimeText3)
Hot Topics
 1378
1378
 52
52

 Samsung Galaxy Buds Pro Bluetooth headset pairing guide and usage tutorial
Dec 30, 2023 pm 03:44 PM
Samsung Galaxy Buds Pro Bluetooth headset pairing guide and usage tutorial
Dec 30, 2023 pm 03:44 PM
Samsung's Galaxy Buds series of headphones are uniquely designed and ergonomically designed, making them very comfortable to wear. In addition to being comfortable to wear, Samsung Buds series headphones also provide excellent sound quality experience, which has attracted many users. Next, we will introduce to you the usage tutorial of Samsung Buds headphones, especially the pairing process of Samsung Galaxy Buds Pro Bluetooth headphones and mobile phones. How to pair Samsung Galaxy Buds Pro Bluetooth headsets. Pairing with Samsung Buds headsets is very simple. Just follow the steps below to complete the pairing. The first step is to turn on the Bluetooth function of the phone. You can find the Bluetooth setting option in the settings interface of your phone. Step 2: Place GalaxyBu
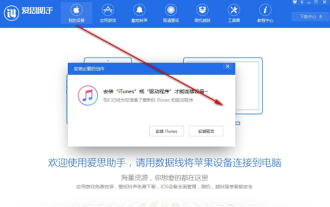 How to use Aisi Assistant-Aisi Assistant usage tutorial
Mar 06, 2024 pm 12:10 PM
How to use Aisi Assistant-Aisi Assistant usage tutorial
Mar 06, 2024 pm 12:10 PM
Many novice friends still don’t know how to use Aisi Assistant, so the editor below has brought a tutorial on how to use Aisi Assistant. Friends who need it can quickly take a look. 1. Operation interface, check whether necessary components are installed (as shown in the figure below); 2. My device window, read the relevant description information (as shown in the figure below); 3. If the link cannot be made, according to Instructions for related operations (as shown in the figure below); 4. Use the game window to quickly complete the experience of related popular games (as shown in the figure below); 5. Download and select the various ringtones you need to use (as shown in the figure below) shown); 6. Quickly download various high-definition wallpapers (as shown in the figure below); 7. Support the function of rooting and jailbreaking (as shown in the figure below). above
 How to use exescope? Detailed usage tutorial
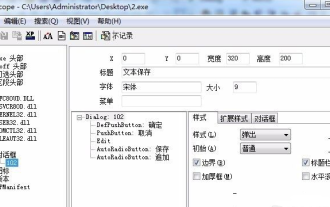
Mar 13, 2024 pm 10:40 PM
How to use exescope? Detailed usage tutorial
Mar 13, 2024 pm 10:40 PM
exescope is a powerful program resource editing tool that can easily convert the English version of the software into the Chinese version. So how to use the newly downloaded exescope? If you are also a novice user, come and take a look at the detailed tutorial below. Exescope usage tutorial 1. Open eXeScope, click on the file in the upper left corner, click [Open] in the pop-up options, and select the file you want to open. 2. After opening the software, you can see many controls. 3. You can directly modify the size, position, and content of each control by inputting data, or you can directly click on the dialog box editor above and directly drag the controls on the program interface. After adjusting the controls, click [Save].
 Little black box usage tutorial
Feb 23, 2024 pm 05:10 PM
Little black box usage tutorial
Feb 23, 2024 pm 05:10 PM
Little Black Box is a very easy to use game platform, so how to use this software specifically? Users will encounter many problems when using this software and have different solutions. This tutorial summary of the multi-functional use of the small black box will tell you how to use it. The following is a detailed introduction, so take a look! Tutorial on using Little Black Box [2024-01-31] How to redeem the cdkey purchased from Little Black Box [2024-01-31] How to store games purchased from Little Black Box into Steam [2024-01-31] The CDkey purchased from Little Black Box can be returned Payment?
 How to use Enterprise WeChat - Tutorial on using Enterprise WeChat
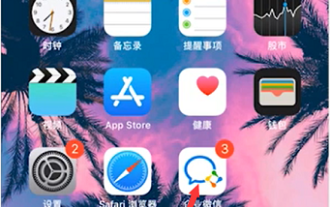
Mar 04, 2024 pm 02:28 PM
How to use Enterprise WeChat - Tutorial on using Enterprise WeChat
Mar 04, 2024 pm 02:28 PM
Many friends don’t know how to use Enterprise WeChat, so the editor below will share the tutorial for using Enterprise WeChat. Let’s take a look. I believe it will be helpful to everyone. Step 1: Click the "Enterprise WeChat" icon to enter Enterprise WeChat. In the message section, we can join the group chat to chat with colleagues (as shown in the picture). Step 2: On the main interface of Enterprise WeChat, click "Contact Book" (as shown in the picture). Step 3: Enter the address book section, where we can view our contacts (as shown in the picture). Step 4: On the main interface of Enterprise WeChat, click "Workbench" (as shown in the picture). Step 5: Enter the workbench section, where we can carry out the company's daily small work (as shown in the picture). Step 6: On the main interface of Enterprise WeChat, click "Me" (as shown in the picture
 How to run thinkphp project
Apr 09, 2024 pm 05:33 PM
How to run thinkphp project
Apr 09, 2024 pm 05:33 PM
To run the ThinkPHP project, you need to: install Composer; use Composer to create the project; enter the project directory and execute php bin/console serve; visit http://localhost:8000 to view the welcome page.
 How to use Thunder magnet link - Tutorial on using Thunder magnet link
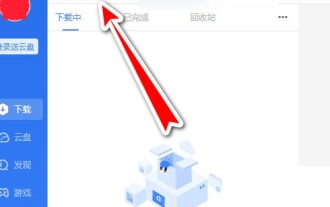
Mar 05, 2024 pm 05:22 PM
How to use Thunder magnet link - Tutorial on using Thunder magnet link
Mar 05, 2024 pm 05:22 PM
Recently, many friends have asked the editor how to use Thunder Magnet Links. Next, let us learn the tutorial on using Thunder Magnet Links. I hope it can help everyone. Step 1: First, we open the installed Thunder and click the New button, as shown in the picture. Step 2: Then find a magnet link on the Internet, copy and paste it to the location shown in the picture below, and click OK, as shown in the picture. Step 3: The detailed download directory of the resource pops up. We check the resource to be downloaded, select the storage directory, and click Download Now, as shown in the figure. Step 4: Finally, we wait for the resources to download, as shown in the picture. The above is all the content on how to use Thunder magnet links brought to you by the editor. I hope it can be helpful to everyone.
 How to use ons simulator - ons simulator usage tutorial
Mar 04, 2024 pm 01:10 PM
How to use ons simulator - ons simulator usage tutorial
Mar 04, 2024 pm 01:10 PM
Recently, many friends have asked me how to use the ons simulator. Next, let us learn the tutorial on how to use the ons simulator. I hope it can help everyone. Step 1: First download the onscripter tool as shown below. Step 2: Then download the ons emulator game. Step 3: Then drag the simulator onscripter.exe file you just downloaded directly into the game directory and double-click onscripter.exe to open it. Step 4: Just run the game directly. The above is all the content on how to use the ons simulator brought by the editor. I hope it can be helpful to everyone.
