

How to install the system without ghost

To install the system without ghost, use the installation CD to install Install the CD. When you see the word "CD" appears at the bottom of the screen, press the Enter key to achieve optical boot; 3. Driver installation, restart the computer after installing all drivers, and the driver installation is completed.

The operating environment of this tutorial: windows10 system, ghost15.0 version, Dell G3 computer.
How to install non-Ghost system
Use the installation CD to install xp.
The first step is to set up the optical boot:
The so-called optical boot means that the computer first reads the optical drive when it starts. In this case, if there is a CD with optical boot function in the optical drive It can be read out before the hard disk starts (such as when installing the system from the CD).
Setting method:
1. Start the computer and hold down the DEL key until the BIOS setting window appears (usually with a blue background and yellow English characters).
2. Select and enter the second item, "BIOS SETUP". Find the item or group containing the BOOT text inside, and find the three items "FIRST", "SECEND" and "THIRD" arranged in order, which represent "first startup", "second startup" and "third startup" respectively. Here we set it to "optical drive", "floppy drive" and "hard disk" in order. (If you do not see these three E-texts on this page, usually the option menu on the right side of BOOT is "SETUP", then press Enter to enter and you can see it) You should select "FIRST" and hit the Enter key. Select CD-ROM from the submenu. Press the Enter key again
3. After selecting the startup method, press the F10 key. An E text dialog box will appear. Press the "Y" key (can be omitted) and press Enter. The computer will automatically restart to prove the base state change. The settings take effect.
The second step is to install the XP system from the CD
Insert the XP installation CD before restarting. When you see the word CD appear at the bottom of the screen, press the Enter key to achieve light startup. . Otherwise, the computer starts to read the hard disk, that is, it skips the optical boot and boots from the hard disk.
After the XP system disk is booted, there will be an installation interface with a blue background. At this time, the system will automatically analyze the computer information. No operation is required until the monitor screen turns black, and then a Chinese interface with a blue background will appear. .
The first thing that appears at this time is the XP system agreement. Press the F8 key (meaning you agree to this agreement), and then you can see the information list of all partitions of the hard disk, and there are Chinese operation instructions. Select the C drive, press the D key to delete the partition (remember to back up the useful files on the C drive first), change the location of the C drive to "unpartitioned", and then press C at the original C drive location (i.e. the "unpartitioned" location) The key creates a partition, and the partition size does not need to be adjusted. After that, the original C drive location changes to "New Unused", press Enter to continue.
Next, the format partition option page may appear. It is recommended to select "Format partition with FAT32 (fast)". Press Enter to continue.
The system starts to format the C drive very quickly. After formatting, it analyzes the hard disk and the previous WINDOWS operating system, which is also very fast, followed by copying the files, which takes about 8 to 13 minutes (depending on the configuration of the machine).
After copying files is completed (100%), the system will automatically restart. When you see the CD-ROM again..., you do not need to press any keys to let the system boot from the hard disk. Because part of the installation file has been copied to the hard disk (note: the CD cannot be removed at this time).
A color XP installation interface with a blue background appears, with an installation progress bar and remaining time display on the left. The starting value is 39 minutes, which is also determined by the configuration of the machine. Usually the installation time of P4 and 2.4 machines It's about 15 to 20 minutes.
At this point, until the installation is completed and the computer automatically restarts, there is no need to do any other operations except entering the serial number and computer information (fill in whatever you want), and hitting Enter 2 to 3 times. The system will automatically complete the installation.
The third step, driver installation
1. After restarting, take out the CD, let the computer boot from the hard disk, and enter the XP settings window.
2. Press "Next", "Skip", select "Do Not Register", and "Finish".
3. Enter the XP system desktop.
4. Right-click on the desktop, select "Properties", select the "Display" tab, click the "Customize Desktop" item, check "My Computer", and select "OK" to exit.
5. Return to the desktop, right-click "My Computer", select "Properties", select the "Hardware" tab, select "Device Manager", which contains the management window for all hardware of the computer, including all The option with a yellow question mark + exclamation mark in front of it represents the hardware for which the driver is not installed. Double-click to open its properties, select "Reinstall Driver", insert the corresponding driver CD, select "Automatic Install", and the system will automatically identify the corresponding driver. and the installation is completed. (AUDIO is the sound card, VGA is the graphics card, and SM is the motherboard. You need to install the motherboard driver first. If there is no SM item, it means there is no need to install it). Restart your computer after installing all drivers. The driver installation is now complete.
The above is the detailed content of How to install the system without ghost. For more information, please follow other related articles on the PHP Chinese website!

Hot AI Tools

Undresser.AI Undress
AI-powered app for creating realistic nude photos

AI Clothes Remover
Online AI tool for removing clothes from photos.

Undress AI Tool
Undress images for free

Clothoff.io
AI clothes remover

AI Hentai Generator
Generate AI Hentai for free.

Hot Article
Hot Tools

Notepad++7.3.1
Easy-to-use and free code editor

SublimeText3 Chinese version
Chinese version, very easy to use

Zend Studio 13.0.1
Powerful PHP integrated development environment

Dreamweaver CS6
Visual web development tools

SublimeText3 Mac version
God-level code editing software (SublimeText3)
Hot Topics
 1371
1371
 52
52

 Ghost Specter Windows 11 Superlite: Download and Installation Guide
May 05, 2023 am 09:10 AM
Ghost Specter Windows 11 Superlite: Download and Installation Guide
May 05, 2023 am 09:10 AM
Updating the operating system to the latest Windows 11 poses a challenge for many PCs due to insufficient system requirements. Therefore, Microsoft released a modified version, GhostSpectreWindows11Superlite, compatible with every PC. Therefore, we will discuss how to download and install it. Likewise, if your PC meets the Windows 11 system requirements, you can read further about obtaining a Windows 11 custom ISO. What is Ghost Windows 11? GhostSpectreWindows11 is a modified version called LightWindows11. This is because of the installed
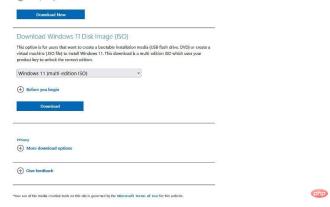 Recommended Three Best Custom ISO Files for Windows 11
Apr 22, 2023 pm 09:58 PM
Recommended Three Best Custom ISO Files for Windows 11
Apr 22, 2023 pm 09:58 PM
In the context of Windows, an ISO file is something that contains all the installation files for a program or operating system. Microsoft has made ISO versions of Windows 11 available on its website for those who want to create bootable installation media. You can save these files to a flash drive or DVD and then take them to your computer to install or use it to create a virtual machine. But there are people on the Internet who create custom ISO files. What is a custom ISO file? Some people find that Windows 11 has a lot of unnecessary files and applications that only slow down the operating system. At least for these people, Windows 11
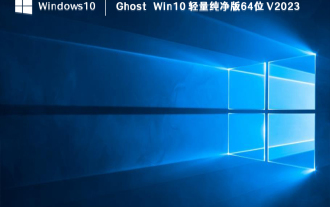 Which ghost win10 is the best? The best win10 ghost version download
Feb 12, 2024 pm 11:40 PM
Which ghost win10 is the best? The best win10 ghost version download
Feb 12, 2024 pm 11:40 PM
Which pure version of Win10Ghost is the best? I believe this is a question that many users are asking. The Win10Ghost system is a very practical system backup and restore tool. If users want to reinstall the system without losing their data and software, they can When using the Ghost system, let this site carefully introduce to users the download address of the best system version of Ghostwin10. Ghostwin10 is the best system version to download. In the process of using the Windows operating system, sometimes we need to reinstall or upgrade the system, but we don’t want to lose our data and software. At this time, we need to use the Ghost system. Ghost system can help
 How to use the ghost installer. The editor teaches you the steps to install the ghost system.
Jan 11, 2024 pm 07:39 PM
How to use the ghost installer. The editor teaches you the steps to install the ghost system.
Jan 11, 2024 pm 07:39 PM
The ghost system is a free installation system. The reason why it is popular is that the ghost system will automatically activate after installation and automatically install the corresponding hardware drivers. This not only saves time, but also provides convenience to novice users. However, many people do not If you know how to install the ghost system image, the installation steps are actually very simple. Below, I will share with you the steps to install the ghost system. Installing systems through USB disks is becoming more and more popular. Nowadays, boot disks are very powerful. They can install ghost systems automatically or manually. However, because the manual ghost method is more complicated, many people don’t know how to install it, which makes users depressed. Sorry, below, the editor brings you the steps to install the ghost system. Recently, the editor is in
 What kind of commonly used software does ghost belong to?
Feb 18, 2021 pm 05:57 PM
What kind of commonly used software does ghost belong to?
Feb 18, 2021 pm 05:57 PM
Ghost is a commonly used "data backup and restore" software. Ghost software is an excellent hard disk backup and restoration tool launched by Symantec in the United States. It can backup and restore partitions and hard disks in various hard disk partition formats such as FAT16, FAT32, NTFS, OS2, etc.; it is commonly known as cloning software.
 How to restore system using ghost
Oct 17, 2023 pm 03:04 PM
How to restore system using ghost
Oct 17, 2023 pm 03:04 PM
Ghost restore system steps: 1. Restart the system and quickly press F8 to enter the DOS interface and run G.exe to enter the GHOST interface. Press Enter to enter the GHOST operation interface; 2. Select the menu to Local-Partition-From Image and select it. Press Enter; 3. Prompt to select the image file that needs to be restored; 4. Display the hard disk information, no processing is required, just press Enter; 5. Generally, the default is to restore the first partition; 6. Enter the GHOST operation interface, etc.
 How to restore system using ghost
Sep 20, 2023 pm 05:12 PM
How to restore system using ghost
Sep 20, 2023 pm 05:12 PM
Ghost restore system steps: 1. Shut down the computer and insert the restoration media into the computer; 2. Start the computer and enter the BIOS setting interface; 3. In the BIOS setting interface, find the "Boot" or "Boot Sequence" option and restore The media is set as the first boot item. Save the settings and exit the BIOS; 4. Restart the computer, which will boot from the restoration media; 6. Wait for the restoration process to complete; 7. After the restoration is completed, the computer will automatically restart.
 Microsoft official website original win11 download_win11 latest version 23H2 download collection
Feb 15, 2024 pm 03:30 PM
Microsoft official website original win11 download_win11 latest version 23H2 download collection
Feb 15, 2024 pm 03:30 PM
The original version of win11 on Microsoft's official website has made many different functionalities to ensure that every user can experience a high-performance operating experience. Among them, the win1123h2 version is the most popular among users. This site recommends several downloads of the latest version of win11 23H2 for users. Users can find the system that suits your system on this page for installation. Interested users can take a look together. Win11 latest version 23H2 download collection 1. Win1123H2x64 extremely pure version V2023. This is a very pure installation system. It retains most of the functions of the original system, takes up a small size, perfectly supports new and old models, and satisfies the user's office and study as much as possible. need. Using an offline environment for production ensures the system's