

Why is there no sound after win10 update?

Why is there no sound after win10 update? After we updated the win10 system, we found that there was no sound in the system when using the computer. What is this situation and how can it be solved? Many friends don’t know how to operate in detail. The editor below has compiled a tutorial on how to solve the problem of no sound after win10 update. If you are interested, follow the editor and read on!
How to solve the problem of no sound after win10 update
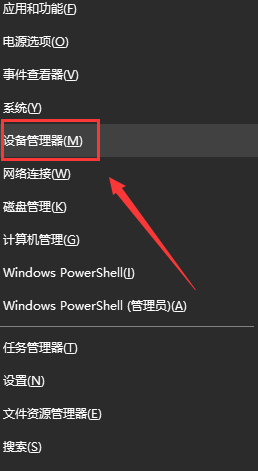
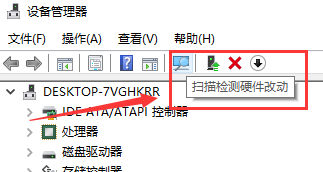
1. First, right-click the lower left corner to start, and click Device Manager.
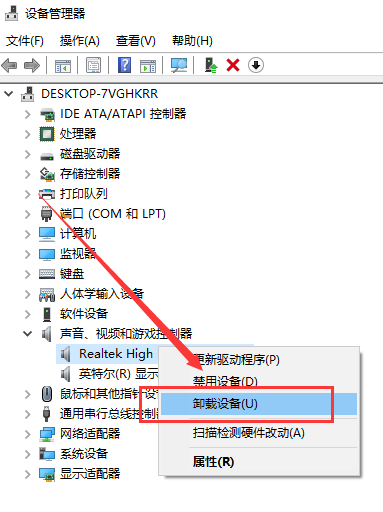
2. Then click on the sound, video and game controller, right-click on the download device
3. Then check the box Select to delete the driver software for this device and click OK.
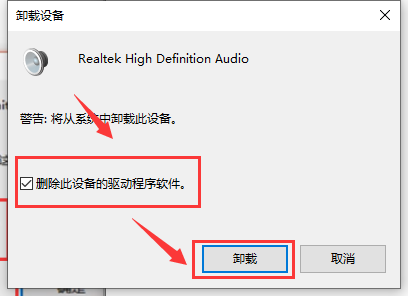
# 4. Click the Scan to detect hardware changes icon to reinstall the driver and restore the sound.
The above is the entire content of [What is going on when there is no sound after win10 is updated - tutorial on how to solve the problem when there is no sound after win10 is updated], more exciting tutorials are on this site!
The above is the detailed content of Why is there no sound after win10 update?. For more information, please follow other related articles on the PHP Chinese website!

Hot AI Tools

Undresser.AI Undress
AI-powered app for creating realistic nude photos

AI Clothes Remover
Online AI tool for removing clothes from photos.

Undress AI Tool
Undress images for free

Clothoff.io
AI clothes remover

AI Hentai Generator
Generate AI Hentai for free.

Hot Article
Hot Tools

Notepad++7.3.1
Easy-to-use and free code editor

SublimeText3 Chinese version
Chinese version, very easy to use

Zend Studio 13.0.1
Powerful PHP integrated development environment

Dreamweaver CS6
Visual web development tools

SublimeText3 Mac version
God-level code editing software (SublimeText3)
Hot Topics
 1386
1386
 52
52

 Solution to the problem that Win11 system cannot install Chinese language pack
Mar 09, 2024 am 09:48 AM
Solution to the problem that Win11 system cannot install Chinese language pack
Mar 09, 2024 am 09:48 AM
Solution to the problem that Win11 system cannot install Chinese language pack With the launch of Windows 11 system, many users began to upgrade their operating system to experience new functions and interfaces. However, some users found that they were unable to install the Chinese language pack after upgrading, which troubled their experience. In this article, we will discuss the reasons why Win11 system cannot install the Chinese language pack and provide some solutions to help users solve this problem. Cause Analysis First, let us analyze the inability of Win11 system to
 How to fix Blizzard Battle.net update stuck at 45%?
Mar 16, 2024 pm 06:52 PM
How to fix Blizzard Battle.net update stuck at 45%?
Mar 16, 2024 pm 06:52 PM
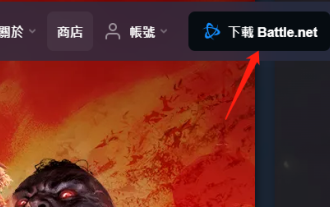
Blizzard Battle.net update keeps stuck at 45%, how to solve it? Recently, many people have been stuck at the 45% progress bar when updating software. They will still get stuck after restarting multiple times. So how to solve this situation? We can reinstall the client, switch regions, and delete files. To deal with it, this software tutorial will share the operation steps, hoping to help more people. Blizzard Battle.net update keeps stuck at 45%, how to solve it? 1. Client 1. First, you need to confirm that your client is the official version downloaded from the official website. 2. If not, users can enter the Asian server website to download. 3. After entering, click Download in the upper right corner. Note: Be sure not to select Simplified Chinese when installing.
 Solution for Win11 unable to install Chinese language pack
Mar 09, 2024 am 09:15 AM
Solution for Win11 unable to install Chinese language pack
Mar 09, 2024 am 09:15 AM
Win11 is the latest operating system launched by Microsoft. Compared with previous versions, Win11 has greatly improved the interface design and user experience. However, some users reported that they encountered the problem of being unable to install the Chinese language pack after installing Win11, which caused trouble for them to use Chinese in the system. This article will provide some solutions to the problem that Win11 cannot install the Chinese language pack to help users use Chinese smoothly. First, we need to understand why the Chinese language pack cannot be installed. Generally speaking, Win11
 The front headphone jack of the computer is not responding? How to solve the problem of no sound from the front headphone of Win11
Apr 11, 2024 pm 06:10 PM
The front headphone jack of the computer is not responding? How to solve the problem of no sound from the front headphone of Win11
Apr 11, 2024 pm 06:10 PM
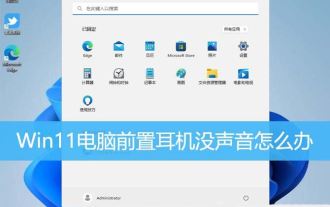
No sound from the front headset of Win11 computer is a common problem, which may be caused by driver problems, hardware failures or setting errors. This article will introduce several solutions to help you solve this problem quickly so that you can continue to enjoy your music, videos, and games. Method 1. 1. First, press the [Win+X] key combination on the keyboard, or right-click the [Windows Start Logo] on the taskbar, and then select [Settings] in the menu item that opens; 2. Settings window, Click [System] on the left sidebar, and click [Sound (Volume Level, Output, Input, Sound Device)] on the right side; 3. The current path is: System > Sound, under Output, select [Headphones]; Method 2. 1. Click [Start] in the taskbar in the lower left corner, on the top
 Windows cannot start the Windows Audio service Error 0x80070005
Jun 19, 2024 pm 01:08 PM
Windows cannot start the Windows Audio service Error 0x80070005
Jun 19, 2024 pm 01:08 PM
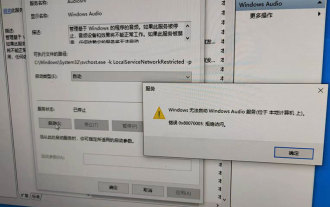
The guy's computer appears: Windows cannot start the WindowsAudio service (located on the local computer). Error 0x8007005: Access denied. This situation is usually caused by user permissions. You can try the following methods to fix it. Method 1: Modify the registry to add permissions through batch processing, create a new text document on the desktop, save it as .bat, and right-click the administrator to go far. Echo==========================EchoProcessingRegistryPermission.Pleasewait...Echo================== ========subinacl/subkey
 How to use shortcut keys to take screenshots in Win8?
Mar 28, 2024 am 08:33 AM
How to use shortcut keys to take screenshots in Win8?
Mar 28, 2024 am 08:33 AM
How to use shortcut keys to take screenshots in Win8? In our daily use of computers, we often need to take screenshots of the content on the screen. For users of Windows 8 system, taking screenshots through shortcut keys is a convenient and efficient operation method. In this article, we will introduce several commonly used shortcut keys to take screenshots in Windows 8 system to help you take screenshots more quickly. The first method is to use the "Win key + PrintScreen key" key combination to perform full
 Win11 Tips Sharing: Skip Microsoft Account Login with One Trick
Mar 27, 2024 pm 02:57 PM
Win11 Tips Sharing: Skip Microsoft Account Login with One Trick
Mar 27, 2024 pm 02:57 PM
Win11 Tips Sharing: One trick to skip Microsoft account login Windows 11 is the latest operating system launched by Microsoft, with a new design style and many practical functions. However, for some users, having to log in to their Microsoft account every time they boot up the system can be a bit annoying. If you are one of them, you might as well try the following tips, which will allow you to skip logging in with a Microsoft account and enter the desktop interface directly. First, we need to create a local account in the system to log in instead of a Microsoft account. The advantage of doing this is
 How to install Angular on Ubuntu 24.04
Mar 23, 2024 pm 12:20 PM
How to install Angular on Ubuntu 24.04
Mar 23, 2024 pm 12:20 PM
Angular.js is a freely accessible JavaScript platform for creating dynamic applications. It allows you to express various aspects of your application quickly and clearly by extending the syntax of HTML as a template language. Angular.js provides a range of tools to help you write, update and test your code. Additionally, it provides many features such as routing and form management. This guide will discuss how to install Angular on Ubuntu24. First, you need to install Node.js. Node.js is a JavaScript running environment based on the ChromeV8 engine that allows you to run JavaScript code on the server side. To be in Ub