How to install ipx protocol in win11 system? IPX refers to the Internet Packet Exchange Protocol. Many users need to enable and install this protocol before they can use other functions when using their computers. However, many users do not know how to add configuration if there is no ipx protocol in the computer. Today, the editor will take the Windows 11 system as an example to tell you that there is no ipx protocol addition configuration tutorial for home appliances in the Win11 system. Users in need should quickly take a look.
 pcHjljY/orq4="title="How to install ipx protocol in win11 system">
1. First, right-click Click the [Network Icon] in the lower right corner of the taskbar, and then select [Network and Internet Settings];

2. Settings window, left sidebar, click [Network and Internet] , click [Advanced network settings (view all network adapters, network reset)] on the right;

3. Under related settings, click [More network adapter options];

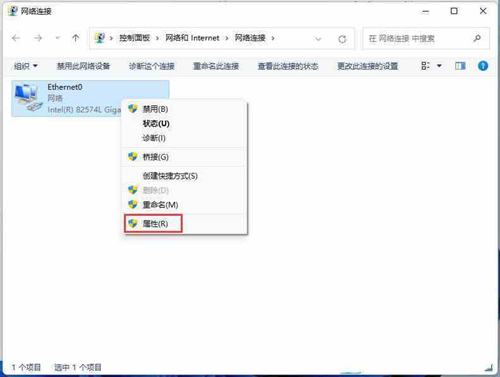
4. In the network connection window, select the local connection, then click [right-click], and in the menu item that opens, select [Properties];

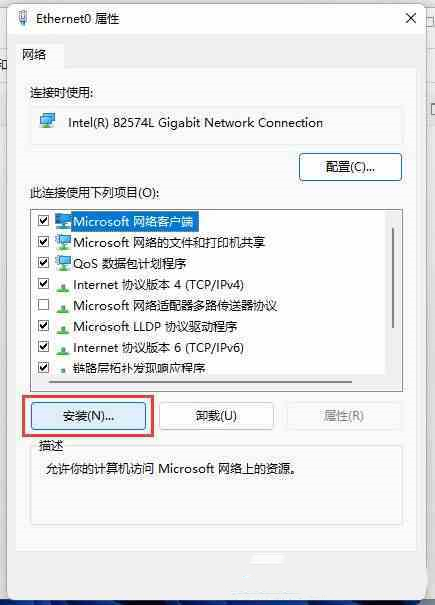
5. In the Network Connection Properties window, click [Install] at the bottom;

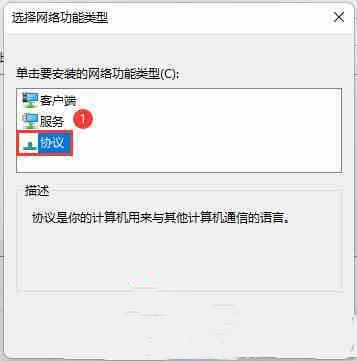
6. In the Select Network Function Type window, select [Protocol], Then click [Add];

7. Select the network protocol window, select [Reliable Multicast Protocol], and then click [Have Disk];

8. From the disk installation window, click [Browse] to find the prepared driver assistance, then select the corresponding system version, and then click [OK];

The above is the entire content of [How to install ipx protocol in win11 system - Tutorial on adding configuration of ipx protocol in win11 system]. More exciting tutorials are on this site!
The above is the detailed content of How to install ipx protocol in win11 system. For more information, please follow other related articles on the PHP Chinese website!
 Blue screen code 0x000009c
 A collection of common computer commands
 You need permission from admin to make changes to this file
 Tutorial on turning off Windows 11 Security Center
 How to set up a domain name that automatically jumps
 What are the virtual currencies that may surge in 2024?
 The reason why header function returns 404 failure
 How to use js code


