How to delete and add by right-clicking New in win11
How to delete and add by right-clicking New in win11? Compared with the win10 system, the right-click menu of win11 has a completely new design, so many users are not used to it, and feel that there are too few new projects or some items are redundant. So how to delete and add new right-click menus in win11? The editor has compiled and shared the methods of right-clicking, creating, deleting and adding in win11 below. Let’s take a look below!

win11 right-click to create, delete and add methods to share
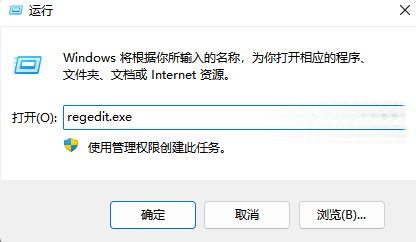
1. Open Run in the computer start menu. Enter regedit.exe in the dialog box to open the registry.

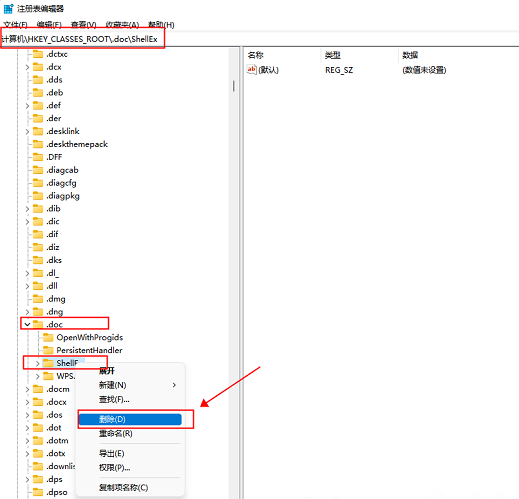
Look for the new file suffix that needs to be added or deleted in the registry of the HKEY_CLASSES_ROOT primary key. Find, .exe, .xls, .ppt, etc., open the previous folder, find the subkey ShellNew, right-click and select Delete.

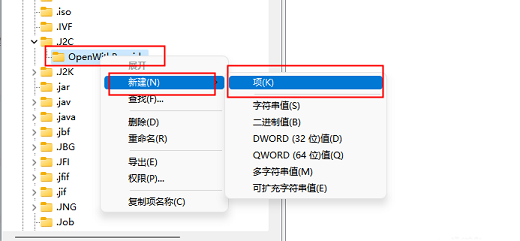
3. Check if there is a shellNew folder under the folder you want to add. If there is not, you need to right-click > New > and name it shellNew. If there is a jump Go through this step. Create a new one and enter the name as ShellNew. Right-click the newly created ShellNew subkey and select New-String Value. A prompt for new value #1 appears in the dialog box. Right-click and rename it to FileName.

The above is the entire content of [How to delete and add by right-clicking New in win11 - How to delete and add by right-clicking New in win11]. More exciting tutorials are on this site!
The above is the detailed content of How to delete and add by right-clicking New in win11. For more information, please follow other related articles on the PHP Chinese website!

Hot AI Tools

Undresser.AI Undress
AI-powered app for creating realistic nude photos

AI Clothes Remover
Online AI tool for removing clothes from photos.

Undress AI Tool
Undress images for free

Clothoff.io
AI clothes remover

AI Hentai Generator
Generate AI Hentai for free.

Hot Article

Hot Tools

Notepad++7.3.1
Easy-to-use and free code editor

SublimeText3 Chinese version
Chinese version, very easy to use

Zend Studio 13.0.1
Powerful PHP integrated development environment

Dreamweaver CS6
Visual web development tools

SublimeText3 Mac version
God-level code editing software (SublimeText3)

Hot Topics
 1379
1379
 52
52


