 Common Problem
 A brief introduction to the split-screen shortcut key operation guide for Win10 Professional Edition
A brief introduction to the split-screen shortcut key operation guide for Win10 Professional Edition
How to use split-screen shortcut keys in Win10 Professional Edition? Win10 ProfessionalCompared with other systems, the professional version system has added many functions, such as virtual desktop, split screen function, Cortana function, etc. The shortcut keys for split screen of Win10 Professional Edition, so how to use Win10 Professional Edition Split screen shortcut key? Many friends don’t know how to operate in detail. The editor below has compiled the tips for using split-screen shortcut keys in Win10 Professional Edition. If you are interested, follow the editor and take a look below!

Tips for using split-screen shortcut keys in Win10 Professional Edition
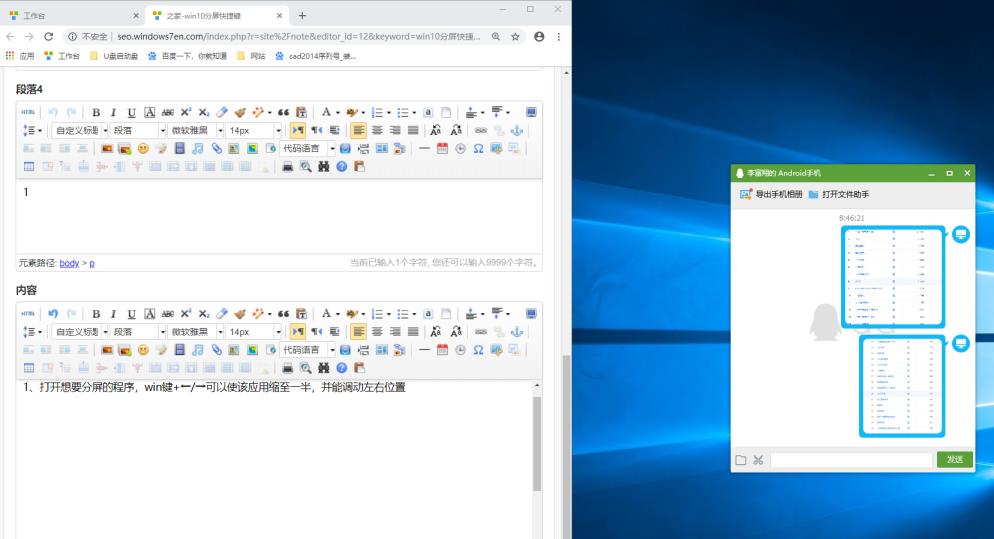
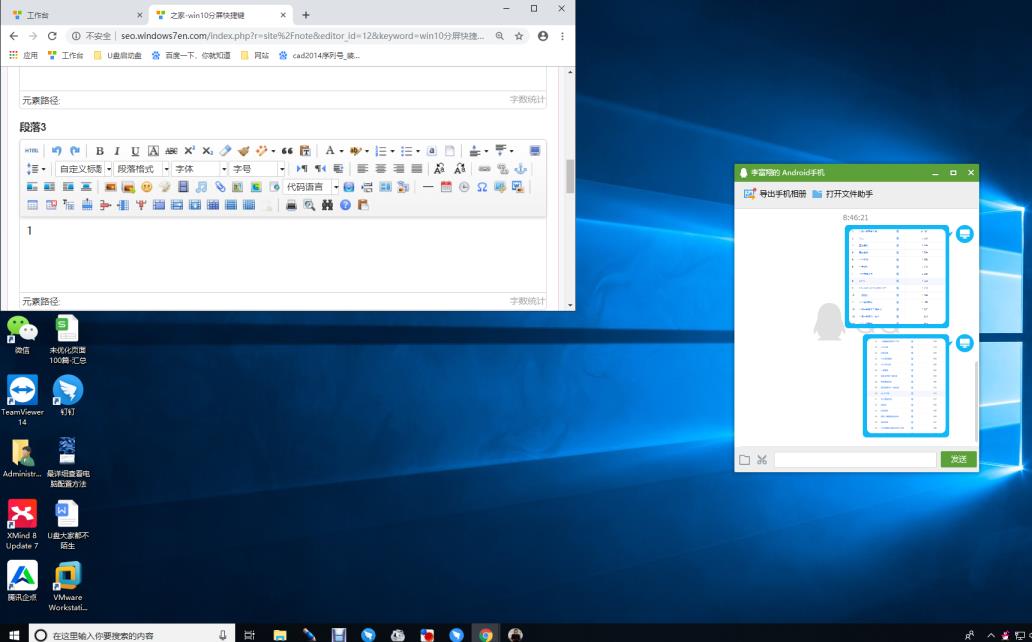
1. Drag the open program to the corner of the screen to split the screen (note that the window does not maximize).
2. You can also shrink it to half of the screen by pressing the win/shortcut key. At the same time, other windows will be automatically arranged on the other side, and you can also move their positions freely.

3. If you feel that the screen is still not enough, click the win button to reduce it to 1/4 of the screen.

4. There is also a shortcut key in the lower left corner of the desktop. Click to split the screen.

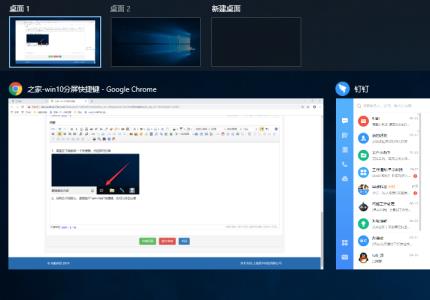
5. Don’t worry if you don’t have it. Just press the [win tab] shortcut key to display the currently running program. Select the program that needs to be displayed in split screen and click [ Left Snap] or [Right Snap]. If the desktop is not enough, you can create a new desktop to switch.

The above is the detailed content of A brief introduction to the split-screen shortcut key operation guide for Win10 Professional Edition. For more information, please follow other related articles on the PHP Chinese website!

Hot AI Tools

Undresser.AI Undress
AI-powered app for creating realistic nude photos

AI Clothes Remover
Online AI tool for removing clothes from photos.

Undress AI Tool
Undress images for free

Clothoff.io
AI clothes remover

AI Hentai Generator
Generate AI Hentai for free.

Hot Article

Hot Tools

Notepad++7.3.1
Easy-to-use and free code editor

SublimeText3 Chinese version
Chinese version, very easy to use

Zend Studio 13.0.1
Powerful PHP integrated development environment

Dreamweaver CS6
Visual web development tools

SublimeText3 Mac version
God-level code editing software (SublimeText3)

Hot Topics
 1378
1378
 52
52

