How to delete third-party mouse pointer in win7
Jul 01, 2023 pm 05:53 PMHow to delete the third-party mouse pointer in win7?Many users will self-edit some interface settings of the computer when using the computer. Among them, mouse cursor replacement is the most popular among users. A custom setting, but many users don’t know how to delete it after replacing the third-party mouse pointer. The editor will introduce the relevant content to you below.
Win7 tutorial to delete third-party mouse pointer

1. Right-click on the desktop and select Personalize in the pop-up right-click menu

2. Find the "Change Mouse Pointer" option on the left side of the pop-up personalization window and click it.

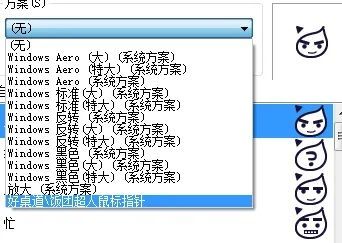
3. Here, open a new window, select the plan you want to delete in the plan drop-down list in the window, and then click it. As shown in the picture, the click is about the mouse pointer.

4. Then click "Delete" and confirm.

# After pressing the "OK" button, the third-party mouse pointer in win7 will be completely deleted. Just reset the mouse style you want and you're good to go.
The above is all the content about win7 deleting third-party mouse pointer tutorial, please stay tuned to this site for more exciting content.
The above is the detailed content of How to delete third-party mouse pointer in win7. For more information, please follow other related articles on the PHP Chinese website!

Hot Article

Hot tools Tags

Hot Article

Hot Article Tags

Notepad++7.3.1
Easy-to-use and free code editor

SublimeText3 Chinese version
Chinese version, very easy to use

Zend Studio 13.0.1
Powerful PHP integrated development environment

Dreamweaver CS6
Visual web development tools

SublimeText3 Mac version
God-level code editing software (SublimeText3)

Hot Topics
 deepseek web version official entrance
Mar 12, 2025 pm 01:42 PM
deepseek web version official entrance
 How to solve the problem of busy servers for deepseek
Mar 12, 2025 pm 01:39 PM
How to solve the problem of busy servers for deepseek
 In-depth search deepseek official website entrance
Mar 12, 2025 pm 01:33 PM
In-depth search deepseek official website entrance


