How to enable memory compression in Win11
Jul 02, 2023 pm 09:25 PMHow to enable memory compression in Win11? The main principle of memory compression is to compress infrequently accessed memory pages to reduce reading and writing to the hard disk. Many friends don’t know how to operate in detail. The editor below has compiled a tutorial on how to enable the memory compression function in Win11. If you are interested, follow the editor and read on!

Tutorial on turning on the memory compression function in Win11
Confirm that memory compression is turned on
First, we need to confirm whether memory compression is real Already enabled, there are two methods.
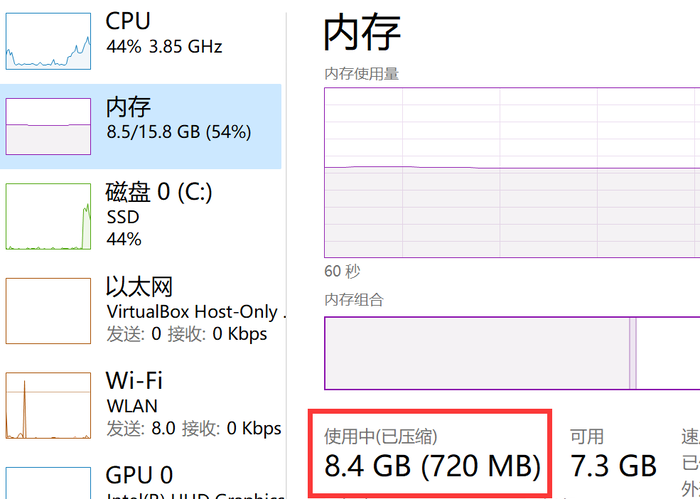
View through Task Manager. If memory compression is turned on, the compressed memory data will be displayed in the task manager, which is easy to observe.
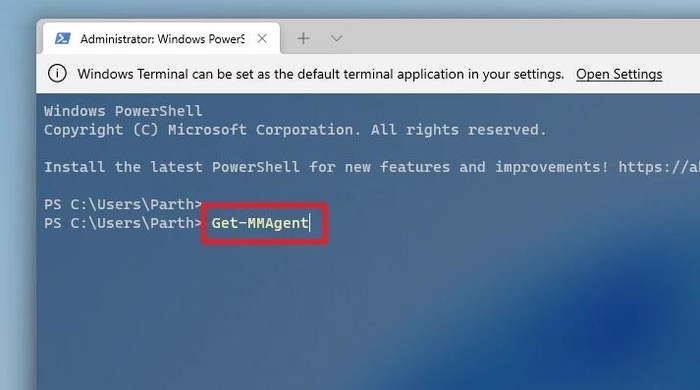
View through the command line. Use system administrator rights, open PowerShell, and then enter the following command:
Get-MMAgent
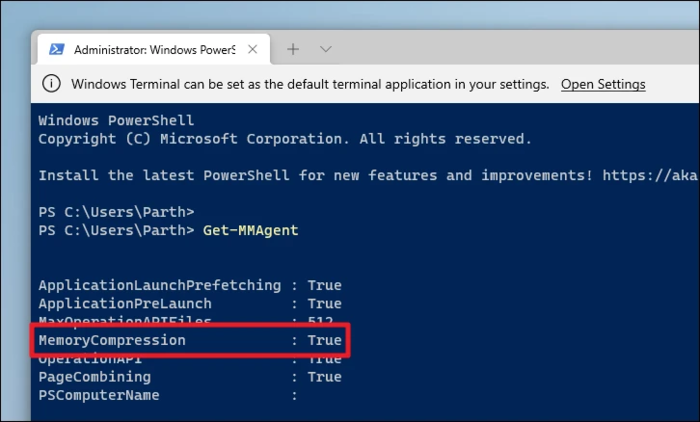
Press Enter to run. If you see " MemoryCompression" is "Ture", which means memory compression has been turned on.
How to turn off memory compression?
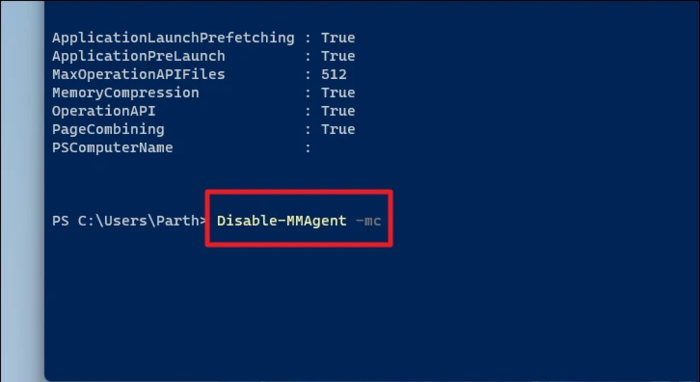
To turn off memory compression, we need to use the command line. Open PowerShell with administrator privileges and enter the following command:
Disable-MMAgent -mc
Press the Enter key to run, then restart the system and compress the memory It's closed.
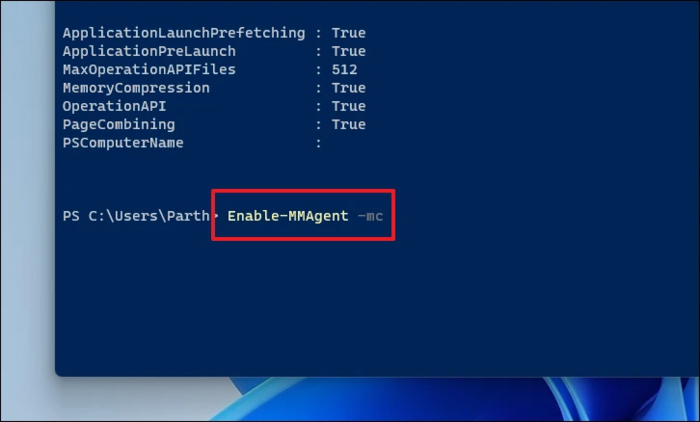
If you want to turn on memory compression again, it is very simple. Also use administrator rights to open Powershell and use the following command:
Enable-MMAgent -mc
After restarting the system, memory compression will be re-enabled.
The above is the detailed content of How to enable memory compression in Win11. For more information, please follow other related articles on the PHP Chinese website!

Hot Article

Hot tools Tags

Hot Article

Hot Article Tags

Notepad++7.3.1
Easy-to-use and free code editor

SublimeText3 Chinese version
Chinese version, very easy to use

Zend Studio 13.0.1
Powerful PHP integrated development environment

Dreamweaver CS6
Visual web development tools

SublimeText3 Mac version
God-level code editing software (SublimeText3)

Hot Topics
 deepseek web version official entrance
Mar 12, 2025 pm 01:42 PM
deepseek web version official entrance
 How to solve the problem of busy servers for deepseek
Mar 12, 2025 pm 01:39 PM
How to solve the problem of busy servers for deepseek
 In-depth search deepseek official website entrance
Mar 12, 2025 pm 01:33 PM
In-depth search deepseek official website entrance


