Detailed explanation of how to connect win7 shared printer to win10
Currently, multiple computers on the same LAN generally share one printer, especially in a corporate environment. At this time, you need to connect to the shared printer. Some netizens don’t know how to connect win7 shared printer from win10. Today I will teach you how to connect win7 shared printer to win10.
The specific steps are as follows:
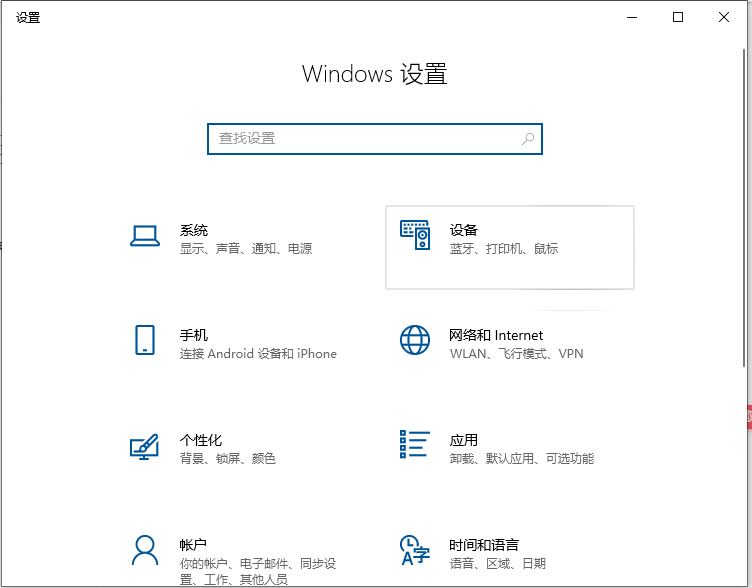
1. After entering the win10 system, click the "Start" menu and select "Settings". Or enter the shortcut key "Win I" to enter the setting interface and click "Device".
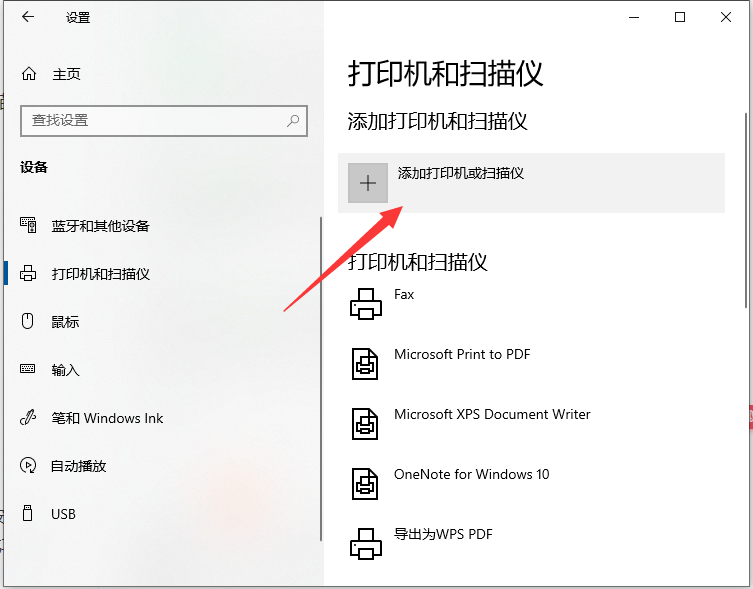
#2. In the new window that pops up, find "Add Printer or Scanner". After clicking, "Searching for a printer or scanner" will appear. At this time, wait a moment and you will see "The printer I need is not in the list."
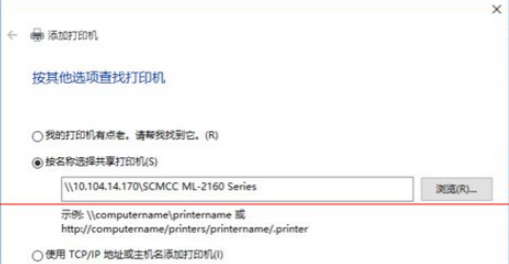
#3. At this time, click "The printer I need is not in the list" and in the new window that pops up, you can see 5 single buttons. Select the second item "Select a shared printer by name" and click "Browse". The third option is not chosen because the success rate of the third option is not high.
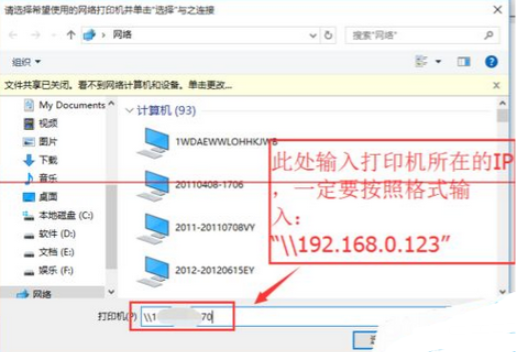
#4. A new window will appear after clicking. This is quite special. Do not click directly on the remote computer you are looking for in the window (because the connection may fail). Directly enter the IP address of the remote computer "\\192.168.0.123" and click "Select". Remember not to get the direction of the slash wrong.
#5. At this time, the remote shared printer appears. Select the required printer and click "Select".
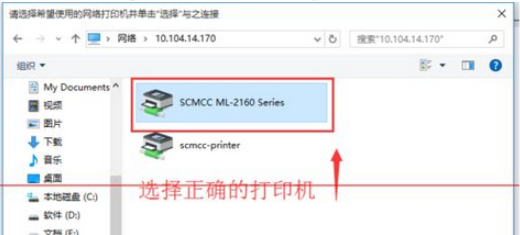
#6. After selection, the printer will be added automatically if normal. But you will also encounter this situation, prompting "Driver not found". At this time, you need to install the printer driver.
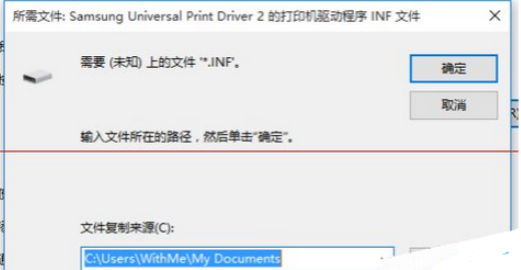
#7. Take out the CD that was given when you bought the printer, or search for the printer model to download. Install according to the prompts. There is something to be said here. It is recommended here to use "Are you sure you want to install the software without connecting the printer" and do not select other options.
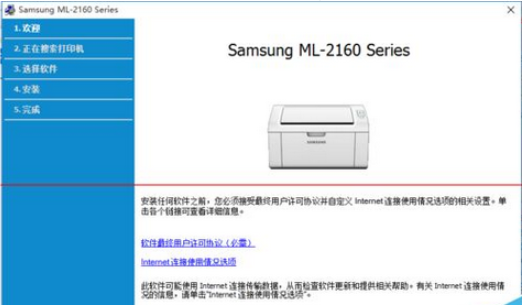
8. After the installation is complete, perform the above steps again. This time the printer was successfully added. When completed, there will be a button to print the test page. Do not click it, just click "Finish".
The above is how to connect win10 to win7 shared printer. I hope it can help you.
The above is the detailed content of Detailed explanation of how to connect win7 shared printer to win10. For more information, please follow other related articles on the PHP Chinese website!

Hot AI Tools

Undresser.AI Undress
AI-powered app for creating realistic nude photos

AI Clothes Remover
Online AI tool for removing clothes from photos.

Undress AI Tool
Undress images for free

Clothoff.io
AI clothes remover

AI Hentai Generator
Generate AI Hentai for free.

Hot Article

Hot Tools

Notepad++7.3.1
Easy-to-use and free code editor

SublimeText3 Chinese version
Chinese version, very easy to use

Zend Studio 13.0.1
Powerful PHP integrated development environment

Dreamweaver CS6
Visual web development tools

SublimeText3 Mac version
God-level code editing software (SublimeText3)

Hot Topics
 deepseek web version official entrance
Mar 12, 2025 pm 01:42 PM
The domestic AI dark horse DeepSeek has risen strongly, shocking the global AI industry! This Chinese artificial intelligence company, which has only been established for a year and a half, has won wide praise from global users for its free and open source mockups, DeepSeek-V3 and DeepSeek-R1. DeepSeek-R1 is now fully launched, with performance comparable to the official version of OpenAIo1! You can experience its powerful functions on the web page, APP and API interface. Download method: Supports iOS and Android systems, users can download it through the app store; the web version has also been officially opened! DeepSeek web version official entrance: ht
 In-depth search deepseek official website entrance
Mar 12, 2025 pm 01:33 PM
At the beginning of 2025, domestic AI "deepseek" made a stunning debut! This free and open source AI model has a performance comparable to the official version of OpenAI's o1, and has been fully launched on the web side, APP and API, supporting multi-terminal use of iOS, Android and web versions. In-depth search of deepseek official website and usage guide: official website address: https://www.deepseek.com/Using steps for web version: Click the link above to enter deepseek official website. Click the "Start Conversation" button on the homepage. For the first use, you need to log in with your mobile phone verification code. After logging in, you can enter the dialogue interface. deepseek is powerful, can write code, read file, and create code
 How to solve the problem of busy servers for deepseek
Mar 12, 2025 pm 01:39 PM
DeepSeek: How to deal with the popular AI that is congested with servers? As a hot AI in 2025, DeepSeek is free and open source and has a performance comparable to the official version of OpenAIo1, which shows its popularity. However, high concurrency also brings the problem of server busyness. This article will analyze the reasons and provide coping strategies. DeepSeek web version entrance: https://www.deepseek.com/DeepSeek server busy reason: High concurrent access: DeepSeek's free and powerful features attract a large number of users to use at the same time, resulting in excessive server load. Cyber Attack: It is reported that DeepSeek has an impact on the US financial industry.


