Detailed steps to install the original win7 system
Many netizens’ impression of the original win7 is probably that “the desktop has only one recycle bin”, and then it can’t even connect to the Internet! So do you want to know how to install the original win7 system? This tutorial teaches you how to quickly install the original win7 system. Come and learn it.
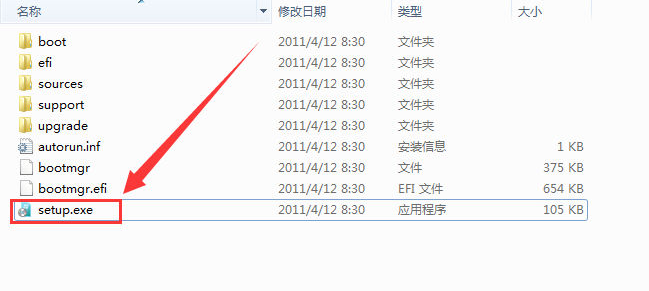
1. Use the decompression tool to decompress the original win7 image file to a partition other than the C drive, such as the D drive. Then open the folder and click setup.exe.
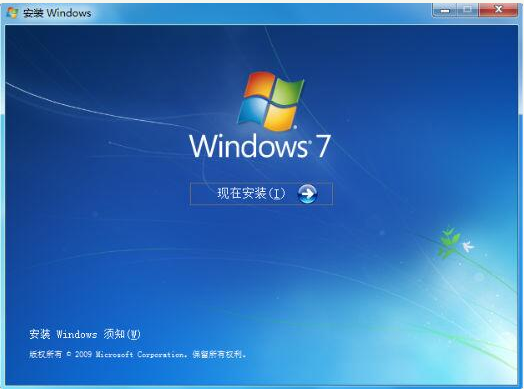
#2. The installation wizard appears, click "Install Now".
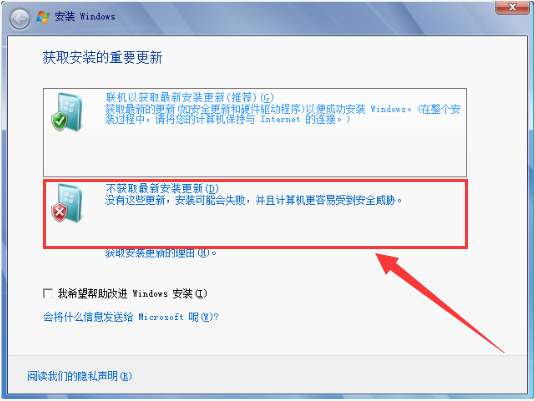
#3. Select "Do not get the latest installation updates".
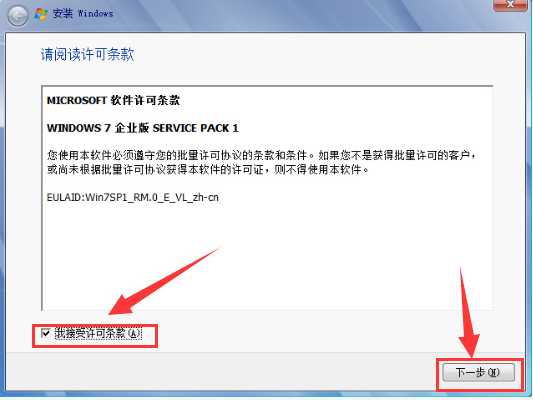
4. Accept the terms.
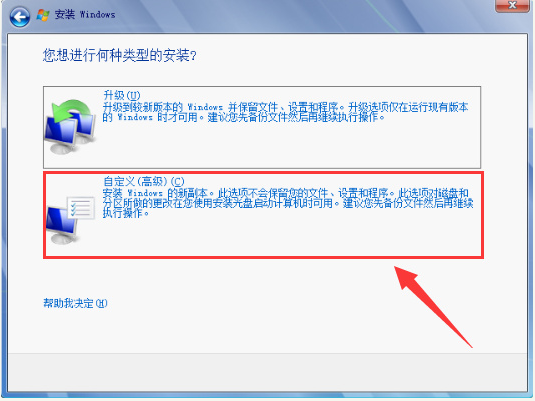
#5. Select “Custom (Advanced)” for the installation type.
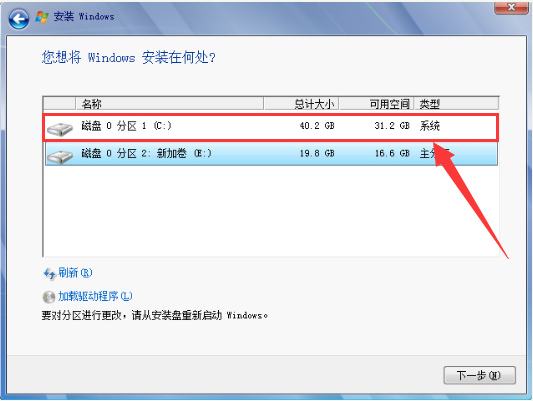
#6. Select the hard disk where the system is installed (usually the C drive).
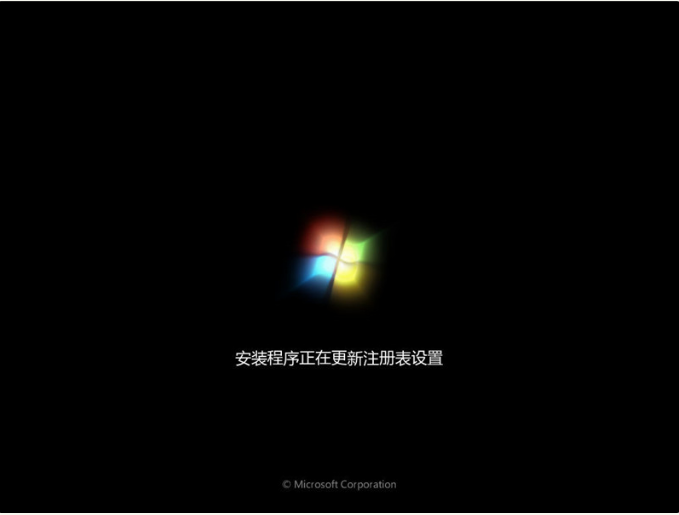
7. Start the installation of win7 system. During this period, the computer will automatically restart several times, which may take some time.
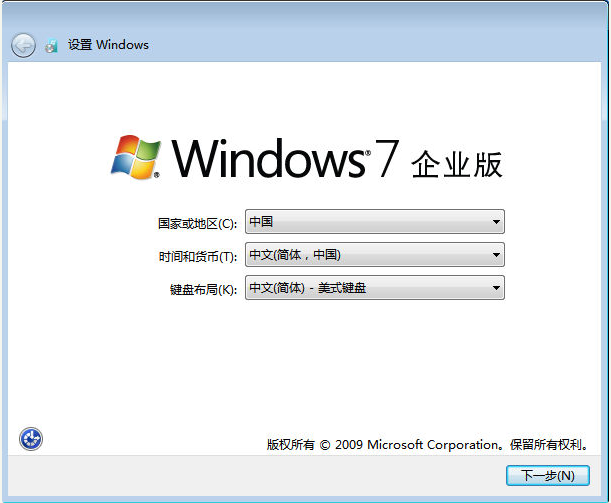
#8. Enter the system configuration process, generally the default is enough.
#9. Create a user name and computer name.
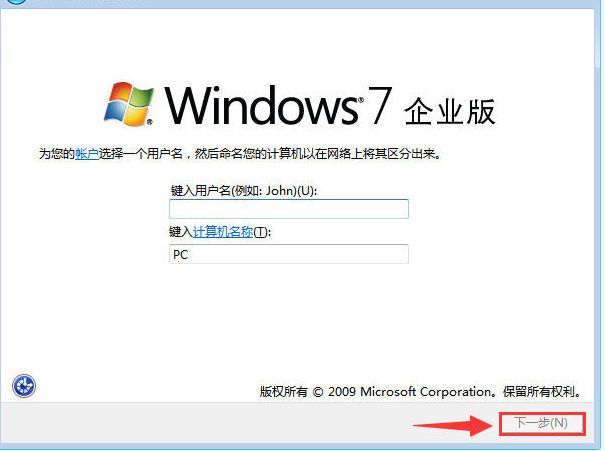
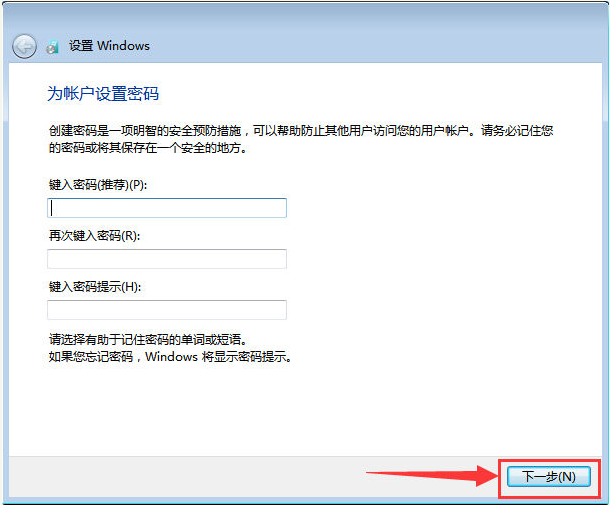
#10. Set the computer login password (this item does not need to be set).
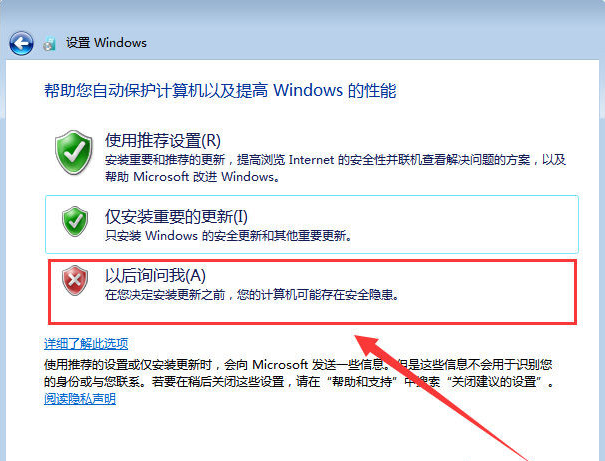
#11. Select Ask me later (A).
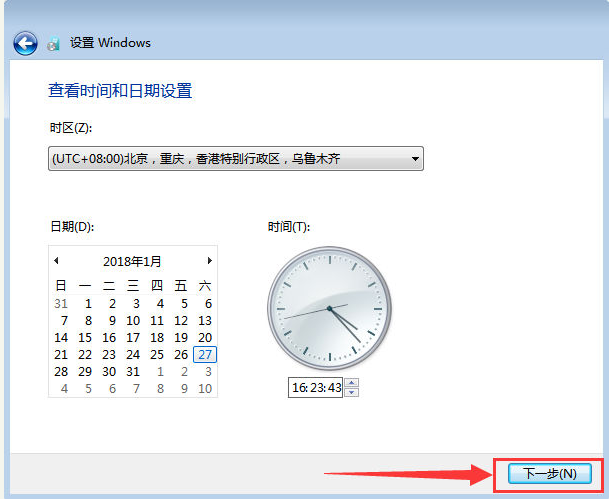
#12. Set the time and date (the default is Beijing time on that day).
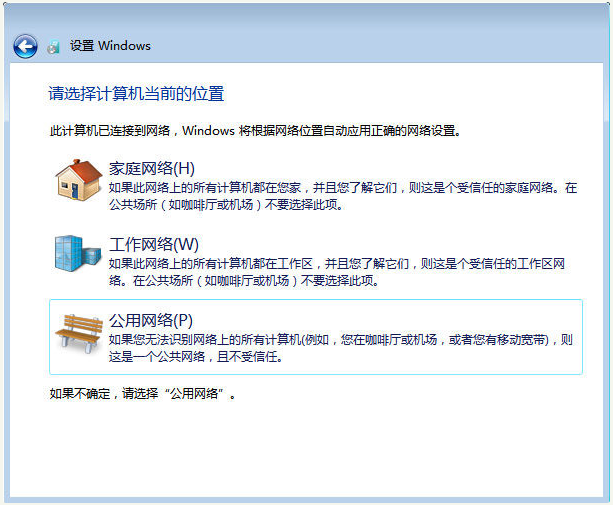
#13. Then set up your own network according to your personal needs.
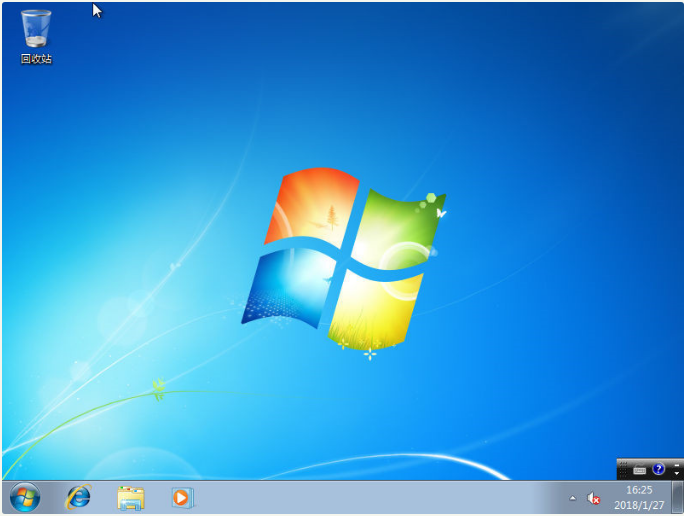
#14. After a while, you will enter the win7 interface. Congratulations, you have completed the installation of win7 system.
#The above are the detailed steps for installing the original win7. I hope it can help everyone.
The above is the detailed content of Detailed steps to install the original win7 system. For more information, please follow other related articles on the PHP Chinese website!

Hot AI Tools

Undresser.AI Undress
AI-powered app for creating realistic nude photos

AI Clothes Remover
Online AI tool for removing clothes from photos.

Undress AI Tool
Undress images for free

Clothoff.io
AI clothes remover

Video Face Swap
Swap faces in any video effortlessly with our completely free AI face swap tool!

Hot Article

Hot Tools

Notepad++7.3.1
Easy-to-use and free code editor

SublimeText3 Chinese version
Chinese version, very easy to use

Zend Studio 13.0.1
Powerful PHP integrated development environment

Dreamweaver CS6
Visual web development tools

SublimeText3 Mac version
God-level code editing software (SublimeText3)

Hot Topics
 1386
1386
 52
52
 Solution to the problem that Win11 system cannot install Chinese language pack
Mar 09, 2024 am 09:48 AM
Solution to the problem that Win11 system cannot install Chinese language pack With the launch of Windows 11 system, many users began to upgrade their operating system to experience new functions and interfaces. However, some users found that they were unable to install the Chinese language pack after upgrading, which troubled their experience. In this article, we will discuss the reasons why Win11 system cannot install the Chinese language pack and provide some solutions to help users solve this problem. Cause Analysis First, let us analyze the inability of Win11 system to
 Solution for Win11 unable to install Chinese language pack
Mar 09, 2024 am 09:15 AM
Win11 is the latest operating system launched by Microsoft. Compared with previous versions, Win11 has greatly improved the interface design and user experience. However, some users reported that they encountered the problem of being unable to install the Chinese language pack after installing Win11, which caused trouble for them to use Chinese in the system. This article will provide some solutions to the problem that Win11 cannot install the Chinese language pack to help users use Chinese smoothly. First, we need to understand why the Chinese language pack cannot be installed. Generally speaking, Win11
 Unable to install guest additions in VirtualBox
Mar 10, 2024 am 09:34 AM
You may not be able to install guest additions to a virtual machine in OracleVirtualBox. When we click on Devices>InstallGuestAdditionsCDImage, it just throws an error as shown below: VirtualBox - Error: Unable to insert virtual disc C: Programming FilesOracleVirtualBoxVBoxGuestAdditions.iso into ubuntu machine In this post we will understand what happens when you What to do when you can't install guest additions in VirtualBox. Unable to install guest additions in VirtualBox If you can't install it in Virtua
 What should I do if Baidu Netdisk is downloaded successfully but cannot be installed?
Mar 13, 2024 pm 10:22 PM
If you have successfully downloaded the installation file of Baidu Netdisk, but cannot install it normally, it may be that there is an error in the integrity of the software file or there is a problem with the residual files and registry entries. Let this site take care of it for users. Let’s introduce the analysis of the problem that Baidu Netdisk is successfully downloaded but cannot be installed. Analysis of the problem that Baidu Netdisk downloaded successfully but could not be installed 1. Check the integrity of the installation file: Make sure that the downloaded installation file is complete and not damaged. You can download it again, or try to download the installation file from another trusted source. 2. Turn off anti-virus software and firewall: Some anti-virus software or firewall programs may prevent the installation program from running properly. Try disabling or exiting the anti-virus software and firewall, then re-run the installation
 How to use shortcut keys to take screenshots in Win8?
Mar 28, 2024 am 08:33 AM
How to use shortcut keys to take screenshots in Win8? In our daily use of computers, we often need to take screenshots of the content on the screen. For users of Windows 8 system, taking screenshots through shortcut keys is a convenient and efficient operation method. In this article, we will introduce several commonly used shortcut keys to take screenshots in Windows 8 system to help you take screenshots more quickly. The first method is to use the "Win key + PrintScreen key" key combination to perform full
 How to install Android apps on Linux?
Mar 19, 2024 am 11:15 AM
Installing Android applications on Linux has always been a concern for many users. Especially for Linux users who like to use Android applications, it is very important to master how to install Android applications on Linux systems. Although running Android applications directly on Linux is not as simple as on the Android platform, by using emulators or third-party tools, we can still happily enjoy Android applications on Linux. The following will introduce how to install Android applications on Linux systems.
 Win11 Tips Sharing: Skip Microsoft Account Login with One Trick
Mar 27, 2024 pm 02:57 PM
Win11 Tips Sharing: One trick to skip Microsoft account login Windows 11 is the latest operating system launched by Microsoft, with a new design style and many practical functions. However, for some users, having to log in to their Microsoft account every time they boot up the system can be a bit annoying. If you are one of them, you might as well try the following tips, which will allow you to skip logging in with a Microsoft account and enter the desktop interface directly. First, we need to create a local account in the system to log in instead of a Microsoft account. The advantage of doing this is
 How to install Podman on Ubuntu 24.04
Mar 22, 2024 am 11:26 AM
If you have used Docker, you must understand daemons, containers, and their functions. A daemon is a service that runs in the background when a container is already in use in any system. Podman is a free management tool for managing and creating containers without relying on any daemon such as Docker. Therefore, it has advantages in managing containers without the need for long-term backend services. Additionally, Podman does not require root-level permissions to be used. This guide discusses in detail how to install Podman on Ubuntu24. To update the system, we first need to update the system and open the Terminal shell of Ubuntu24. During both installation and upgrade processes, we need to use the command line. a simple


