
For many netizens who have just started to learn how to install the system, installing the original system is a very exciting thing. In order to allow ordinary netizens to experience the feeling of being sophisticated, today I will tell you about the step-by-step tutorial on installing the original version of the win7 system. Let's take a look.
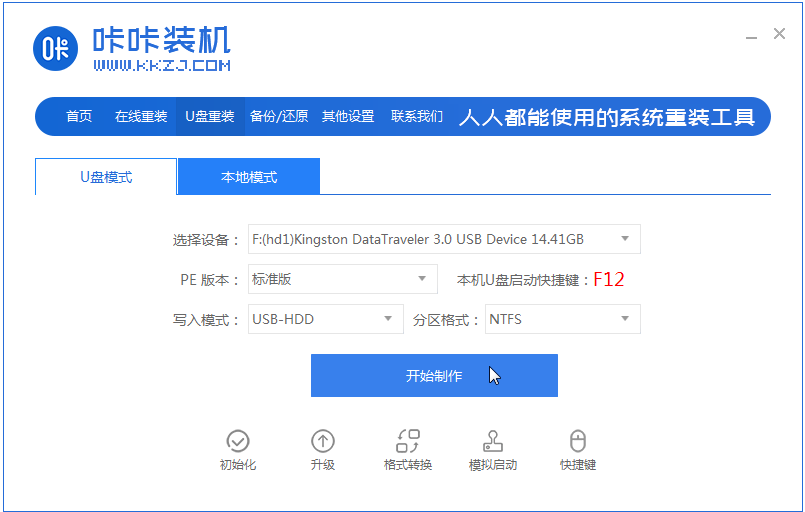
1. Download and open the Kaka installation software, select the U disk to reinstall the system.

#2. Select U disk mode and click "Start Production" to next step.
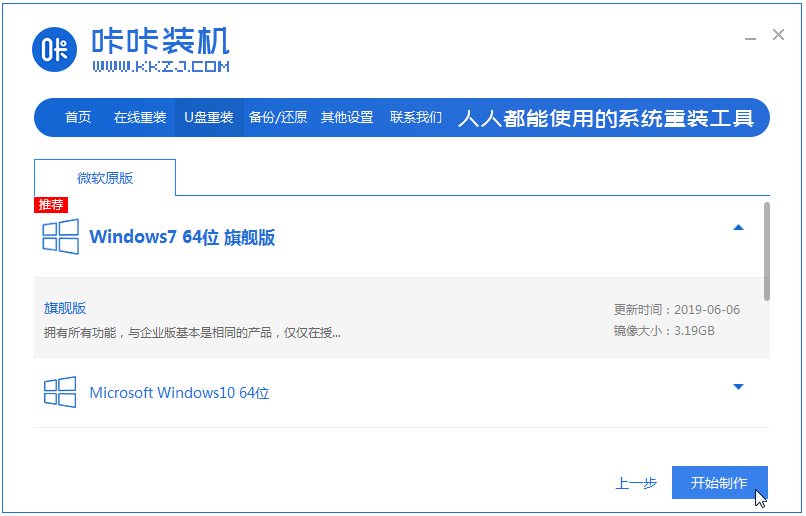
#3. Check the operating system you want to install and click "Start Production".
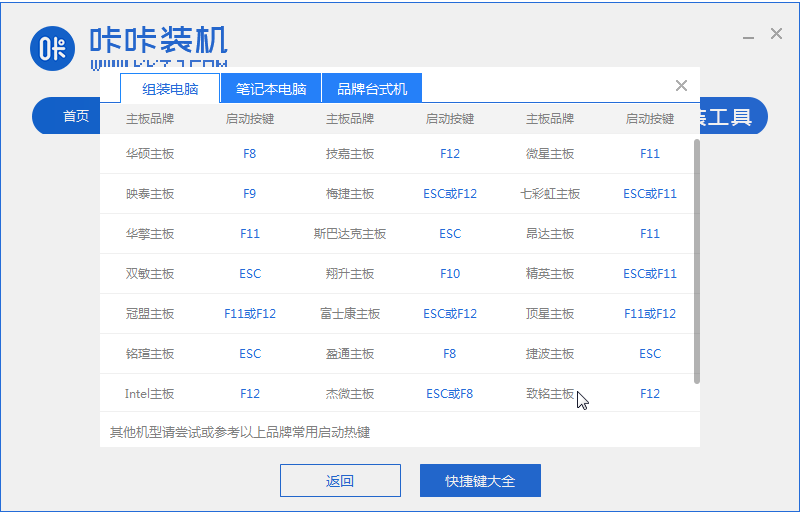
#4. After waiting for the Kaka installation prompt "Start USB disk creation successful", we can click "Preview" first.

#5. After checking the computer startup shortcut key, directly pull out the USB disk and insert it into the computer where the system needs to be installed.
#6. After plugging in the USB flash drive and booting, use the up and down keys on the keyboard to select and then press the Enter key to enter.
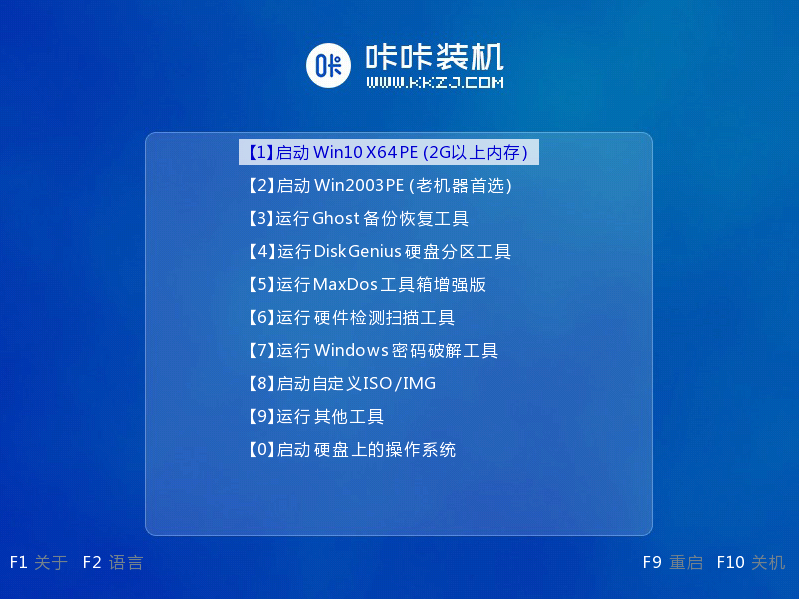
#7. Enter the pe installation system interface and select a system we need to install.
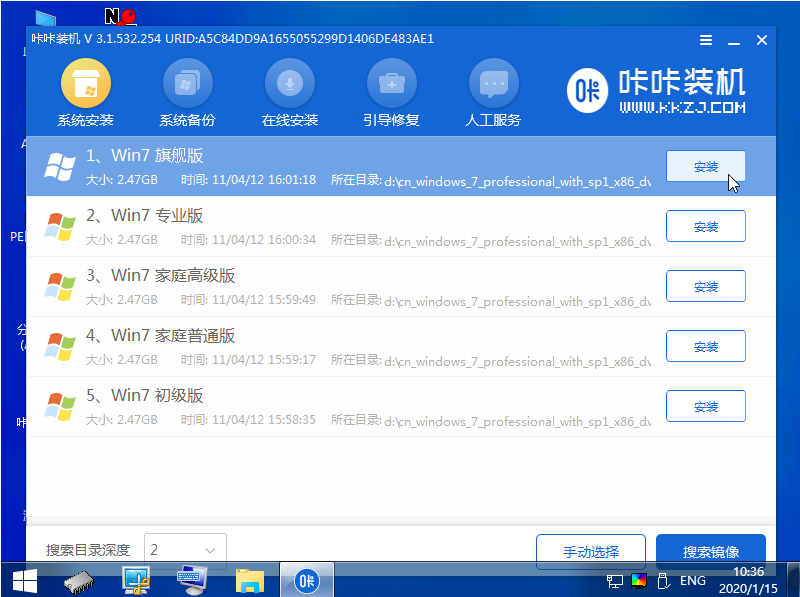
#8. Change the target partition to "Disk C" and click "Start Installation".
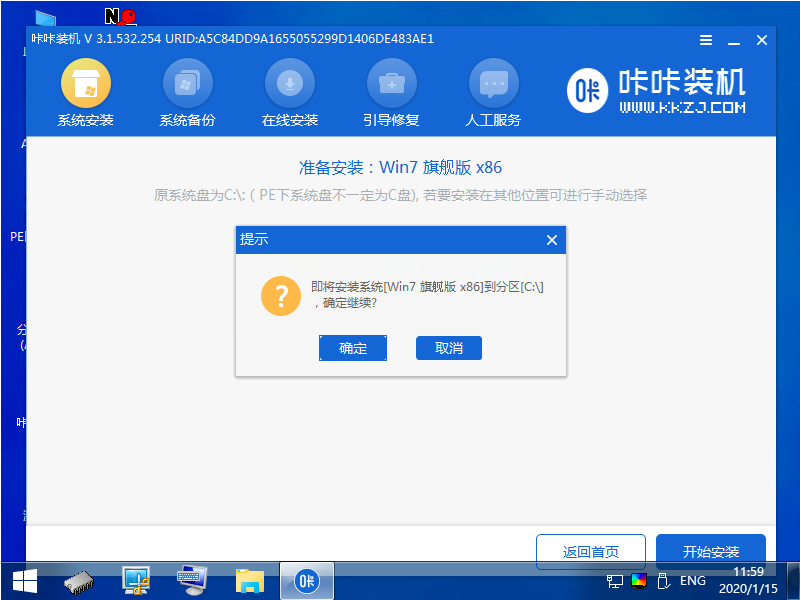
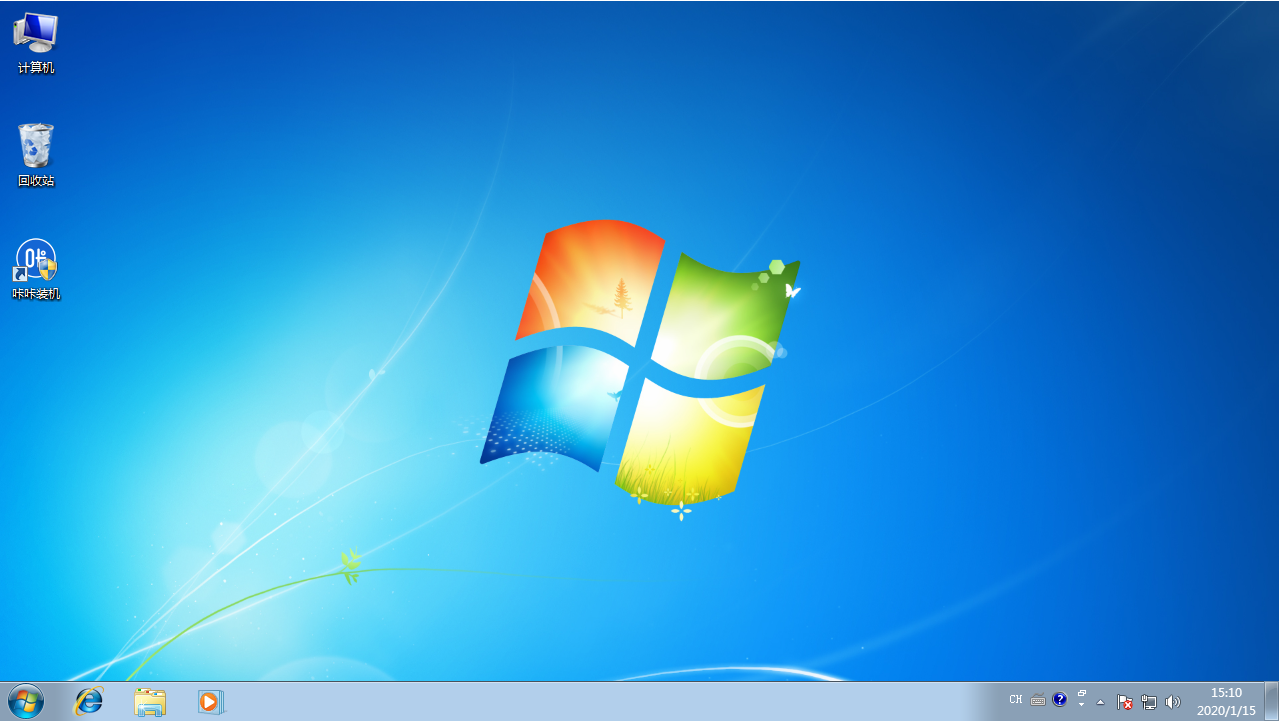
#9. After the system image installation is completed, unplug the USB flash drive and restart the computer to enter the system desktop.
#The above is the step-by-step tutorial for installing the original version of win7 system. I hope it can help everyone.
The above is the detailed content of Step-by-step tutorial for installing the original version of win7 system. For more information, please follow other related articles on the PHP Chinese website!


