

Detailed tutorial for one-click installation of Chenfeng USB disk

With the advancement of the Internet, there are now many one-click installation software on the website. Chenfeng USB flash drive one-click installation is one of them. Recently, many users want to know the detailed tutorial of Chenfeng USB flash drive one-click installation. So today I will teach you how to operate Chenfeng USB flash drive one-click installation. Let’s take a look below!
Detailed tutorial for one-click installation of Chenfeng U disk:
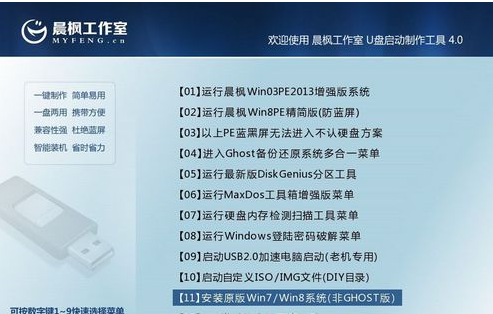
1. Use Chenfeng U disk boot creation tool to start the U disk.
2. Find the iso image of the Windows 7 system and unzip all files to the root directory of your U disk
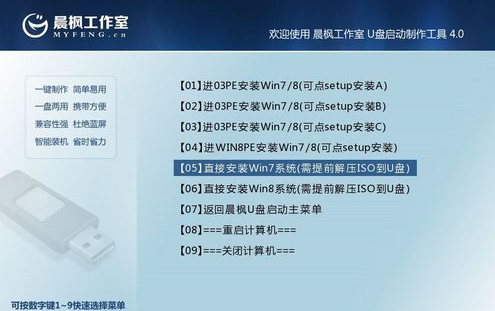
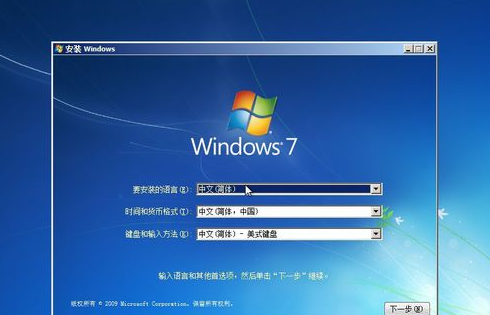
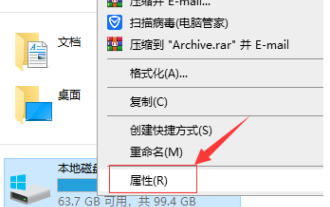
3. We find the bootmgr file in the USB flash drive and name it win7mgr. Then use the U disk to start the computer, and it will enter the pe system and automatically help us install the system!

#4. Finally, after we complete the settings, we can use it normally!
The above is a detailed tutorial on how to operate the one-click installation of Chenfeng USB disk! Hope it helps everyone!
The above is the detailed content of Detailed tutorial for one-click installation of Chenfeng USB disk. For more information, please follow other related articles on the PHP Chinese website!

Hot AI Tools

Undresser.AI Undress
AI-powered app for creating realistic nude photos

AI Clothes Remover
Online AI tool for removing clothes from photos.

Undress AI Tool
Undress images for free

Clothoff.io
AI clothes remover

AI Hentai Generator
Generate AI Hentai for free.

Hot Article
Hot Tools

Notepad++7.3.1
Easy-to-use and free code editor

SublimeText3 Chinese version
Chinese version, very easy to use

Zend Studio 13.0.1
Powerful PHP integrated development environment

Dreamweaver CS6
Visual web development tools

SublimeText3 Mac version
God-level code editing software (SublimeText3)
Hot Topics
 1359
1359
 52
52

 How to Fix Steam Error Code 102: Detailed Solutions
Dec 26, 2023 pm 04:58 PM
How to Fix Steam Error Code 102: Detailed Solutions
Dec 26, 2023 pm 04:58 PM
Many users have encountered the problem of error code 102 on the steam platform. How to solve this situation? In fact, the error codes of steam are all similar. We can open the run interface and find steam.dll, delete this DLL file, and delete Then steam will automatically update. How to solve steam error code 102: 1. First open the CMD command line. The specific operation is Ctrl+R, and then enter CMD to enter the command line. 2. Enter "netshinterfaceipsetdns local connection static114.114.114.114" in the command line, and then Enter "netshinterfaceipa
 Detailed tutorial on changing Lenovo win10 to win7 professional version system
Jul 19, 2023 pm 04:01 PM
Detailed tutorial on changing Lenovo win10 to win7 professional version system
Jul 19, 2023 pm 04:01 PM
Most of the laptops bought now are installed with win10 system. Recently, a friend of mine bought a Lenovo laptop, but since he is more accustomed to using win7 system, he wants to change Lenovo win10 to win7. Below, the editor will demonstrate how to use Lenovo How to change win10 to win7. Steps to change Lenovo win10 to win7: 1. In the first step, we open the browser and search for the download and installation bar to reinstall the system software with one click and select the win7 system. 2. After the software download is completed, click to restart the computer. 3. Enter the startup page and select the second option zhuangjibape to enter. 4. After entering the pe system, wait for the installation. The online reinstall system tool will help us reinstall the system, and finally restart the computer.
 Detailed steps to turn off automatic updates in Win10
Jan 03, 2024 pm 04:14 PM
Detailed steps to turn off automatic updates in Win10
Jan 03, 2024 pm 04:14 PM
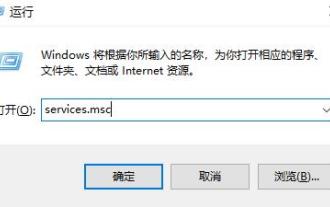
The win10 system is still being updated continuously. Some netizens feel that their current computers are in very good condition and therefore do not want to upgrade. It may be because they don’t know how to set win10 to never update, so we have brought a tutorial for you to learn together. How to set win10 to never update: 1. First press the shortcut key "win+r" to open Run and enter "services.msc". 2. Then find “windowsupdate” below. 3. Right-click the option and click "Properties" below. 4. Select "Disabled" as the startup type and click "Stop". 5. Finally, click "Apply" and "OK" in sequence.
 Introduction to the usage tutorial of the one-click installation wizard
Jul 14, 2023 am 09:25 AM
Introduction to the usage tutorial of the one-click installation wizard
Jul 14, 2023 am 09:25 AM
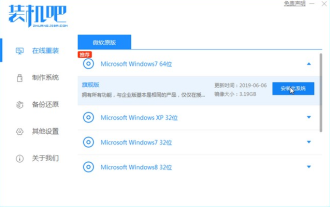
Many friends use the one-click system reinstallation method when they encounter system problems. Although the one-click system reinstallation operation is relatively simple, there are still many friends who don’t know how to operate it. In fact, it is not difficult. It only requires a few simple steps. Just follow these steps. Let’s take a look at the detailed introduction of the one-click installation wizard. Usage method 1. Click to download the software and open it normally. Click the "One-click reinstall" button on the main interface of the software to enter "Next step". If you already have a GHO image file on your machine, you can use the third step. System Restore" to restore your previous computer configuration! 2. As shown in the figure: Select the system according to your personal preferences and computer configuration, or go to Baidu to download the genuine version you need to install
 How to restore win7 taskbar to the following detailed tutorial
Jul 09, 2023 pm 11:29 PM
How to restore win7 taskbar to the following detailed tutorial
Jul 09, 2023 pm 11:29 PM
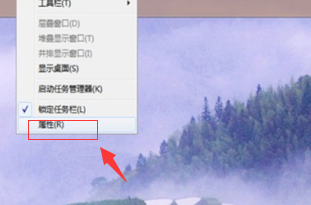
When using computers on a daily basis, sometimes the taskbar is moved to the top, right or left by accident or by someone else using it. So how do you restore the win7 taskbar to the bottom? The editor will make it simple for you now. Introducing the detailed tutorial below on how to restore the win7 taskbar. Method 1: 1. Right-click the blank area of the desktop and select [Properties]; 2. Select [Taskbar] in the properties of the taskbar, and then select [Bottom] in the [Taskbar position on screen] option. , then click [OK]. The taskbar will be restored to the bottom. Method 2: 1. Right-click the current taskbar and uncheck [Lock Taskbar]; 2. Move the mouse to the current taskbar position, press and hold the left button of the mouse, and
 Detailed tutorial on how to clean the C drive to its cleanest state
Jul 19, 2023 pm 10:25 PM
Detailed tutorial on how to clean the C drive to its cleanest state
Jul 19, 2023 pm 10:25 PM
We all know that if the computer system disk (usually the C drive) is full, it will cause the computer to freeze. In severe cases, it may even cause the computer to be unable to start. So what are the cleaning methods? Today, the editor has compiled a detailed tutorial for you on how to clean the C drive to the cleanest possible state. If you need it, please come and take a look. 1. Right-click on the C drive of your computer and select "Properties". 2. In the properties menu that pops up, select "General" and click "Disk Cleanup". 3. Wait for Disk Cleanup to calculate garbage. 4. Select the garbage that needs to be cleaned and click OK. The above is the editor's tutorial on how to clean the C drive to the cleanest state using win10 system. The operation of win7 is also almost the same. If your computer is also stuck, you might as well try to clean up c
 Detailed tutorial for installing NumPy in Python
Feb 20, 2024 am 08:57 AM
Detailed tutorial for installing NumPy in Python
Feb 20, 2024 am 08:57 AM
Detailed tutorial for installing NumPy in Python NumPy (NumericalPython) is one of the important scientific computing libraries in Python. It provides high-performance multi-dimensional array objects and related tools, which can be used for various numerical calculations and data analysis. This article will introduce how to install NumPy in a Python environment and provide specific code examples. 1. Check the Python version First, we need to ensure that the Python version is 2.7 or 3.4 or above. able to pass
 Teach you how to install a computer for newbies with one click
Jul 19, 2023 pm 05:57 PM
Teach you how to install a computer for newbies with one click
Jul 19, 2023 pm 05:57 PM
For computer novices, reinstalling the system is still a relatively challenging problem. Today I will introduce to you a simple one-click system reinstallation method suitable for computer novices. So how can a computer novice install the computer with one click? The following are the specific steps to demonstrate the one-click computer installation system tutorial. The specific steps are as follows: 1. Download and install Xiaobai’s one-click system reinstallation tool on your computer and open it. Select the Windows system that needs to be installed and click to install this system. (Note that before installation, back up important data and turn off the anti-virus software on the computer to avoid being intercepted) 2. Wait for the software to download system image file information, etc. 3. After the deployment is completed, choose to restart the computer. 4. After the computer restarts, it enters the boot options interface, select xiaobai-pe system to enter. 5.