Eye protection mode is a function of the win10 system. It can help us reduce the harm to the eyes caused by long-term screen viewing. Many friends do not know how to set the eye protection mode in win10. Below, the editor will introduce the eye protection mode in win10. Let me teach you how to set up the eye protection mode.
How to set win10 eye protection mode:
1. First, we open the win10 desktop, click the start menu in the lower left corner, and select "Settings".

2. After entering the settings page, we find the "System" option.

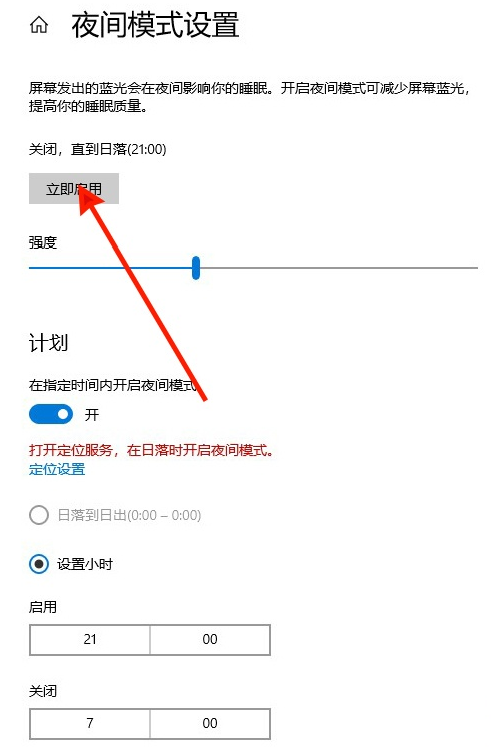
3. Open the system page, turn on night mode under the "Display" option on the left, and click "Night Mode Settings".

4. Then we set the intensity and time as needed, and click "Start Now" to take effect.

Method 2
1. We press "win r" to bring up the run menu. Right-click the Start key and select Run, enter the command "regedit" and press Enter to go to the Registry Editor.

2. Enter the Registry Editor, select the second item HKEY_CURRENT_USER and click to enter. After entering, click Control Panel to enter.

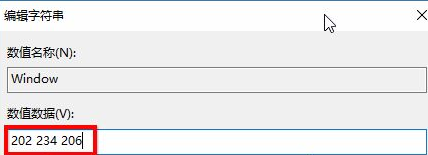
3. We find the Colors folder in the Control Panel folder and click on it. Find the window in Colors and click on it. Fill it out and confirm.

4. Then we restart the computer and it will take effect.
The above is how to set the eye protection mode in win10. Have you learned it?
The above is the detailed content of The editor teaches you how to set the eye protection mode in win10. For more information, please follow other related articles on the PHP Chinese website!


