

Win7 shared folder setting example tutorial

Although the win7 system software is relatively old, there may be many folders that can be shared, and there may still be users who don’t know how to operate them, so the following is a win7 shared folder setting example. Tutorial, come and take a look together.
win7 shared folder settings:
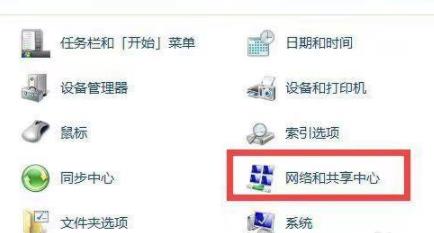
1. First click on the lower left corner to start, then enter the operation panel and click "Internet and Shared Core".
#2. Then click "Change advanced sharing settings" on the left.
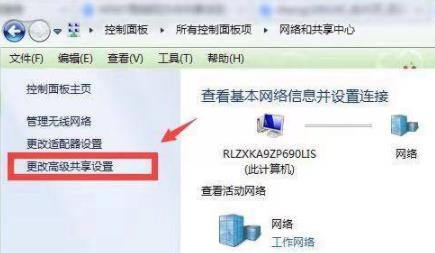
#3. Enable "Enable network discovery" and "Turn on document and copier sharing".

#4. Then select "Turn off password protected sharing" below.

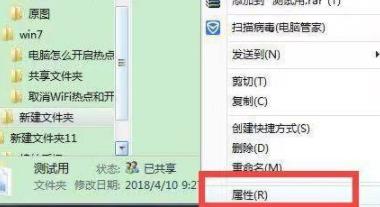
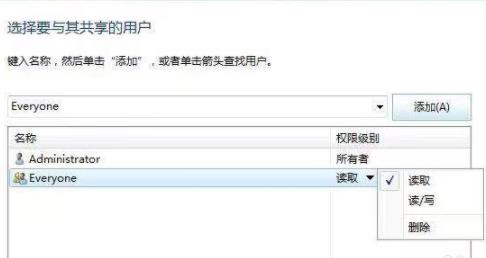
#5. Then go to the shared folder, right-click and select "Properties".
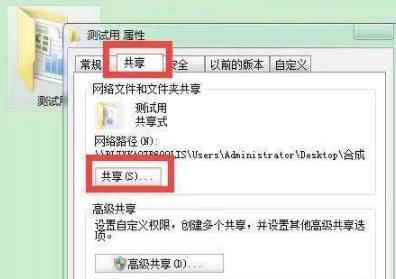
#6. Then click the share menu bar and click "Share" below.
#7. Finally, the folder creation is completed.
The above is the detailed content of Win7 shared folder setting example tutorial. For more information, please follow other related articles on the PHP Chinese website!

Hot AI Tools

Undresser.AI Undress
AI-powered app for creating realistic nude photos

AI Clothes Remover
Online AI tool for removing clothes from photos.

Undress AI Tool
Undress images for free

Clothoff.io
AI clothes remover

Video Face Swap
Swap faces in any video effortlessly with our completely free AI face swap tool!

Hot Article
Hot Tools

Notepad++7.3.1
Easy-to-use and free code editor

SublimeText3 Chinese version
Chinese version, very easy to use

Zend Studio 13.0.1
Powerful PHP integrated development environment

Dreamweaver CS6
Visual web development tools

SublimeText3 Mac version
God-level code editing software (SublimeText3)
Hot Topics
 1389
1389
 52
52