

Tutorial on making a digital clock with HTML5_html5 tutorial tips

It was this digital clock. I thought it was a good idea at the time, but I didn’t bother with it. Until yesterday, my colleague saw this case on the Internet. He thought it was very cool, so he came over and asked me how it was implemented. Then I thought about the implementation method and became a little interested, so I spent some time imitating it. Made one. The difference is that Cen An uses div to make it. And I did it using canvas. It will be better to use canvas for performance, because just to control the movement of each point, using js to control the style attribute of dom is definitely lacking in performance compared to using js to control canvas drawing.
Let’s take a look at the DEMO I made first, and then briefly describe the method of doing this: Please poke me to see the DEMO.
The idea of doing this is very simple, which is to save the position of each number through a string:
Copy code
- var numData = [
- "1111/1001/1001/1001/1001/1001/1111", //0
- "0001/0001/0001/0001/0001/0001/0001", //1
- "1111/0001/0001/1111/1000/1000/1111", //2
- "1111/0001/0001/1111/0001/0001/1111", //3
- "1010/1010/1010/1111/0010/0010/0010", //4
- "1111/1000/1000/1111/0001/0001/1111", //5
- "1111/1000/1000/1111/1001/1001/1111", //6
- "1111/0001/0001/0001/0001/0001/0001", //7
- "1111/1001/1001/1111/1001/1001/1111", //8
- "1111/1001/1001/1111/0001/0001/1111", //9
- "0000/0000/0010/0000/0010/0000/0000", //:
- ]
0 means no pixels, 1 means there are pixels, / is for better appearance, it is a branch. To put it simply: for example, 0 is:
- 1 1 1 1
- 1 0 0 1
- 1 0 0 1
- 1 0 0 1
- 1 0 0 1
- 1 0 0 1
- 1 1 1 1
That should make it very clear. There is also a : number from 0 to 9, which is represented by a string.
Then write a particle object, which is a pixel:
- var P_radius = 8,Gravity = 9.8;
- var Particle = function(){
- this.x = 0;
- this.y = 0;
- this.vx = 0;
- this.vy = 0;
- this.color = "";
- this.visible = false;
- this.drop = false;
- }
- Particle.prototype = {
- constructors:Particle,
- paint:function(){ //绘制自身
- ctx.fillStyle = this.color;
- ctx.beginPath();
- ctx.arc(this.x,this.y,P_radius,0,2*Math.PI);
- ctx.fill();
- },
- reset:function(x,y,color){ //重置
- this.x = x;
- this.y = y;
- this.vx = 0;
- this.vy = 0;
- this.color = color;
- this.visible = true;
- this.drop = false;
- },
- isDrop:function(){ //落下
- this.drop = true;
- var vx = Math.random()*20 15
- this.vx = Math.random()>=0.5?-vx : vx;
- },
- update:function(time){ //每一帧的动作
- if(this.drop){
- this.x = this.vx*time;
- this.y = this.vy*time;
- var vy = this.vy Gravity*time;
- if(this.y>=canvas.height-P_radius){
- this.y = canvas.height-P_radius
- vy = -vy*0.7;
- }
- this.vy = vy;
- if(this.x<-P_radius||this.x>canvas.width P_radius||this.y<-P_radius||this.y>canvas.height P_radius){
- this.visible = false;
- }
- }
- }
- }
粒子对象的属性比较简单,就位置,速度,以及是否可视化。方法的话,paint是绘制方法,reset是重置(因为粒子要循环利用的,提升性能),isDrop是粒子落下方法,update就是每一帧更新粒子的动作,update中当粒子运动超出canvas的绘制区域时,就把它的可视化置为false,在粒子容器中保存起来等待下一次调用。
写好粒子对象后,就要考虑如何让粒子按照位置画上去,同时当粒子不需要用时能够让他做自由落体的动画了。
先画背景(也就是那没有像素的白点):
- function drawBg(){
- var tx = (canvas.width-((P_radius*2 X_J)*4*8 7*xjg))/2;
- for(var i=0;i<8;i ){
- var ty = (canvas.height-((P_radius yjg)*6))/2;
- for(var j=0;j<numData[0].length;j ){
- var tt = numData[0].charAt(j);
- if(tt==="/"){
- ty =yjg;
- }else {
- var x = tx j%5*(P_radius*2 X_J),
- y = ty;
- bgctx.fillStyle = "#FFF";
- bgctx.beginPath();
- bgctx.arc(x,y,P_radius,0,2*Math.PI);
- bgctx.fill();
- }
- }
- tx =xjg 4*(P_radius*2 X_J);
- }
- }
First draw the background into an off-screen canvas and cache it. Then there is no need for logical calculation when redrawing each frame. Just draw the off-screen canvas directly. The above logic should not be difficult to understand. It is to loop through 8 numbers through two loops, and then draw each number point by point. When "/" is encountered, it means that a new line is required, and the drawn ty Add a newline interval, reset tx, and then draw. Just like that, all the dots can be drawn. The rendering is as follows: 
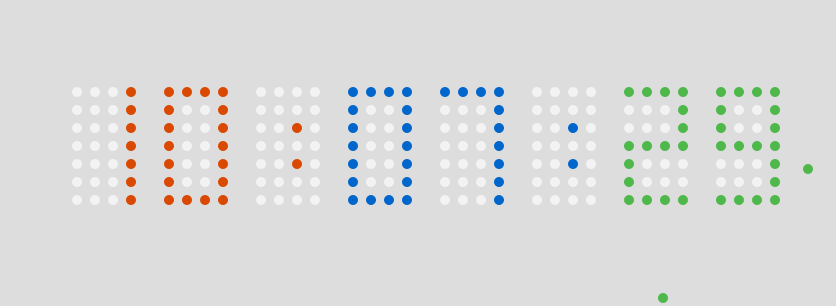
After the background is drawn, start drawing digital pixels according to each second of time. The main method is this:
- function setTime(time){
- var h = time.getHours() "",
- m = time.getMinutes() "",
- s = time.getSeconds() "";
- hh = h.length===1?"0" h:h;
- mm = m.length===1?"0" m:m;
- ss = s.length===1?"0" s:s;
- var nowdate = h ":" m ":" s;
- var tx = (canvas.width-((P_radius*2 X_J)*4*8 7*xjg))/2,color = "";
- for(var i=0;i<nowdate.length;i ){
- var n = nowdate.charAt(i)===":"?10:parseInt(nowdate.charAt(i)),
- text = numData[n];
- var ty = (canvas.height-((P_radius yjg)*6))/2;
- switch(i){
- case 0:color = "#4DCB74";break;
- case 2:color = "#4062E0";break;
- case 3:color = "#D65050";break;
- case 5:color = "#4062E0";break;
- case 6:color = "#797C17";break;
- }
- for(var j=0;j<text.length;j ){
- var tt = text.charAt(j);
- if(tt==="/"){
- ty =yjg;
- }else{
- var x = tx j%5*(P_radius*2 X_J),
- y = ty,
- pp = null,
- usefullp = null;
- particles.forEach(function(p){
- if(p.visible&p.x===x&p.y===y){
- ppp = p;
- }else if(!p.visible&usefullp===null){
- usefullp = p;
- }
- });
- if(pp!==null&tt==="0"){
- pp.isDrop();
- }else if(pp===null&tt==="1"){
- usefullp.reset(x , y , color);
- }
- }
- }
- tx =xjg 4*(P_radius*2 X_J);
- }
- }
原理也不难,也是跟上面画背景差不多,遍历所有点,然后根据当前时间的数字转换成的字符串来判断,当前点是否应该有像素,如果有像素就再判断当前这个点是否已经有粒子对象在了,如果已经有粒子对象在了,就直接跳出不处理,如果没有粒子对象在,就再粒子容器中找一个没有被使用的粒子reset到这个位置。还有一种情况,就是当前这个点是不应该有像素的,但是却有粒子,那就获取这个粒子,让这个粒子进行自由落体。
时间设置也写好了,就可以写舞台更新的代码了:
- var timeCount_0 = 0,timeCount_1 = 0,particles = [];
- function initAnimate(){
- for(var i=0;i<200;i ){
- var p = new Particle();
- particles.push(p);
- }
- timeCount_0 = new Date();
- timeCount_1 = new Date();
- drawBg();
- setTime(timeCount_0)
- animate();
- }
- function animate(){
- ctx.clearRect(0,0,canvas.width,canvas.height);
- ctx.drawImage(bgcanvas,0,0);
- var timeCount_2 = new Date();
- if(timeCount_1-timeCount_0>=1000){
- setTime(timeCount_1);
- timeCount_0 = timeCount_1;
- }
- particles.forEach(function(p){
- if(p.visible){
- p.update((timeCount_2-timeCount_1)/70);
- p.paint();
- }
- });
- timeCount_1 = timeCount_2;
- RAF(animate)
The logic in animate is also very simple. Get the timestamp. If the time difference between the two timestamps is greater than or equal to 1 second, setTime is performed. The next step is to traverse and redraw all the visualized particles in the particle container.
Then it’s done:
 There are still many areas that can be optimized for this effect, because the clock and minutes move relatively rarely, so these two can be cached, and when there is no action, just draw the cached data directly. This can reduce the number of drawing API calls for each frame of the stage, which will definitely improve performance. However, there are not many particles now, and two to three hundred particle objects are enough. If optimization is not done, the animation can still run smoothly. So the original poster was just a little lazy.
Source code address:
https://github.com/whxaxes/canvas-test/blob/gh-pages/src/Funny-demo/coolClock/index.html
Hot AI Tools

Undresser.AI Undress
AI-powered app for creating realistic nude photos

AI Clothes Remover
Online AI tool for removing clothes from photos.

Undress AI Tool
Undress images for free

Clothoff.io
AI clothes remover

AI Hentai Generator
Generate AI Hentai for free.

Hot Article
Hot Tools

Notepad++7.3.1
Easy-to-use and free code editor

SublimeText3 Chinese version
Chinese version, very easy to use

Zend Studio 13.0.1
Powerful PHP integrated development environment

Dreamweaver CS6
Visual web development tools

SublimeText3 Mac version
God-level code editing software (SublimeText3)
Hot Topics
 1374
1374
 52
52

 Table Border in HTML
Sep 04, 2024 pm 04:49 PM
Table Border in HTML
Sep 04, 2024 pm 04:49 PM
Guide to Table Border in HTML. Here we discuss multiple ways for defining table-border with examples of the Table Border in HTML.
 Nested Table in HTML
Sep 04, 2024 pm 04:49 PM
Nested Table in HTML
Sep 04, 2024 pm 04:49 PM
This is a guide to Nested Table in HTML. Here we discuss how to create a table within the table along with the respective examples.
 HTML margin-left
Sep 04, 2024 pm 04:48 PM
HTML margin-left
Sep 04, 2024 pm 04:48 PM
Guide to HTML margin-left. Here we discuss a brief overview on HTML margin-left and its Examples along with its Code Implementation.
 HTML Table Layout
Sep 04, 2024 pm 04:54 PM
HTML Table Layout
Sep 04, 2024 pm 04:54 PM
Guide to HTML Table Layout. Here we discuss the Values of HTML Table Layout along with the examples and outputs n detail.
 HTML Ordered List
Sep 04, 2024 pm 04:43 PM
HTML Ordered List
Sep 04, 2024 pm 04:43 PM
Guide to the HTML Ordered List. Here we also discuss introduction of HTML Ordered list and types along with their example respectively
 HTML Input Placeholder
Sep 04, 2024 pm 04:54 PM
HTML Input Placeholder
Sep 04, 2024 pm 04:54 PM
Guide to HTML Input Placeholder. Here we discuss the Examples of HTML Input Placeholder along with the codes and outputs.
 Moving Text in HTML
Sep 04, 2024 pm 04:45 PM
Moving Text in HTML
Sep 04, 2024 pm 04:45 PM
Guide to Moving Text in HTML. Here we discuss an introduction, how marquee tag work with syntax and examples to implement.
 HTML onclick Button
Sep 04, 2024 pm 04:49 PM
HTML onclick Button
Sep 04, 2024 pm 04:49 PM
Guide to HTML onclick Button. Here we discuss their introduction, working, examples and onclick Event in various events respectively.
