
 Common Problem
How to create a D drive in Windows 10 without a D drive? Detailed introduction to how to create a D drive in Windows 10
Common Problem
How to create a D drive in Windows 10 without a D drive? Detailed introduction to how to create a D drive in Windows 10
How to create a D drive in Windows 10 without a D drive? Detailed introduction to how to create a D drive in Windows 10

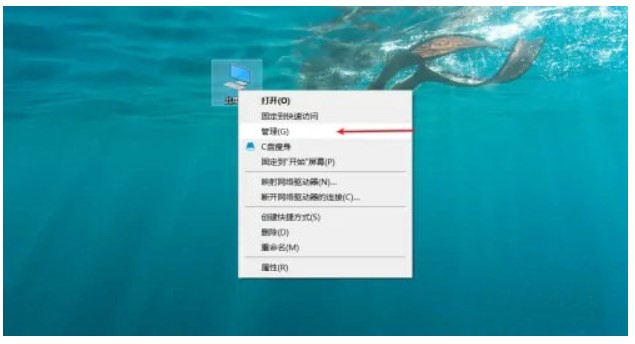
After installing the Windows 10 system, some consumers find that there is no D drive in their computer, and it is very troublesome to redo the system. So how to create a D drive directly? In fact, the creation method is relatively simple. You first right-click the computer, open the management panel, then add storage extensions, open disk management, right-click on the opening interface, select compressed volume, and then select New Simple Volume, then D drive can be created.
How to create a D drive in Windows 10:
1. Enter the management page: On the computer, right-click this computer, open the menu, and select the management method option.
#2. Turn on the disk management option: On the management page, turn on the disk management option.
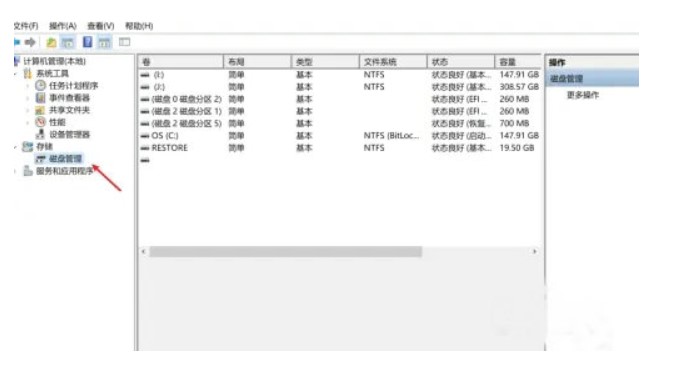
#3. Select the compressed volume option: Select the hard disk, right-click the mouse to open the menu, and select the compressed volume option.

#4. Create a simple volume: Click the expanded storage space to open the menu, select the New Simple Volume option, and you can create a D drive.

This article details how to create a D drive in Windows 10 and tells the solution to the problem that Windows 10 does not have a D drive.
The above is the detailed content of How to create a D drive in Windows 10 without a D drive? Detailed introduction to how to create a D drive in Windows 10. For more information, please follow other related articles on the PHP Chinese website!

Hot AI Tools

Undresser.AI Undress
AI-powered app for creating realistic nude photos

AI Clothes Remover
Online AI tool for removing clothes from photos.

Undress AI Tool
Undress images for free

Clothoff.io
AI clothes remover

AI Hentai Generator
Generate AI Hentai for free.

Hot Article
Hot Tools

Notepad++7.3.1
Easy-to-use and free code editor

SublimeText3 Chinese version
Chinese version, very easy to use

Zend Studio 13.0.1
Powerful PHP integrated development environment

Dreamweaver CS6
Visual web development tools

SublimeText3 Mac version
God-level code editing software (SublimeText3)
Hot Topics
 1382
1382
 52
52