Let you learn about the shocking win10x system knowledge
Recently, the latest image download of the win 10X system has leaked out on the Internet. Different from the common ISO, this image is in .ffu format and can currently only be used for the Surface Pro 7 experience. Although many friends can't experience it, they can still read the relevant content of the evaluation and enjoy it, so let's take a look at the latest evaluation of the win10x system!
Win10x system latest review
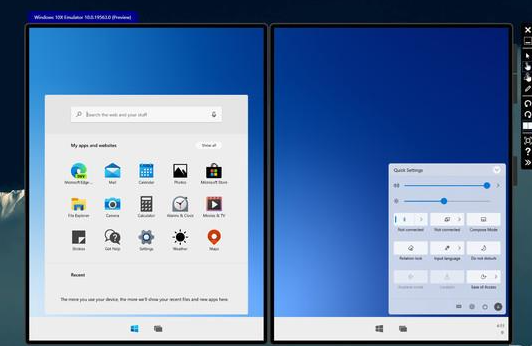
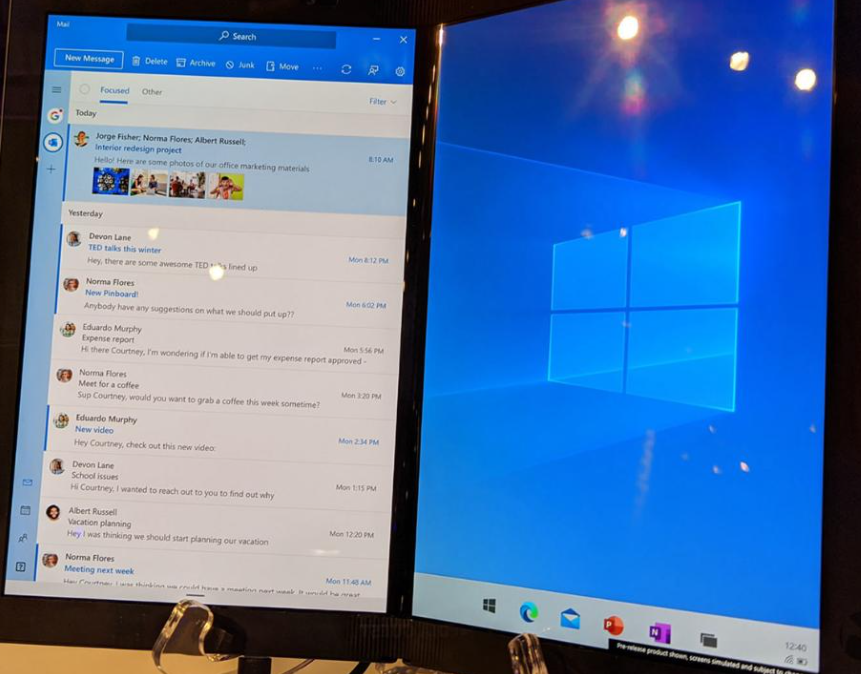
1. The biggest difference between Win10X and Win10 is that the start button is placed in the center of the taskbar after booting. In addition to fixed applications, the taskbar can also display recently launched applications, similar to Android and iOS. cell phone.

2. Another thing is that the "Start" menu of the new system does not support folders, and the arrangement is similar to the icon page of a tablet, which is also in line with its positioning.

3. In addition, win10X also provides a new setting experience, guiding users to complete the settings, select the correct login name, language, region and other settings to update privacy. Although Cortana has been deleted in win10X, which may be a good thing or a bad thing, at least Cortana's voice can no longer be heard.

win10x simulator online installation tutorial
1. Configuration
Memory: 8GB or more
Processor: Quad-core processor supporting Intel Virtualization Technology or higher
Drive: 15GB-20GB or more (SSD recommended)
Graphics card: independent graphics card, supports DirectX 11 and WDDM 2.4
2. To install the Windows 10X emulator, first go to the [Start] menu > [Settings] > [Time and Language] > [Region] and select [United States] in the country or region.
3. Then open the Microsoft Store [Microsoft Store], search [Microsoft Emulator], and then select [Get] or [Install].
4. The third step is to open the Microsoft Store [Microsoft Store], search for [Windows 10X Emulator Image.], and then select [Get] or [Install].
5. Go to the [Start] menu, select the [Microsoft Emulator] application, and select [Start] to make it lighter and faster.
Then open the win10x emulator in the virtual machine
1. Click "Turn Windows features on or off", check Hyper-V and restart the computer.
2. Start Hyper-V Manager.
3. Search for ‘hy’ and it will come out! Click on the new virtual machine on the right.
4. Set the virtual machine name.
5. It is recommended to allocate about 50% of the memory of the host to ensure smooth operation. For example, if your computer has 8G of memory, you can allocate 4G.

6. Select the default switch for the network and double-click to start!
7. Log in to your Microsoft account and you can experience the new win10x!
Then the above is all the content that will take you to understand the quite shocking win10x system knowledge. I hope it will be helpful to you! Please pay attention to more related content!
The above is the detailed content of Let you learn about the shocking win10x system knowledge. For more information, please follow other related articles on the PHP Chinese website!

Hot AI Tools

Undresser.AI Undress
AI-powered app for creating realistic nude photos

AI Clothes Remover
Online AI tool for removing clothes from photos.

Undress AI Tool
Undress images for free

Clothoff.io
AI clothes remover

Video Face Swap
Swap faces in any video effortlessly with our completely free AI face swap tool!

Hot Article

Hot Tools

Notepad++7.3.1
Easy-to-use and free code editor

SublimeText3 Chinese version
Chinese version, very easy to use

Zend Studio 13.0.1
Powerful PHP integrated development environment

Dreamweaver CS6
Visual web development tools

SublimeText3 Mac version
God-level code editing software (SublimeText3)

Hot Topics
 1386
1386
 52
52
 Let you learn about the shocking win10x system knowledge
Jul 14, 2023 am 11:29 AM
Recently, the latest image download of win10X system has been leaked on the Internet. Different from the common ISO, this image is in .ffu format and can currently only be used for Surface Pro7 experience. Although many friends can’t experience it, you can still read the relevant content of the evaluation and enjoy it. Let’s take a look at the latest evaluation of the win10x system! The latest evaluation of the win10x system 1. The biggest difference between Win10X and Win10 first appears after booting up. Buttons are placed in the center of the taskbar. In addition to pinned applications, the taskbar can also display recently launched applications, similar to Android and iOS phones. 2. Another thing is that the “Start” menu of the new system does not support file
 Let's talk about knowledge extraction. Have you learned it?
Nov 13, 2023 pm 08:13 PM
1. Introduction Knowledge extraction usually refers to mining structured information from unstructured text, such as tags and phrases containing rich semantic information. This is widely used in the industry in scenarios such as content understanding and product understanding. By extracting valuable tags from user-generated text information and applying them to content or products, knowledge extraction is usually accompanied by the classification of the extracted tags or phrases. , is usually modeled as a named entity recognition task. The general named entity recognition task is to identify named entity components and classify the components into place names, person names, organization names and other types; domain-related tag word extraction identifies and divides tag words into Field-defined categories, such as series (Air Force One, Sonic 9), brand (Nike, Li Ning), type (shoes, clothing, digital), style (
 Understanding Golang: essential knowledge for developers
Feb 23, 2024 am 10:51 AM
Golang, also known as Go language, is an open source programming language developed by Google. Since its release in 2007, Golang has gradually emerged in the field of software development and has been favored by more and more developers. As a statically typed, compiled language, Golang has many advantages, such as efficient concurrent processing capabilities, concise syntax, and powerful tool support, making it have broad application prospects in cloud computing, big data processing, network programming, etc. . This article will introduce the basic concepts of Golang,
 How does a chatbot answer questions through a knowledge graph?
Apr 17, 2023 am 09:13 AM
Preface In 1950, Turing published the landmark paper "Computing Machinery and Intelligence" (Computing Machinery and Intelligence), proposing a famous judgment principle about robots - the Turing test, also known as the Turing judgment, which states that if the first If the three cannot distinguish the difference between the responses of humans and AI machines, it can be concluded that the machine has artificial intelligence. In 2008, the AI butler Jarvis in Marvel's "Iron Man" let people know how AI can accurately help humans (Tony) solve various matters thrown at them... Figure 1: AI butler Jarvis ( Picture source: Internet) In early 2023, Chat, a free chat robot that broke out in the technology world in a 2C way, became popular.
 Understanding Linux Server Security: Essential Knowledge and Skills
Sep 09, 2023 pm 02:55 PM
Understanding Linux Server Security: Essential Knowledge and Skills With the continuous development of the Internet, Linux servers are increasingly used in various fields. However, since servers store a large amount of sensitive data, their security issues have also become the focus of attention. This article will introduce some essential Linux server security knowledge and skills to help you protect your server from attacks. Updating and Maintaining Operating Systems and Software Timely updating of operating systems and software is an important part of keeping your server secure. Because every operating system and software
 The strong lineup returns! Strawberry Music Festival shocks Shenzhen again
May 22, 2023 pm 11:43 PM
According to news on May 20, JD.com 3C Digital and the Strawberry Music Festival jointly held a love-filled ceremony at Dameisha Seaside Park in Shenzhen. On this exciting day, 24 groups of well-known musicians and bands at home and abroad, which are loved by young people, took the stage one after another and gave wonderful performances to the music fans at the scene. At the same time, JD.com has cooperated with major digital brands such as Dianxiaoer, Xiaomi, BOSE, and OPPO to combine music festivals, technology products, and camping elements to create a unique summer camping music party for Strawberry Star people. After an absence of five years, the Strawberry Music Festival returned to Shenzhen again, showing its full sincerity with a strong lineup of artists. Well-known musicians and bands such as Dou Jingtong, Yang Naiwen, the right to reshape the statue, Chen Li, Ma Di, Yao Shisan, etc., as well as thefin.
 Learn more about jQuery sibling nodes
Feb 27, 2024 pm 06:51 PM
There is no doubt that jQuery is one of the most used JavaScript libraries in front-end development, providing a concise and powerful way to manipulate HTML documents. In jQuery, sibling nodes are elements that have the same parent element as the specified element. A deep understanding of jQuery sibling nodes is crucial for front-end developers. This article will introduce how to use jQuery to operate sibling nodes, and attach specific code examples. 1. To find sibling nodes in jQuery, we can pass
 Master the key knowledge and practical skills of HTML global attributes
Jan 06, 2024 am 08:40 AM
Essential knowledge and practical skills for learning the global attributes of HTML HTML (HyperTextMarkupLanguage) is a markup language used to create the structure of web pages. When building web pages, we often need to use various tags and attributes to define the appearance and behavior of the page. Among all HTML attributes, global attributes are a very important type of attributes. They can be applied to all HTML tags, providing web developers with powerful flexibility and customization capabilities. Learning and using HTML


