

Step-by-step tutorial for downloading and installing win7 Microsoft system

Since the advent of computers, people's daily lives have become more colorful, and computers have become an indispensable tool for us. One of the factors that governs the operation of a computer is the operating system. So it’s time to download the win7 Microsoft system. Let’s take a look at the detailed step-by-step tutorial.
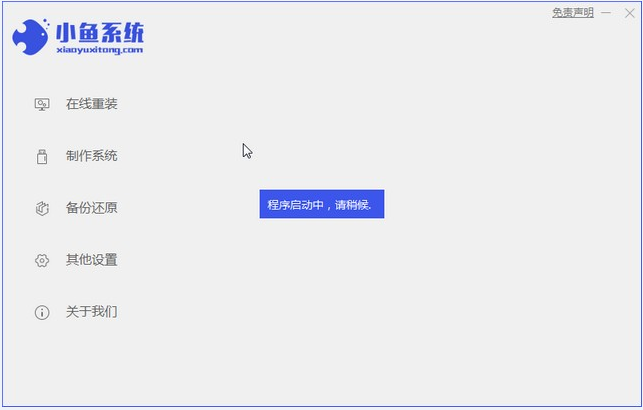
1. Download the Xiaoyu one-click reinstallation software; the interface is as shown below.
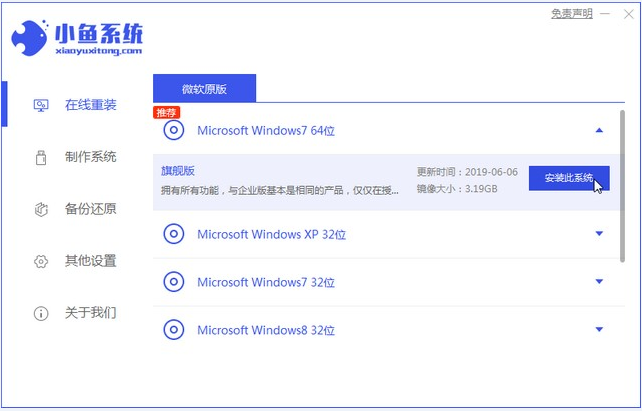
#2. Select the win7 system and click "Install this system" as shown below.
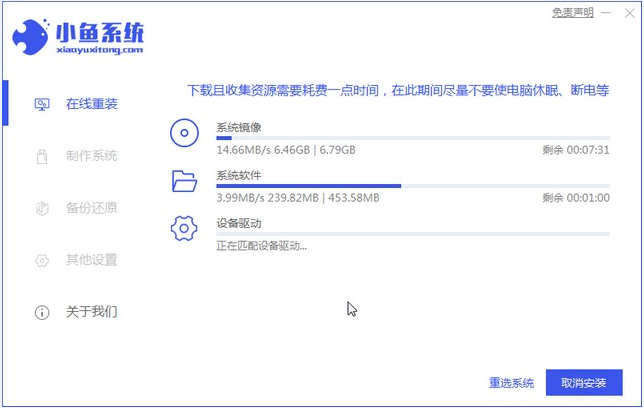
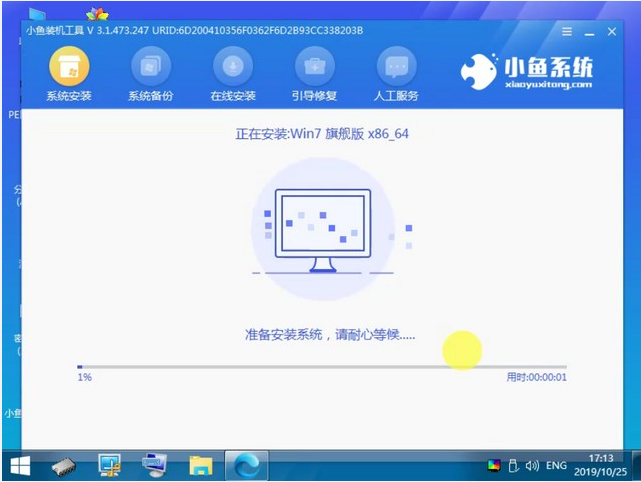
#3. Then start downloading the image of the win7 system.
#4. After downloading, deploy the environment, and then click Restart Now after completion.

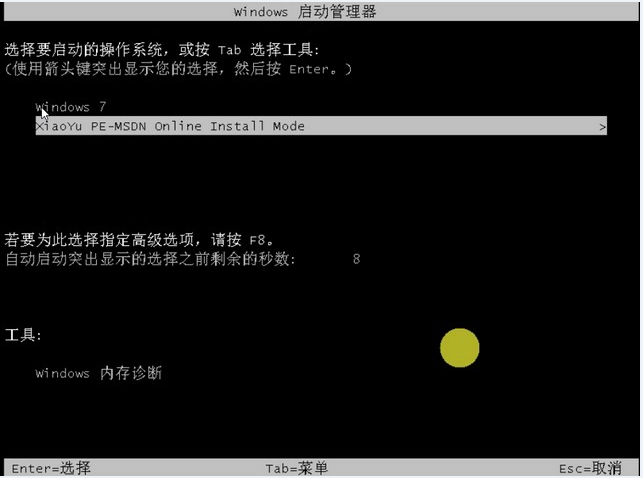
#5. After restarting the computer, the windows manager page will appear. We choose the second one.
#6. Enter the computer pe interface to continue the installation.
#7. After completion, restart the computer.

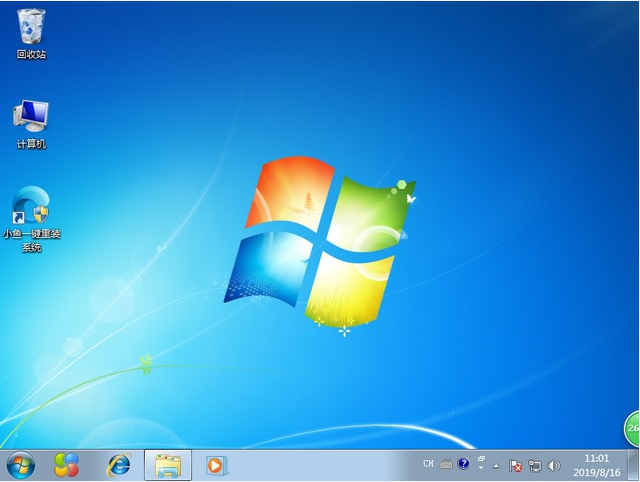
#8. After restarting, the desktop of the win7 system is as shown below.
The above is the step-by-step tutorial for downloading and installing the win7 Microsoft system. I hope it can help everyone.
The above is the detailed content of Step-by-step tutorial for downloading and installing win7 Microsoft system. For more information, please follow other related articles on the PHP Chinese website!

Hot AI Tools

Undresser.AI Undress
AI-powered app for creating realistic nude photos

AI Clothes Remover
Online AI tool for removing clothes from photos.

Undress AI Tool
Undress images for free

Clothoff.io
AI clothes remover

AI Hentai Generator
Generate AI Hentai for free.

Hot Article
Hot Tools

Notepad++7.3.1
Easy-to-use and free code editor

SublimeText3 Chinese version
Chinese version, very easy to use

Zend Studio 13.0.1
Powerful PHP integrated development environment

Dreamweaver CS6
Visual web development tools

SublimeText3 Mac version
God-level code editing software (SublimeText3)
Hot Topics


 Illustrated installation steps of an electric fan 'A must-see for beginners: How to disassemble and assemble an electric fan'
Feb 06, 2024 pm 08:10 PM
Illustrated installation steps of an electric fan 'A must-see for beginners: How to disassemble and assemble an electric fan'
Feb 06, 2024 pm 08:10 PM
The disassembly and assembly operation of the electric fan can be carried out according to the actual maintenance needs. Let's take the Midea FTS35-M2 electric fan as an example to introduce the disassembly and assembly method of the electric fan. 1. Disassembly of the electric fan grille and fan blades The electric fan grille and fan blades are important components on the top of the electric fan. If you suspect that the fan blades are faulty, you need to remove the grille first and then the fan blades. The grille and blades of an electric fan are usually fixed with screws. When disassembling, find the screws on the grille, unscrew and remove the grille, and further disassemble the fan blades. Remove the electric fan grille and fan blades. The specific operation is as shown in the figure: 2. Removal of the electric fan motor casing. The electric fan motor is fixed in the electric fan casing by fixing screws. When it is suspected that the motor in the electric fan is faulty, The casing of the motor should be disassembled first.
 How to change the computer's Microsoft system to Hongmeng system
Nov 06, 2023 pm 05:11 PM
How to change the computer's Microsoft system to Hongmeng system
Nov 06, 2023 pm 05:11 PM
The computer's Microsoft system can be replaced with the Hongmeng system by understanding the hardware compatibility, preparing tools and resources, making a bootable USB disk or DVD disc, and installing the Hongmeng system. The specific operations are as follows: 1. Insert the USB flash drive or DVD disc into the computer and restart the computer. Make sure the computer is connected to the Internet; 2. When the computer starts, enter the BIOS settings. In the BIOS settings, set the startup sequence to boot from the U disk or DVD disc; 3. Save and exit the BIOS settings, the computer will automatically start from the U disk Or boot from DVD disc; 4. Follow the prompts to install Hongmeng system.
 Where to download win7 professional version
Jan 11, 2024 pm 09:09 PM
Where to download win7 professional version
Jan 11, 2024 pm 09:09 PM
win7 has always been loved by everyone for its stability and good compatibility, but many friends don’t know where to download win7 professional version. Today, the editor brings the download method and download and installation steps. The specific solutions are as follows Let’s take a look. Recommended address for win7 professional version download and installation tutorial>>>>This site<<<Download link>>>>win7 professional version original iso<<<>>>New Radish Home GhostWin764-bit professional version v2019.07<<<The first installation tutorial Step: Click the download button in the download system (you can choose Thunder download, network disk download, Telecom
 Step-by-step tutorial for installing win7 network card driver
Jul 27, 2023 am 10:53 AM
Step-by-step tutorial for installing win7 network card driver
Jul 27, 2023 am 10:53 AM
Whether an original win7 system professional version computer can work normally depends on whether our driver is normal. Just like whether our computer can access the Internet normally depends on whether our network card is installed. Then the next step is Let the editor tell you the step-by-step tutorial on installing the win7 network card driver, let’s take a look. 1. Right-click Computer-->Manage-->Device Manager: 2. Click on the network card device, select Properties, and then select the driver, as shown in the figure: 3. Click Update Driver. 4. Browse the computer for driver software and find the CD-ROM network card driver. 5. Install through the driver wizard. Download a driver wizard and open the driver management, it will pop up the driver you need to update or install, select update or
 Detailed explanation of pip installation guide on Ubuntu
Jan 27, 2024 am 09:45 AM
Detailed explanation of pip installation guide on Ubuntu
Jan 27, 2024 am 09:45 AM
Detailed explanation of the pip installation steps on Ubuntu On the Ubuntu operating system, pip is a Python package management tool that can easily help us install, upgrade and manage Python components. This article will detail the steps to install pip on Ubuntu and provide specific code examples. Step 1: Open Terminal First, open Terminal. In Ubuntu, you can open the terminal by clicking the "Applications" icon in the upper left corner and typing "terminal" in the search bar. Step 2:
 Solution: How to download WeChat on win11 and add it to the desktop
Jan 02, 2024 pm 05:19 PM
Solution: How to download WeChat on win11 and add it to the desktop
Jan 02, 2024 pm 05:19 PM
Since WeChat is a commonly used software, many people want to install it on the desktop, but they find that the WeChat downloaded in win11 is not on the desktop. This may be because it is not installed or the desktop is not selected during installation. Solution to WeChat downloaded in win11 not on the desktop: 1. If you have not installed WeChat, run the installation program. 2. When installing, modify the installation path and click "Install" 3. After the installation is completed, it should automatically appear on the desktop. 4. If it still does not exist, then open the "Bottom Menu" 5. Search for "WeChat" on it 6. After searching, select "Open File Location" on the right 7. Then right-click the WeChat icon and select "Show More Options" 8. Finally, select "Send to" and click "Desktop Shortcut" to send WeChat
 How to install Apple Pingfang font_Apple Pingfang font installation steps
Mar 23, 2024 pm 02:16 PM
How to install Apple Pingfang font_Apple Pingfang font installation steps
Mar 23, 2024 pm 02:16 PM
1. First download the Apple Pingfang font software package from this site. After the download is completed, you will get the zip format compressed package. 2. Right-click the downloaded zip format compressed package and select to extract it to the current folder to get the full set of Apple Square Font folders. 3. Double-click to open the folder and you can get the full set of Apple Pingfang fonts in .ttf format.
 How to solve the error code problem when downloading language packs in win11
Jan 01, 2024 pm 08:17 PM
How to solve the error code problem when downloading language packs in win11
Jan 01, 2024 pm 08:17 PM
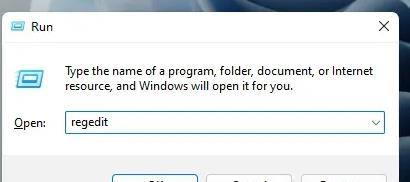
When you try to add a new language pack to the Windows 11 operating system, you may occasionally encounter warning messages such as error code: 0x800f0950, etc., which hinders the progress of the language pack installation. What factors usually come from this unknown error message? And how to solve it? What should I do if there is an error code when downloading the language pack in win11? 1. The first step is to press the "Win+R" key combination on the keyboard at the same time to start the run function. , then enter the command: Regedit, and press the Enter key on the keyboard. 2. Open the Registry Editor and click \HKEY_LOCAL_MACHINE\SOFTWARE\Policies\Microsoft\WindowsDef